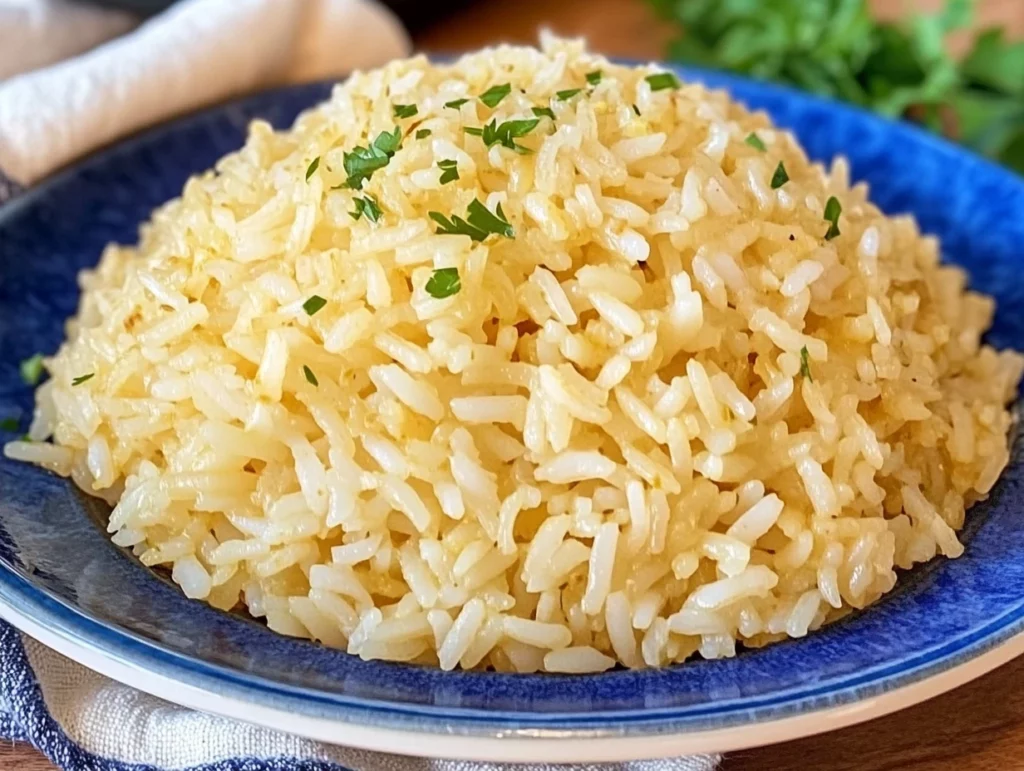
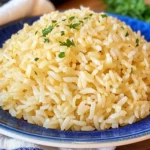
If there’s one side dish that never fails to steal the spotlight at my dinner table, it’s this Garlic Butter Rice. Simple ingredients, barely any prep time, and yet—oh, the flavor! It’s one of those recipes that feels like a cheat code for busy weeknights. Toasty golden rice, savory bouillon, and that unmistakable aroma of garlic cooked in butter—what’s not to love?
I first stumbled on a version of this recipe when I was trying to stretch a few pantry staples into something comforting and craveable. After a few tweaks (hello, Better Than Bouillon magic), it became a go-to that my family asks for all the time—whether we’re grilling chicken outside or throwing together a quick skillet dinner.
The best part? This Garlic Butter Rice pairs with just about anything. Grilled steak? Perfect. Roasted veggies? Yes, please. A simple fried egg on top? Don’t mind if I do.
Let’s dive into how to make this delicious side dish. The method is super easy and forgiving, so even beginner cooks can feel confident tackling it.
Ingredients You’ll Need:
-
¼ cup (½ stick) unsalted butter
-
½ cup long-grain white rice (not instant)
-
1½ cups water
-
2 teaspoons chicken Better Than Bouillon base
-
4 garlic cloves, minced
STEP 1: Toast the Rice in Butter
Grab a large skillet and melt the unsalted butter over medium heat. Once the butter is fully melted and begins to bubble just slightly, it’s time to add the rice.
Stir constantly for about 2 minutes. The goal here is to get the rice lightly golden—don’t rush it. This step is what gives the dish its signature nutty flavor and rich base. The rice should smell a little toasty and look golden-brown in spots.
Toasting the rice in butter adds a depth of flavor you just can’t get from boiling alone. It also helps the grains stay separate and fluffy once cooked.
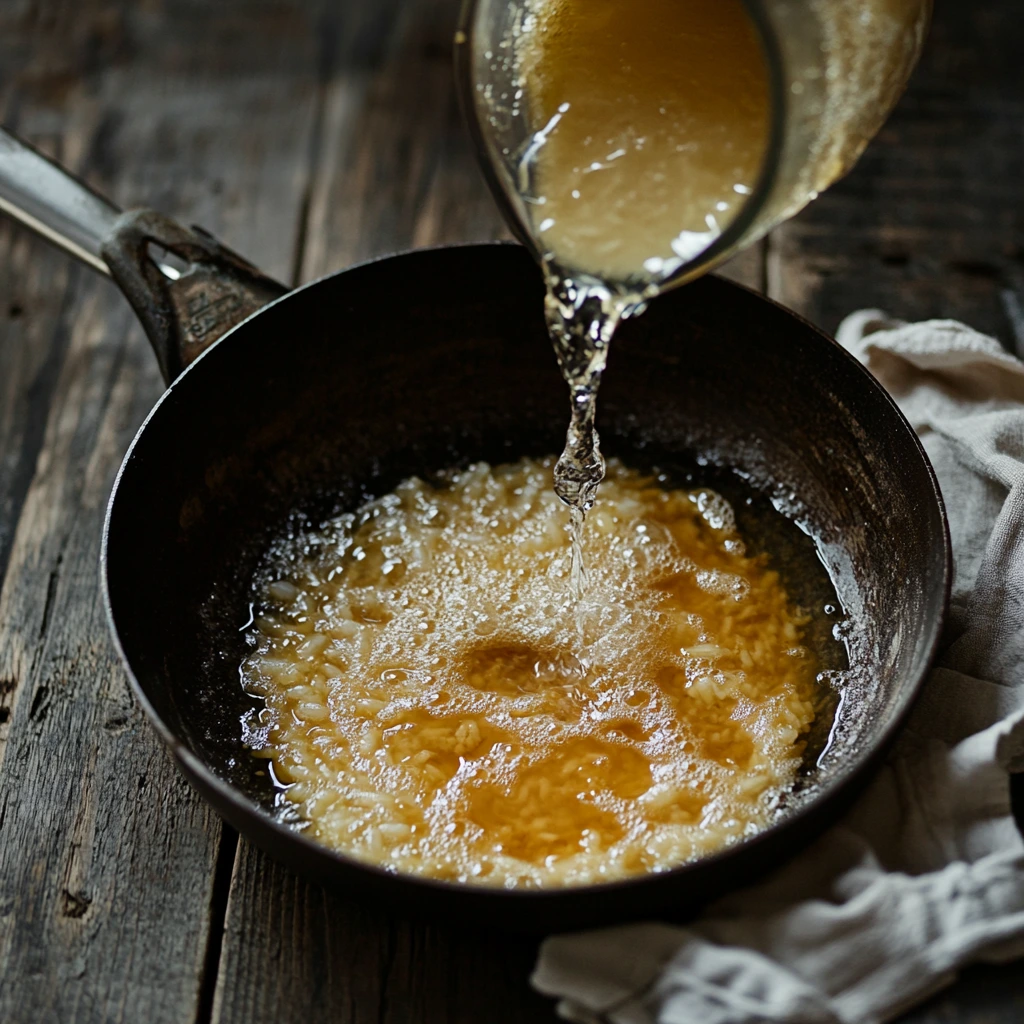
STEP 2: Add Water and Bouillon
Next up, add your water and the chicken Better Than Bouillon base. Stir everything together really well—you want that bouillon to fully dissolve into the liquid so it spreads its savory, umami goodness throughout the dish.
The Better Than Bouillon is a game changer here. It gives the rice a deep, slow-simmered flavor without needing to actually simmer anything for hours. Trust me, it’s worth keeping a jar in your fridge just for recipes like this.
STEP 3: Stir in the Garlic
Now it’s time to stir in those minced garlic cloves. Four cloves might sound like a lot, but once they cook down into the rice, they mellow into this warm, comforting flavor that makes the dish irresistible.
Distribute the garlic evenly so it infuses every bite. You’ll start to smell that cozy, buttery-garlicky aroma—and that’s how you know you’re doing it right.
How to Cook Garlic Butter Rice to Perfect Fluffiness (Plus Tips & Easy Variations)
Now that we’ve got all those rich, savory flavors mingling in the pan, it’s time to turn this buttery rice into the fluffy, flavorful side dish you’ll want to make again and again. The steps from here are just as easy, but they do require a little patience—and a few smart tricks to lock in that perfect texture.
Whether you’re planning to serve this rice with juicy grilled chicken or as a cozy base for your favorite veggie stir-fry, what comes next will ensure every bite is packed with garlic butter goodness.
Let’s finish up this simple yet spectacular recipe, and then I’ll share a few of my favorite ways to tweak it depending on what’s in the fridge.
STEP 4: Simmer Gently (Low and Slow is the Way to Go)
Once you’ve stirred in the garlic and everything is nicely combined, it’s time to cover the skillet with a lid. Bring the mixture to a gentle boil—don’t crank the heat too high or you’ll risk overcooking the bottom layer before the top is even done.
As soon as it reaches a boil, lower the heat to the very lowest setting and let it simmer gently for 15 to 20 minutes. Keep that lid on tight to trap all the steam inside—it’s what helps the rice absorb every bit of that buttery, garlicky broth without turning mushy.
Resist the temptation to peek. I know it’s hard, especially when your kitchen starts smelling incredible, but lifting the lid too early can throw off the cooking time and leave you with underdone rice.
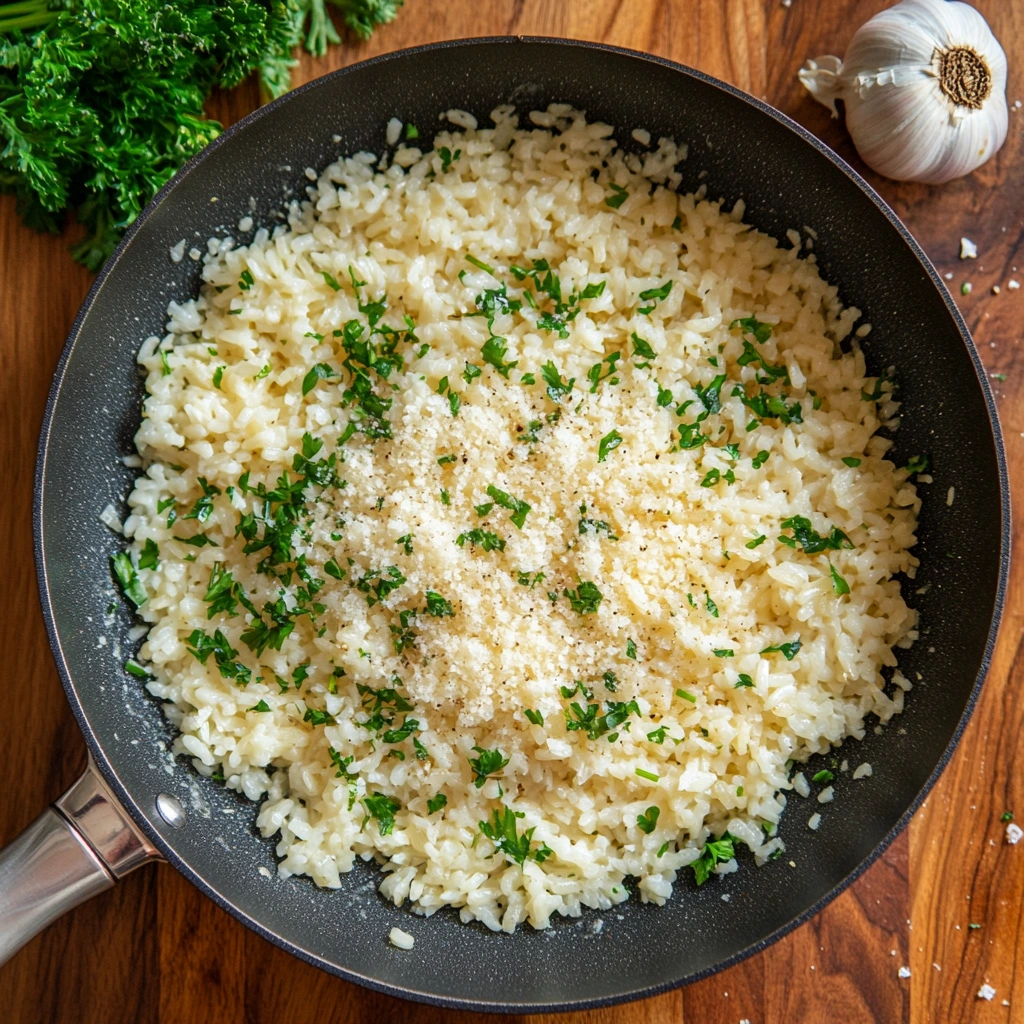
STEP 5: Fluff and Finish
Once all the liquid has been absorbed and the rice is tender, go ahead and remove the skillet from the heat. Let it sit, covered, for another 2–3 minutes—this little rest helps steam the rice fully and makes it easier to fluff.
Now, take a fork and gently fluff the rice. This separates the grains and evenly distributes the garlic and butter throughout the dish. You’ll see how toasty and golden it looks—and you’ll definitely want to sneak a bite before it hits the table.
Tasty Tips and Easy Variations
Here’s where you can get creative with your Garlic Butter Rice. It’s already packed with flavor, but a few extra touches can really elevate it depending on the meal or your mood.
-
Add Fresh Herbs: A handful of chopped parsley or thyme stirred in just before serving adds a fresh, earthy note. You can even toss in chopped green onions for a little zing.
-
Make It Cheesy: Stir in some grated Parmesan cheese after fluffing the rice for a creamy, savory twist. It melts right into the butter and garlic and adds an extra layer of richness.
-
Spice It Up: Want a little kick? Add a pinch of crushed red pepper flakes or a dash of black pepper while the rice is simmering.
-
Double the Batch: This recipe is easy to scale up—just double all the ingredients and make sure your skillet is big enough to accommodate the extra liquid and rice. It’s a great make-ahead for meal prepping.
-
Use It as a Base: Garlic Butter Rice makes an excellent base for everything from grilled shrimp and sautéed mushrooms to stir-fried tofu or even a fried egg on top with a drizzle of hot sauce.
Garlic Butter Rice FAQs and Final Thoughts
By now, you’ve got a skillet full of buttery, garlicky perfection—and hopefully a few ideas for how to make this recipe your own. But before we wrap up, let’s take a minute to go through some of the most common questions I get about making Garlic Butter Rice. Whether you’re wondering about rice types, how to fix a sticky batch, or how long those leftovers will last, I’ve got you covered.
FAQ: Your Garlic Butter Rice Questions Answered
1. Can I use brown rice instead of white rice?
Yes, you can—but you’ll need to adjust the cook time and liquid. Brown rice takes longer to cook and requires more water (usually about 2 cups of water for every 1 cup of brown rice). The flavor will still be delicious, just a bit nuttier and more robust.
2. What if my rice turns out sticky or mushy?
This usually happens when there’s too much water or the lid is removed too often while simmering. Stick to the 1½ cups of water and keep the lid on the entire time. Also, make sure you’re using long-grain white rice, not instant or short-grain rice, which tend to absorb water differently.
3. Can I use garlic powder instead of fresh garlic?
You can, in a pinch. Use about ½ teaspoon of garlic powder in place of the fresh garlic. The flavor won’t be quite as bold or aromatic, but it still works for a quick fix.
4. Is this rice gluten-free?
Yes—with one important note: the Better Than Bouillon base must be labeled gluten-free. Some versions contain gluten, so double-check the packaging if you’re cooking for someone with sensitivities.
5. Can I make this ahead of time?
Absolutely. Store the cooked rice in an airtight container in the fridge for up to 4 days. Reheat with a splash of water over low heat or in the microwave. You can also freeze it in individual portions for quick side dishes later.
6. Can I add vegetables to this recipe?
Definitely. Peas, corn, or finely chopped carrots work well—just stir them in during the last 5 minutes of cooking so they have time to soften. You can also add cooked spinach or sautéed mushrooms for a more veggie-loaded version.
7. What protein goes best with Garlic Butter Rice?
Grilled chicken, seared shrimp, or roasted pork are all perfect pairings. It’s also amazing alongside a hearty beef stew or even as a base under a fried egg for a simple meal.
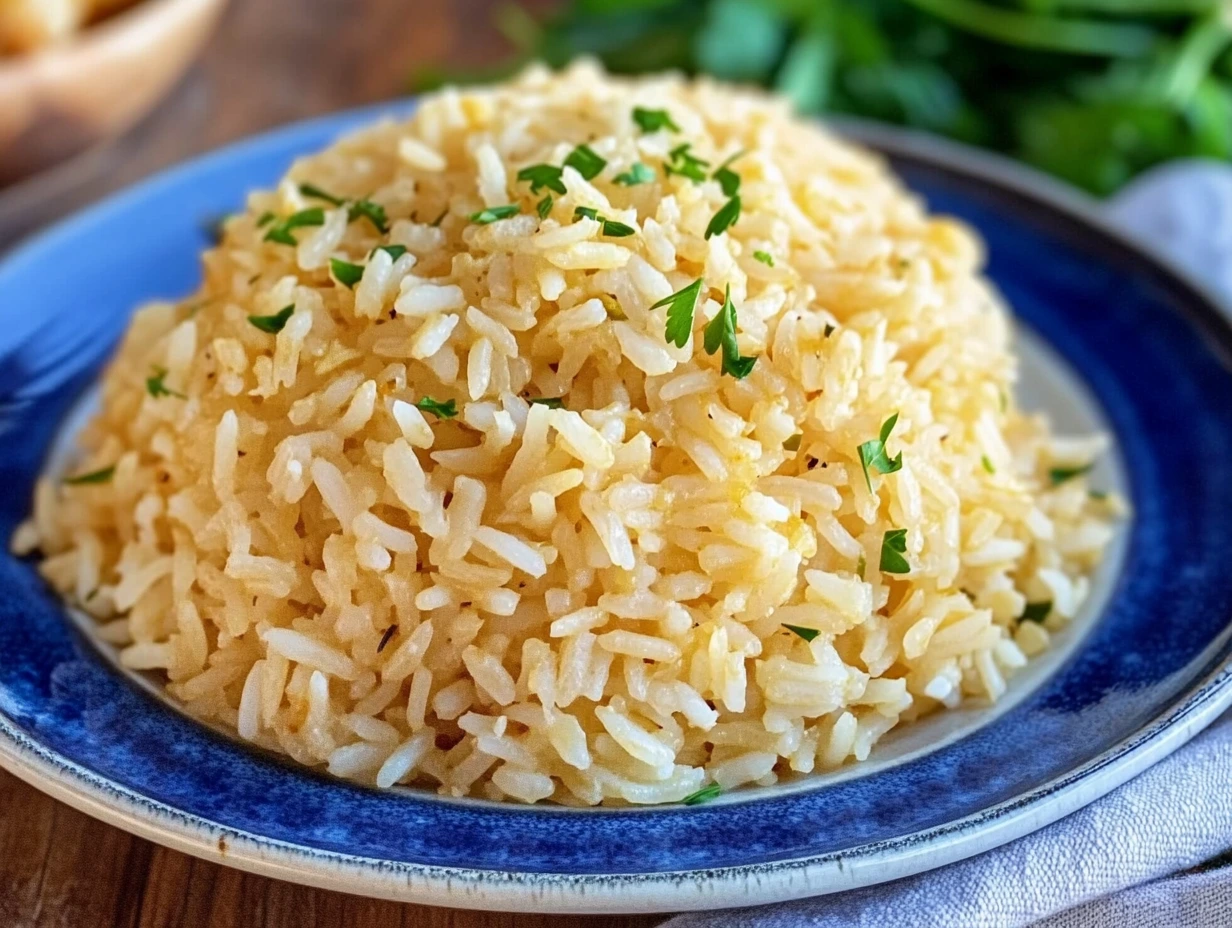
Final Thoughts: Why You’ll Keep Coming Back to This Rice Recipe
Garlic Butter Rice is one of those recipes that you make once, and then suddenly it becomes a weekly staple. It’s budget-friendly, ridiculously easy, and full of deep, savory flavor. Even though it’s simple, it delivers comfort in every bite—just the kind of side dish that brings a meal together.
What I love most is how adaptable it is. Whether you’re dressing it up with herbs and cheese or keeping it plain and classic, this rice works with almost anything. It’s the perfect solution when you don’t want to think too hard about dinner but still want something that tastes homemade and special.
PrintGarlic Butter Rice
This cinnamon rhubarb bread is a delightful blend of sweet and tart flavors with a warm, spiced swirl running through the center. The tangy rhubarb contrasts beautifully with the rich, moist crumb, and a hint of cinnamon adds cozy comfort. A simple glaze can be added on top for extra sweetness and visual appeal.
- Author: Mark's Recipe
Ingredients
For the bread:
1 1/2 cups all-purpose flour
1 tsp baking soda
1/2 tsp baking powder
1/2 tsp salt
1 tsp ground cinnamon
1 cup granulated sugar
1/2 cup unsalted butter, melted
2 large eggs
1 tsp vanilla extract
1/2 cup plain yogurt (or sour cream for extra richness)
1 1/2 cups chopped fresh rhubarb (about 1/2-inch pieces)
For the cinnamon swirl:
2 tbsp granulated sugar
1 tsp ground cinnamon
Optional glaze:
1/2 cup powdered sugar
1–2 tsp milk or lemon juice
Optional: 1/4 tsp almond extract for added depth
Instructions
Preheat your oven to 350°F (175°C). Grease a 9×5-inch loaf pan and line it with parchment paper for easier removal and a cleaner finish.
In a medium bowl, whisk together the flour, baking soda, baking powder, salt, and ground cinnamon. This dry mixture ensures your leavening agents and spices are well distributed throughout the batter.
In a large mixing bowl, stir together the granulated sugar and melted butter until well combined. Beat in the eggs one at a time, ensuring each is fully incorporated before adding the next. Mix in the vanilla extract and yogurt until the batter is smooth and creamy.
Gradually add the dry ingredients to the wet mixture, stirring just until no flour streaks remain. Overmixing can lead to a dense loaf, so mix with care. Gently fold in the chopped rhubarb to distribute it evenly throughout the batter.
In a small bowl, combine the 2 tablespoons of sugar with 1 teaspoon of cinnamon to make the cinnamon swirl. Pour half of the batter into the prepared loaf pan and smooth the top. Evenly sprinkle the cinnamon-sugar mixture over this layer, then pour the remaining batter over the top, spreading it out evenly.
Bake in the preheated oven for 50 to 60 minutes, or until a toothpick inserted into the center comes out clean. If the loaf browns too quickly on top, tent it loosely with foil during the last 10 to 15 minutes of baking.
While the bread cools in the pan for about 10 minutes, prepare the glaze if using. Mix the powdered sugar with milk or lemon juice to your desired consistency. For added depth, stir in a small amount of almond extract.
Once the bread has cooled on a wire rack, drizzle the glaze over the top. Let it set before slicing and serving.
Notes
This bread is perfect served warm or at room temperature. Store it in an airtight container for up to 3 days, or refrigerate to keep it fresh longer. You can also freeze it without the glaze for later enjoyment.

")
