Peanut butter cookies—let’s be honest, they’re a classic for a reason. They’re sweet, salty, and so incredibly satisfying. But when you add the convenience of an air fryer into the mix, well, you’ve just taken a timeless treat and made it even better. If you’ve ever thought about baking cookies but didn’t want to wait for the oven to heat up or deal with the mess, then this Air Fryer Peanut Butter Cookie recipe is exactly what you need.
There’s something truly special about air fryer cookies. The texture is always perfect: slightly crisp around the edges, soft in the center, and full of that irresistible peanut butter flavor. And the best part? You don’t have to preheat your oven or wait forever for a batch to bake. These cookies come together in no time and bake up beautifully in just a few minutes. I was honestly shocked at how easy and delicious they turned out on the very first try! If you’re in the mood for a sweet snack that’s fast, easy, and absolutely mouthwatering, this recipe is going to be your new go-to.
What You’ll Need to Make These Air Fryer Peanut Butter Cookies
Before we jump into the step-by-step process, let’s talk about the ingredients. Don’t worry, this recipe is super simple with pantry staples that you probably already have on hand. Here’s what you’ll need:
-
1 cup peanut butter (smooth or chunky – the choice is yours!)
-
1/2 cup granulated sugar
-
1/2 cup brown sugar
-
1 large egg
-
1 teaspoon vanilla extract (optional, but I highly recommend it for a little extra flavor)
-
1/2 teaspoon baking soda (optional, but it helps with a lighter texture)
You’ll notice that there are just a few ingredients, making this recipe easy to remember and quick to pull together. The peanut butter is the star here, so you’ll want to use a good-quality peanut butter to get the best results. Whether you go for smooth or chunky is totally up to your personal taste. Smooth will give you a softer, more uniform texture, while chunky adds a bit of extra crunch and texture to each bite.
Let’s Get Started: How to Make These Easy Air Fryer Peanut Butter Cookies
Step 1: Prepare the Dough
Start by grabbing a mixing bowl and combining all your ingredients. This is the fun part—just throw in your peanut butter, granulated sugar, brown sugar, egg, and vanilla extract (if you’re using it) into the bowl. If you’re opting for the baking soda, add that in too. Using a spoon or spatula, stir the ingredients together until they form a smooth, thick dough.
The dough will be a little sticky, but don’t worry, that’s exactly how it should be! If it feels a bit too sticky to handle, you can pop it in the fridge for a few minutes to firm up slightly, but I usually don’t find it necessary. The best part of this dough is that you don’t need to chill it for hours like some cookie recipes—this is all about quick, easy, and satisfying.

Step 2: Shape the Cookies
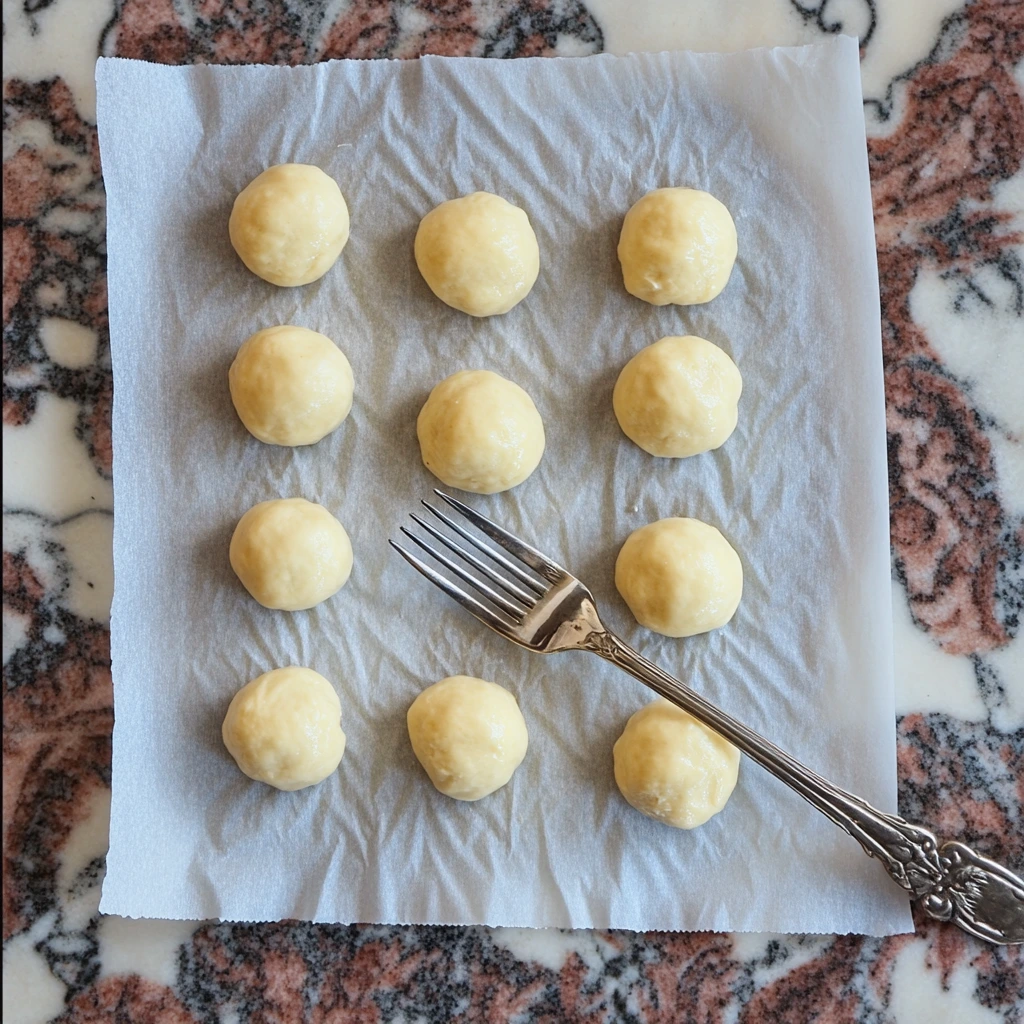
Now comes the fun part: rolling the dough into little balls. Take a small spoonful of dough and roll it into a ball about the size of a walnut—roughly 1 inch in diameter. Place the dough balls onto a small sheet of parchment paper or a silicone mat that will fit into your air fryer basket.
Once they’re on the parchment, gently flatten each ball with a fork. You can make a classic crisscross pattern on top, which not only makes these cookies look extra charming but also helps them bake more evenly. Make sure to leave a little space between each cookie, as the air fryer needs room for the hot air to circulate around each one for perfect cooking.
Step 3: Preheat the Air Fryer
Before we move on to cooking the cookies, we need to preheat the air fryer. This step is important because it ensures that the cookies start baking as soon as they go in. Preheat your air fryer to 350°F (175°C) for about 3 minutes. Most air fryers heat up pretty quickly, so this shouldn’t take long at all.
If your air fryer doesn’t have a preheat function, simply set it to 350°F and let it run for 3 minutes before you put the cookies in. It’s a small step, but it helps the cookies cook evenly right from the start.
Step 4: Cook the Cookies
Now it’s time to bake these little beauties! Carefully transfer the parchment paper with your cookie dough balls into the air fryer basket. Make sure the cookies aren’t overcrowded and that there’s some space between each one so they cook evenly. Depending on your air fryer’s size, you may need to bake the cookies in batches, but that’s okay—it’s worth it!
Air fry the cookies at 350°F for 6-8 minutes, checking for doneness around the 6-minute mark. The cookies should be slightly soft in the center but firm up as they cool. They’ll be lightly golden around the edges and just a little bit puffy. If you prefer a crispier texture, you can let them cook for an extra minute or two. Keep in mind that every air fryer cooks a bit differently, so it’s a good idea to check a little earlier to prevent over-baking.
Once the cookies are done, carefully remove the parchment paper with the cookies from the air fryer. Let them cool for a few minutes on the paper to firm up. Then, transfer them to a cooling rack to cool completely.
And there you have it—crispy-edged, soft-centered peanut butter cookies made in an air fryer with minimal effort. Ready to be devoured in no time at all!

Tips, Tricks, and Variations to Make Your Air Fryer Peanut Butter Cookies Even Better
By now, you’ve already got a batch of delicious Air Fryer Peanut Butter Cookies cooling down on your counter, and I’m sure the house smells incredible! But before you dive in, let’s talk about some ways you can make this recipe even better, along with a few variations that’ll have you experimenting in the kitchen. Trust me, once you’ve mastered this simple version, the possibilities are endless.
Tips for Perfect Air Fryer Peanut Butter Cookies
1. Get the Right Peanut Butter
Peanut butter is the star ingredient here, so it’s important to use one you really enjoy. If you want a smooth, melt-in-your-mouth texture, go for smooth peanut butter. But if you love a little extra crunch and texture in your cookies, chunky peanut butter is the way to go. I personally like to use natural peanut butter because it’s made with fewer additives, but just be sure to stir it well before you use it since natural peanut butter tends to separate.
2. Be Careful with the Baking Soda
While baking soda is optional in this recipe, it can make a big difference in texture. It helps create a slightly lighter, airier cookie with a little more rise. If you want a more dense, chewy cookie, you can skip the baking soda. The choice is yours, but if you’re after that classic soft-and-crisp texture, I’d say it’s worth including.
3. Don’t Overcrowd the Air Fryer
One of the keys to getting perfectly baked cookies in the air fryer is to give each cookie enough space. Air fryers work by circulating hot air around your food, so if your cookies are too close together, they won’t cook as evenly. Make sure there’s space between each cookie, and if your air fryer basket is small, it’s totally fine to bake the cookies in two batches.
4. Check Early to Avoid Overbaking
Air fryers cook quickly, and sometimes even just a minute or two can make a big difference. I recommend checking your cookies around the 6-minute mark to see how they’re doing. The edges should be set, but the center will still be soft. If you like a bit more crispness, give them another minute or two, but be careful not to let them burn.
5. Let the Cookies Cool Properly
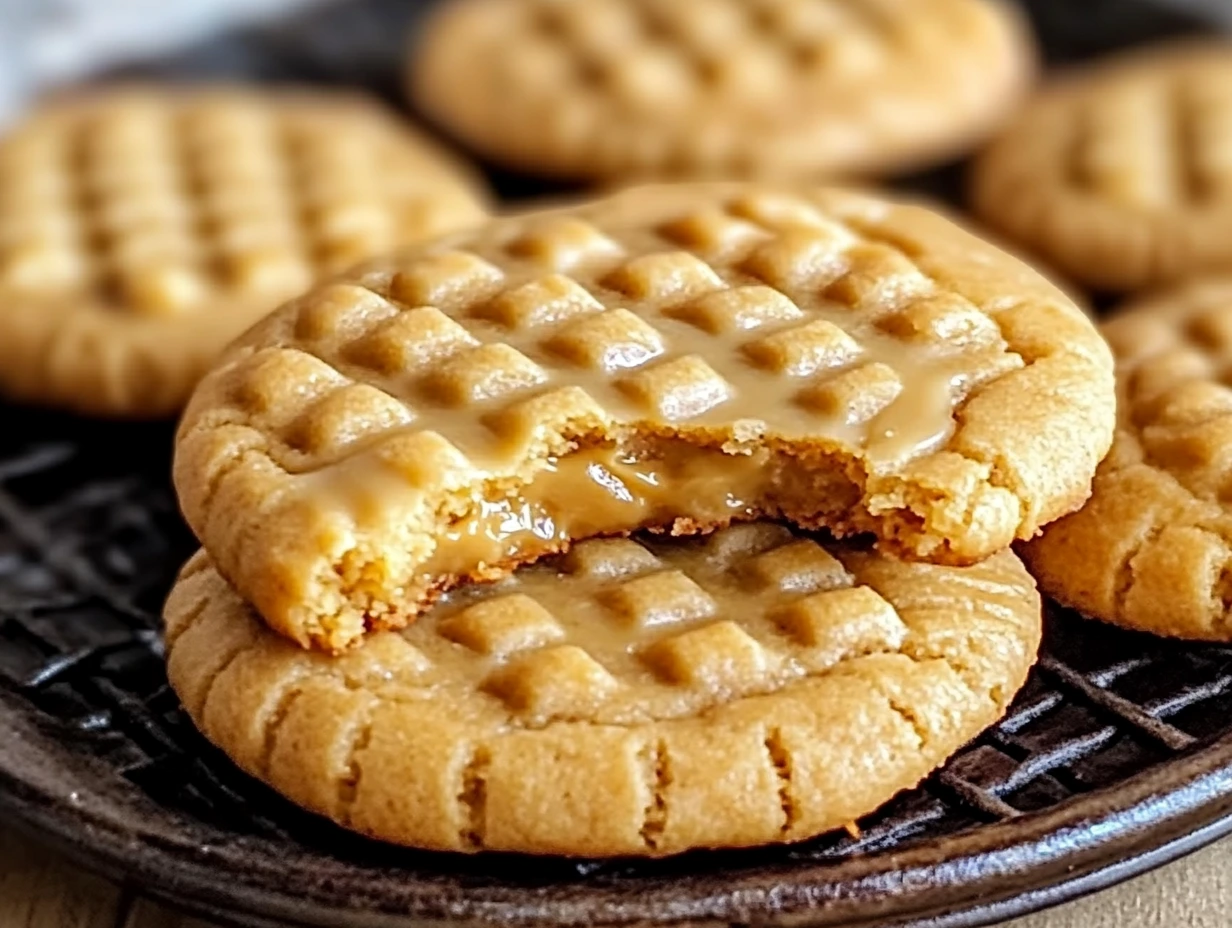
I know, it’s tempting to eat them straight out of the air fryer, but trust me—let them cool for a few minutes! The cookies will firm up as they cool, and you’ll avoid the risk of them falling apart. Once they’ve had a few minutes to rest on the parchment paper, carefully transfer them to a cooling rack to finish cooling. They’ll be perfectly crisp on the outside and soft in the middle.
Variations: Customizing Your Air Fryer Peanut Butter Cookies
Now, let’s get creative! While the base recipe is fantastic on its own, there are so many fun ways to tweak these cookies to suit your tastes. Here are a few variations to consider:
1. Add Chocolate Chips
If you’re a fan of the classic peanut butter and chocolate combo, this is a must-try! After mixing your dough, fold in about 1/2 cup of mini chocolate chips or regular-sized chips for a sweet twist. The chocolate will melt just slightly while the cookies bake, creating gooey pockets of chocolate in each bite. Yum!
2. Add a Pinch of Sea Salt
For a salty-sweet flavor that’ll elevate your cookies, try sprinkling a pinch of flaky sea salt on top before baking. This little touch brings out the richness of the peanut butter and creates a delightful balance of flavors. It’s perfect if you love that salty-sweet contrast.
3. Roll the Dough in Sugar for Extra Sweetness
If you want your cookies to have that classic crinkly, sugary look, try rolling the dough balls in granulated sugar before baking. This will give them an extra layer of sweetness and make them look even more irresistible. It’s an easy way to give the cookies a little extra flair with minimal effort!
4. Make Them Gluten-Free
If you need a gluten-free option, you can easily swap out the all-purpose flour with a 1:1 gluten-free flour blend. Just be sure the peanut butter you’re using is also certified gluten-free, and your cookies will be safe for anyone with gluten sensitivities.
5. Add Nuts for Extra Crunch
If you’re someone who loves a bit of crunch in your cookies, adding some chopped peanuts or other nuts is a great idea. Simply fold 1/4 to 1/2 cup of your favorite nuts into the dough. The added texture will make your cookies even more satisfying, especially if you’re using smooth peanut butter and want a bit more bite.
6. Use Honey or Maple Syrup Instead of Sugar
Looking for a slightly healthier option? You can swap the granulated sugar for honey or maple syrup for a more natural sweetness. Keep in mind that the texture might change slightly, and the cookies could be a little softer than when using granulated sugar, but it’s a delicious option if you’re trying to cut back on refined sugars.
The Magic of Air Frying: Why You’ll Love These Cookies
One of the best things about air fryers is how quickly they can bake up treats like these peanut butter cookies. Unlike traditional baking, where you have to wait for the oven to preheat and deal with the longer baking time, the air fryer lets you enjoy fresh-baked cookies in minutes. Plus, the even heat distribution ensures that your cookies come out perfectly cooked every time.
If you’re short on time or just want a no-fuss way to enjoy warm, gooey cookies without heating up the whole kitchen, the air fryer is your best friend. It’s fast, efficient, and leaves you with perfectly baked cookies in no time.
Frequently Asked Questions and Conclusion
Now that you’ve got all the details on making these delicious Air Fryer Peanut Butter Cookies, let’s address some of the most common questions I get about this recipe. I know you might have a few lingering thoughts or concerns, so I’m here to help! In this section, we’ll clear up any confusion and give you a little more confidence as you bake your perfect batch of cookies.
Frequently Asked Questions
1. Can I make these cookies without baking soda?
Yes, you absolutely can! Baking soda helps create a lighter texture, but if you don’t have any on hand or prefer a denser cookie, feel free to leave it out. Your cookies will still turn out great; they’ll just be a little more chewy and thick. So, if you want a classic, rich peanut butter cookie without the fuss of baking soda, this recipe is still for you!
2. How do I store these cookies?
Once your cookies have cooled completely, store them in an airtight container at room temperature for up to a week. If you want them to last even longer, you can freeze them for up to 2-3 months. Just make sure to layer them with parchment paper or wax paper to prevent them from sticking together. When you’re ready to enjoy, let them thaw at room temperature for a few minutes.
3. Can I double this recipe?
Absolutely! If you’re planning to make a larger batch or share these cookies with family and friends, feel free to double the ingredients. Just keep in mind that the air fryer basket may only hold so many cookies at once, so you might need to bake in batches. The air fryer works best when there’s enough space for air circulation, so don’t overcrowd the basket.
4. How do I make these cookies crispy all the way through?
If you love a crispy cookie, there are a few things you can do. First, make sure to flatten the dough balls well with the fork before baking. The thinner the cookie, the crispier it will be. You can also cook the cookies a little longer—around 8 minutes or more—but be careful not to overdo it, as they might burn. The key is to check them around the 6-minute mark and give them extra time as needed.
5. Can I add other ingredients like chocolate chips or nuts?
Yes! Adding chocolate chips, nuts, or even a swirl of Nutella is a great way to customize these cookies. Chocolate and peanut butter are a classic combo, so feel free to fold in about 1/2 cup of mini chocolate chips or your favorite chopped nuts into the dough. These additions will melt and bake perfectly in the air fryer, making every bite even more indulgent.
6. Can I use a different type of nut butter?
Of course! While peanut butter is the traditional choice here, you can substitute it with other nut butters, like almond butter or cashew butter. Just keep in mind that the flavor and texture might change a bit depending on which nut butter you choose. Almond butter, for example, will give your cookies a slightly more earthy flavor, while cashew butter will make them smoother and a bit milder. Experiment and see which version you like best!
7. My air fryer is a different size—how do I adjust cooking time?
No worries! Cooking times may vary depending on the size and power of your air fryer. If your air fryer is larger, your cookies may cook a little faster, so keep an eye on them after about 5 minutes. For smaller air fryers, it may take a minute or two longer. The key is to check the cookies around the 6-minute mark and adjust as needed. You’ll know they’re ready when the edges are set, and the center is still slightly soft.
Conclusion: Enjoy Your Perfectly Air Fried Peanut Butter Cookies!
I hope you’re as excited as I am to dive into these Air Fryer Peanut Butter Cookies! With just a few simple ingredients and minimal effort, you can have a batch of delicious cookies in less than 15 minutes—without ever turning on the oven. Whether you’re baking for yourself, your family, or a group of friends, these cookies are sure to be a hit.
As you experiment with this recipe, feel free to get creative and try out different variations. Adding chocolate chips, nuts, or even a sprinkle of sea salt can transform these cookies into a new, exciting version every time. Don’t forget to let me know what you think in the comments or tag me on social media if you try out any fun twists on the recipe!
So, go ahead and grab your air fryer, roll up your sleeves, and get baking! These cookies are perfect for when you’re craving something sweet and want it fast. And once you’ve made them, I bet they’ll become a regular in your baking rotation. Enjoy!
PrintAir Fryer Peanut Butter Cookies
These Air Fryer Peanut Butter Cookies are an easy, quick treat that’s packed with rich peanut butter flavor. The texture is just right—slightly crisp around the edges and soft in the middle. The crisscross fork pattern adds a nice touch of texture, making them look as good as they taste.
- Author: Mark's Recipe
Ingredients
1 cup peanut butter (smooth or chunky)
1/2 cup granulated sugar
1/2 cup brown sugar
1 large egg
1 teaspoon vanilla extract (optional)
1/2 teaspoon baking soda (optional, for a lighter texture)
Instructions
Prepare the Dough
In a mixing bowl, combine the peanut butter, granulated sugar, brown sugar, egg, vanilla extract (if using), and baking soda (if using). Stir until the ingredients are well combined and a smooth dough forms. The mixture should be thick and slightly sticky.
Shape the Cookies
Roll the dough into 1-inch balls. Place them on a small sheet of parchment paper or a silicone mat that fits into your air fryer basket. Gently flatten each ball slightly using a fork, making a crisscross pattern on top of each cookie. Ensure they are spaced apart for even cooking.
Preheat the Air Fryer
Preheat your air fryer to 350°F (175°C) for about 3 minutes to get it ready for cooking.
Cook the Cookies
Carefully place the parchment paper with the cookies into the air fryer basket, ensuring there’s enough space between the cookies for air circulation. Air fry the cookies for 6–8 minutes, checking for doneness around the 6-minute mark. The cookies should be set on the edges and slightly soft in the center. If needed, you can add a minute or two for desired crispness.
Cool and Serve
Once done, remove the cookies from the air fryer and let them cool on the parchment paper for a few minutes. Then transfer them to a cooling rack to finish cooling completely.
Notes
For an extra crunch, use chunky peanut butter. You can skip the baking soda if you prefer a denser cookie. These cookies are perfect for those who want a small-batch, no-bake-oven-required treat. The air fryer cooks the cookies evenly, and the reduced baking time makes them super convenient for a fast snack.