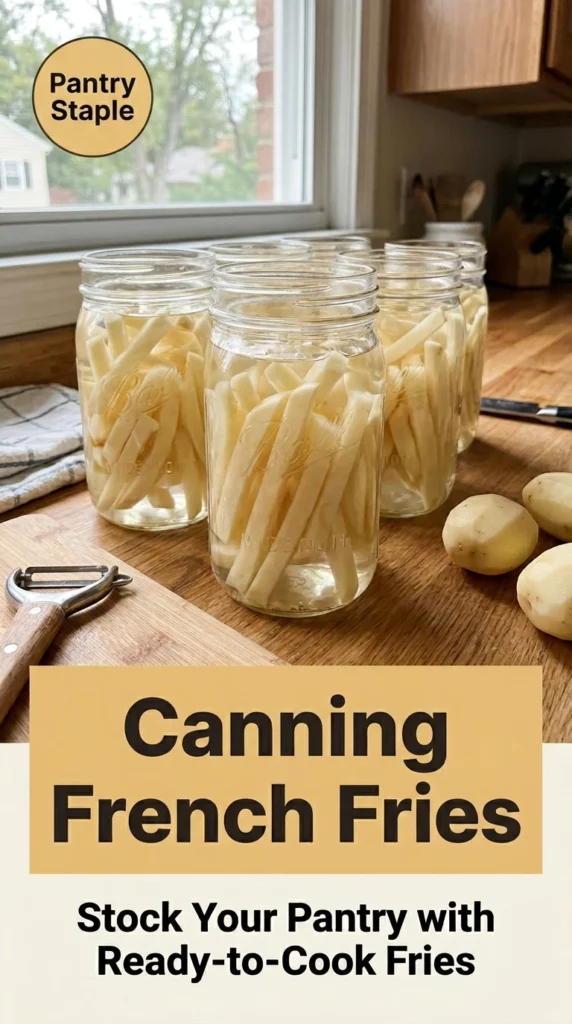
Canning French fries is an artisan skill that brings the joy of homemade comfort food right to your pantry. Imagine the satisfying crunch of perfectly fried potatoes, now captured in a jar for your convenience. Whether it’s a bustling weeknight or a lazy Sunday gathering with family, having these prepped and preserved golden fries on hand elevates your meal prep game to new heights. The aroma of freshly canned French fries wafts through your kitchen, a promise of delicious meals to come. With the right techniques and quality ingredients, you can master this method and enjoy the best of both worlds: homemade goodness and long-lasting storage.
- Why This Canning French Fries Is Worth Your Time
- Main Ingredients for Canning French Fries
- Tools Needed for Canning French Fries
- Step-by-Step Instructions for Canning French Fries
- Pro Tips for Perfect Canning French Fries
- Serving Ideas and Pairings
- Variations and Swaps for Canning French Fries
- Leftovers and Storage Tips
- Nutrition Notes
- Frequently Asked Questions About Canning French Fries
Why This Canning French Fries Is Worth Your Time
Canning French fries is not just about preserving food; it’s about capturing the essence of the potato in a way that allows you to enjoy its flavor and texture long after the harvest. The balance of creamy interiors and crispy exteriors is achieved through careful preparation and canning techniques. When you can your fries, you are ensuring that they maintain their artisan quality, allowing you to enjoy homemade fries any time you desire. This method adds a layer of craftsmanship, turning a simple ingredient into a versatile staple in your pantry.
Each step in the process—from peeling and cutting to soaking and packing—plays a crucial role in developing the final product. By focusing on uniform sizes and proper soaking, you enhance the texture and flavor of your fries, ensuring they are as delightful as freshly cooked ones. Moreover, knowing how to can your own French fries empowers you to take control of your ingredients, ensuring they are of the highest quality without any additives or preservatives. This dedication to quality and flavor is what sets artisan cooking apart.
Main Ingredients for Canning French Fries
Choosing the right ingredients is key when canning French fries. Here’s what you’ll need:
- Potatoes: Select starchy varieties like Russets or Idaho potatoes for the best fry texture. Their high starch content results in a fluffy interior and crispy exterior.
- Water: Used for soaking and boiling, water plays a vital role in the canning process. Always use filtered or clean water to ensure your fries remain fresh.
- Salt: This enhances flavor and helps in preserving the fries. Use kosher or sea salt for a cleaner taste.
- Boiling Water: This is crucial for the canning process, as it ensures the fries are fully cooked and helps to create a seal within the jars.
Tools Needed for Canning French Fries
| Tool | Purpose / what it helps with |
| Peeler | Essential for removing potato skins before cutting. |
| Knife | For cutting potatoes into uniform fry shapes. |
| Large Bowl | Used for soaking the cut potatoes to remove excess starch. |
| Jars | Glass containers for storing the canned fries; ensure they are sterilized. |
| Pressure Canner | Necessary for safely processing the jars under pressure. |
| Spatula | Helps to remove air bubbles from the jars. |
| Towel | For drying jars and absorbing any spills during the canning process. |
Step-by-Step Instructions for Canning French Fries
Now that you have your ingredients and tools ready, let’s dive into the step-by-step process of canning French fries. This method ensures you achieve the perfect texture and flavor every time.
- Begin by peeling your potatoes. Peeling is essential when canning potatoes, regardless of the recipe. Once peeled, cut the potatoes into uniform, fry-shaped strips, targeting a size of about ½ to ¾ inch wide. This size works best for canning and ensures a perfect fry texture after cooking.
- To achieve the best texture, soak the potatoes in water to remove excess starch. Place your cut potatoes in a large bowl and cover them with water. Change the water three times, allowing each water change to soak for about an hour. For optimal results, you can soak them overnight. After the final soak, drain the fries well and rinse them quickly in cold water to eliminate any remaining starch.
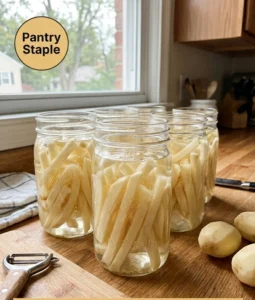
- Start packing the raw fries into the jars. Pack the fries firmly but avoid squishing them. Leave 1 inch of headspace at the top of the jar, ensuring the fries are upright to maximize capacity. Add 1 teaspoon of salt per quart jar or ½ teaspoon per pint jar.
- Bring a pot of water to a boil. Carefully pour the boiling water into the jars over the fries, ensuring they are fully submerged while maintaining the 1-inch headspace. Use a spatula or a non-metallic utensil to gently remove any air bubbles by running it along the inside of the jar. Wipe the rims of the jars with a clean towel to ensure a proper seal.
- Place your jars in the pressure canner and follow the manufacturer’s instructions for your pressure canner to ensure safety and proper processing times. Process the jars at 10 pounds of pressure for 35 minutes for pint jars or 40 minutes for quart jars, adjusting pressure according to altitude. After processing, turn off the heat and allow the pressure to release naturally. Once the pressure has fully released, remove the jars from the canner and let them cool on a towel-lined surface.
- After your jars have cooled, check the seals to ensure they are tight. Any jars that do not seal properly can be refrigerated and used within a few days. Label your jars with the date of canning, and store them in a cool, dark place.
Pro Tips for Perfect Canning French Fries
- Always use fresh potatoes; older ones may have a higher sugar content, affecting the fry texture.
- Uniform cuts are crucial for even cooking; invest time in slicing your potatoes consistently.
- Soaking overnight can lead to even better results, as it removes more starch and helps achieve a crispier fry.
- When packing your jars, ensure fries are tightly packed but do not compress them too much; this can lead to uneven cooking.
- Monitor your pressure canner carefully, especially if you live at a higher altitude, as this will affect processing times.
- Label your jars with not just the date but also the variety of potato used for easy reference later.
Serving Ideas and Pairings
- Serve canned French fries alongside homemade dipping sauces like garlic aioli or a spicy ketchup.
- Pair fries with grilled meats or roasted vegetables for a balanced meal.
- Incorporate fries into casseroles or as a topping for shepherd’s pie for a comforting twist.
- Sprinkle fresh herbs or grated cheese on top before serving for added flavor.
- Enjoy them as a side dish with your favorite sandwiches or burgers.
Variations and Swaps for Canning French Fries
Restaurant-Style Version
For a restaurant-style version, consider adding seasonings such as garlic powder or paprika to the fries before packing them into jars. This gives a flavor boost and makes them ready to serve straight from the jar.
Rustic Home-Cook Version
For a more rustic approach, leave the skins on the potatoes for added texture and flavor. Just make sure to scrub them thoroughly before cutting.
Make-Ahead Version
To make ahead, prepare the fries and pack them in jars, but do not process immediately. Store in the refrigerator for up to a day before canning.
Seasonal Ingredient Version
Incorporate seasonal herbs or spices, such as rosemary or thyme, during the packing stage to infuse your fries with unique flavors.
Leftovers and Storage Tips
- Canned French fries can be stored for up to a year in a cool, dark place.
- Once opened, store any leftover fries in the refrigerator and consume within three days.
- To reheat, place fries in an oven preheated to 400°F (200°C) for about 15 minutes for that crispy texture.
- Freezing is not recommended for canned fries, as it may alter the texture.
Nutrition Notes
Canned French fries are a source of carbohydrates, providing energy for your meals. A serving typically contains around 150 calories, primarily from the potatoes. For those looking to adjust caloric intake, consider reducing the amount of salt used or pairing fries with low-calorie dips. Balancing your meal with proteins and vegetables can create a well-rounded dish while enjoying the artisan quality of your canned French fries.
Frequently Asked Questions About Canning French Fries
Can I use any type of potato for canning French fries?
It is best to use starchy varieties like Russets or Idaho potatoes for the best texture and flavor.
What is the process time for canning French fries?
Process pint jars for 35 minutes and quart jars for 40 minutes at 10 pounds of pressure, adjusting for altitude as needed.
How should I store my canned French fries?
Store your jars in a cool, dark place, and they can last up to a year when sealed properly.
Are canned French fries healthy?
Canned French fries are primarily a source of carbohydrates. Pairing them with proteins and vegetables can enhance their nutritional value.
What should I do if my jars do not seal properly?
If jars do not seal, refrigerate them and use within a few days.
With the knowledge and techniques shared in this guide, you’re well on your way to mastering the art of canning French fries. This exceptional skill not only allows you to enjoy homemade fries at your convenience but also celebrates the joy of artisan cooking. Embrace the process and savor the satisfaction of having your own canned French fries ready to enhance any meal.

Crispy Canned French Fries Delight
Ingredients
Method
- Begin by peeling your potatoes. Peeling is essential when canning potatoes, regardless of the recipe. Once peeled, cut the potatoes into uniform, fry-shaped strips, targeting a size of about ½ to ¾ inch wide. This size works best for canning and ensures a perfect fry texture after cooking.
- To achieve the best texture, soak the potatoes in water to remove excess starch. Place your cut potatoes in a large bowl and cover them with water. Change the water three times, allowing each water change to soak for about an hour. For optimal results, you can soak them overnight. After the final soak, drain the fries well and rinse them quickly in cold water to eliminate any remaining starch.
- Start packing the raw fries into the jars. Pack the fries firmly but avoid squishing them. Leave 1 inch of headspace at the top of the jar, ensuring the fries are upright to maximize capacity. Add 1 teaspoon of salt per quart jar or ½ teaspoon per pint jar.
- Bring a pot of water to a boil. Carefully pour the boiling water into the jars over the fries, ensuring they are fully submerged while maintaining the 1-inch headspace. Use a spatula or a non-metallic utensil to gently remove any air bubbles by running it along the inside of the jar. Wipe the rims of the jars with a clean towel to ensure a proper seal.
- Place your jars in the pressure canner and follow the manufacturer's instructions for your pressure canner to ensure safety and proper processing times. Process the jars at 10 pounds of pressure for 35 minutes for pint jars or 40 minutes for quart jars, adjusting pressure according to altitude. After processing, turn off the heat and allow the pressure to release naturally. Once the pressure has fully released, remove the jars from the canner and let them cool on a towel-lined surface.
")
