Light and Fluffy Cream-Filled Clothespin Cookies – A Classic Delicate Treat
If you love light, flaky pastries filled with sweet, creamy goodness, then these Cream-Filled Clothespin Cookies are about to become your new favorite treat! These delicate cookies, sometimes called Lady Locks, have a buttery, slightly crisp shell that’s wrapped around a mold, baked until golden, and then filled with a sweet, fluffy whipped cream filling.
These cookies have been a beloved classic for generations, often appearing at holiday gatherings, weddings, and special celebrations. While they may look fancy, they’re surprisingly easy to make with just a few simple ingredients.
Why You’ll Love This Recipe
✔ Light & Buttery Pastry – A crisp, flaky exterior that melts in your mouth.
✔ Sweet & Creamy Filling – The perfect contrast to the delicate cookie shell.
✔ Classic & Elegant – Perfect for holidays, parties, and tea time.
✔ Easier Than You Think – No special baking skills required!
Let’s get started on making these beautiful, cream-filled delights!
Step 1: Gather Your Ingredients
These cookies require just a few basic pantry staples, but the result is an elegant and impressive dessert.
For the Dough:
- 1 cup all-purpose flour – Creates a delicate, crisp texture.
- ½ cup unsalted butter, chilled and diced – Keeps the pastry flaky.
- ¼ cup sour cream – Adds moisture and richness to the dough.
For the Filling:
- 1 cup heavy cream – Whipped to create a light, airy texture.
- ¼ cup confectioners’ sugar – Sweetens the filling without making it grainy.
- 1 teaspoon vanilla extract – Adds a warm, classic flavor.
For Dusting:
- ½ cup granulated sugar – A light dusting for a hint of sweetness.
✅ Pro Tip: Traditional clothespin cookies are shaped using clothespin molds (hence the name!). If you don’t have clothespins, small wooden dowels or metal cannoli tubes work just as well.
Step 2: Make the Dough
To create flaky, buttery shells, we first need to make the dough.
1. Combine the Flour and Butter
- In a mixing bowl, add 1 cup all-purpose flour and ½ cup diced chilled butter.
- Use a pastry cutter or your fingers to blend until the mixture resembles coarse crumbs.
2. Add the Sour Cream
- Stir in ¼ cup sour cream and mix until the dough starts to come together.
- Knead lightly until it forms a smooth ball.
✅ Pro Tip: Using chilled butter is key to creating a flaky pastry. Try working quickly to prevent the butter from warming up too much.
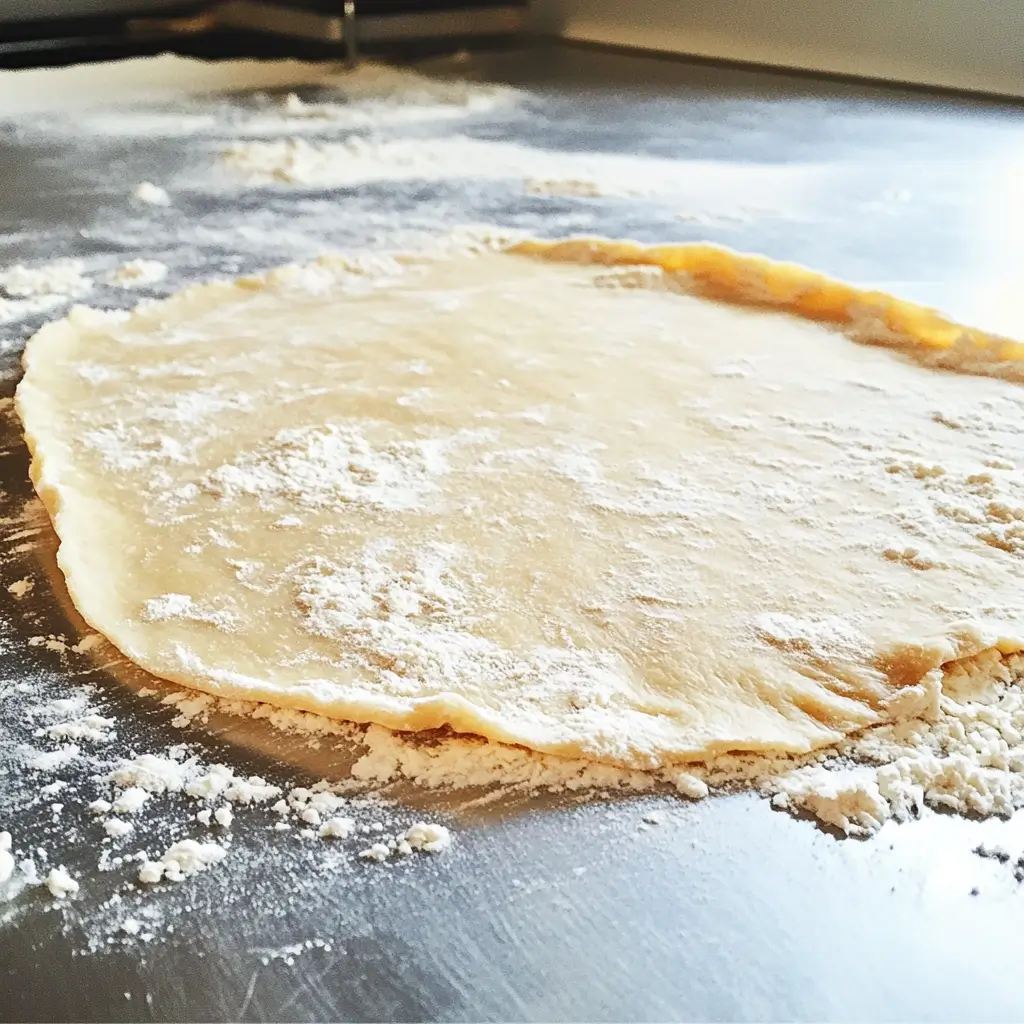
Step 3: Roll and Shape the Dough
Now that our dough is ready, we need to roll it out and shape it into delicate spirals around the clothespin molds.
1. Roll Out the Dough
- Lightly flour a clean surface and roll the dough out to ⅛ inch thickness.
2. Cut the Dough into Strips
- Using a sharp knife or pizza cutter, cut the dough into ½-inch wide strips.
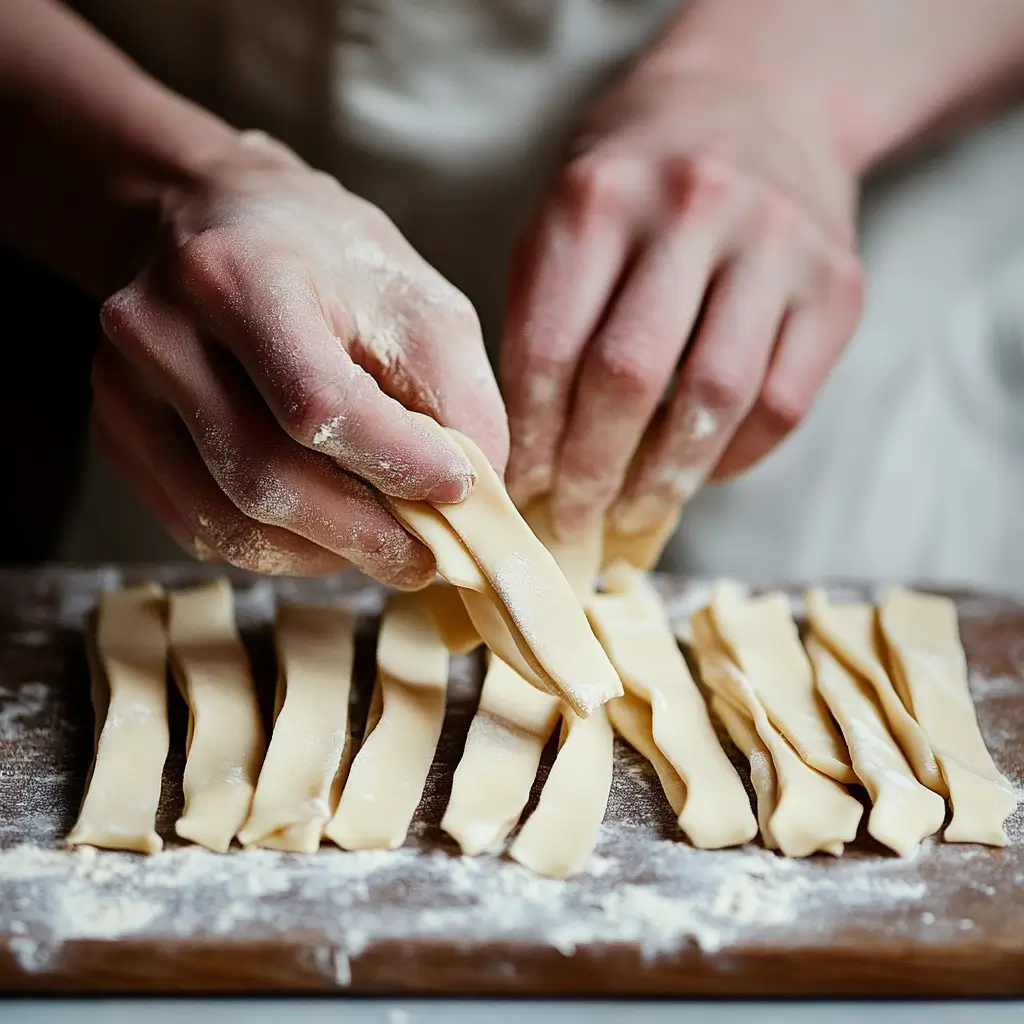
3. Wrap Around Molds
- Take each strip and gently wrap it around a greased clothespin mold, overlapping slightly as you go.
✅ Pro Tip: Be careful not to stretch the dough too tightly around the mold, as it will shrink slightly while baking.
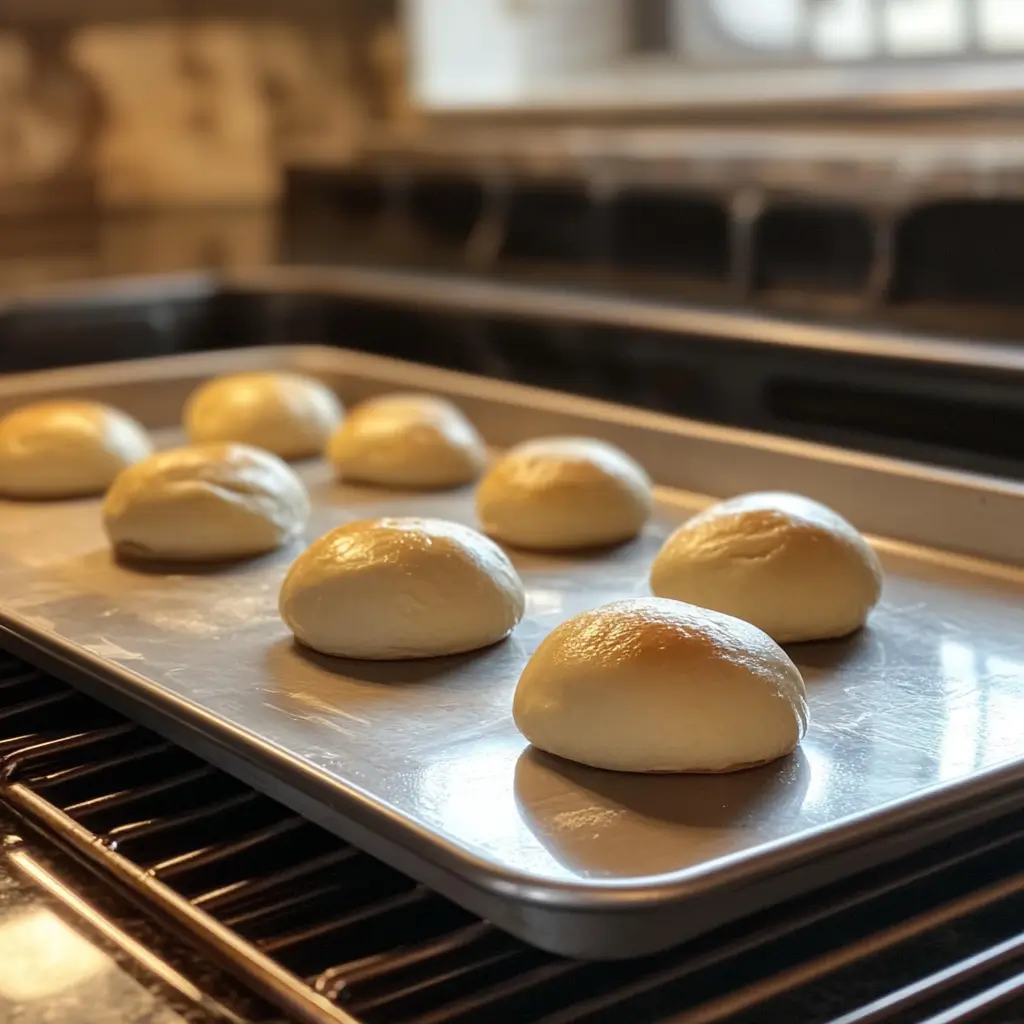
Step 4: Bake the Cookie Shells
Now that our dough is wrapped around the molds, it’s time to bake the shells until light, crispy, and golden brown.
1. Preheat the Oven
- Set your oven to 375°F (190°C).
2. Arrange on a Baking Sheet
- Place the wrapped molds on a parchment-lined baking sheet, making sure they are spaced slightly apart to allow for even baking.
3. Bake Until Golden
- Bake for 10-12 minutes, or until the shells turn a light golden brown.
- Keep an eye on them—since the dough is thin and delicate, it can brown quickly!
4. Cool & Remove from Molds
- Let the cookies cool completely before attempting to remove them from the molds.
- Once cooled, gently slide the shells off the molds. If they seem stuck, twist gently or use a toothpick to help loosen them.
✅ Pro Tip: To prevent sticking, lightly grease the molds with butter or non-stick spray before wrapping the dough around them.
Step 5: Make the Cream Filling
While the shells are cooling, let’s prepare the light, fluffy whipped cream filling that will make these cookies truly irresistible.
1. Whip the Heavy Cream
- In a large mixing bowl, add 1 cup heavy cream.
- Using a hand mixer or stand mixer, beat on medium-high speed until it starts to thicken.
2. Add the Sugar and Vanilla
- Add ¼ cup confectioners’ sugar and 1 teaspoon vanilla extract to the cream.
- Continue whipping until stiff peaks form—this means the cream holds its shape when lifted with a spoon.
✅ Pro Tip: Make sure your heavy cream is cold before whipping—it will whip up faster and hold its structure better.
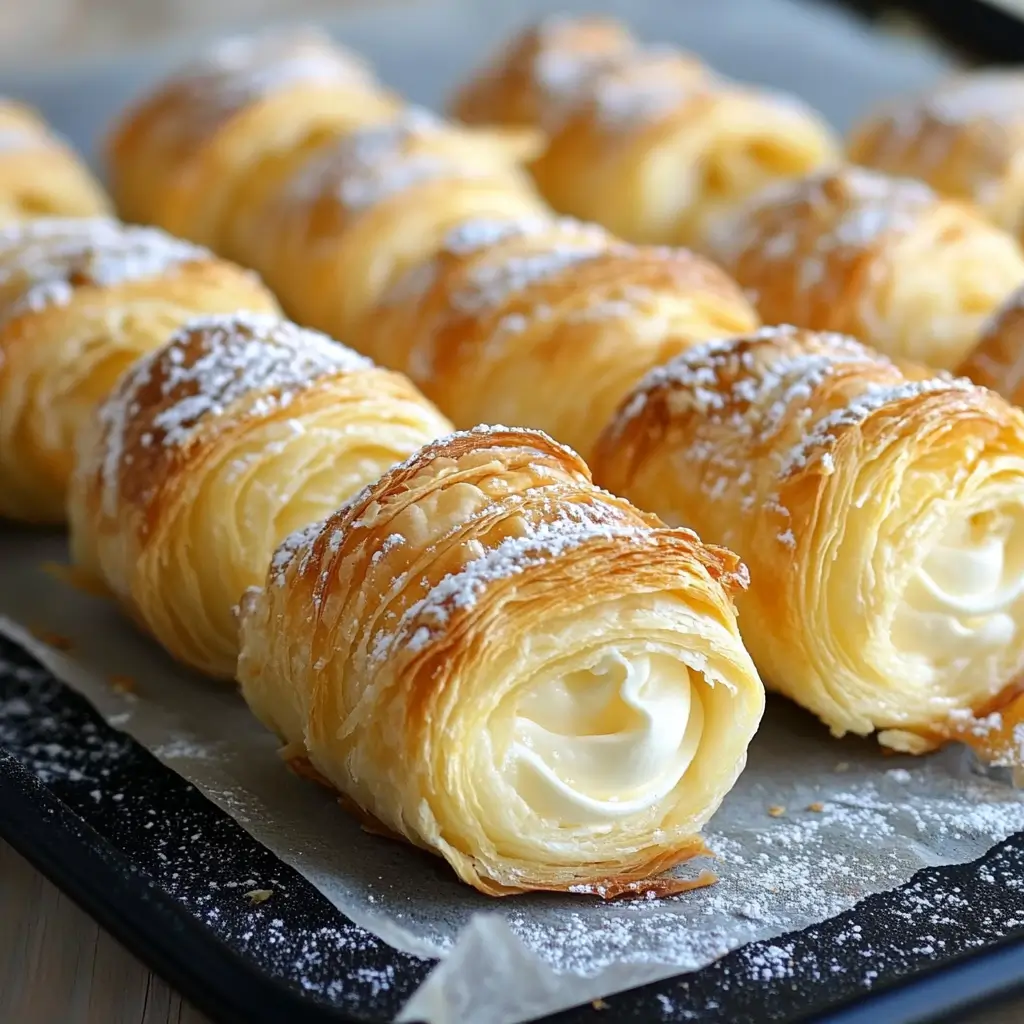
Step 6: Fill the Cookies
Now that both the cookie shells and cream filling are ready, it’s time to assemble!
1. Transfer the Filling to a Piping Bag
- Spoon the whipped cream into a piping bag fitted with a small round tip.
- If you don’t have a piping bag, you can use a ziplock bag with a small hole cut in the corner.
2. Pipe the Cream into Each Shell
- Insert the piping tip into one end of the cookie shell and gently squeeze until the shell is filled.
- Repeat for all cookies.
✅ Pro Tip: Fill the cookies just before serving for the crispiest texture. If making ahead, store unfilled shells separately and pipe the filling when ready to serve.
Step 7: Dust and Serve
For the finishing touch, lightly dust the cookies with granulated sugar for a hint of extra sweetness.
Time to Enjoy!
- Arrange the filled cookies on a serving platter.
- Serve immediately and enjoy their light, crispy texture with the creamy filling inside!
At this point, your Cream-Filled Clothespin Cookies are beautifully assembled and ready to impress!
The Ultimate Guide to Making Lyonnaise Potatoes at Home

These delicate and flaky clothespin cookies are filled with a sweet vanilla whipped cream, making them a nostalgic and irresistible treat. Perfect for holidays, special occasions, or just because!
- Prep Time: 30 minutes
- Cook Time: 12 minutes
- Total Time: 42 minutes
- Yield: 24 cookies 1x
Ingredients
For the Dough:
- 1 cup all-purpose flour
- ½ cup unsalted butter, chilled and diced
- ¼ cup sour cream
For the Filling:
- 1 cup heavy cream
- ¼ cup confectioners’ sugar
- 1 teaspoon vanilla extract
For Dusting:
- ½ cup granulated sugar
Instructions
1️⃣ Prepare the Dough: In a mixing bowl, combine flour and diced butter. Use a pastry cutter or your hands to blend until the mixture resembles coarse crumbs. Stir in sour cream until the dough comes together. Wrap in plastic wrap and chill for 30 minutes.
2️⃣ Roll and Shape: On a lightly floured surface, roll out the chilled dough to 1/8-inch thickness. Cut into strips about ½ inch wide and wrap each strip around greased clothespin molds (or dowels), overlapping slightly.
3️⃣ Bake the Shells: Preheat the oven to 375°F (190°C). Place the wrapped molds on a baking sheet and bake for 10-12 minutes, or until golden brown.
4️⃣ Cool and Remove Molds: Allow the baked shells to cool completely, then gently slide them off the molds.
5️⃣ Prepare the Filling: In a mixing bowl, whip the heavy cream, confectioners’ sugar, and vanilla extract until stiff peaks form.
6️⃣ Fill the Cookies: Transfer the whipped cream filling into a piping bag. Carefully pipe the cream into each cooled cookie shell.
7️⃣ Dust and Serve: Lightly dust the filled cookies with granulated sugar before serving. Enjoy!
Notes
- No clothespin molds? Use small dowels or metal cannoli tubes instead.
- Make it extra special: Drizzle with melted chocolate or dust with powdered sugar for a fancier look!
- Storage Tip: Keep refrigerated in an airtight container and enjoy within 2-3 days for the best texture.

")
