There’s just something about a chilled, fruity dessert that makes any warm day feel a little more magical. And if you’re anything like me, when the sun is blazing and you’re looking for that perfect make-ahead treat that doesn’t require turning on the oven—Strawberry Icebox Pie is exactly what you need in your life. It’s cool, it’s creamy, and it’s the kind of dessert that disappears quickly at backyard BBQs, family dinners, or lazy weekends on the porch swing.
I’ve been making versions of this pie for years, and every time I pull it out of the fridge, I get the same reaction: “Ohhh, that looks amazing!” And trust me—it tastes even better than it looks. With a graham cracker crust that’s just the right balance of sweet and buttery, and a strawberry filling that’s smooth, tangy, and full of real berry flavor, this pie checks all the right boxes. Plus, no baking means you can whip it up without breaking a sweat.
This recipe is super simple and doesn’t require any fancy ingredients or techniques—just a few bowls, a blender or food processor, and some fridge time. That’s my kind of dessert.
So let’s dive into the first part of this no-bake wonder. Trust me, once you make it, it’s going to become a summer staple at your house too.
Ingredients You’ll Need
Let’s start by pulling together everything you need. There are two main components to this pie: the crust and the filling.
For the crust:
-
1 ½ cups graham cracker crumbs
-
¼ cup granulated sugar
-
6 tablespoons melted butter
For the filling:
-
1 pound fresh strawberries, hulled
-
1 can (14 oz) sweetened condensed milk
-
1 package (8 oz) cream cheese, softened
-
1 teaspoon vanilla extract
-
1 cup heavy whipping cream
That’s it! Simple ingredients, but when they come together? Absolute magic.
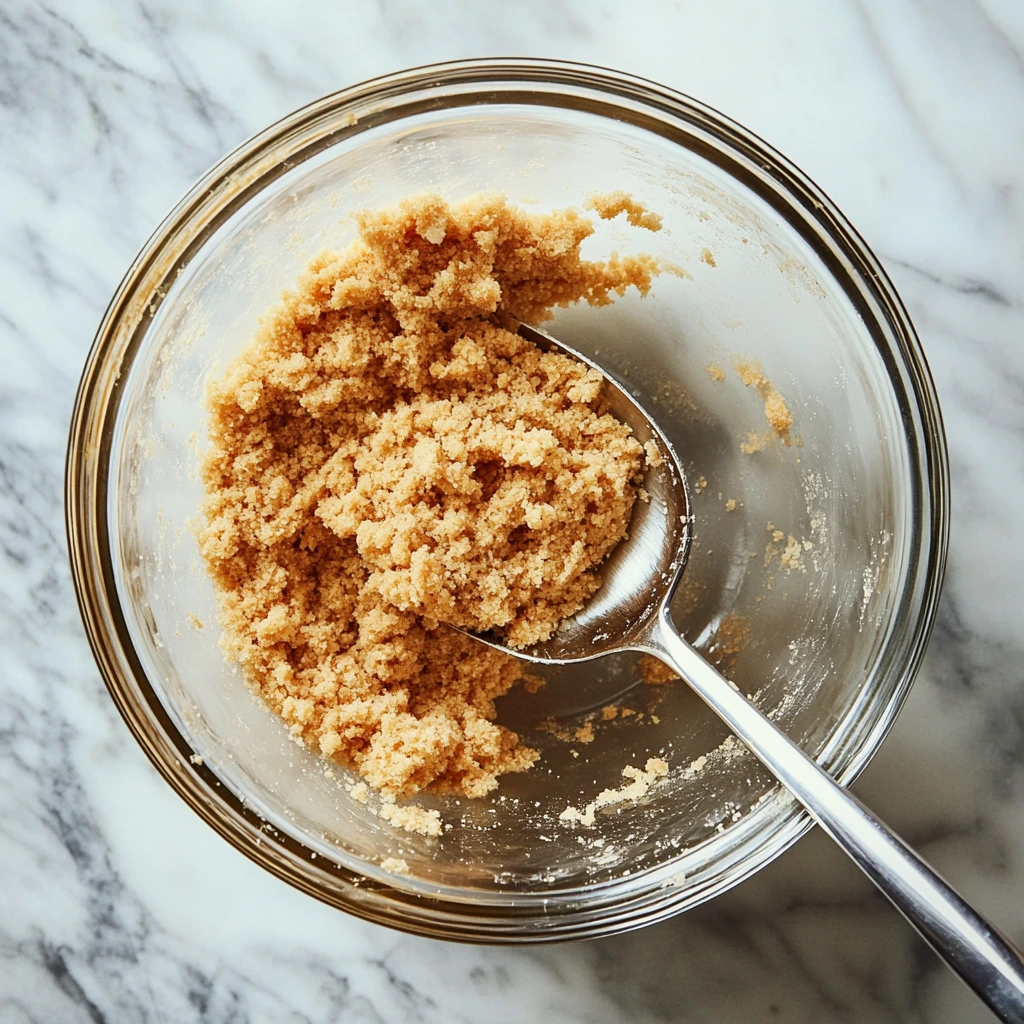
STEP 1: Make the Crust
This part is easy and gives the pie that classic crunchy foundation.
In a medium bowl, combine your graham cracker crumbs, sugar, and melted butter. Stir everything together until the texture looks like damp sand. It should hold together when you press it between your fingers. Once it’s mixed, press the crumb mixture firmly into the bottom and up the sides of a 9-inch pie dish.
Tip: Use the bottom of a measuring cup to really press the crust down evenly—it helps create a solid base that won’t crumble when sliced.
Pop the crust in the fridge while you move on to the filling. Chilling it helps firm things up so it holds together once the creamy strawberry layer goes in.
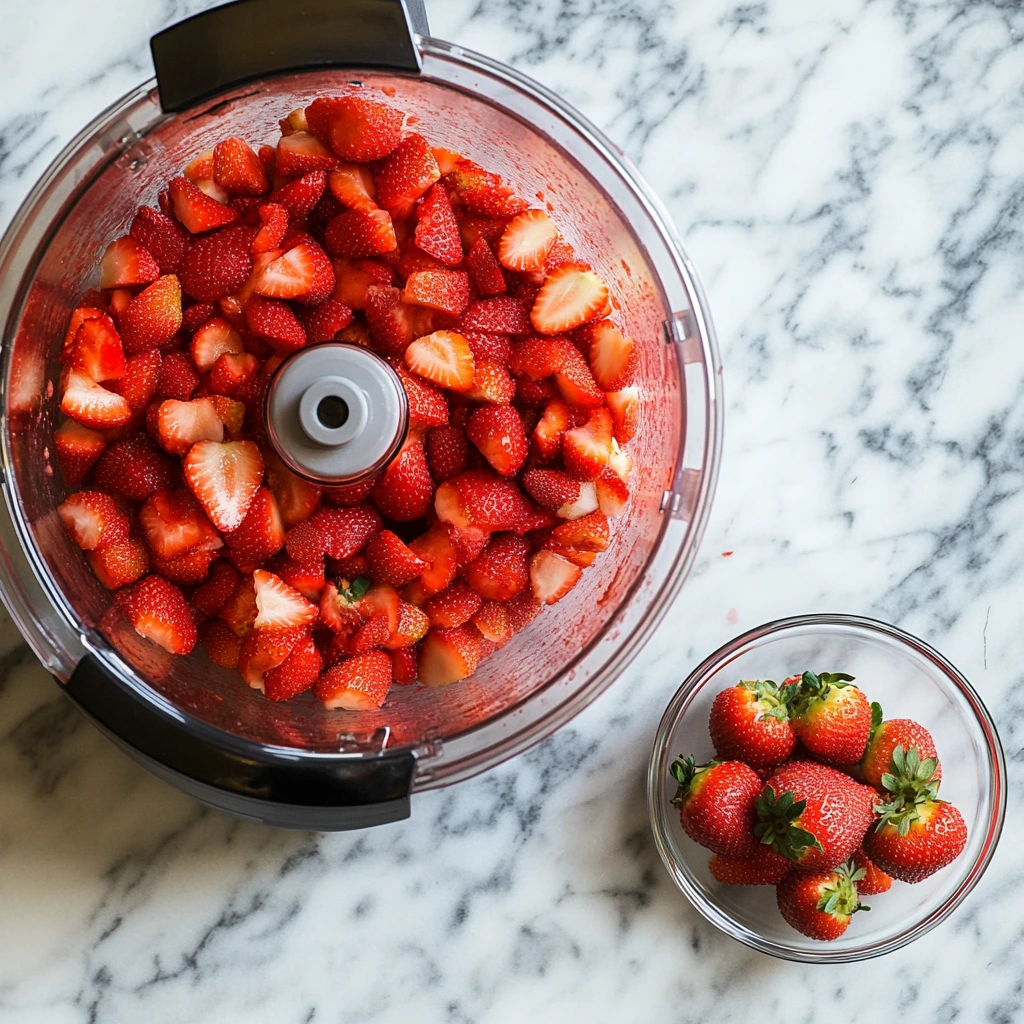
STEP 2: Puree the Strawberries
Next, grab your blender or food processor and toss in the hulled strawberries. Blend until smooth—you want a nice, even puree with no big chunks. Once it’s blended, set it aside while you whip up the creamy base.
Fresh strawberries work best here for the brightest flavor, but if you only have frozen on hand, they’ll do the trick too. Just make sure they’re completely thawed and drained well before blending so you don’t end up with extra water in the filling.
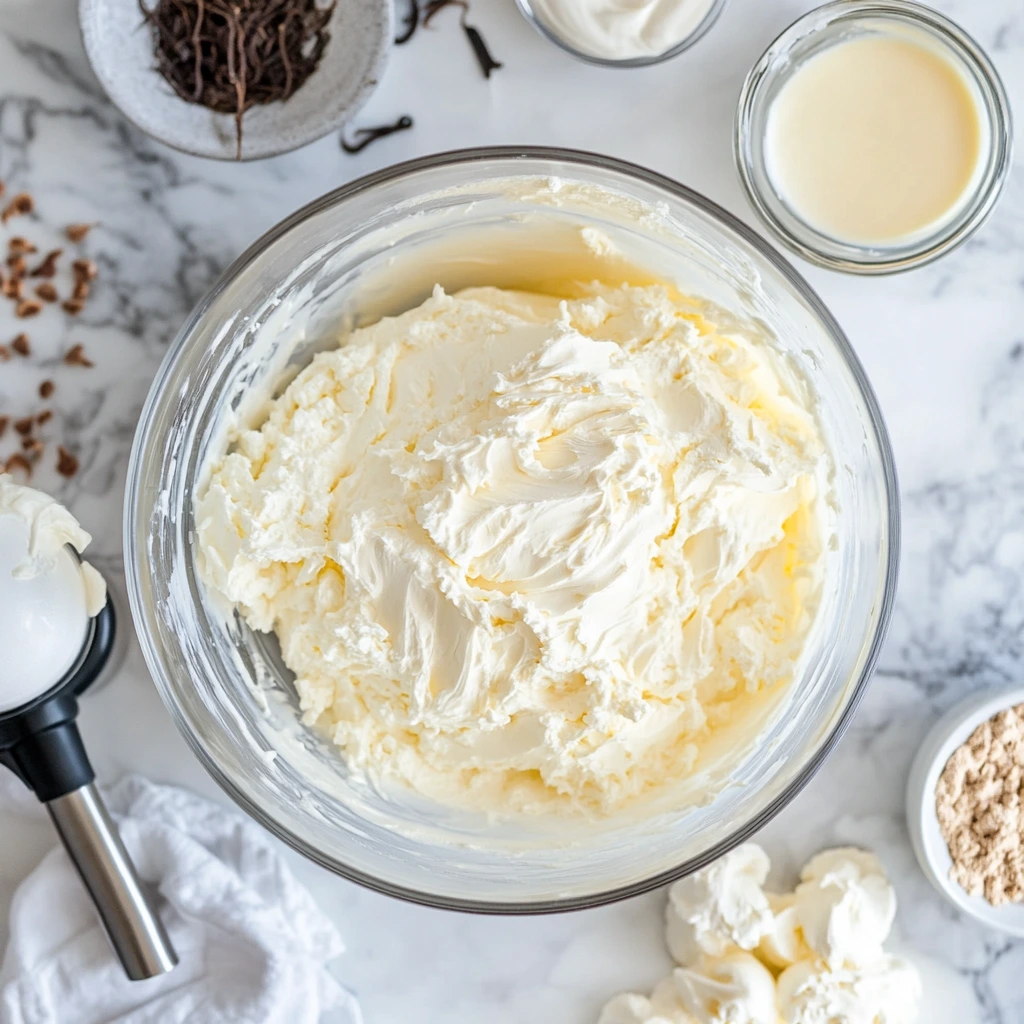
STEP 3: Mix the Creamy Base
Now it’s time to start building that dreamy filling. In a large mixing bowl, beat the softened cream cheese until smooth and fluffy. It helps to let it come to room temp first—no one likes lumpy cream cheese in their pie!
Once that’s smooth, pour in the sweetened condensed milk and vanilla extract. Beat until everything is fully combined. The mixture should be silky and a little glossy.
Now comes the good stuff—pour in your strawberry puree and beat until it’s fully blended. The filling will turn a gorgeous pink color, and you’ll start smelling that sweet berry scent that screams summer.
Strawberry Icebox Pie
Alright, now that we’ve got our crust ready and that strawberry-infused cream cheese mixture prepped, it’s time to take this pie to the next level. We’re about to whip up some fluffy cream, fold everything together, and let the fridge do its magic.
This next part is where all those beautiful flavors and textures start to come together—creamy, light, and perfectly sweet with a natural strawberry kick. Trust me, the hardest part of this whole process is waiting for the pie to chill before you dig in. But I promise, it’s so worth the wait.
Let’s jump right into it!
STEP 4: Whip the Cream
In a separate bowl, pour in your heavy whipping cream and beat it until stiff peaks form. This means the cream should be thick enough to stand up on its own when you lift the beaters out of the bowl. Be careful not to overbeat—once it looks like it’s holding its shape, stop.
This whipped cream is what’s going to give your filling that dreamy, airy texture. It balances out the richness of the cream cheese and sweetened condensed milk, and makes every bite feel like a cloud.
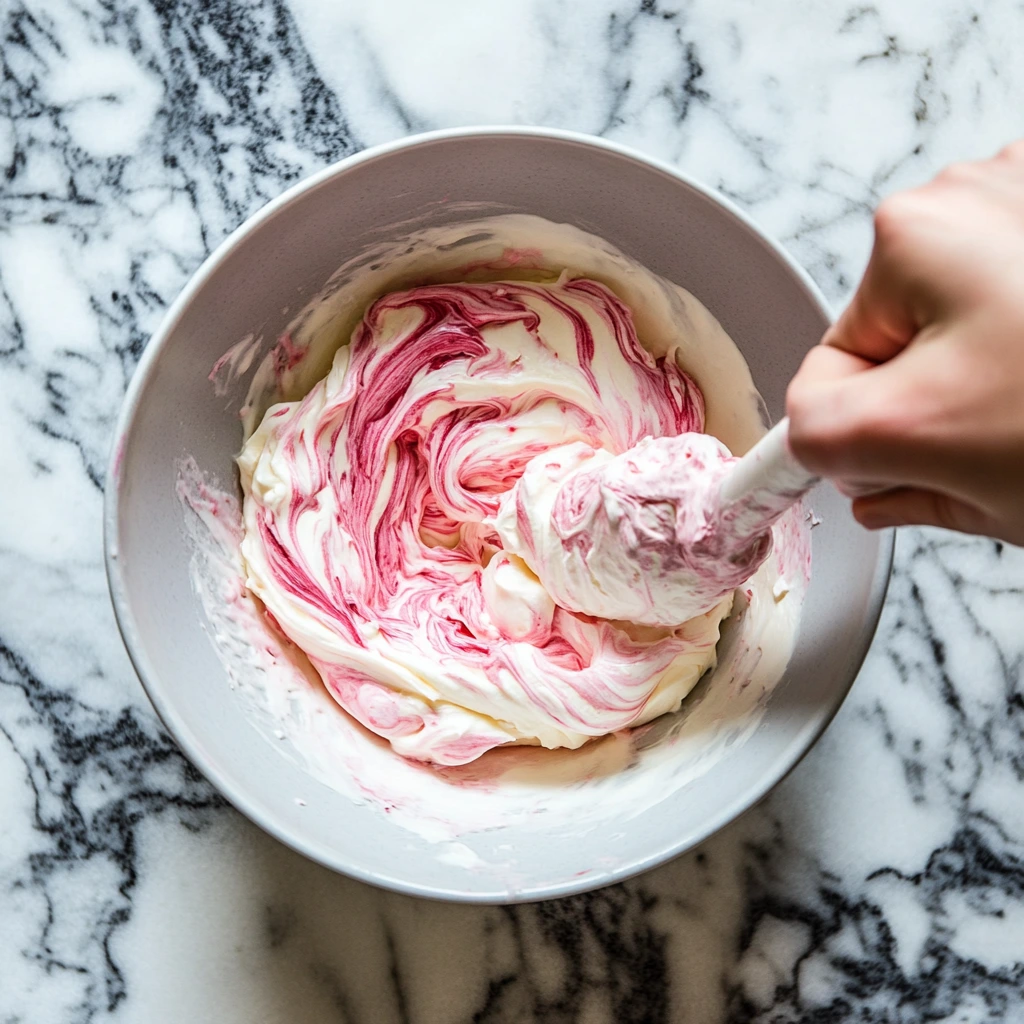
STEP 5: Fold the Whipped Cream into the Filling
Now comes the fun part. Gently fold the whipped cream into the strawberry cream cheese mixture. Don’t stir aggressively—you want to keep as much air in the whipped cream as possible to keep that filling nice and fluffy.
Use a spatula and work slowly, turning the mixture over itself until it’s all incorporated. The color will turn a lovely pale pink, and the texture should be smooth, creamy, and light.
This step is all about patience. Take your time and fold until everything is combined and velvety.
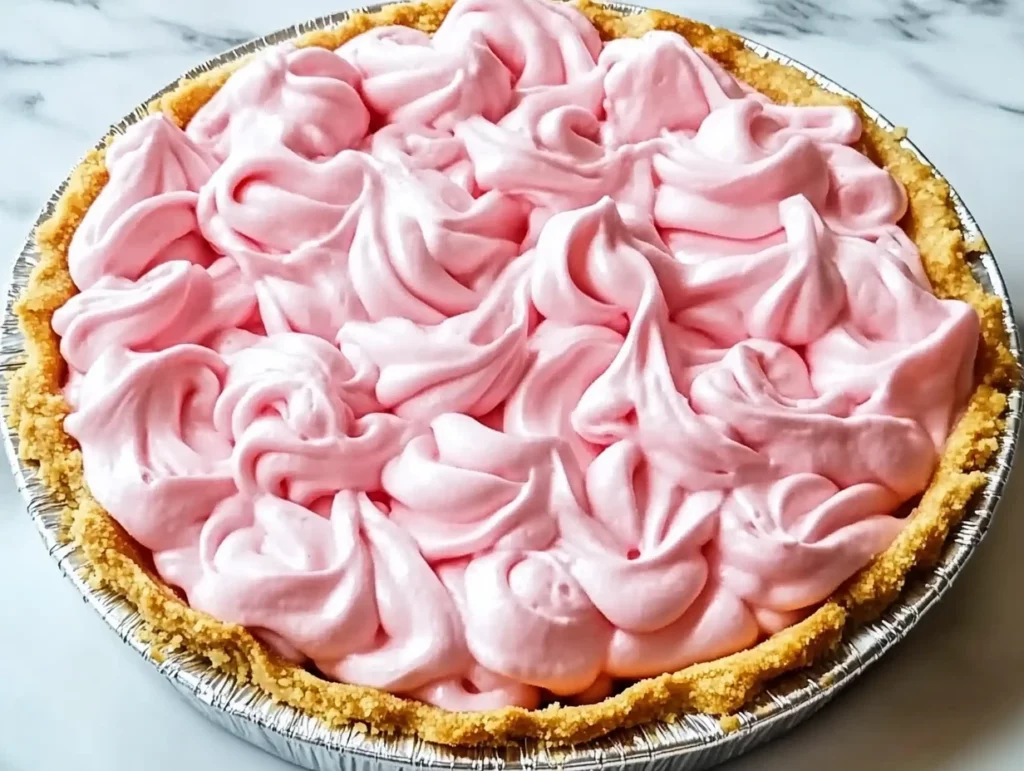
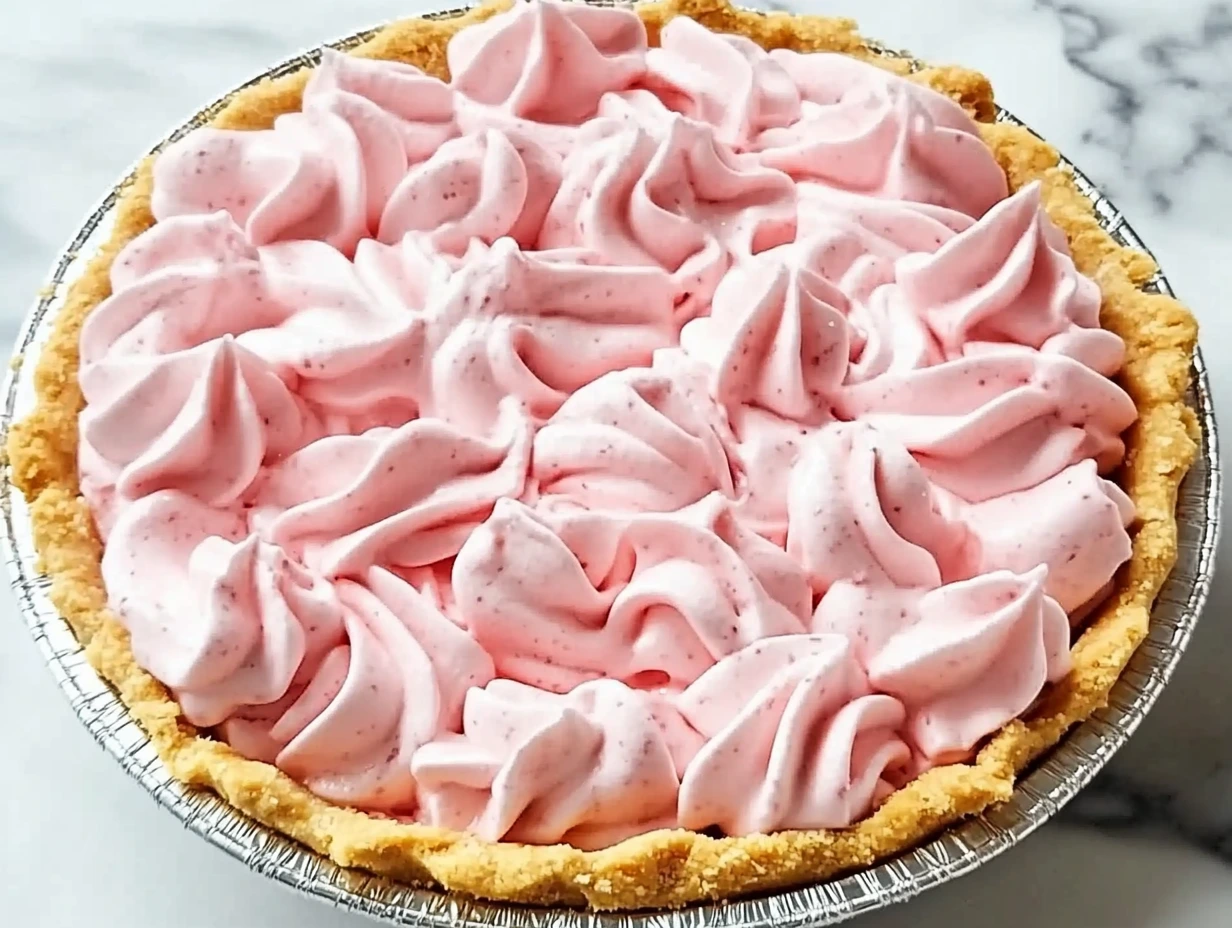
STEP 6: Fill the Crust and Chill
Once your filling is ready, pour it into the prepared graham cracker crust. Smooth out the top with a spatula or the back of a spoon so it’s even and pretty.
Now, cover the pie with plastic wrap or foil and place it in the fridge for at least 6 hours—overnight is even better if you have the time. The chilling time allows the pie to set up so you can slice it cleanly and get that perfect forkful.
The filling firms up beautifully in the fridge thanks to the whipped cream and cream cheese, but it still stays silky and light. It’s the kind of pie that melts in your mouth while still holding its shape.
Optional Toppings and Fun Variations
Once your pie is fully chilled and ready to serve, you can leave it as-is or dress it up a little. Here are a few fun ideas if you’re in the mood to add a little flair:
-
Fresh sliced strawberries: A few on top make the pie look extra inviting.
-
Whipped cream swirls: Use a piping bag for a fancier presentation or just dollop some on each slice.
-
Graham cracker crumbs: Sprinkle a few over the top for extra crunch.
-
Lemon zest: A touch of brightness adds a fresh twist and pairs perfectly with the strawberries.
Want to change it up? You can try swapping out the strawberries for raspberries or a mix of berries. Just make sure to puree and strain them if they have too many seeds. Or, for a citrusy twist, fold in a little lemon or lime juice to the filling—just a teaspoon or two will add a refreshing zing.
Make-Ahead Tips and Storage
This pie is ideal for making ahead—actually, it’s meant to be. It needs that chill time, so it’s a great option if you’re hosting or bringing dessert to a gathering.
You can make it the night before and keep it covered in the fridge until serving time. Leftovers (if you’re lucky enough to have any!) can be stored in the refrigerator for up to 3 days. Just cover the pie dish with foil or transfer slices to an airtight container.
And pro tip: this pie holds up really well in the freezer too. You can freeze the whole pie (wrap it tightly) or individual slices. Let them thaw in the fridge for a few hours before serving, and they’ll taste just as delicious as the day you made them.
Strawberry Icebox Pie
You’ve made it to the final part—and honestly, if you’ve followed along so far, you’re just a few chilled hours away from one of the easiest and most delicious desserts you’ll ever make. This Strawberry Icebox Pie has all the summery charm of fresh fruit, the no-fuss ease of a no-bake recipe, and the kind of creamy texture that makes everyone ask for seconds.
Before we wrap things up, I want to cover a few frequently asked questions to help you troubleshoot, plan ahead, or just get more confident before diving in.
Frequently Asked Questions
Can I use frozen strawberries instead of fresh?
Yes! If fresh strawberries aren’t available, frozen will work just fine. Just make sure to fully thaw and drain them before blending to remove excess moisture—too much liquid can affect how the filling sets.
How long does this pie need to chill?
The pie needs to chill for at least 6 hours, but overnight is ideal. The longer chill time allows the filling to firm up fully so you get clean slices and the best texture.
Can I make this pie ahead of time?
Absolutely! This is a perfect make-ahead dessert. You can prep it a day in advance, keep it covered in the fridge, and it’ll be ready to serve when you are.
How do I store leftovers?
Store any leftover pie in the refrigerator, covered with plastic wrap or foil. It will stay fresh for up to 3 days. You can also freeze leftovers—just wrap slices tightly and thaw in the fridge before serving.
Can I substitute the cream cheese?
Cream cheese gives this pie its richness and helps the filling set. While you could experiment with mascarpone or Greek yogurt, keep in mind the texture and flavor might change. If you do substitute, make sure it’s something with a similar consistency.
What’s the best way to get a clean slice?
For perfect slices, use a sharp knife dipped in hot water (then wiped dry) before each cut. This helps glide through the chilled filling without dragging or crumbling the crust.
Can I add other fruits to the filling?
Definitely! Raspberries, blueberries, or even peaches work well. You can mix them with the strawberries or substitute completely—just be sure to puree and strain any fruits with a lot of seeds for the best texture.
Final Thoughts: Why You’ll Love This Pie Again and Again
There’s a reason this Strawberry Icebox Pie is such a hit in my kitchen—and I’m pretty sure once you try it, you’ll feel the same way. It’s easy, it’s no-bake, and it’s just the right balance of sweet, creamy, and fruity. It also looks beautiful on a dessert table and doesn’t take a ton of effort, which is a win in my book.
Whether you’re making it for a summer potluck, a weekend treat, or just because strawberries are in season and calling your name, this pie is one of those recipes you’ll come back to again and again. It’s nostalgic and refreshing all at once—and honestly, it just makes people happy.
If you give it a try, I’d love to hear how it turns out! Let me know if you made any fun changes or stuck with the classic version. Either way, this strawberry icebox pie is about to earn a permanent spot in your warm-weather dessert lineup.
Happy no-baking, and enjoy every cool, creamy bite!
PrintStrawberry Icebox Pie

Strawberry icebox pie is a refreshing, no-bake dessert that’s perfect for warm days and special occasions alike. With a creamy strawberry filling set in a buttery graham cracker crust, this chilled pie is bursting with fruity flavor and a touch of nostalgia. It’s easy to prepare ahead of time and delivers a smooth, cool slice of summertime sweetness in every bite.
- Author: Mark's Recipe
Ingredients
For the crust:
1 ½ cups graham cracker crumbs
¼ cup granulated sugar
6 tablespoons melted butter
For the filling:
1 pound fresh strawberries, hulled
1 can (14 oz) sweetened condensed milk
1 package (8 oz) cream cheese, softened
1 teaspoon vanilla extract
1 cup heavy whipping cream
Instructions
In a bowl, mix the graham cracker crumbs, sugar, and melted butter until well combined. Press the mixture firmly into the bottom and up the sides of a 9-inch pie dish. Chill in the refrigerator while preparing the filling.
Place the strawberries in a blender or food processor and puree until smooth. Set aside.
In a large mixing bowl, beat the softened cream cheese until smooth and fluffy. Add the sweetened condensed milk and vanilla extract, and beat until fully combined.
Pour in the strawberry puree and mix until evenly blended.
In a separate bowl, whip the heavy cream until stiff peaks form. Gently fold the whipped cream into the strawberry mixture until light and creamy.
Pour the filling into the prepared crust and smooth the top. Cover and refrigerate for at least 6 hours or overnight until set.
Serve chilled, optionally topped with fresh strawberries or whipped cream.
Notes
Make sure the pie has enough time to chill thoroughly so it slices cleanly. Frozen strawberries can be used if fresh ones are unavailable—just thaw and drain well before pureeing. For a twist, add a touch of lemon zest to the filling for a bright, citrusy note.


")
