If there’s one thing I can always count on to make the whole family happy, it’s pizza. But when we’re short on time and long on cravings, these Pepperoni Pizzadillas come to the rescue every single time. Think of them as your favorite pepperoni pizza tucked into a golden, crispy quesadilla—gooey mozzarella, zesty pizza sauce, and that classic pepperoni punch, all ready in under 15 minutes. Yes, you read that right—fifteen.
I stumbled upon this genius combo on a busy weeknight when I had exactly three things in the fridge: tortillas, cheese, and a half-used jar of pizza sauce. Add a handful of pepperoni slices I had leftover from Friday night’s pizza night, and the pizzadilla was born. One bite in and my kids were hooked. Now it’s a regular request around here, especially when we want something fun but don’t feel like making a full homemade pizza.
These pizzadillas are perfect for everything from game day snacks to after-school dinners. They’re simple, satisfying, and endlessly customizable. And let’s be honest—anything with melted cheese inside a crispy tortilla is already a win, right?
Ingredients You’ll Need
-
4 large flour tortillas
-
1 cup shredded mozzarella cheese
-
½ cup pizza sauce (plus more for dipping)
-
24 to 30 slices pepperoni
-
½ teaspoon Italian seasoning
-
1 tablespoon butter or olive oil (for cooking)
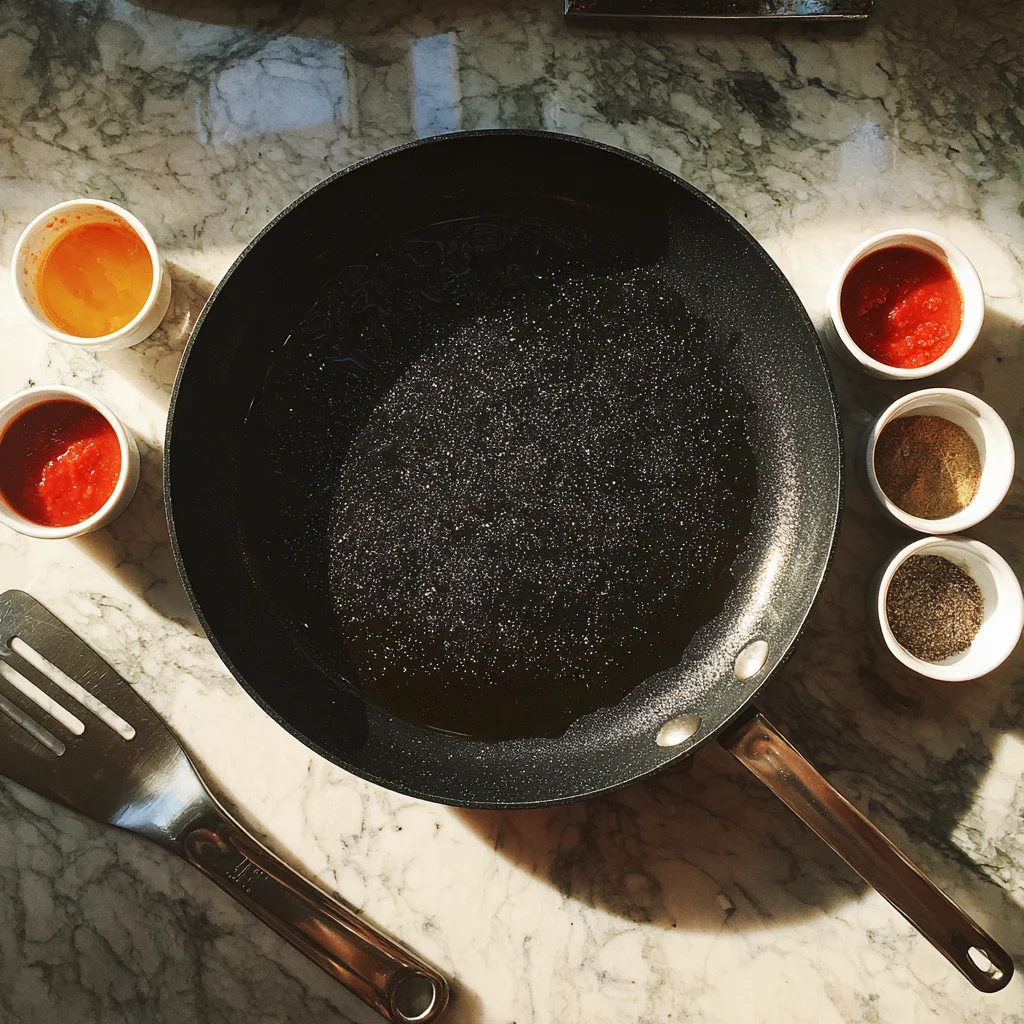
STEP 1: Prep Your Skillet
Start by heating a large skillet over medium heat. Add a little butter or olive oil to lightly coat the bottom of the pan. This helps the tortilla crisp up perfectly and gives that nice golden-brown crunch we all love.
I usually go with butter because it adds a touch of richness, but olive oil works just as well—especially if you’re trying to keep it a bit lighter.
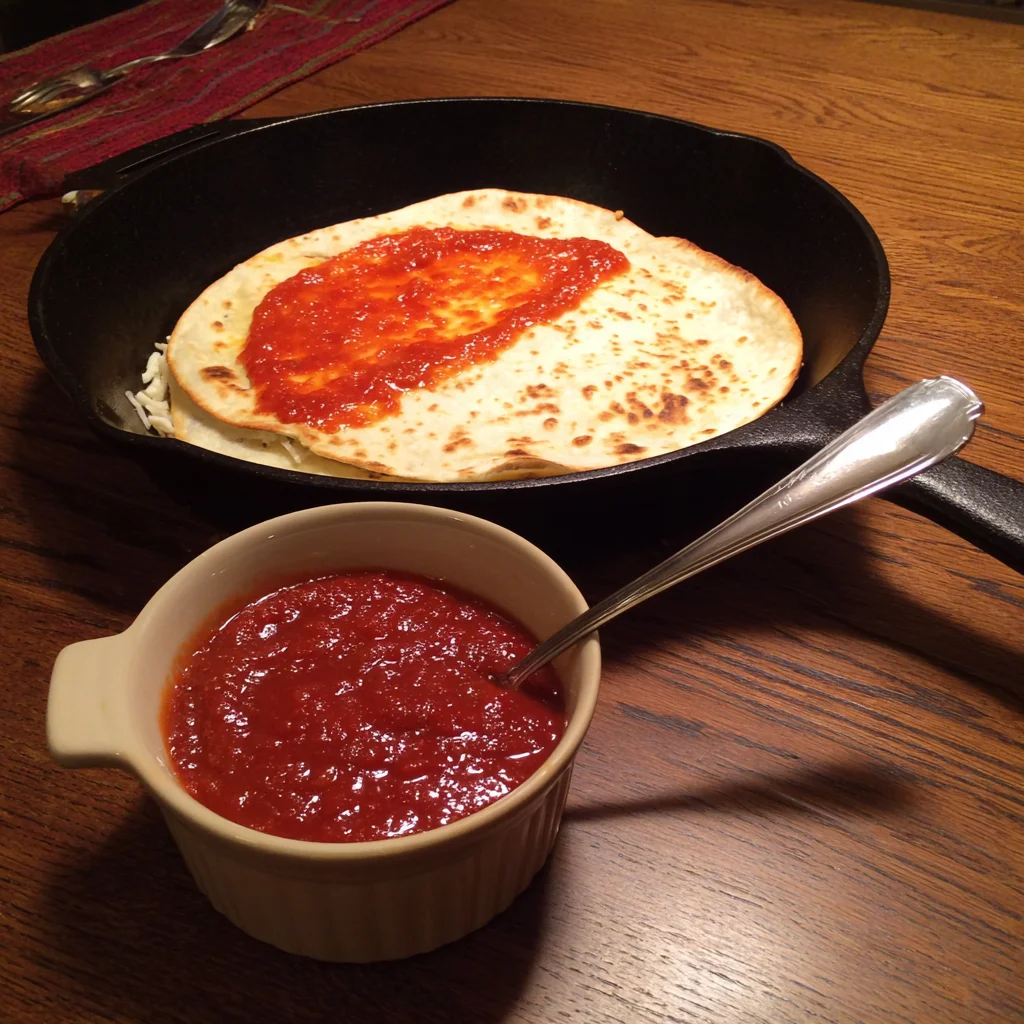
STEP 2: Assemble the First Pizzadilla
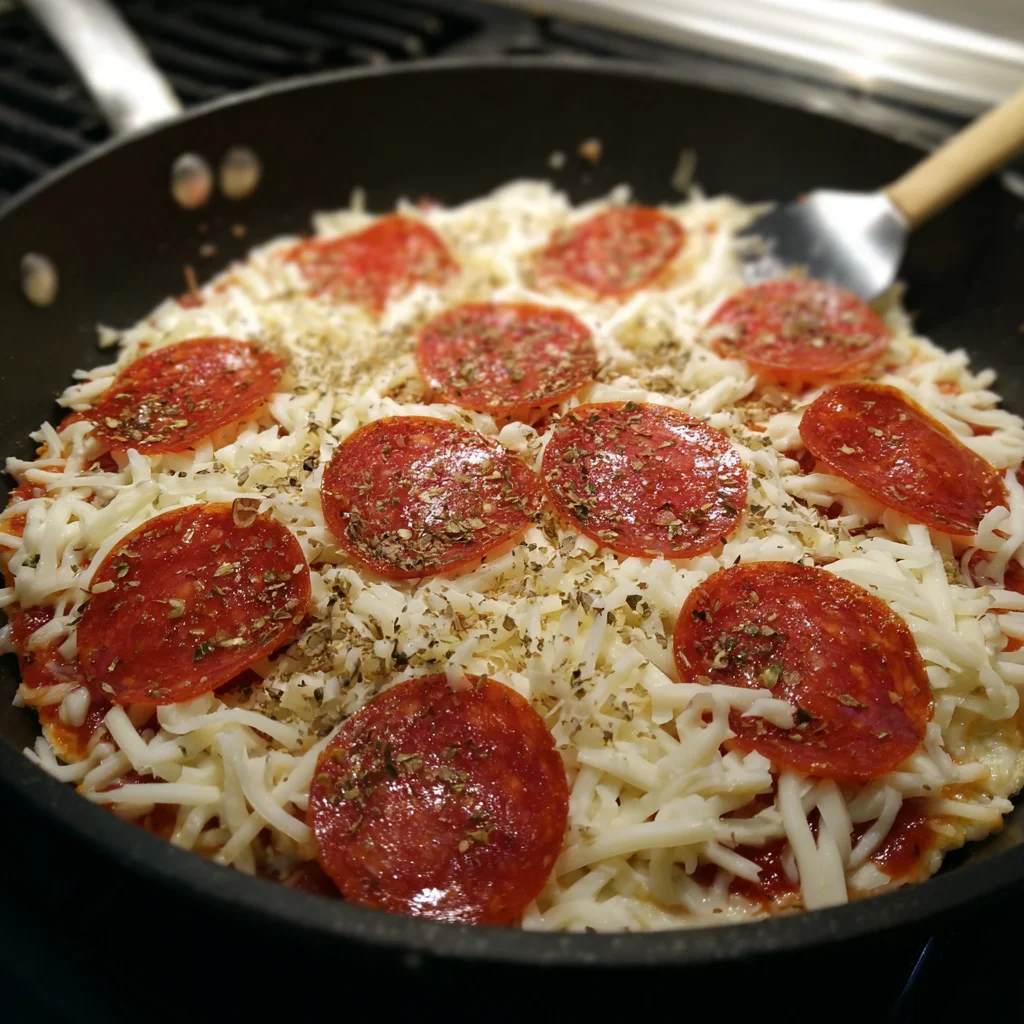
Once your skillet is heated and ready, place one tortilla in the pan. Working on just one half of the tortilla, spread about 2 tablespoons of pizza sauce. You don’t want to overdo it—just enough to give it that signature pizza flavor without making the tortilla soggy.
Next, sprinkle about ¼ cup of shredded mozzarella cheese over the sauce. Then add 6 to 8 slices of pepperoni—just enough to get a bite in every slice. Finally, sprinkle a small pinch of Italian seasoning right over the top. This little step adds that classic pizzeria flavor you don’t want to skip.
STEP 3: Fold and Press
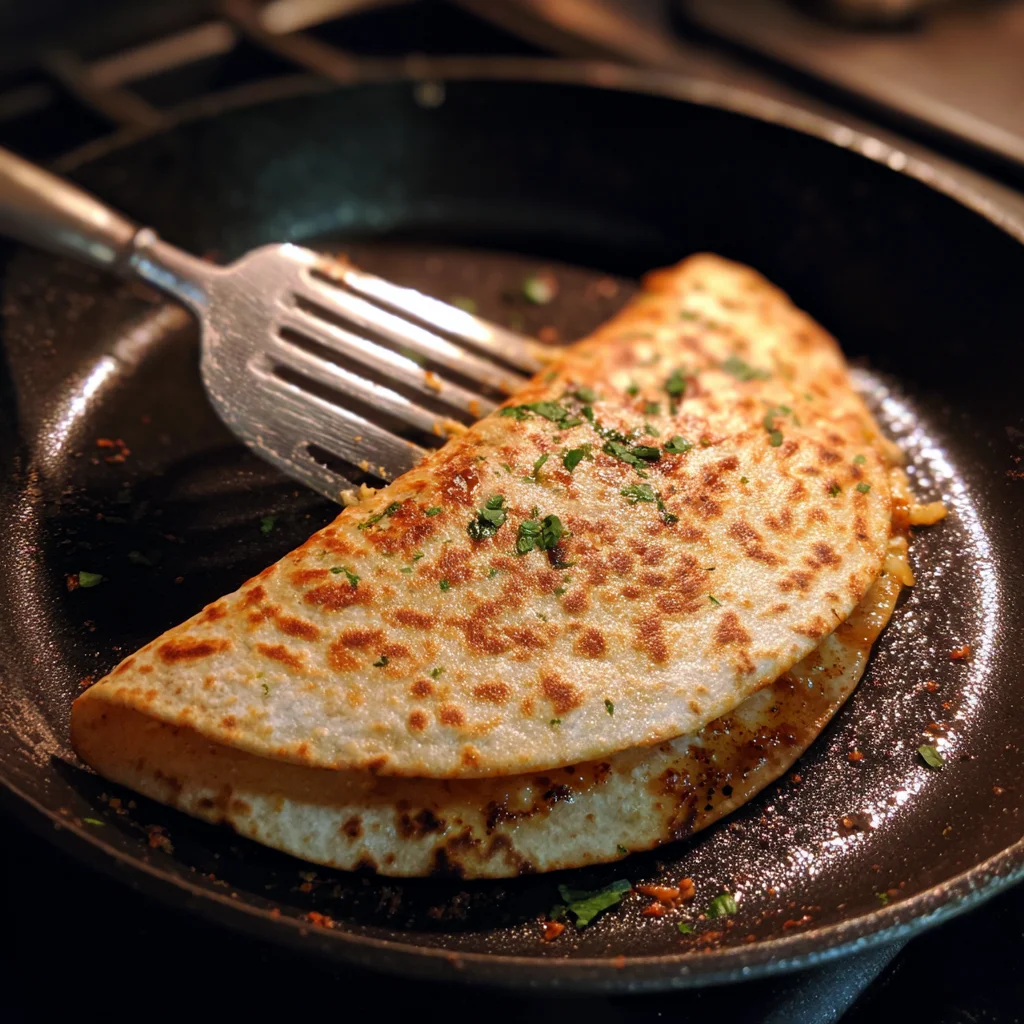
Carefully fold the tortilla over to create a half-moon shape. Use a spatula to press it down gently—this helps everything stick together and makes it easier to flip later.
STEP 4: Cook Until Crispy and Melty
Let it cook for about 2 to 3 minutes on one side, then flip and cook another 2 to 3 minutes on the other side. You’re looking for that perfect balance: golden and crispy on the outside, melty and gooey on the inside.
Every stove is a little different, so keep an eye on it—if the tortilla starts to brown too quickly, just lower the heat a bit. Once it’s done, remove it from the pan and let it cool for a minute or two before slicing.
Finish Cooking and Try These Tasty Variations
By now, your kitchen probably smells like a mini pizzeria—and we’re not mad about it. If you’ve made one pizzadilla, you know how quick and easy it is to knock out the rest. And trust me, once you’ve got the hang of it, you’ll be tempted to make a double batch.
Whether you’re feeding hungry kids after school or putting out a casual snack spread for game day, these Pepperoni Pizzadillas are always a hit. Plus, you can totally make them your own with whatever toppings or sauces you have on hand.
Let’s get back into the skillet and finish up!
STEP 5: Repeat with Remaining Ingredients
Now that you’ve cooked your first pizzadilla, repeat the same process with the remaining tortillas and filling ingredients.
Here’s a quick recap of the process:
-
Place a tortilla in your heated, greased skillet.
-
Spread about 2 tablespoons of pizza sauce on one half.
-
Sprinkle with mozzarella cheese, add 6 to 8 slices of pepperoni, and finish with a dash of Italian seasoning.
-
Fold the tortilla in half, press gently, and cook for 2 to 3 minutes per side until golden and crispy.
Depending on the size of your skillet, you may be able to cook two at once—just make sure not to overcrowd the pan or they won’t crisp up properly.
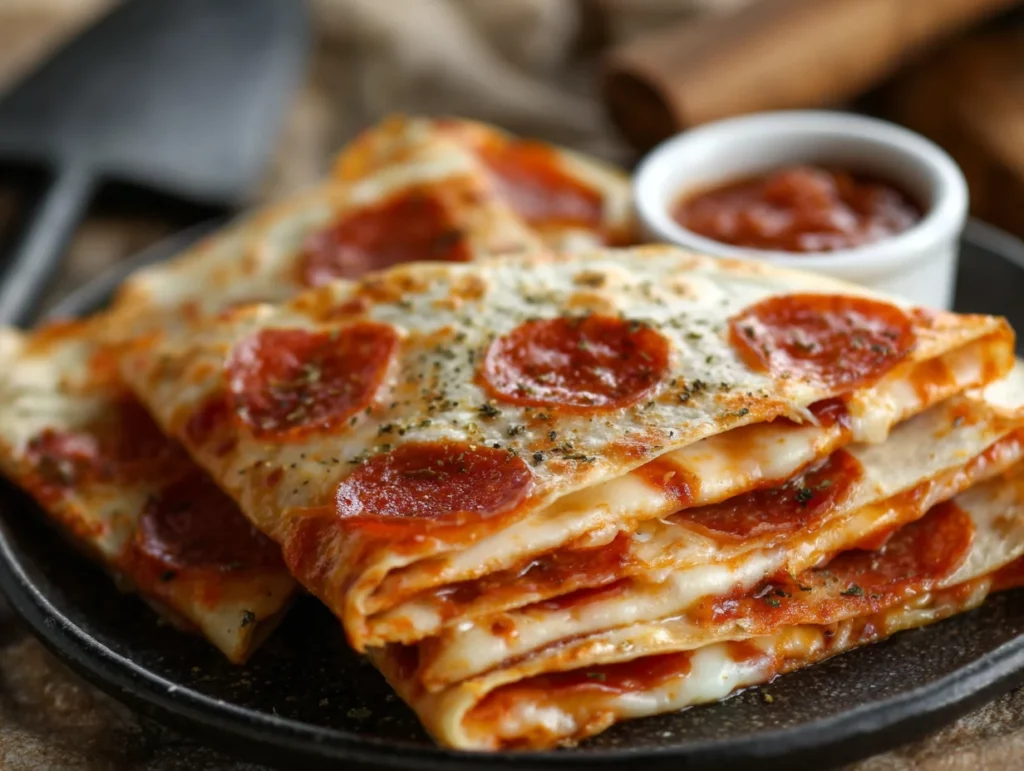
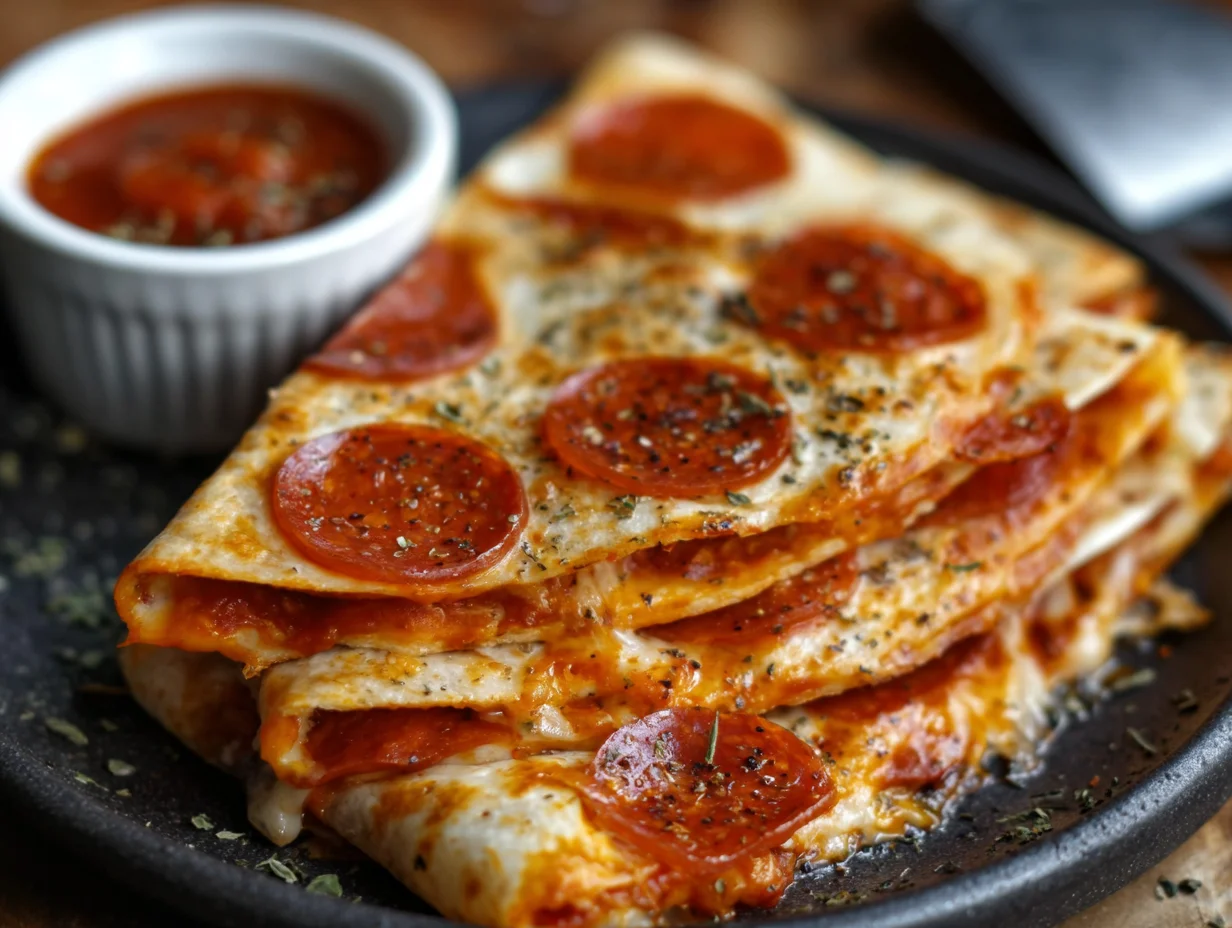
STEP 6: Slice and Serve
Once all of your pizzadillas are cooked, let them cool slightly before slicing. I like to use a pizza cutter to make quick, even wedges—usually 3 to 4 per pizzadilla.
Serve them with a little bowl of warm pizza sauce for dipping. It’s a small touch that makes a big difference, especially if you’re serving these to guests. Something about dipping just makes it more fun, right?
Tips for Perfect Pizzadillas Every Time
You already know this recipe is quick and easy—but with a few simple tips, you can take it to the next level. Here’s what I’ve learned after making these more times than I can count:
-
Don’t overstuff: It’s tempting to pile on the cheese and sauce, but too much filling can lead to leaks and soggy tortillas. Stick to a thin layer for the best results.
-
Use freshly shredded mozzarella: While the pre-shredded kind is super convenient, freshly shredded cheese melts smoother and gives a creamier texture.
-
Adjust the heat: If your tortilla is browning too quickly and the cheese isn’t melting, reduce the heat to medium-low and give it a little extra time.
-
Get creative with fillings: Pepperoni is a classic, but don’t stop there! You can add sliced black olives, sautéed mushrooms, diced bell peppers, cooked sausage, or even pineapple (if that’s your thing).
-
Use a sandwich press or grill pan: If you want super crispy pizzadillas with those pretty grill lines, try using a panini press or grill pan. Just be sure not to overfill so everything stays sealed.
Make-Ahead & Storage Tips
These pizzadillas are best when served fresh, but leftovers can be stored and reheated without losing too much crispiness.
-
Refrigerate: Store any leftovers in an airtight container in the fridge for up to 2 days.
-
Reheat: Use a toaster oven, air fryer, or skillet to reheat for best results. Microwaving works in a pinch, but they won’t be quite as crispy.
-
Freezing tip: If you want to freeze them, cook as directed, let cool completely, and then freeze in a single layer. Reheat in an oven or air fryer straight from frozen.
Fun Ways to Serve Pepperoni Pizzadillas
These pizzadillas aren’t just for dinner. Here are a few creative ways to serve them:
-
Appetizer platter: Cut into smaller wedges and serve with a trio of dipping sauces—pizza sauce, ranch, and garlic butter.
-
Lunchbox surprise: Pack cooled pizzadilla wedges in your kids’ lunchboxes with a little container of dipping sauce.
-
Movie night snack: Swap out popcorn for pizzadillas for a fun twist on movie night. Just add sodas and you’re set!
-
Mini pizzadillas: Use taco-size tortillas for bite-sized versions that are perfect for parties or kids’ snacks.
FAQs and Final Thoughts on Pepperoni Pizzadillas
You’ve got your skillet hot, your tortillas golden, and that cheese perfectly melty—now let’s wrap things up with answers to some of the most common questions I get about this recipe. Whether you’re wondering about gluten-free swaps, vegetarian options, or how to store leftovers, I’ve got you covered.
These Pepperoni Pizzadillas are such a flexible, family-friendly recipe, and it’s no surprise that people want to tweak them to fit different needs or preferences. So let’s dive into the FAQs!
Frequently Asked Questions
1. Can I make these pizzadillas vegetarian?
Absolutely! Just skip the pepperoni and load up on your favorite veggie toppings. Think sautéed mushrooms, spinach, onions, bell peppers, or even artichokes. You could also try a meat-free pepperoni alternative—there are some great plant-based options out there now.
2. Can I use corn tortillas instead of flour?
You can, but keep in mind that corn tortillas are smaller and a bit more fragile, so they might crack when folded. If you do use them, warm them up first to make them more pliable. Also, the texture will be slightly different—more like a taco than a quesadilla.
3. What’s the best way to make these gluten-free?
Use your favorite gluten-free flour tortillas. Most grocery stores carry them now, and they work well in this recipe. Just make sure to handle them gently when folding—they can be a bit more delicate than regular flour tortillas.
4. Can I add other meats besides pepperoni?
Yes! Cooked sausage crumbles, chopped ham, or even shredded rotisserie chicken all work great. Just make sure any meat you add is fully cooked before using it in the pizzadillas.
5. What’s the best dipping sauce for these?
Warm pizza sauce is the classic go-to, but you can also try ranch dressing, garlic butter, marinara, or even a spicy sriracha mayo if you want to change it up. A simple pesto can also be delicious with veggie versions.
6. Can I make these in the oven instead of on the stove?
Yes, you can bake them at 400°F for about 8–10 minutes, flipping halfway through. They won’t be quite as crispy as pan-fried, but it’s a great option if you’re making several at once.
7. How do I keep them warm for a crowd?
If you’re making these for a party or game day spread, keep cooked pizzadillas warm in a 200°F oven until ready to serve. Just place them on a baking sheet with a wire rack to keep them from getting soggy.
Final Thoughts: Why You’ll Keep Coming Back to These Pizzadillas
At the end of the day, Pepperoni Pizzadillas are one of those go-to recipes that never disappoint. They’re fast, satisfying, and totally customizable—basically everything you want in a last-minute dinner or snack.
What I love most is how kid-friendly they are while still being grown-up approved. The crispy tortilla, gooey cheese, and bold pepperoni flavor hit all the right notes—and they come together in just 15 minutes. That’s a win in my book.
Whether you’re whipping these up on a weeknight, serving them as party food, or sneaking one for lunch when no one’s looking (hey, no judgment here), this recipe is a keeper. And once you’ve tried it, I’d love to hear how you made it your own! Did you go veggie? Add pineapple? Try a gluten-free version?
Leave a comment below and let me know how your pizzadillas turned out. And if you’ve got a fun variation, don’t keep it to yourself—share it with the rest of us!
PrintPepperoni Pizzadillas

Pepperoni Pizzadillas are the perfect mash-up of two comfort food favorites—pizza and quesadillas. Crispy golden tortillas are filled with melty mozzarella cheese, classic pepperoni slices, and tangy pizza sauce, creating a handheld snack or quick dinner that satisfies every pizza craving in minutes. Ideal for busy weeknights, game days, or a kid-friendly meal that adults will love too.
- Author: Mark's Recipe
Ingredients
4 large flour tortillas
1 cup shredded mozzarella cheese
½ cup pizza sauce, plus extra for dipping
24 to 30 slices pepperoni
½ tsp Italian seasoning
1 tbsp butter or olive oil, for cooking
Instructions
1 Heat a large skillet over medium heat and lightly grease with butter or olive oil.
2 Place one tortilla in the skillet and spread half of the pizza sauce on one half of the tortilla.
3 Layer with a generous sprinkle of mozzarella cheese, followed by 6 to 8 slices of pepperoni. Sprinkle a pinch of Italian seasoning over the top.
4 Fold the tortilla in half over the filling and press gently with a spatula.
5 Cook for 2 to 3 minutes per side, or until golden brown and the cheese is melted. Repeat with remaining tortillas and filling.
6 Let cool slightly before slicing into wedges. Serve with warm pizza sauce for dipping.
Notes
You can easily customize these with your favorite pizza toppings—add sliced olives, mushrooms, or bell peppers before folding. Using pre-shredded cheese saves time, but freshly shredded mozzarella melts more smoothly. If you want a crispier pizzadilla, cook over medium-high heat and press down firmly with a spatula. These are best served immediately, but leftovers can be reheated in a toaster oven to bring back the crunch.
")
