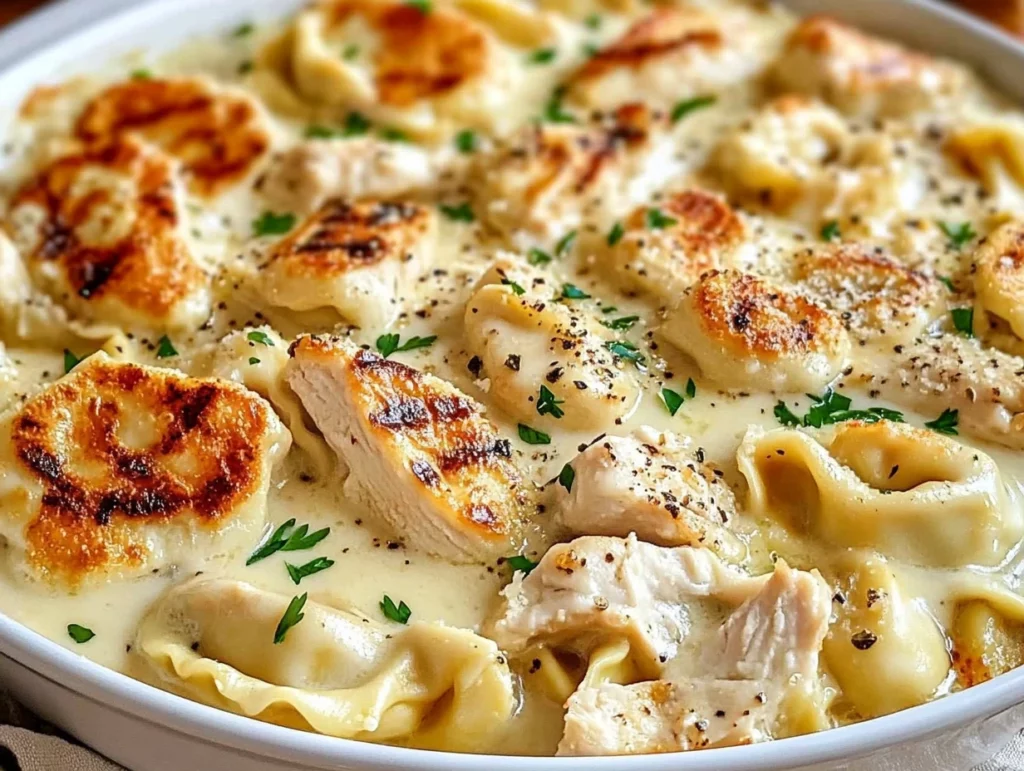
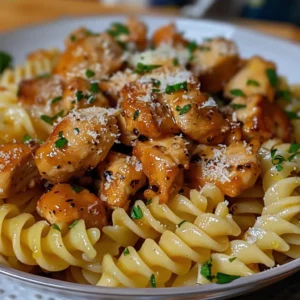
There’s something about indulging in a rich, cheesy, restaurant-quality pasta dish that just feels like a warm hug on a plate. And if you’ve ever been to Olive Garden and savored their Asiago Tortelloni Alfredo with Grilled Chicken, you know exactly what I mean. The tender, juicy grilled chicken, the creamy Alfredo sauce, and the perfectly stuffed tortelloni make this dish a fan-favorite.
But guess what? You don’t have to wait for your next Olive Garden visit to enjoy this decadent meal. I’m going to show you how to recreate it right at home! With just a few simple ingredients, you’ll have a mouthwatering pasta dish that tastes like it came straight from your favorite Italian restaurant.
Let’s dive in and get cooking!
WHY YOU’LL LOVE THIS RECIPE
- Restaurant-Quality at Home – This recipe gives you all the flavors of Olive Garden’s famous dish without leaving your kitchen.
- Creamy, Cheesy Goodness – The Alfredo sauce is smooth, rich, and packed with Parmesan and Asiago cheese.
- Perfect for Special Occasions – Whether it’s date night, a family dinner, or a cozy weekend meal, this dish is guaranteed to impress.
- Customizable – You can switch up the cheeses, add veggies, or even swap the chicken for shrimp!
INGREDIENTS YOU’LL NEED
Before we start, gather everything you need to make this dish.
For the Chicken:
- 1 lb boneless, skinless chicken breasts
- 2 tbsp olive oil
- ½ tsp salt
- ½ tsp ground black pepper
- ½ tsp Italian seasoning blend
For the Pasta & Sauce:
- 9 oz refrigerated tortellini (Asiago & ham blend recommended)
- 1 cup heavy cream
- 1 cup half & half
- 4 oz salted butter (unsalted works too)
- ¾ cup grated Parmesan cheese
- ¼ cup grated Asiago cheese (or extra Parmesan)
- 1 tsp garlic powder
For the Topping:
- ⅓ cup Panko breadcrumbs
- ½ cup shredded Mozzarella cheese
Now that we’ve got everything ready, let’s start cooking!
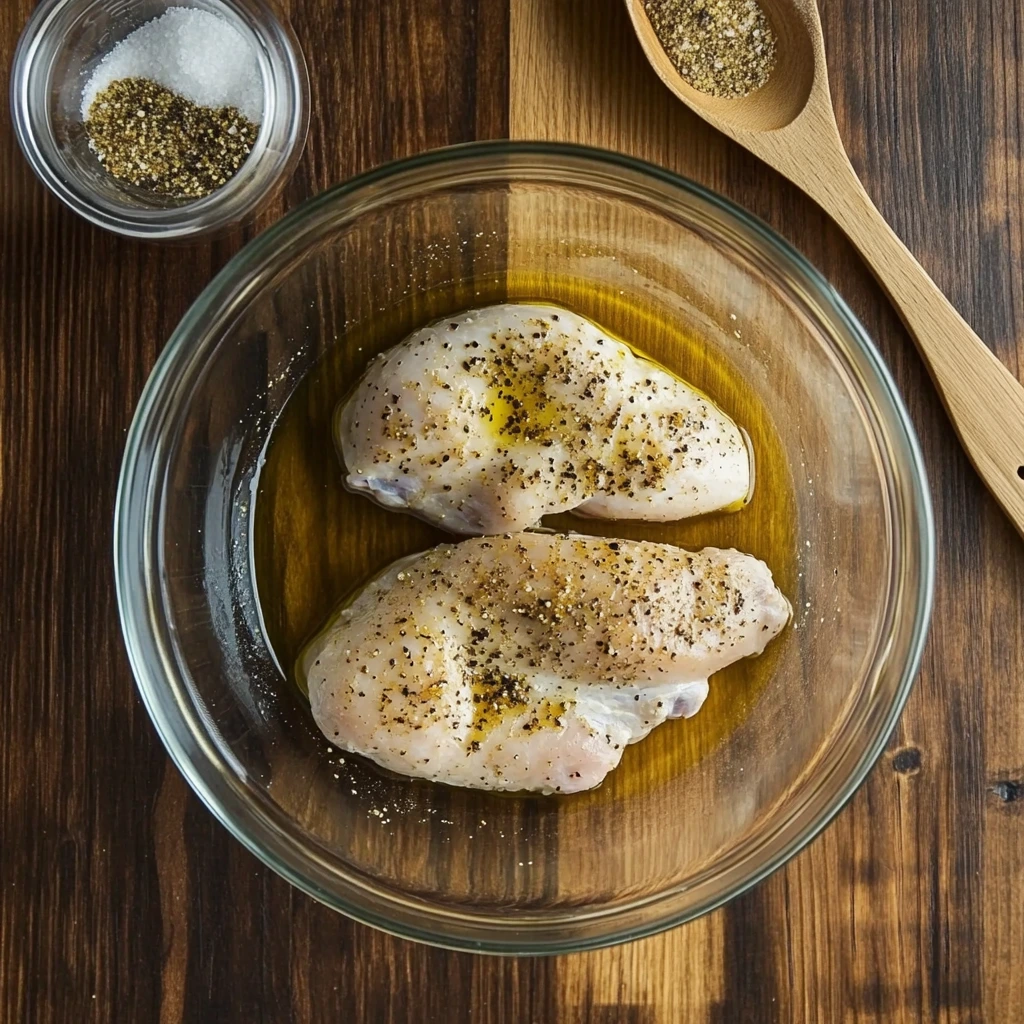
STEP 1: PREPARE THE CHICKEN
To make sure our chicken turns out juicy and full of flavor, we’re going to start by marinating it.
- Place the chicken breasts between two pieces of plastic wrap and pound them to an even ½-inch thickness. This helps them cook evenly and stay tender.
- In a large zip-top bag, add the olive oil, salt, black pepper, and Italian seasoning.
- Place the chicken in the bag, seal it, and massage it gently to coat the chicken in the seasoning.
- Let it marinate for 30 minutes while you prepare the other ingredients.
Pro Tip: If you have time, let the chicken marinate for up to 2 hours in the fridge for even more flavor.
STEP 2: COOK THE CHICKEN
Now that our chicken is nicely marinated, let’s get it grilled to perfection.
- Heat a large skillet over medium-high heat. Add a drizzle of oil to prevent sticking.
- Cook the chicken for 7-9 minutes per side, flipping only once. You want a nice golden-brown sear on both sides.
- Check the internal temperature with a meat thermometer – it should read 165°F when done.
- Remove the chicken from the pan and let it rest on a cutting board for 5 minutes before slicing.
Resting the chicken is key! It locks in all the juices so that every bite is moist and flavorful.
STEP 3: MAKE THE CREAMY ALFREDO SAUCE
Here comes the best part – the luscious, creamy Alfredo sauce! This homemade version is way better than anything store-bought.
- In a medium saucepan, melt the butter over medium heat.
- Add the heavy cream and half & half, stirring occasionally until small bubbles form. Don’t let it boil – you just want it hot enough to melt the cheese.
- Stir in the Parmesan, Asiago, and garlic powder.
- Whisk continuously until the sauce is smooth and slightly thickened.
At this point, your kitchen is going to smell absolutely amazing! The creamy, cheesy aroma is a sign that you’re on the right track.

STEP 4: COOK THE TORTELLINI
Now that our Alfredo sauce is silky smooth and ready to go, it’s time to prepare the tortellini. Using fresh refrigerated tortellini is key here—it cooks quickly and has a deliciously cheesy filling that pairs perfectly with the rich sauce.
- Bring a large pot of salted water to a rolling boil.
- Add the tortellini and cook according to the package instructions (typically around 3-5 minutes).
- Once the pasta is tender but not mushy, drain it well and set it aside.
Pro Tip: Reserve about ¼ cup of the pasta water before draining. If your Alfredo sauce is too thick, you can add a splash of this starchy water to loosen it up.
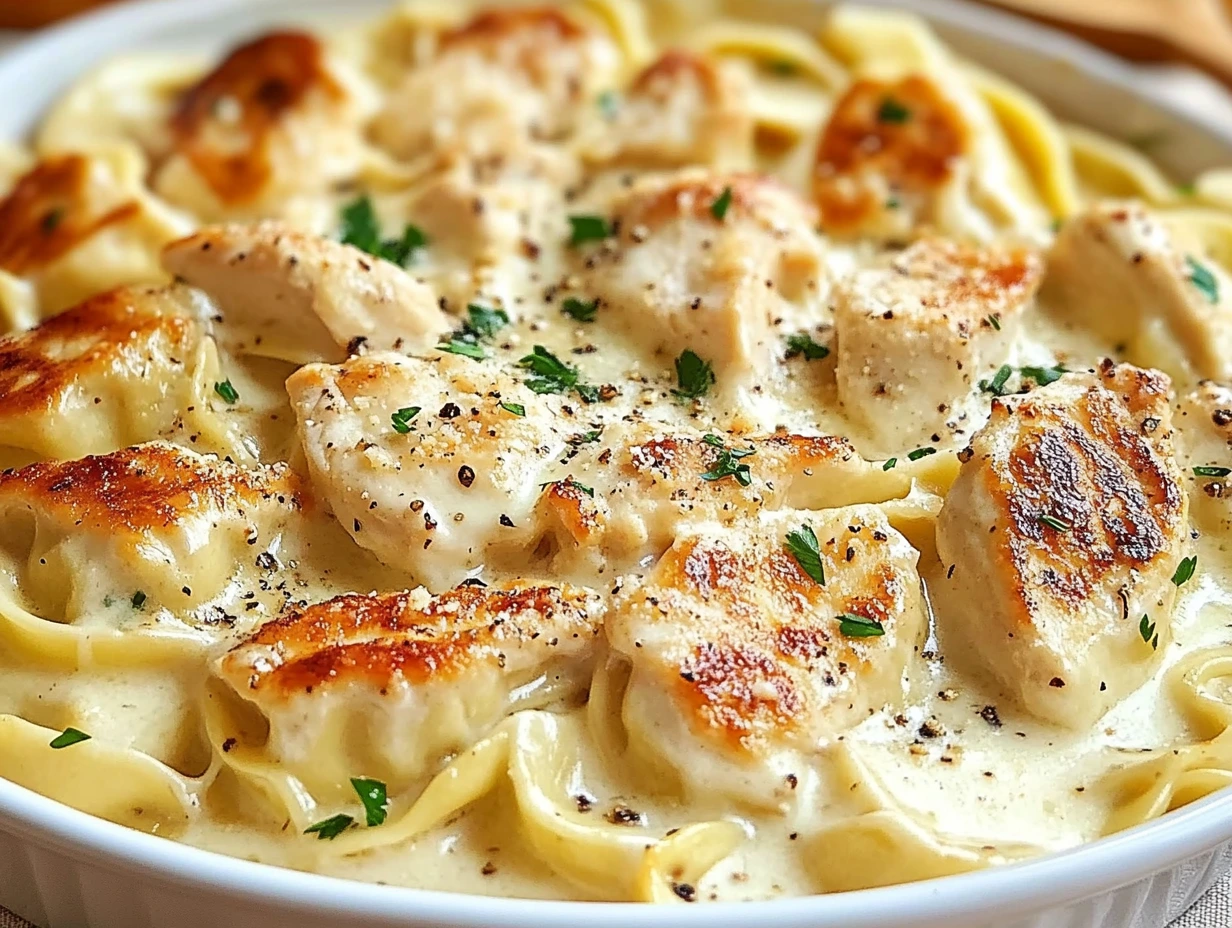
STEP 5: ASSEMBLE THE DISH
Now comes the fun part—bringing everything together in a single dish!
- Preheat your oven to broil (high setting).
- In a 2-quart baking dish, spread out the cooked tortellini evenly.
- Pour the warm Alfredo sauce over the tortellini, making sure every piece is coated in that creamy goodness.
- Take your grilled chicken, slice it into strips, and place it on top of the pasta.
At this point, the dish already looks tempting, but we’re about to take it up a notch with a crunchy, cheesy topping.

STEP 6: ADD THE CRISPY TOPPING
For that signature Olive Garden touch, we’re going to create a golden, cheesy crust using Panko breadcrumbs and shredded Mozzarella.
- In a small bowl, mix the Panko breadcrumbs with a little bit of melted butter. This helps them crisp up beautifully under the broiler.
- Sprinkle the Panko mixture evenly over the pasta and chicken.
- Top everything with a generous layer of shredded Mozzarella cheese.
Pro Tip: If you love extra cheesiness, you can add a little more Parmesan or Asiago on top for an even richer flavor.
STEP 7: BROIL UNTIL GOLDEN PERFECTION
Now, let’s finish off the dish with a quick broil to get that irresistible golden brown topping.
- Place the baking dish in the preheated oven on the top rack.
- Broil for 2-3 minutes, watching closely to prevent burning.
- Once the cheese is melted, bubbly, and slightly golden, remove the dish from the oven.
Pro Tip: Every broiler is different, so keep a close eye on it! It can go from golden to burnt in a matter of seconds.
STEP 8: SERVE AND ENJOY
Now that your Asiago Tortelloni Alfredo with Grilled Chicken is fresh out of the oven, all that’s left to do is dig in!
- Let the dish sit for a couple of minutes before serving (this helps the sauce thicken slightly).
- Serve warm with garlic bread or a crisp side salad for the ultimate Olive Garden experience at home.
Trust me, one bite of this creamy, cheesy, flavor-packed pasta will transport you straight to your favorite Italian restaurant!
TIPS & VARIATIONS
Want to customize this dish? Here are some fun ways to mix things up:
- Make It Spicy: Add a pinch of red pepper flakes to the Alfredo sauce for a little heat.
- Try a Different Protein: Swap the grilled chicken for shrimp, sausage, or even crispy bacon.
- Add Some Greens: Stir in fresh spinach, roasted broccoli, or sun-dried tomatoes for extra flavor.
- Use Homemade Pasta: If you have time, homemade cheese tortellini makes this dish even more special.
FREQUENTLY ASKED QUESTIONS
Making a restaurant-quality dish at home can raise a few questions, so here are some common ones to help you perfect this Asiago Tortelloni Alfredo with Grilled Chicken recipe.
1. CAN I USE FROZEN TORTELLINI INSTEAD OF REFRIGERATED?
Yes! Frozen tortellini works just as well. Just be sure to adjust the cooking time according to the package instructions, as frozen tortellini typically takes a few minutes longer to cook than fresh.
2. HOW CAN I MAKE THIS DISH LIGHTER?
If you want a lighter version without sacrificing flavor:
- Use half-and-half instead of heavy cream for a slightly lower fat content.
- Swap butter for olive oil in the Alfredo sauce.
- Use grilled shrimp or leaner proteins instead of chicken.
- Reduce the cheese topping slightly to cut down on extra calories.
3. CAN I MAKE THIS AHEAD OF TIME?
Yes, but with a few modifications:
- Prepare the Alfredo sauce and refrigerate it separately.
- Cook and store the grilled chicken in an airtight container.
- Assemble the dish just before broiling, so the tortellini doesn’t get too soft from sitting in the sauce.
To reheat, bake at 350°F for about 15 minutes, or until warmed through.
4. WHAT OTHER CHEESES CAN I USE?
If you don’t have Asiago cheese, try using:
- Extra Parmesan for a nuttier taste.
- Fontina for a milder, creamy texture.
- Gruyère for a deeper, slightly sweet flavor.
- A mix of Mozzarella and Provolone for extra cheesiness.
5. HOW DO I KEEP MY ALFREDO SAUCE FROM GETTING TOO THICK?
If your Alfredo sauce thickens too much, add a splash of reserved pasta water or a little extra cream to loosen it up. Always stir continuously when reheating to keep it smooth.
6. CAN I USE PRE-COOKED CHICKEN?
Absolutely! If you’re short on time, rotisserie chicken or pre-cooked grilled chicken strips will work well. Just slice and layer them over the tortellini before adding the cheese topping.
7. HOW LONG DO LEFTOVERS LAST?
Store leftovers in an airtight container in the fridge for up to 3 days. To reheat, warm in the oven at 325°F for about 10 minutes, or microwave in 30-second intervals until heated through.
CONCLUSION – YOUR NEW FAVORITE HOMEMADE PASTA DISH
And there you have it! Olive Garden’s Asiago Tortelloni Alfredo with Grilled Chicken, made right in your own kitchen. This dish is creamy, cheesy, indulgent, and perfect for a special dinner at home.
The best part? You control the ingredients, flavors, and portion sizes. Whether you make it exactly as written or customize it with your favorite proteins and add-ins, this recipe is bound to become a household favorite.
PrintOlive Garden Asiago Tortelloni Alfredo with Grilled Chicken

This creamy, cheesy, and indulgent Asiago Tortelloni Alfredo with Grilled Chicken is a restaurant-quality meal you can make at home! Featuring tender grilled chicken, cheesy tortellini, and a rich Alfredo sauce, this dish is perfect for a cozy dinner.
- Author: Mark's Recipe
- Prep Time: 15 minutes
- Cook Time: 25 minutes
- Total Time: 40 minutes
Ingredients
✅ For the chicken:
- 1 lb boneless, skinless chicken breasts
- 2 tbsp olive oil
- ½ tsp salt
- ½ tsp ground black pepper
- ½ tsp Italian seasoning blend
✅ For the pasta & sauce:
- 9 oz refrigerated tortellini (Asiago & ham blend recommended)
- 1 cup heavy cream
- 1 cup half & half
- 4 oz salted butter (unsalted works too)
- ¾ cup grated Parmesan cheese
- ¼ cup grated Asiago cheese (or extra Parmesan)
- 1 tsp garlic powder
✅ For the topping:
- ⅓ cup Panko breadcrumbs
- ½ cup shredded Mozzarella cheese
Instructions
1️⃣ Prepare the Chicken:
Pound the chicken breasts to ½-inch thickness with a meat mallet.
Place them in a zip-top bag with olive oil, salt, black pepper, and Italian seasoning.
Seal the bag and let the chicken marinate for 30 minutes.
2️⃣ Cook the Chicken:
Heat a skillet over medium-high heat and add enough vegetable oil to coat the bottom.
Cook the chicken for 7-9 minutes per side until fully cooked.
Remove from the skillet and let it rest on a cutting board before slicing.
3️⃣ Make the Alfredo Sauce:
In a saucepan over medium-high heat, combine heavy cream, half & half, and butter.
Heat until small bubbles form, but do not boil.
Add Parmesan, Asiago, and garlic powder; whisk until the sauce is smooth and thickened.
4️⃣ Prepare the Tortellini:
Cook the tortellini according to package directions, then drain.
In a 2-quart baking dish, add the cooked tortellini and pour Alfredo sauce over it, making sure it’s evenly coated.
5️⃣ Assemble & Broil:
Slice the grilled chicken and place it on top of the pasta.
Sprinkle with Panko breadcrumbs and shredded Mozzarella cheese.
Broil for 2-3 minutes until the cheese is melted and golden brown.
6️⃣ Serve & Enjoy:
Let the dish cool slightly, then serve warm with garlic bread or a fresh salad!
Notes
- Tortellini Substitute: If you can’t find Asiago & ham tortellini, use cheese or spinach tortellini.
- Extra Creamy: For a richer sauce, add ¼ cup cream cheese while making the Alfredo sauce.
- Crispier Topping: Mix Panko with melted butter before sprinkling to enhance crispiness.
- Make Ahead: Assemble everything except the final broil, refrigerate, and bake when ready.
Nutrition
- Serving Size: 4
")
