When I first dreamed up these Loaded Brownie Cheesecake Cups, I was craving something that combined the fudgy magic of homemade brownies with the silky tang of classic cheesecake—without committing to a giant slab of dessert. If you’ve ever found yourself torn between brownie night and cheesecake night, this is the recipe to settle the debate once and for all. Picture this: a rich brownie base that gives way to a creamy vanilla cheesecake layer, all finished with a cloud of whipped cream, a drizzle of chocolate (or caramel, if you’re feeling saucy), and a sprinkle of nuts and mini chocolate chips for extra crunch. It’s like having the best bite of every dessert tray, packaged into a perfectly portioned cup.
I first tested this recipe on a lazy Sunday afternoon when my oven felt neglected and I had a half-empty tub of cream cheese hanging out in the fridge. A little whisking, a little tapping of ramekins, and before I knew it, I had six gorgeous individual desserts cooling away in the fridge—each one begging to be eaten. These cups are ideal for dinner parties (no aggressive slicing required), special occasions, or simply when you need a personal moment of over-the-top indulgence.
Ingredients
-
Brownie Base
-
½ cup unsalted butter, melted
-
¾ cup granulated sugar
-
2 large eggs, room temperature
-
1 teaspoon vanilla extract
-
⅓ cup all-purpose flour
-
⅓ cup unsweetened cocoa powder
-
¼ teaspoon salt
-
-
Cheesecake Layer
-
4 ounces cream cheese, softened
-
2 tablespoons granulated sugar
-
2 tablespoons sour cream
-
¼ teaspoon vanilla extract
-
1 tablespoon all-purpose flour
-
Chef’s Tip: Make sure your eggs and cream cheese sit out at room temperature for at least 30 minutes before starting. This helps everything blend together smoothly with no lumps.
Steps
-
Preheat and Prep
Preheat your oven to 350 °F (175 °C). Lightly grease six 6-ounce ramekins or the cups of a standard muffin tin with cooking spray or a thin brush of melted butter. Setting up your ramekins ahead of time keeps the assembly line moving quickly. -
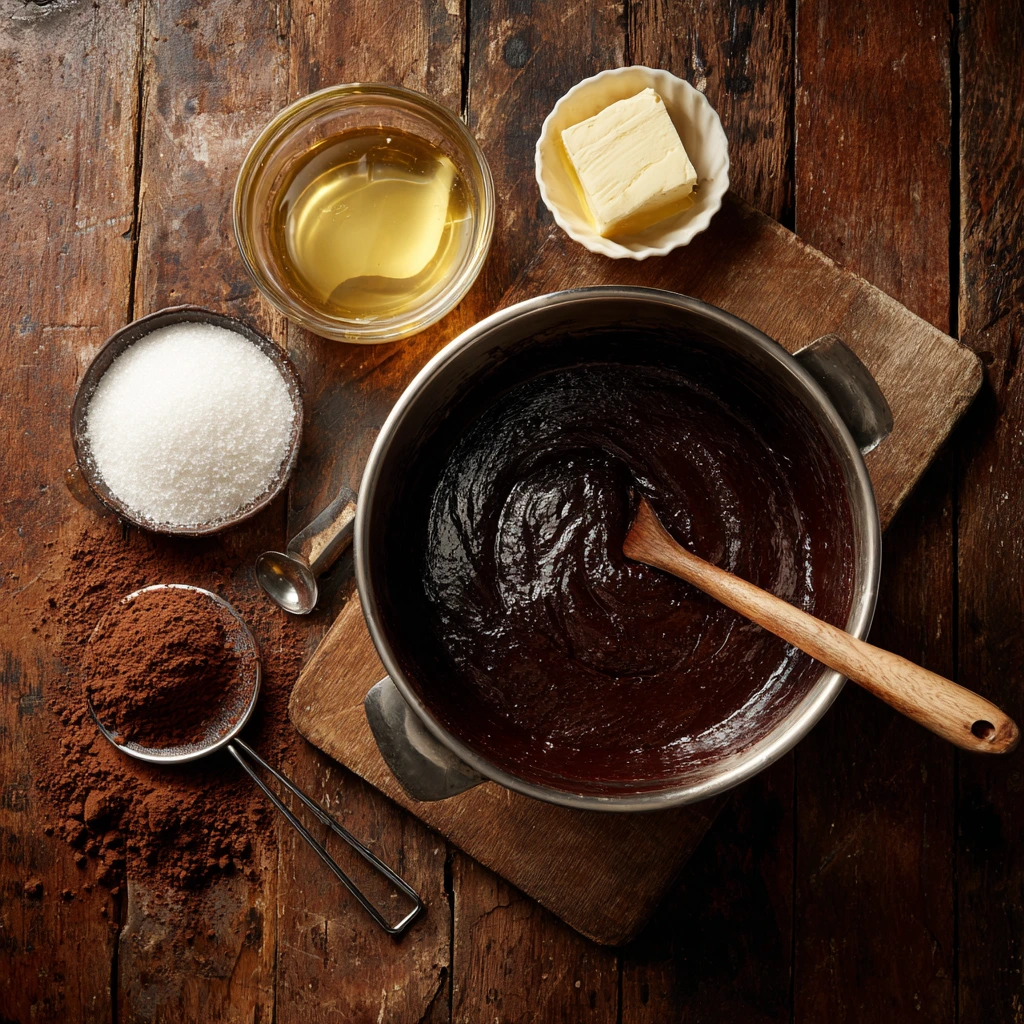
Whisk the Brownie Batter
In a medium bowl, combine the melted butter and ¾ cup granulated sugar. Whisk until the mixture pale and slightly thickened (about 30 seconds). Add the eggs one at a time, whisking well after each addition, then stir in 1 teaspoon vanilla extract until smooth. -
Incorporate Dry Ingredients
Sift together ⅓ cup all-purpose flour, ⅓ cup unsweetened cocoa powder, and ¼ teaspoon salt. Gently fold these dry ingredients into the butter–sugar–egg mixture, stirring only until just combined. Overmixing will toughen your brownies—be gentle and stop when you see no streaks of flour. -
Layer the Brownie Base
Using a small cookie scoop or a teaspoon, divide about one tablespoon of brownie batter among the six ramekins. Smooth each mound into a thin, even layer at the bottom of the cup. This ensures every spoonful has that fudgy brownie surprise. -
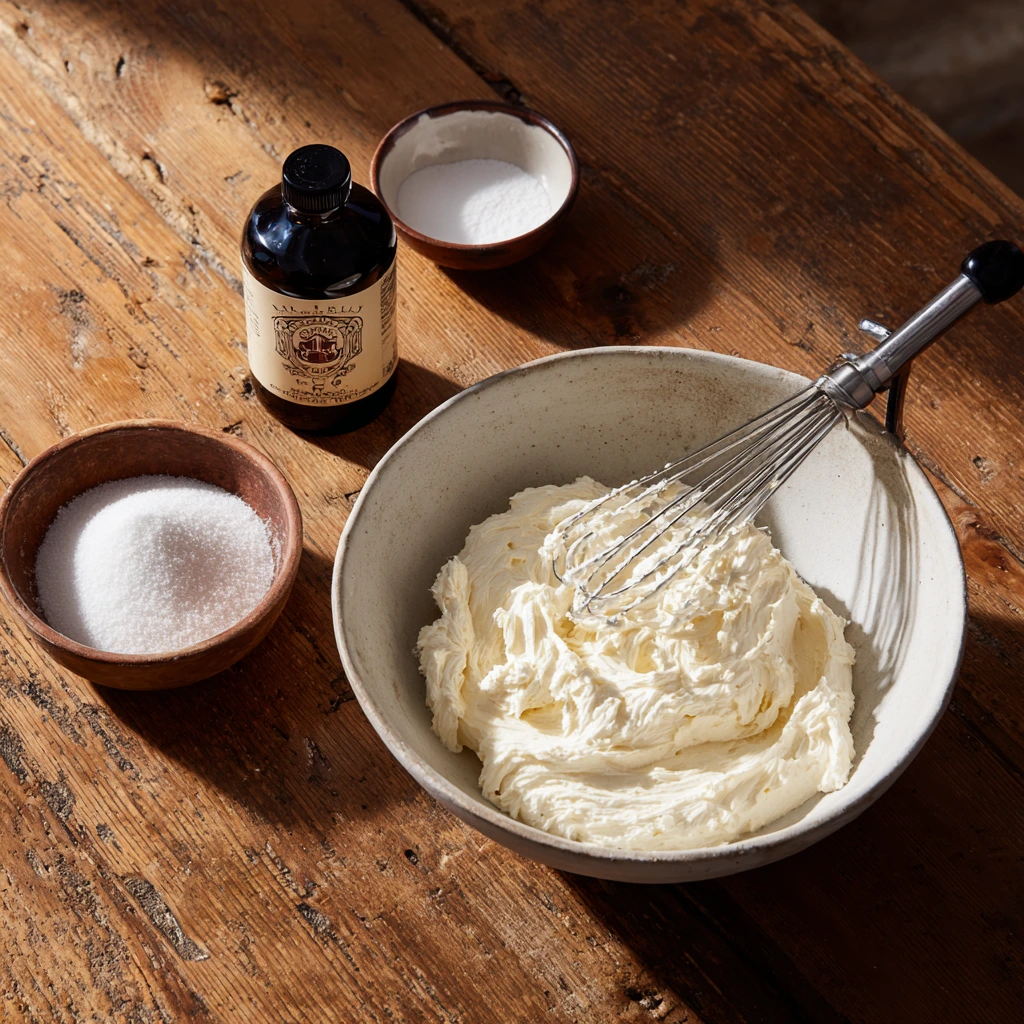
Prepare the Cheesecake Filling
In a clean bowl, beat together the softened 4 ounces of cream cheese and 2 tablespoons granulated sugar until creamy and lump-free. Add 2 tablespoons sour cream, ¼ teaspoon vanilla extract, and 1 tablespoon flour. Continue beating on medium speed until the mixture is silky smooth. -
Add the Cheesecake Layer
Divide the cheesecake mixture equally between the ramekins, gently pouring it on top of the brownie layer. Try to pour as close to the center as possible—this helps keep the layers distinct. A little wobble of the ramekin will help the filling settle evenly over the brownie.
Baking, Chilling & Delicious Finishing Touches
Now that your brownie and cheesecake layers are cozied up in their ramekins, it’s time to bring it all together. This part is where the transformation happens—from simple layers to fully baked, rich, and indulgent treats. We’re talking about that melt-in-your-mouth texture you get when the brownie is just barely set, the cheesecake is velvety smooth, and the whole thing is chilled to perfection. And just wait until we dress them up at the end—whipped cream, chocolate drizzle, crunchy toppings—it’s the finishing touch that makes them totally irresistible.
If you’re wondering whether the two batters will bake evenly—don’t worry. The cheesecake and brownie layers bake beautifully together, and even if they blur a little during the process, that just means more chocolatey-creaminess in every bite. Plus, once they’re cooled and topped, they look and taste like something straight from a fancy bakery. But the best part? You made them at home, in your own oven, without breaking a sweat.
Let’s get back into the kitchen and finish what we started.
-
Top with Remaining Brownie Batter
Take the rest of your brownie batter and gently spoon it over the cheesecake layers in each ramekin. The batter may be a little thick, so use the back of a spoon to carefully spread it just to the edges. It’s okay if it doesn’t completely cover the cheesecake—the layers will settle and bake together beautifully. -
Bake to Perfection
Place the ramekins on a baking sheet to make transferring them easier. Bake in your preheated oven for 20 to 25 minutes. You’ll know they’re ready when the edges look set but the centers still have a slight jiggle. That jiggle is important—it means your cheesecake layer is smooth and not overbaked. -
Cool and Chill
Once out of the oven, let the ramekins cool on a wire rack to room temperature. This usually takes about 30–45 minutes. Then, transfer them to the refrigerator and chill for at least 2 hours—or ideally overnight. This step is key for the flavors to fully develop and the layers to firm up just right. -
Whip the Cream
When you’re ready to serve, whip ½ cup of heavy whipping cream with 1 tablespoon of powdered sugar until soft peaks form. You can do this by hand or with an electric mixer—just be careful not to over-whip or it’ll turn grainy. You want a soft, pillowy texture that balances the richness of the brownie and cheesecake. -
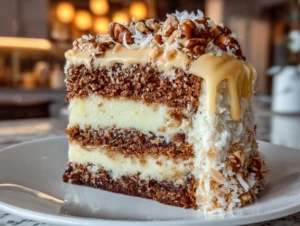
Decorate Like a Pro
Top each chilled brownie cheesecake cup with a dollop or swirl of whipped cream. Then sprinkle with 2 tablespoons chopped pecans or walnuts and 2 tablespoons mini chocolate chips. Finish with a light drizzle of chocolate or caramel sauce. These little extras add texture, sweetness, and visual flair that make the cups feel like a special occasion all on their own.
Make-Ahead Tip: These cups are ideal for prepping the night before a party or gathering. Just keep them covered in the fridge and add the whipped cream and toppings just before serving.
![]()
Optional Variations and Quick Shortcuts
If you’re short on time or want to switch things up, here are a few fun ways to make the recipe your own:
-
Use a Boxed Brownie Mix: Save a step by using your favorite boxed mix. Just prepare as directed and layer it with the cheesecake mixture as written.
-
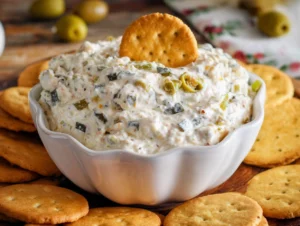
Swap the Toppings: Crushed Oreos, toasted coconut, or fresh raspberries work beautifully on top.
-
Try a Flavored Cheesecake Layer: Add a swirl of raspberry jam or a touch of espresso powder to the cheesecake batter for a twist.
-
Make it Nut-Free: Skip the chopped nuts and use more chocolate chips or crushed pretzels for crunch.
Serving Tip: Let the cups sit at room temperature for 5 minutes before serving. This softens the brownie layer just enough so your spoon glides through without resistance.
FAQs & Final Thoughts
We’ve covered all the steps from prepping to baking to dressing up these indulgent little brownie cheesecake cups—but before we wrap things up, I wanted to answer a few of the most common questions that might pop up while you’re making (or planning to make) this recipe. Whether you’re wondering about substitutions, storage, or just how to make these ahead for guests, I’ve got you covered.
Let’s dig into those FAQs, and then I’ll leave you with a few final thoughts to inspire your next baking session.
Frequently Asked Questions
1. Can I use a boxed brownie mix instead of homemade batter?
Absolutely. If you’re pressed for time, using a boxed mix is a great shortcut. Just prepare the mix as directed and use it in place of the homemade brownie batter in the recipe. Keep in mind, you may have extra batter depending on the brand and quantity.
2. How should I store leftover brownie cheesecake cups?
Store them covered in the refrigerator for up to 3 days. I recommend adding whipped cream and toppings just before serving to keep everything fresh and looking its best.
3. Can I freeze these?
Yes, you can freeze the baked and cooled brownie cheesecake cups (without the whipped cream or toppings). Wrap each one tightly in plastic wrap and store in an airtight container. Thaw in the fridge overnight before serving.
4. What size ramekins should I use?
Six-ounce ramekins work perfectly for this recipe. If you’re using a muffin tin instead, standard-sized cups will do, though they may be a bit shallower. Just watch the bake time—it may be a few minutes shorter.
5. Can I make these in advance for a party?
Yes! These are great make-ahead desserts. You can bake them the day before, store them in the fridge, and just top them with whipped cream, nuts, and drizzle right before serving.
6. What are some nut-free topping options?
If you’re avoiding nuts, crushed graham crackers, mini marshmallows, crushed pretzels, or even cookie crumbs (like Oreos or Biscoff) are fantastic alternatives. They add great texture and flavor without the allergens.
7. Why is my cheesecake layer lumpy?
This usually happens if your cream cheese is too cold or not fully softened. Be sure to let it sit at room temperature for 30–45 minutes before mixing, and beat it well until completely smooth before adding other ingredients.
Final Thoughts: You Deserve Dessert Like This
There’s something so satisfying about a dessert that feels like it came from a fancy bakery—but was actually made right in your kitchen. These Loaded Brownie Cheesecake Cups are all about layers of texture and flavor: the rich fudgy brownie, the smooth and creamy cheesecake, the fluffy whipped cream, and that irresistible finishing crunch on top.
I love how customizable they are, too. You can keep it simple with chocolate chips and drizzle, or go all out with your favorite toppings and flavor twists. And because they’re made in individual portions, they’re perfect for entertaining—or just for treating yourself to something special without having to share.
So the next time you’re craving a dessert that’s a little bit extra (in the best way), give these brownie cheesecake cups a try. I’d love to hear how they turned out for you—leave a comment, share your topping combos, or let me know if you tried a fun variation. Happy baking!
PrintLoaded Brownie Cheesecake Cup
A decadent individual dessert combining a fudgy brownie base with a smooth vanilla cheesecake layer, crowned with whipped cream, chocolate drizzle, and crunchy nuts. Perfect for special occasions or whenever you need a rich, indulgent treat.
- Author: Mark's Recipe
Ingredients
½ cup unsalted butter, melted
¾ cup granulated sugar
2 large eggs, room temperature
1 teaspoon vanilla extract
⅓ cup all-purpose flour
⅓ cup unsweetened cocoa powder
¼ teaspoon salt
4 ounces cream cheese, softened
2 tablespoons granulated sugar
2 tablespoons sour cream
¼ teaspoon vanilla extract
1 tablespoon all-purpose flour
½ cup heavy whipping cream
1 tablespoon powdered sugar
2 tablespoons chopped pecans or walnuts
2 tablespoons mini chocolate chips
Chocolate sauce or caramel sauce for drizzling
Instructions
Preheat the oven to 350 °F and grease six 6-ounce ramekins or a muffin tin with cooking spray.
In a medium bowl combine melted butter and granulated sugar, whisk in eggs and vanilla until smooth, then stir in flour, cocoa powder, and salt just until combined to form the brownie batter.
Spoon about one tablespoon of brownie batter into the bottom of each ramekin and smooth the surface.
In a separate bowl beat together softened cream cheese, sugar, sour cream, vanilla, and flour until creamy and lump-free.
Divide the cheesecake mixture evenly among the ramekins, pouring it gently over the brownie layer without mixing the two batters.
Top each cup with the remaining brownie batter, covering the cheesecake layer. Smooth the tops lightly.
Bake until the centers are set but still slightly jiggly, about 20 to 25 minutes. Remove from the oven and let cool to room temperature, then chill in the refrigerator for at least two hours or until fully set.
Before serving, whip the heavy cream with powdered sugar to soft peaks. Pipe or spoon a dollop of whipped cream onto each cheesecake cup.
Sprinkle with chopped nuts and mini chocolate chips, then finish with a drizzle of chocolate or caramel sauce.
Notes
For a quicker version, use your favorite boxed brownie mix and add a simple cheesecake layer by mixing one package of cream cheese with ¼ cup sugar, one egg, and 1 teaspoon vanilla. Swap the nuts for crushed Oreo cookies or toasted coconut for extra texture. These cups can be made up to one day ahead and stored covered in the refrigerator. To serve, let sit at room temperature for five minutes to soften the brownie layer slightly.
")
