There are some recipes that feel like a warm hug, and this Garlic Butter Chicken and Rice Casserole is definitely one of them. It’s one of those easy, fuss-free dishes that checks all the boxes: it’s comforting, flavorful, and everything cooks in a single dish. And let’s be honest—less cleanup is always a win, especially on busy weeknights.
This recipe is something I turn to when I want a home-cooked meal that doesn’t take a ton of effort. The buttery garlic rice is full of flavor and fluffs up perfectly in the oven, and the chicken comes out juicy every single time. It’s the kind of dinner that practically cooks itself once it’s in the oven. If you’re anything like me, you’ll want to put this on your regular meal rotation. It’s perfect for feeding a family, bringing to a potluck, or just making ahead for a cozy weeknight dinner.
What I love most is how the flavors come together with such simple ingredients. You don’t need anything fancy—just some pantry staples and a few fresh touches like garlic and parsley. The garlic butter soaks into the rice and infuses the whole dish with that rich, savory goodness that’s hard to resist. And while the parmesan topping is totally optional, I highly recommend it if you love a little golden, cheesy finish on your casseroles.
Alright, let’s get cooking!
Ingredients You’ll Need
-
1½ pounds boneless, skinless chicken thighs or breasts
-
1½ cups long-grain white rice (uncooked)
-
3 cups chicken broth
-
5 tablespoons unsalted butter, melted
-
4 cloves garlic, minced
-
1 teaspoon onion powder
-
1 teaspoon salt
-
½ teaspoon black pepper
-
½ teaspoon paprika
-
1 tablespoon chopped fresh parsley (or dried)
-
½ cup grated parmesan cheese (optional)
STEP 1: Preheat and Prep
Start by preheating your oven to 375°F. Lightly grease a 9×13-inch baking dish. I usually use a quick spritz of nonstick spray or a light brushing of oil. This helps prevent any sticking and makes cleanup even easier.
![]()
STEP 2: Mix the Flavor Base
In a medium bowl, whisk together the melted butter, minced garlic, chicken broth, onion powder, salt, and black pepper. This is where all that flavor magic starts. The garlic and butter combo is what gives this casserole its irresistible aroma and rich taste.
Pro tip: If you really love garlic (I know I do), feel free to add an extra clove. You won’t regret it!
STEP 3: Build the Base Layer
Pour your uncooked rice into the prepared baking dish and spread it out evenly. Then, carefully pour the garlic butter broth mixture over the rice. Make sure the rice is fully submerged in the liquid so it cooks properly in the oven.
The rice absorbs all that buttery, seasoned broth as it bakes, so don’t skip this step or rush it. It’s what transforms plain rice into something rich and full of flavor.
STEP 4: Add the Chicken
Now, season your chicken thighs or breasts with paprika, and if you’d like, an extra sprinkle of salt and pepper. Nestle the chicken pieces directly on top of the rice. Don’t worry if they’re slightly overlapping—the oven will take care of cooking everything evenly.
I usually opt for chicken thighs here because they tend to stay juicier, but if you prefer leaner meat, chicken breasts work just as well. Just keep in mind that chicken breasts can cook a little faster, so be sure to check them for doneness during the final baking step.
![]()
STEP 5: Cover and Bake
Once everything’s in place, cover the dish tightly with aluminum foil. This helps trap the steam and ensures the rice cooks through properly.
Pop the dish into your preheated oven and bake for 45 minutes. During this time, the chicken starts to cook through, and the rice begins absorbing all the delicious garlic butter broth.
Garlic Butter Chicken and Rice Casserole – Bringing It All Together
Alright, now that you’ve got your casserole in the oven and the house is starting to smell amazing, let’s talk about finishing this dish off just right. This is the part where everything starts to come together—the chicken finishes cooking, the rice gets perfectly fluffy, and the top of the casserole takes on that golden, slightly crispy edge that’s completely irresistible.
The beauty of this recipe is how hands-off it is once it’s in the oven. There’s no babysitting, no stovetop stirring—just a bit of patience while your oven does the heavy lifting. And once you take off that foil and add the finishing touches, you’ll see why this casserole is such a go-to favorite in so many households.
Let’s finish strong!
STEP 6: Remove Foil and Add Topping
After the initial 45 minutes of baking, carefully remove the foil from the baking dish. At this point, your chicken should be mostly cooked through, and the rice should have absorbed most of the broth. You’ll probably notice some steam escaping—that’s a good sign the rice is cooking properly underneath.
If you’re using parmesan cheese (and I always recommend it if you like a cheesy finish), now’s the time to sprinkle it evenly over the top. It adds a subtle nuttiness and helps give the casserole a slightly crisp, golden top. Not a cheese fan? No worries—this step is totally optional.
STEP 7: Bake Uncovered
Return the uncovered dish to the oven and bake for an additional 15 to 20 minutes. This final stretch is where the magic really happens. The cheese melts and browns slightly, the chicken finishes cooking, and the rice turns perfectly tender and fluffy.
Keep an eye on it during the last 5 minutes. If your oven runs hot, you might see the top starting to brown quickly. You want it golden, not overly crisp. If needed, you can tent it loosely with foil toward the end of the bake.
By the time the timer goes off, you’ll have a bubbling, aromatic dish that’s ready to be the star of your dinner table.
STEP 8: Rest and Garnish
Once it’s out of the oven, resist the urge to dive in right away (I know, it’s tough!). Let the casserole rest for 5 to 10 minutes. This gives the rice time to settle and firm up a bit, making it easier to serve without falling apart.
Before serving, sprinkle with fresh or dried parsley for a pop of color and freshness. It’s a small touch, but it really brightens the dish and makes it look just as good as it tastes.
Tips for Success
If this is your first time making a baked chicken and rice casserole, here are a few helpful tips to make sure it turns out perfect:
-
Use Long-Grain White Rice: Jasmine or basmati rice work best here. Short-grain or instant rice will cook differently and may result in mushy or undercooked results.
-
Brown Rice Alternative: Want to use brown rice? You absolutely can—but you’ll need to increase the liquid slightly and extend the baking time by at least 15–20 minutes. Keep the dish covered longer to ensure even cooking.
-
Customize the Seasonings: Feel free to play around with the spices. A touch of Italian seasoning or a sprinkle of crushed red pepper flakes can give the dish a new twist without much effort.
-
Add Veggies: Want to make it a full one-pan meal? Toss in a cup of frozen peas, diced carrots, or even chopped spinach before adding the chicken. They’ll cook right along with everything else.
-
Make It Creamy: If you like your casseroles a little creamier, stir in a splash of heavy cream or a couple tablespoons of sour cream right after baking. It adds a rich texture without making it too heavy.
Why You’ll Love This Recipe
This casserole is the ultimate in cozy, no-fuss cooking. It’s got the richness of garlic butter, the heartiness of rice, and the juicy tenderness of baked chicken—all baked together in one dish. Whether you’re cooking for your family, prepping meals for the week, or just want something warm and filling without too much cleanup, this recipe fits the bill.
It’s also super forgiving. You don’t need to hover over it or stress about exact measurements. As long as your chicken is nestled into that seasoned rice and the dish is covered well for the first bake, you’re pretty much guaranteed success.
Plus, leftovers reheat beautifully, which makes it great for lunches or another dinner later in the week. In fact, I often make a double batch just to have some on hand. It’s that good.
Garlic Butter Chicken and Rice Casserole – FAQ and Final Thoughts
You’ve made it to the final part of this cozy, flavor-packed recipe—and if you’re anything like me, you’re already dreaming about leftovers (because yes, they’re just as good the next day). Before we wrap things up, let’s cover some of the most frequently asked questions about this Garlic Butter Chicken and Rice Casserole to help you troubleshoot, plan ahead, and make the most out of this delicious dish.
Frequently Asked Questions
1. Can I use brown rice instead of white rice?
Yes, you can! But keep in mind that brown rice takes longer to cook and will need more liquid. Add an extra ½ to 1 cup of broth and extend the baking time by at least 15–20 minutes. You may also need to keep it covered a bit longer to prevent the chicken from drying out.
2. Should the rice be cooked before going into the casserole?
Nope—the rice goes in uncooked. It cooks directly in the garlic butter and chicken broth mixture, absorbing all that flavor as it bakes. Just make sure you’re using long-grain white rice like jasmine or basmati for the best texture.
3. What’s the best type of chicken to use for this recipe?
Both boneless skinless chicken thighs and chicken breasts work great. Thighs tend to be more forgiving and stay juicier, especially if you’re planning to reheat leftovers. If you’re using chicken breasts, try to use ones that aren’t too thick—or slice them in half lengthwise so they cook more evenly.
4. Can I make this ahead of time?
Absolutely. You can assemble everything in the baking dish up to 24 hours in advance and store it in the fridge, covered. When you’re ready to bake, let it sit out at room temperature for about 15–20 minutes before putting it in the oven to prevent the dish from cracking and to ensure even cooking.
5. Can I freeze this casserole?
Yes! To freeze, bake the casserole completely, let it cool, and then wrap it tightly in foil or place it in an airtight container. Freeze for up to 2 months. To reheat, thaw overnight in the fridge and warm it in the oven, covered, at 350°F until heated through.
6. Why is my rice undercooked or too firm?
This can happen if your foil wasn’t sealed tightly during the first part of baking or if your oven temperature runs low. Make sure the dish is tightly covered and that you’re using the full amount of liquid. If needed, add a splash more broth and bake a bit longer with the foil back on.
7. What sides go well with this casserole?
Since this dish is hearty and filling on its own, I usually keep the sides simple—steamed green beans, a fresh salad, or roasted veggies work great. You could also serve it with some crusty bread to soak up any extra garlic butter sauce.
Final Thoughts and Serving Suggestions
This Garlic Butter Chicken and Rice Casserole has quickly become one of my favorite weeknight dinners, and I know it’ll be the same for you once you try it. It’s simple, comforting, and packed with the kind of flavor that keeps everyone coming back for seconds.
One of the things I appreciate most is how customizable it is. Whether you’re cooking for picky eaters or looking to clean out the fridge, this recipe can easily be adjusted to fit your needs. Toss in some extra veggies, switch up the seasonings, or add a touch of creaminess at the end—it’s hard to mess it up.
And don’t forget how well this dish holds up for meal prep. Store leftovers in an airtight container in the fridge, and enjoy them for up to 4 days. A quick reheat in the microwave or oven, and dinner is ready again—no fuss required.
If you give this recipe a try, I’d love to hear how it turns out. Leave a comment with your favorite variations or any tips that worked for you. This is the kind of recipe that’s meant to be shared, so feel free to pass it along to a friend or save it for a cozy Sunday dinner.
PrintIrresistible Garlic Butter Chicken and Rice Casserole

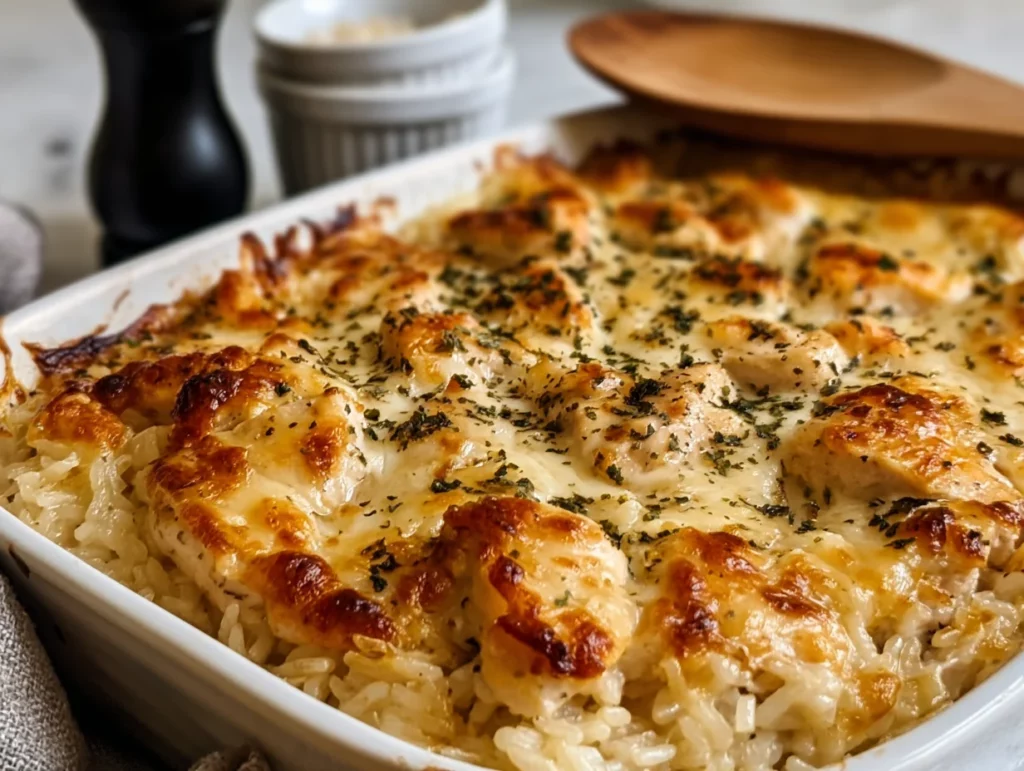
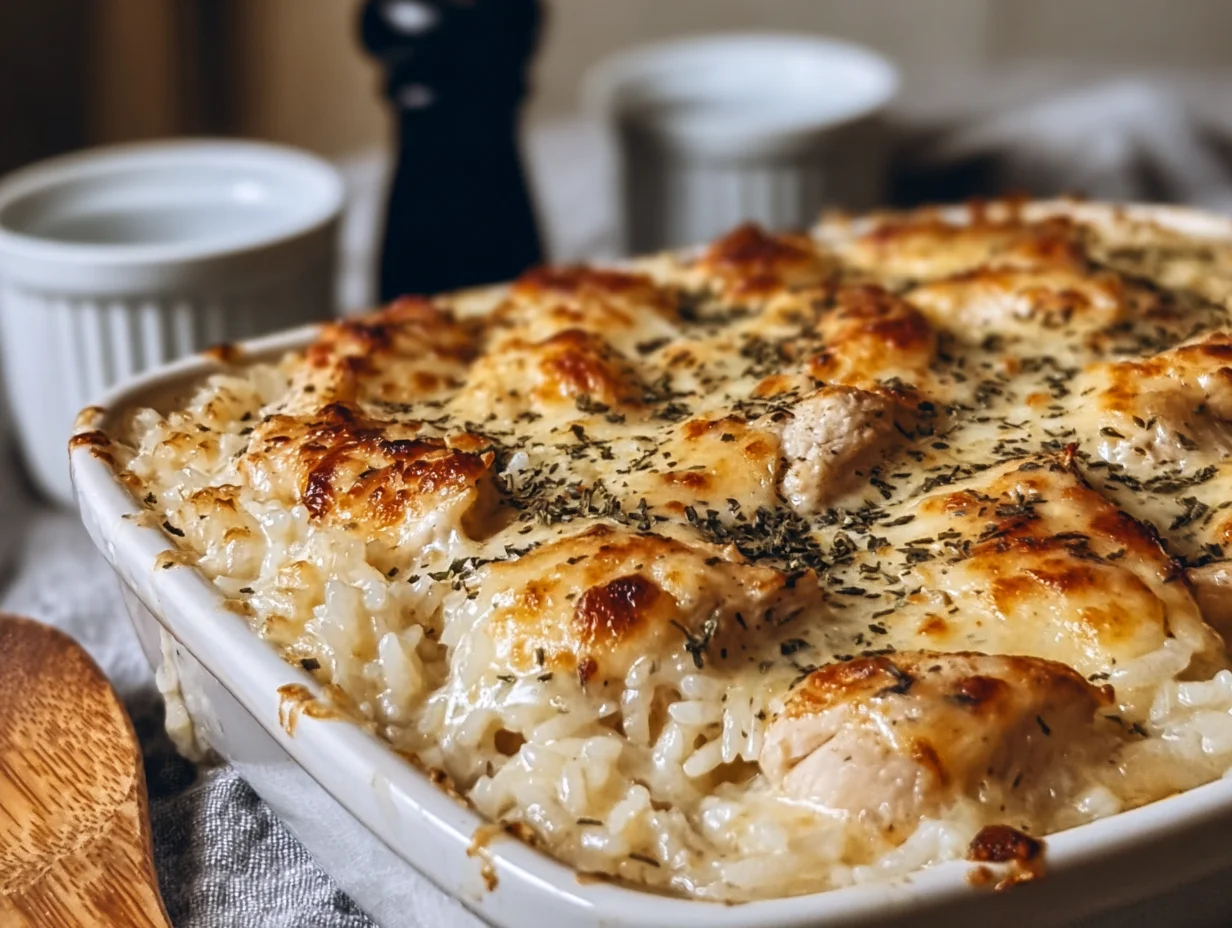
Garlic butter chicken and rice casserole is a rich, savory one-dish meal that’s packed with flavor and comfort. Juicy chicken pieces are baked over a bed of buttery, garlic-infused rice that cooks to fluffy perfection in the oven. The result is a golden-topped, creamy casserole that’s easy to make and perfect for feeding the whole family with minimal cleanup.
- Author: Mark's Recipe
Ingredients
1½ pounds boneless, skinless chicken thighs or breasts
1½ cups long-grain white rice, uncooked
3 cups chicken broth
5 tablespoons unsalted butter, melted
4 garlic cloves, minced
1 teaspoon onion powder
1 teaspoon salt
½ teaspoon black pepper
½ teaspoon paprika
1 tablespoon chopped fresh parsley or dried parsley
½ cup grated parmesan cheese (optional for topping)
Instructions
1 Preheat the oven to 375°F. Lightly grease a 9×13 inch baking dish.
2 In a medium bowl, whisk together the melted butter, minced garlic, chicken broth, onion powder, salt, and pepper.
3 Pour the uncooked rice into the prepared baking dish, then evenly pour the garlic butter broth mixture over the rice.
4 Season the chicken thighs or breasts with paprika, additional salt, and pepper if desired. Nestle the seasoned chicken directly on top of the rice in the baking dish.
5 Cover the dish tightly with aluminum foil and bake for 45 minutes.
6 Remove the foil, sprinkle with parmesan cheese if using, and return to the oven uncovered. Bake for an additional 15 to 20 minutes, or until the chicken is cooked through and the rice is tender and fluffy.
7 Let the casserole rest for 5 to 10 minutes before serving. Sprinkle with parsley just before serving.
Notes
For best results, use long-grain white rice such as jasmine or basmati. Brown rice can be used but will require a longer baking time and extra liquid. If you prefer a creamier texture, stir in a splash of heavy cream or a dollop of sour cream after baking. This casserole stores and reheats well, making it great for meal prep or leftovers.
")

What a wonderful recipe!!! Great flavors and easy preparation. I added a 5 oz bag of baby spinach for a one dish meal.
★★★★★