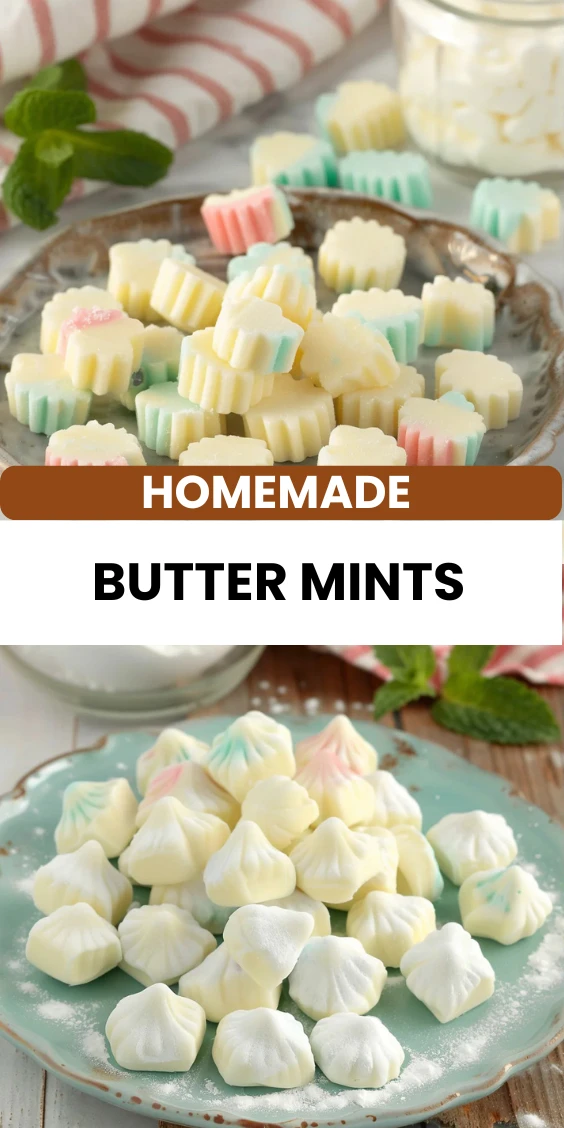
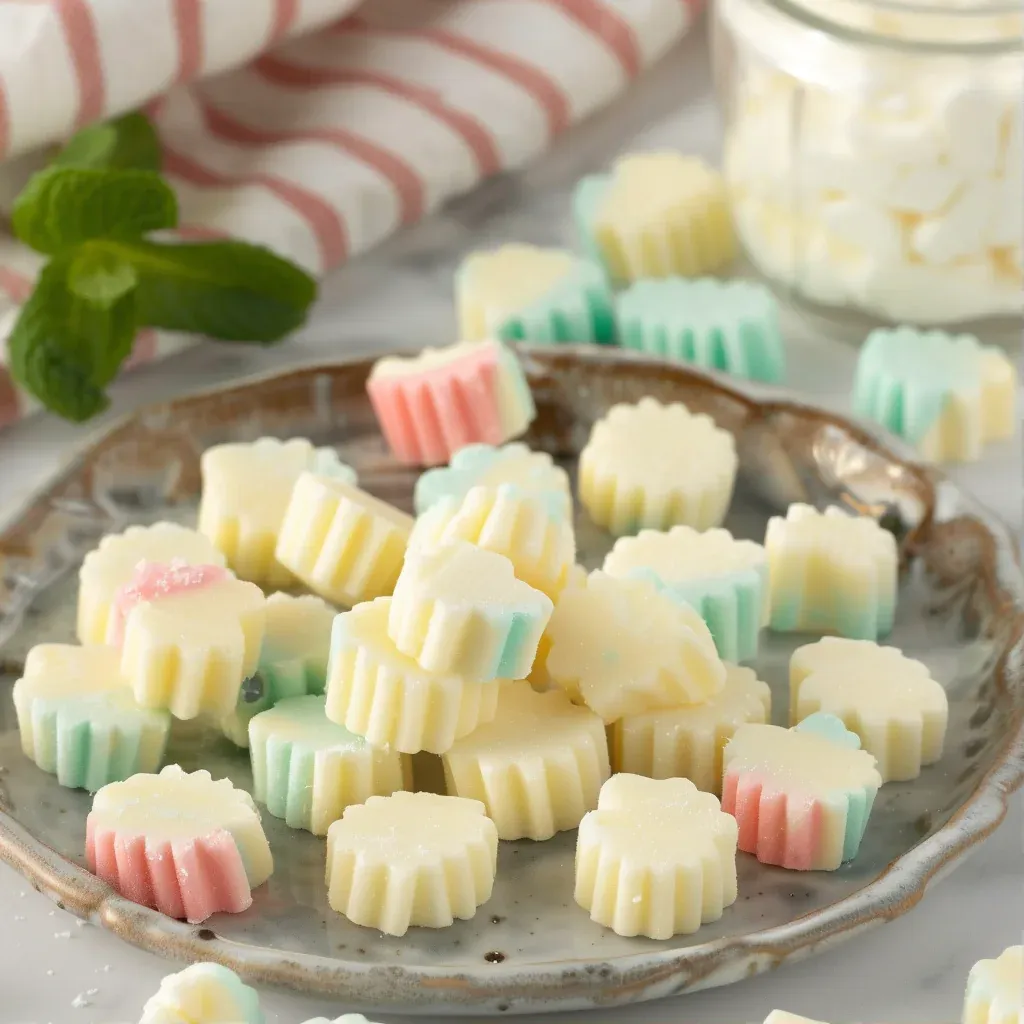
Butter mints are a delightful treat that perfectly capture the essence of sweet nostalgia. With their soft, creamy texture and melt-in-your-mouth flavor, these little confections are a staple at celebrations, from weddings to holiday gatherings. Picture a table adorned with these pastel-colored mints, each one glistening slightly in the light, inviting you to indulge in their sweetness. The aroma of fresh peppermint wafts through the air, hinting at the delicious experience to come. Making homemade butter mints is not just about creating a treat; it’s about mastering a classic technique that brings joy and a touch of artisan charm to any occasion.
- Why This Recipe Is Worth Your Time
- Main Ingredients
- Tools Needed
- Step-by-Step Instructions
- Pro Tips for Perfect Butter Mints
- Serving Ideas and Pairings
- Variations and Swaps for Butter Mints
- Leftovers and Storage Tips
- Nutrition Notes
- Frequently Asked Questions About Butter Mints
Why This Recipe Is Worth Your Time
Creating homemade butter mints is an endeavor that rewards you with not only a delicious treat but also a sense of accomplishment. The balance of flavors—rich butter, sweet powdered sugar, and refreshing peppermint—comes together to create a confection that is both comforting and uplifting. The craftsmanship involved in whipping the mixture to the perfect consistency and then shaping it into charming little bites is an art form in itself. Each step in the process is an opportunity to hone your skills, whether it’s whipping the butter to the right texture or rolling the dough into perfect ropes. This recipe stands out not only for its simplicity but also for the delightful results that make it a favorite among both children and adults alike.
Main Ingredients for Butter Mints
-
The beauty of butter mints lies in their simplicity. Here are the essential ingredients that create this melt-in-your-mouth treat:
- 1 stick butter: Use high-quality unsalted butter for a creamy texture that enhances the flavor.
- 1 tablespoon whipping cream: This adds richness and helps achieve a smooth consistency.
- 4 cups powdered sugar: Essential for sweetness and to achieve the right texture; sifting it can aid in a smoother mix.
- ½ teaspoon pure peppermint extract: Opt for pure extract for an authentic flavor that elevates the mints.
- 1-4 drops food coloring: Choose your favorite colors to make the mints visually appealing; gel colors work well for vibrant hues.
Tools Needed for Butter Mints
| Tool | Purpose / what it helps with |
| Stand mixer | For creaming the butter and mixing the dough to the right consistency. |
| Plastic wrap | To keep the dough sections from drying out while they rest. |
| Sharp knife or dough scraper | For cutting the rolled dough into even pieces. |
| Cutting board | A surface for rolling and shaping the dough. |
| Measuring spoons | To ensure accurate measurements of ingredients. |
| Baking sheet | For drying the cut mints at room temperature. |
Step-by-Step Instructions for Butter Mints
Now that we have our ingredients and tools ready, let’s dive into the step-by-step process of making these delightful butter mints. Each step is crucial to achieving that perfect creamy texture and flavor.
- In the bowl of a stand mixer, cream together the butter, whipping cream, 1 cup of powdered sugar, and peppermint extract until the mixture is smooth. You’ll know it’s ready when the mixture is light and fluffy, with no lumps of butter remaining.
- Scrape down any dough that clings to the sides of the bowl and add another cup of powdered sugar, then mix again. Continue this process until all the sugar is incorporated and the dough begins to pull away from the sides of the bowl. The final mixture should be soft yet firm enough to hold its shape.
- If using multiple colors, divide the dough evenly and wrap each section in plastic wrap to keep it from drying out. Note: I weigh the entire ball on a scale before dividing it evenly to ensure consistency in size.
- Start with one section, adding 1-4 drops of your chosen color and mixing until it is evenly distributed. Note: We used Y-4, G-2, B-2, R-1 for a beautiful variety. Once mixed, wrap the colored dough again and chill it in the fridge for 1 hour. Repeat this for the remaining colors.
- Working with one color at a time on a cutting board dusted with icing sugar, roll the dough into a ½” thick rope shape using the palm of your hand. Pay attention to the texture; it should be pliable but not sticky. Cut into pieces with a sharp knife or dough scraper for uniformity.
- Leave the cut pieces on the cutting board or transfer them to a baking sheet, allowing them to dry at room temperature for about 12 hours. This step is critical for achieving that perfect, slightly firmer texture.
- Store the mints at room temperature in an airtight container for up to 2 weeks. This will keep them fresh and ready for whenever you need a sweet treat.
Pro Tips for Perfect Butter Mints
- Use room temperature butter for easier creaming and better incorporation of the ingredients.
- Be patient when mixing; the dough should be smooth and homogenous before proceeding.
- Dust your cutting board with powdered sugar to prevent sticking when rolling out the dough.
- Experiment with different flavors by substituting the peppermint extract with other extracts like vanilla or almond.
- Keep the dough wrapped tightly to prevent it from drying out during the resting period.
- For a fun twist, consider adding a sprinkle of sea salt to the dough for a sweet-salty flavor profile.
- When cutting the mints, try to make them uniform in size for even drying and presentation.
Serving Ideas and Pairings
- Serve butter mints in decorative bowls at events like weddings and showers for a charming touch.
- Pair with hot cocoa or coffee for a delightful after-dinner treat.
- Use as a sweet garnish on dessert platters alongside cookies and pastries.
- Wrap individual mints in colored cellophane for a lovely gift or party favor.
- Incorporate them into gift baskets with other homemade treats for a personal touch.
Variations and Swaps for Butter Mints
Restaurant-Style Version
For a more refined version, consider incorporating flavored oil such as spearmint or citrus oils for a unique twist. Use clear extracts for a sophisticated presentation.
Rustic Home-Cook Version
Add crushed peppermint candies to the dough for a textured mint that offers a delightful crunch alongside the creamy softness.
Make-Ahead Version
These mints can be made up to a month in advance. Just freeze them in an airtight container and let them come to room temperature before serving.
Seasonal Ingredient Version
Swap out the peppermint extract for seasonal flavors like cinnamon or pumpkin spice in the fall for a festive touch.
Leftovers and Storage Tips
- Store leftover mints in an airtight container at room temperature for up to 2 weeks.
- For longer storage, consider freezing them; they can last for up to a month in the freezer.
- To reheat, simply allow them to come back to room temperature; do not microwave, as this can alter the texture.
- Keep mints away from direct sunlight to maintain their color and flavor.
Nutrition Notes
These butter mints are a delightful indulgence, with each piece containing moderate calories. To adjust for dietary preferences, consider using a butter substitute or experimenting with sugar alternatives like erythritol for a lower-calorie option. However, be mindful that such substitutions may alter the classic texture and taste.
Frequently Asked Questions About Butter Mints
What are butter mints made of?
Butter mints are made from butter, whipping cream, powdered sugar, peppermint extract, and food coloring, resulting in a sweet and creamy confection.
Can I use different extracts for my butter mints?
Absolutely! You can experiment with different extracts like vanilla, almond, or even seasonal flavors to create unique variations.
How long do butter mints last?
Homemade butter mints can be stored at room temperature in an airtight container for up to 2 weeks, or they can be frozen for up to a month.
What is the best way to store butter mints?
Store them in an airtight container at room temperature, away from direct sunlight to preserve their color and flavor.
Can I make butter mints ahead of time?
Yes, butter mints can be made in advance and stored either at room temperature or frozen for later use.
As you embark on your journey to create homemade butter mints, remember that the joy of artisan cooking lies in the process as much as the result. Each step is an opportunity to infuse your personality and creativity into this sweet treat. So gather your ingredients, roll up your sleeves, and let the magic of butter mints fill your kitchen with delightful aromas and flavors that will surely bring joy to your family and friends.
Sweet & Creamy Butter Mints
Ingredients
Method
- In the bowl of a stand mixer, cream together the butter, whipping cream, 1 cup of powdered sugar, and peppermint extract until the mixture is smooth.
- Scrape down any dough that clings to the sides of the bowl and add another cup of powdered sugar, then mix again. Continue this process until all the sugar is incorporated and the dough begins to pull away from the sides.
- Working with one color at a time on a cutting board dusted with icing sugar, roll the dough into a ½” thick rope shape using the palm of your hand and cut into pieces with a sharp knife or dough scraper.
- Leave the cut pieces on the cutting board or transfer them to a baking sheet, allowing them to dry at room temperature for about 12 hours.
- Store the mints at room temperature in an airtight container for up to 2 weeks.