Elegant French Crullers with Honey Glaze – A Light and Airy Delight
If you’ve ever visited a French bakery or a classic donut shop, you’ve probably seen these delicate, beautifully ridged pastries known as French Crullers. Unlike traditional donuts, French Crullers are made from choux pastry, which gives them their signature light, airy, and slightly crispy texture. Coated in a sweet honey glaze, they are delightfully soft on the inside, crisp on the outside, and irresistibly delicious.
The best part? You don’t need a bakery to enjoy these elegant pastries at home! With just a few simple ingredients and some easy steps, you can make homemade French Crullers that are just as good (if not better!) than the ones from your favorite pastry shop.
Why You’ll Love This Recipe
✔ Crispy on the Outside, Light & Airy on the Inside – The perfect texture combination.
✔ Naturally Sweetened with Honey Glaze – A simple yet elegant finishing touch.
✔ Easier Than You Think – Made with choux pastry, the same dough used for cream puffs.
✔ Perfect for Special Occasions – Serve these at brunch, tea time, or as a dessert!
Let’s get started on making these irresistible, golden-brown French Crullers!
Step 1: Gather Your Ingredients
Before we begin, let’s make sure we have everything ready for both the crullers and the honey glaze.
For the Crullers:
- 1 cup water – The base for the choux pastry.
- 6 tbsp unsalted butter – Adds richness and helps with structure.
- 1 tbsp sugar – Just a touch of sweetness.
- ¼ tsp salt – Enhances the overall flavor.
- 1 cup all-purpose flour – The main structure of the dough.
- 3 large eggs + 1 egg white – Helps create the perfect light and airy texture.
- Vegetable oil (for frying) – Neutral oil works best for deep-frying.
For the Honey Glaze:
- ½ cup powdered sugar – Creates a smooth, glossy glaze.
- 1 tbsp honey – Adds natural sweetness and a touch of floral flavor.
- 2 tbsp milk – Thins out the glaze for dipping.
✅ Pro Tip: Using unsalted butter gives you full control over the flavor, but if you only have salted butter, simply reduce the added salt slightly.
Step 2: Make the Choux Pastry Dough
French Crullers are made using choux pastry, the same dough used for eclairs and cream puffs. This dough is cooked on the stovetop before adding eggs, which helps give the crullers their light and airy texture.
1. Boil the Liquid Ingredients
- In a medium saucepan, combine 1 cup water, 6 tbsp butter, 1 tbsp sugar, and ¼ tsp salt.
- Bring to a gentle boil over medium heat, ensuring the butter is fully melted.
✅ Why Boil First? Heating the butter and water together ensures even incorporation and allows the flour to absorb liquid quickly.
2. Add the Flour All at Once
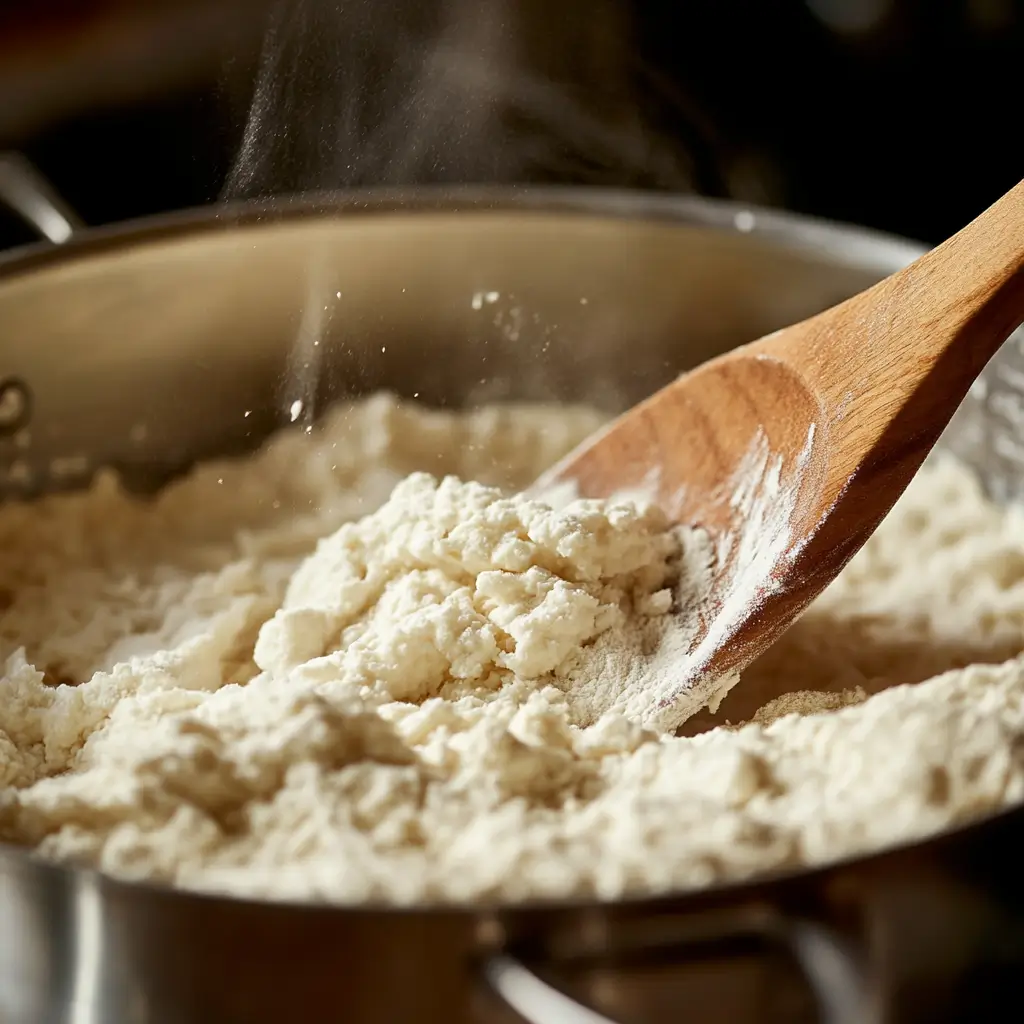
- Reduce the heat to low, then add 1 cup of flour all at once.
- Stir vigorously with a wooden spoon until the dough forms a ball and pulls away from the sides of the pan.
- Continue stirring for about 1-2 minutes to remove excess moisture.
✅ Pro Tip: Cooking the flour helps develop structure and texture, which is key for crullers that hold their shape while frying.
3. Cool the Dough Slightly
- Remove the pan from heat and let the dough cool for about 5 minutes.
- This prevents the eggs from scrambling when they’re added.
✅ Why Cool First? If the dough is too hot, it will cook the eggs instead of incorporating them smoothly!
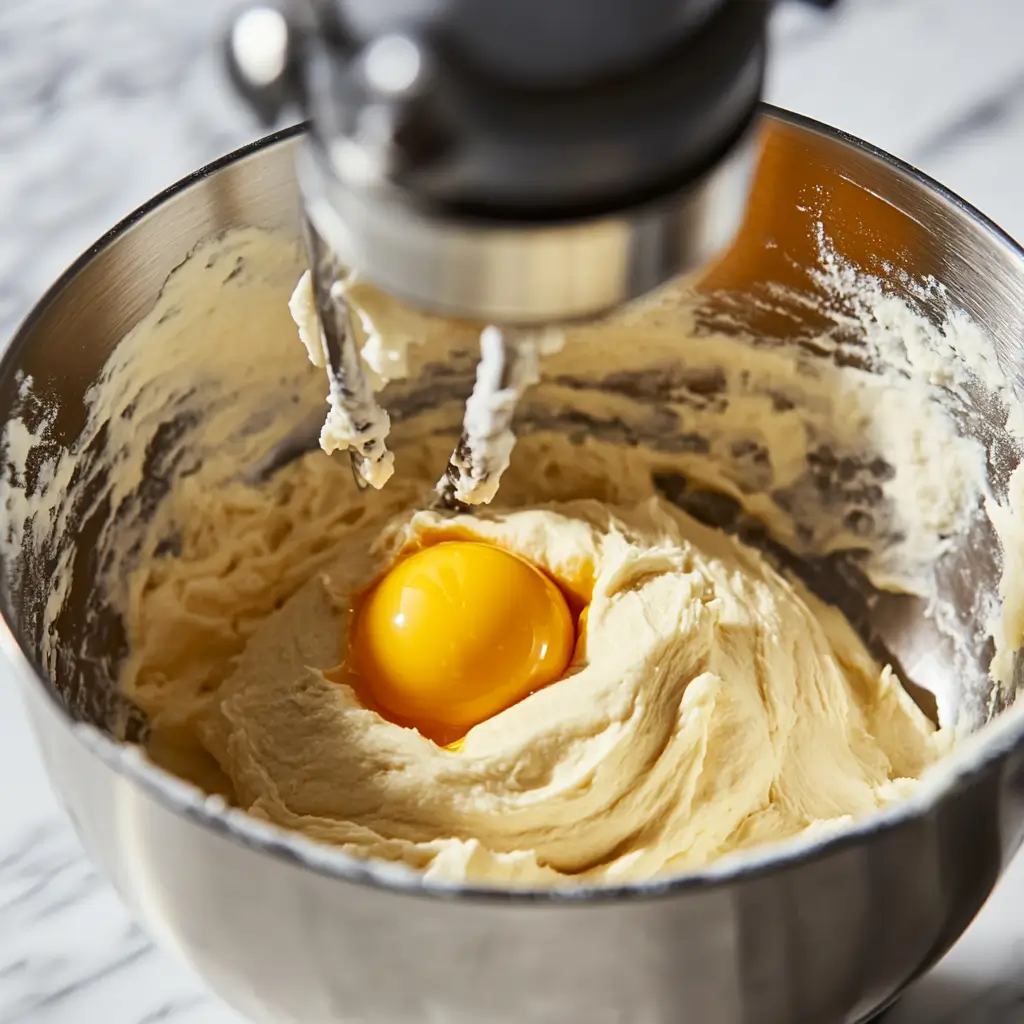
4. Add the Eggs One at a Time
- Using a hand mixer or wooden spoon, beat in one egg at a time, ensuring each egg is fully incorporated before adding the next.
- Add 1 egg white at the end to help create a smooth, glossy dough.
✅ Pro Tip: The dough should be thick but pipeable. If it’s too stiff, add a teaspoon of water or milk to loosen it slightly.
Step 3: Pipe the Crullers
To create the classic ridged look, we’ll pipe the dough into rings before frying.
1. Prepare a Piping Bag
- Transfer the dough to a piping bag fitted with a large star tip (like a Wilton 1M or 2D).
- Line a baking sheet with parchment paper and lightly grease it.
2. Pipe the Dough into Rings
- Pipe 2-3 inch rings onto the parchment paper.
- For perfectly round crullers, pipe in a circular motion, overlapping slightly where the ends meet.
✅ No Piping Bag? Use a ziplock bag with the tip cut off or shape the dough using two spoons.
Part 2: Frying the Crullers to Golden Perfection
Now that we’ve made our choux pastry dough and piped our beautiful rings, it’s time for the most exciting step—frying the crullers! This is where they get their signature light, crispy exterior and soft, airy interior.
Step 4: Heat the Oil for Frying
1. Choose the Right Oil
- Use a neutral oil like vegetable oil, canola oil, or peanut oil, as these have a high smoke point and won’t affect the flavor of the crullers.
2. Heat the Oil to 375°F (190°C)
- Pour about 2-3 inches of oil into a heavy-bottomed pot or deep fryer.
- Heat the oil over medium heat until it reaches 375°F (190°C).
- Use a candy thermometer or deep-fry thermometer to monitor the temperature.
✅ Pro Tip: Keeping the oil at the right temperature is key to achieving crispy, golden crullers. If the oil is too cold, the crullers will be greasy. If it’s too hot, they’ll brown too quickly without cooking through.
Step 5: Fry the Crullers
1. Carefully Transfer the Dough to the Oil
- To make frying easier, cut small squares of parchment paper under each piped cruller.
- Lift each cruller by the parchment and carefully place it into the hot oil, dough side down.
- After a few seconds, use tongs or a slotted spoon to gently remove the parchment paper from the oil.
✅ Why Use Parchment Paper? It keeps the dough’s shape intact while transferring it to the oil without deflating.
2. Fry Until Golden Brown
- Fry the crullers in small batches (about 2-3 at a time) to avoid overcrowding.
- Cook for about 2 minutes per side, flipping once, until they are puffed up and golden brown.
✅ Pro Tip: If your crullers are browning too quickly, lower the heat slightly to allow the inside to cook through.
3. Drain & Cool
- Use a slotted spoon or tongs to remove the crullers from the oil.
- Transfer them to a paper towel-lined plate to drain excess oil.
- Let them cool slightly before glazing.
At this point, your French Crullers should be beautifully golden, crispy on the outside, and light as air inside! Now, let’s move on to the delicious honey glaze that takes them to the next level.
Step 6: Make the Honey Glaze
A good French Cruller wouldn’t be complete without a light, sweet glaze that melts into the ridges. This simple honey glaze adds a hint of floral sweetness and a beautiful glossy finish.
1. Whisk the Ingredients Together
-
In a small mixing bowl, whisk together:
✔ ½ cup powdered sugar
✔ 1 tbsp honey
✔ 2 tbsp milk -
Mix until the glaze is smooth and pourable.
✅ Pro Tip: If the glaze is too thick, add a little extra milk (1 teaspoon at a time). If it’s too thin, add more powdered sugar until it reaches the right consistency.
Step 7: Glaze the Crullers
1. Dip Each Cruller in the Glaze
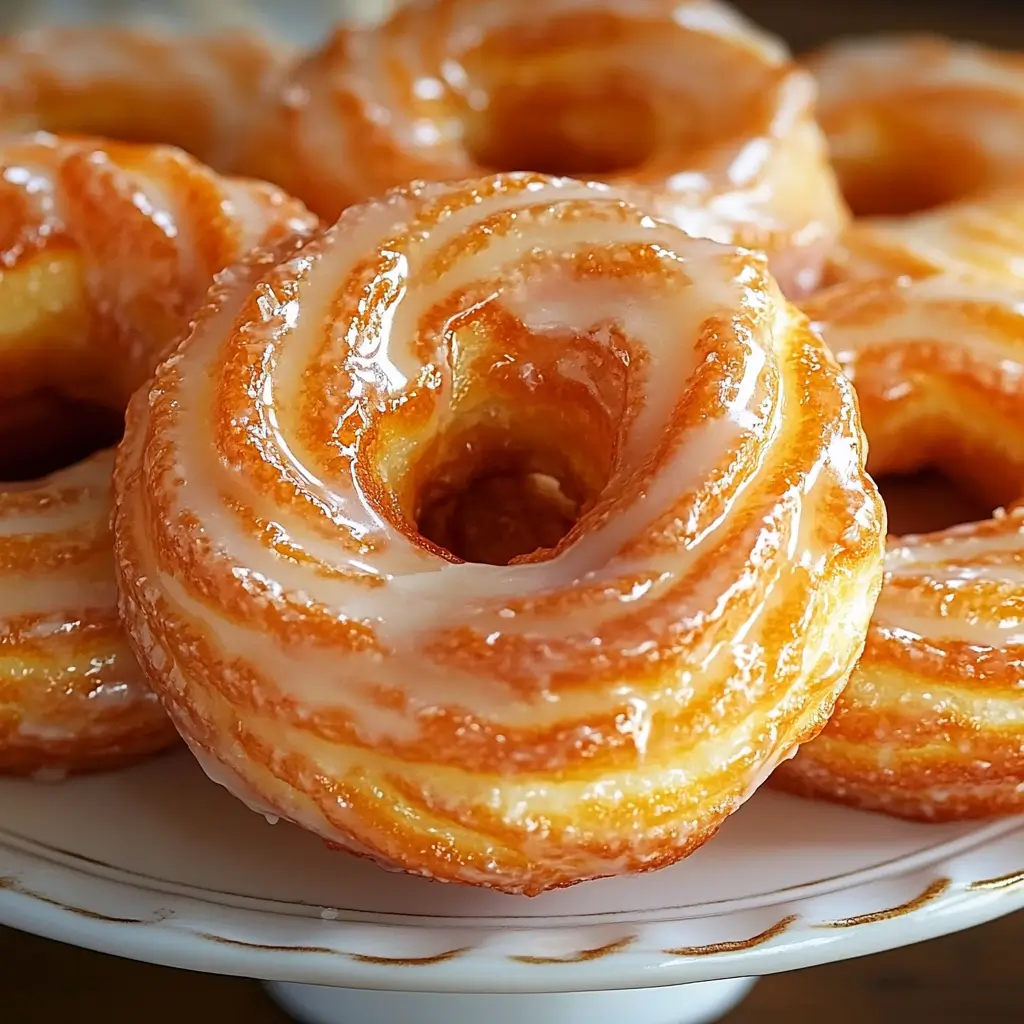
- Once the crullers have cooled slightly, dip the tops into the glaze, letting the excess drip off.
- Place them on a wire rack to set, allowing the glaze to harden slightly.
✅ Pro Tip: For an extra glossy finish, you can double dip the crullers after the first layer sets!
Part 3: Pro Tips, FAQs, and Final Thoughts
Your French Crullers are now light, crispy, perfectly golden, and coated in a delicious honey glaze. Whether you’re making these for a weekend brunch, a special dessert, or just because you’re craving something sweet, they’re sure to impress!
Before you dig in, let’s go over some expert tips, frequently asked questions, and fun variations to help you customize and perfect your crullers every time.
Pro Tips for Perfect French Crullers
1. Keep the Oil Temperature Consistent
- If the oil is too hot, the crullers will brown too quickly on the outside while staying raw inside.
- If it’s too cold, the crullers will absorb too much oil and turn greasy.
- Maintain a steady 375°F (190°C) for the best results.
✅ Pro Tip: Use a deep-fry thermometer to monitor the oil temperature. If the temperature drops after adding crullers, let the oil reheat before frying the next batch.
2. Don’t Overwork the Dough
- Overmixing the eggs into the dough can make it too dense, preventing the crullers from puffing up properly.
- The dough should be smooth, thick, and pipeable, but not runny.
✅ Pro Tip: If the dough is too thick to pipe, add a teaspoon of water at a time until it reaches the right consistency.
3. Use the Right Piping Tip for Classic Cruller Shape
- The signature ridged shape of crullers comes from a large star piping tip.
- A Wilton 1M or Ateco 869 tip works best for achieving defined edges and a classic cruller look.
✅ Pro Tip: If you don’t have a piping bag, use a ziplock bag with the corner cut off, but the ridges may not be as pronounced.
4. Let the Glaze Set for the Best Finish
- Dipping the crullers while still warm allows the glaze to melt slightly into the ridges, creating that glossy bakery-style finish.
- Let them rest on a wire rack for at least 10 minutes so the glaze can set before serving.
✅ Pro Tip: For a shinier, extra-sweet finish, dip the crullers twice in the glaze!
FAQ: Answering Your Cruller Questions
1. Can I bake these instead of frying?
Yes! For a healthier alternative, bake the crullers at 375°F (190°C) for 20-25 minutes, or until golden and puffed up.
✅ Pro Tip: To get a crispy finish, brush the crullers with a little melted butter after baking.
2. How do I store leftover crullers?
- Best fresh: French crullers are best enjoyed the same day they are made.
- Short-term storage: Store leftovers in an airtight container at room temperature for up to 1 day.
- For longer storage: Freeze unglazed crullers for up to 1 month, then reheat and glaze before serving.
✅ Pro Tip: To re-crisp crullers, warm them in the oven at 300°F (150°C) for 5 minutes.
3. Can I make the dough ahead of time?
Yes! You can make the choux pastry dough and store it in the fridge for up to 1 day before frying.
✅ Pro Tip: If the dough becomes too thick, let it sit at room temperature for 10 minutes before piping.
4. Can I use a different glaze?
Absolutely! Here are some delicious alternatives:
✔ Vanilla Glaze – Replace honey with ½ teaspoon vanilla extract.
✔ Chocolate Glaze – Add 2 tablespoons cocoa powder to the powdered sugar.
✔ Maple Glaze – Swap honey for pure maple syrup for a rich, fall-inspired flavor.
✔ Lemon Glaze – Add 1 teaspoon lemon zest and ½ teaspoon lemon juice for a bright citrus twist.
✅ Pro Tip: If you love extra sweetness, try dusting the crullers with powdered sugar instead of glazing them!
Creative Variations to Try
1. Cinnamon Sugar Crullers
- Instead of glazing, toss warm crullers in a mixture of ½ cup sugar + 1 tsp cinnamon for a classic donut-style treat.
2. Pumpkin Spice Crullers
- Add 1 tsp pumpkin spice to the dough and swap the honey glaze for a maple glaze.
3. Espresso-Glazed Crullers
- Add 1 tsp instant espresso powder to the glaze for a coffee-flavored twist.
4. Strawberry Glazed Crullers
- Mix powdered sugar with a few teaspoons of strawberry puree for a fruity glaze.
Serving Suggestions: The Perfect Pairings
French crullers are best served fresh, alongside your favorite drinks or breakfast items. Here’s what pairs well:
✔ Coffee or Espresso – The perfect balance to the sweet glaze.
✔ Hot Chocolate – A decadent treat for cozy mornings.
✔ Fresh Berries – Adds a refreshing, tangy contrast.
✔ Whipped Cream – Light and airy to complement the crullers.
✅ Pro Tip: Want to impress guests? Serve crullers on a tiered pastry stand with different glazes for a bakery-style display!
Final Thoughts: Try These Elegant French Crullers Today!
French Crullers are light, airy, crispy, and covered in a delicious honey glaze, making them one of the most elegant and irresistible pastries you can make at home.
✔ They’re easier than they look – perfect for beginner bakers!
✔ Crispy on the outside, soft on the inside – the best texture combination.
✔ Fully customizable – so many glaze and topping options!
Now it’s your turn! Did you try this recipe? Maybe you experimented with a different glaze or added a fun twist? Let me know in the comments—I’d love to hear how yours turned out!
And if you love bakery-style treats, be sure to check out my other homemade pastry recipes—because homemade always tastes better!
Happy baking! 😊
PrintFrench Crullers Recipe – A Deliciously Light & Crispy Treat
These light, airy, and perfectly golden French crullers are made with a classic choux pastry, fried until crisp, and dipped in a sweet honey glaze. A delicate and elegant pastry perfect for breakfast or a sweet treat!
- Prep Time: 20 minutes
- Cook Time: 4 minutes per batch
- Total Time: About 1 hour
- Yield: 12 crullers 1x
Ingredients
For the Crullers:
- 1 cup water
- 6 tbsp unsalted butter
- 1 tbsp sugar
- ¼ tsp salt
- 1 cup all-purpose flour
- 3 large eggs
- 1 egg white
- Vegetable oil, for frying
For the Honey Glaze:
- ½ cup powdered sugar
- 1 tbsp honey
- 2 tbsp milk
Instructions
1️⃣ Make the Choux Dough: In a medium saucepan, combine water, butter, sugar, and salt. Bring to a boil over medium heat.
2️⃣ Add Flour: Reduce heat to low, add the flour all at once, and stir vigorously with a wooden spoon until the mixture forms a dough and pulls away from the sides of the pan (about 1 minute).
3️⃣ Incorporate Eggs: Remove from heat and let the dough cool for a few minutes. Beat in the eggs and egg white, one at a time, ensuring each is fully incorporated before adding the next. The dough should be smooth and glossy.
4️⃣ Prepare for Frying: Transfer the dough to a piping bag fitted with a large star tip (#846 or similar).
5️⃣ Heat Oil: In a deep fryer or large pot, heat vegetable oil to 375°F (190°C).
6️⃣ Pipe & Fry: Pipe rings of dough directly onto parchment squares for easy handling, then carefully place them into the hot oil. Fry in batches until golden brown, about 2 minutes per side.
7️⃣ Drain: Transfer crullers to a paper towel-lined plate to drain excess oil.
8️⃣ Prepare the Glaze: In a bowl, whisk together powdered sugar, honey, and milk until smooth.
9️⃣ Glaze & Set: Dip each cruller into the honey glaze, then place on a wire rack to set.
Notes
- Want extra crispiness? Let the piped dough rest in the fridge for 15 minutes before frying.
- No piping bag? Use a zip-top bag with the corner cut off or shape the dough into rings by hand.
- Alternative Glazes: Try vanilla glaze, chocolate glaze, or maple glaze for different flavors!