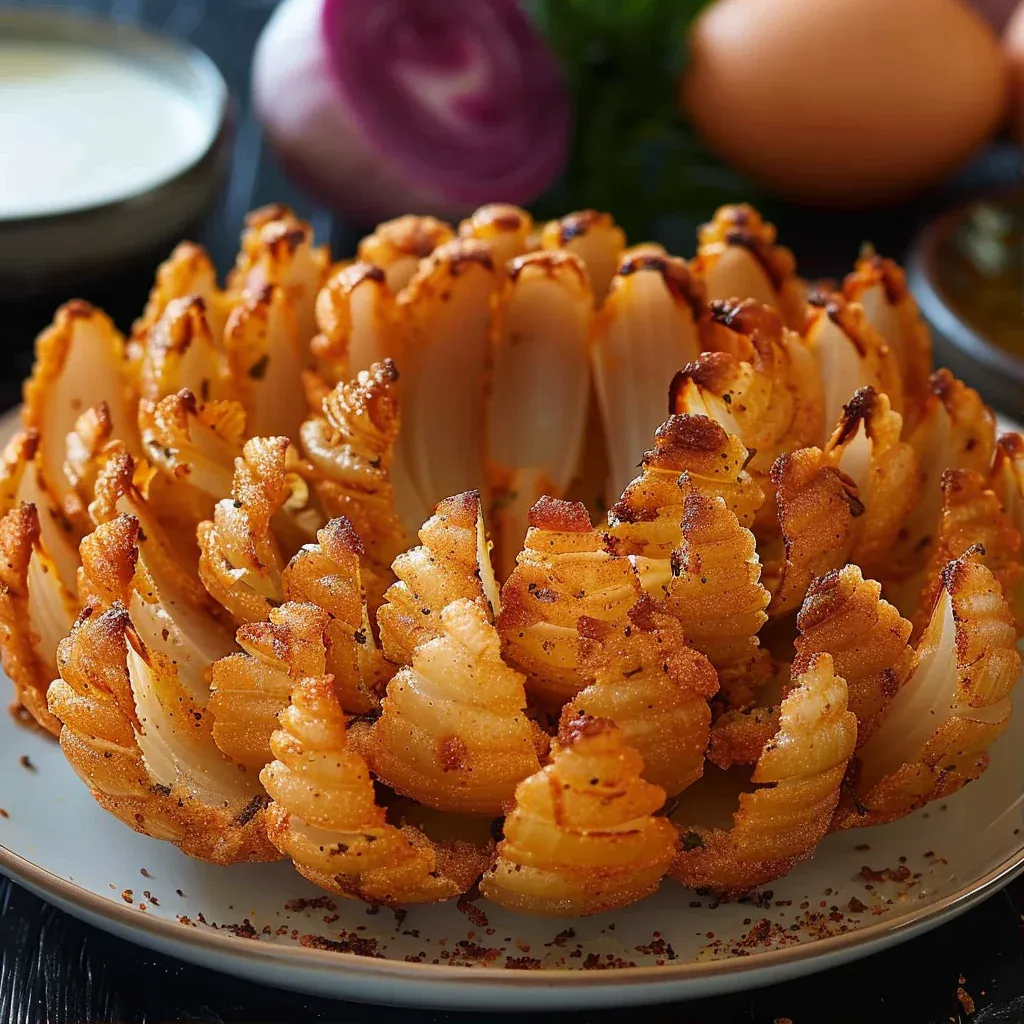
Homemade Bloomin’ Onion is a delightful treat that brings the flavors of a beloved restaurant right into your kitchen. Imagine a large, sweet Vidalia onion transformed into a stunning flower, its petals crisped to perfection and ready to be dipped in a zesty sauce. The aroma wafts through your home, inviting everyone to gather around the table as you unveil this masterpiece. Whether it’s a Sunday family dinner or a gathering with friends, a blooming onion is sure to impress, showcasing your culinary craftsmanship and attention to detail.
- Why This Recipe Is Worth Your Time
- Main Ingredients
- Tools Needed
- Step-by-Step Instructions
- Pro Tips for Perfect Bloomin’ Onion
- Serving Ideas and Pairings
- Variations and Swaps for Bloomin’ Onion
- Leftovers and Storage Tips
- Nutrition Notes
- Frequently Asked Questions About Bloomin’ Onion
Why This Homemade Bloomin’ Onion Is Worth Your Time
The charm of a Homemade Bloomin’ Onion lies not just in its appearance but also in the incredible balance of flavors and textures. The sweet onion, when fried, develops a golden crust that contrasts beautifully with the tender petals inside. The careful seasoning of smoked paprika, garlic powder, and oregano elevates the dish, giving it a depth that turns a simple appetizer into an artisan creation. The technique of carefully cutting the onion to create its signature bloom requires a bit of practice, but the satisfaction of mastering this classic method is immensely rewarding. Each bite provides a delightful crunch followed by the sweet onion’s natural juiciness, making it a show-stopping addition to any meal or party spread.
Main Ingredients for Homemade Bloomin’ Onion
The quality of your ingredients is paramount in achieving the perfect bloomin’ onion. Here’s a breakdown of each component and its role in this recipe:
- 1 large Vidalia or sweet onion: This onion variety is essential for its mild sweetness and ability to caramelize beautifully when fried.
- 2 ½ cups all-purpose flour: Provides the base for the coating, creating that signature crispy texture.
- 2 tsp smoked paprika: Adds a subtle smokiness and vibrant color to the coating.
- 1 tsp garlic powder: Enhances the flavor profile with a warm, savory note.
- ½ tsp dried oregano: Introduces a hint of earthiness that complements the onion’s sweetness.
- 2 large eggs: Helps bind the coating to the onion, ensuring an even crust.
- 1 cup whole milk: Contributes to the richness of the egg wash, adding depth to the flavor.
- Vegetable oil for deep frying: Essential for achieving that crispy, golden finish.
- Salt and black pepper to taste: Enhances all the other flavors, making them pop.
Tools Needed for Homemade Bloomin’ Onion
| Tool | Purpose / what it helps with |
| Sharp knife | For slicing and cutting the onion into petals. |
| Mixing bowls | For combining the flour mixture and egg wash. |
| Whisk | To blend the egg wash ingredients smoothly. |
| Deep pot or fryer | For frying the onion to a perfect crisp. |
| Cooking thermometer | To ensure the oil reaches the ideal frying temperature. |
| Slotted spoon or spider | For safely lowering and removing the onion from hot oil. |
| Paper towels | For draining excess oil after frying. |
Step-by-Step Instructions for Homemade Bloomin’ Onion
Creating a Homemade Bloomin’ Onion is a labor of love, but the results are absolutely worth it. Follow these detailed steps to achieve the best results:
- Begin by slicing off the top of the onion and peeling away the outer skin. Position the onion root-side down and make 4 vertical cuts, ensuring that the root remains intact. Continue making cuts between the segments until you achieve 16 evenly spaced petals. This step is crucial; take your time to ensure the cuts are even, as this will help the onion bloom beautifully.
- Gently immerse the onion in ice water for 10 minutes to encourage the petals to open, and then pat it completely dry. This soaking process helps the petals separate slightly, which enhances the blooming effect during frying.
- In a large mixing bowl, combine the flour, smoked paprika, garlic powder, dried oregano, salt, and black pepper and whisk them together. This blend of spices is what gives the onion its distinctive flavor and color.
- In another bowl, whisk the eggs and whole milk together until well blended. This egg wash will provide a moist coating that the flour can adhere to.
- Take the onion and dip it into the flour mixture, making sure that each petal is coated. Next, dip it into the egg wash, then coat it thoroughly in the flour mixture a second time. This double coating is key for that extra crunch.
- Heat vegetable oil in a deep pot to 375°F. Carefully lower the onion into the hot oil, with the root-side facing up. The high temperature is essential for achieving that crispy exterior.
- Fry the onion for 3 minutes, then carefully flip it and fry for an additional 3 minutes, or until it turns golden brown and crispy. Keep an eye on the color; it should be a beautiful golden hue.
- Once cooked, drain the onion on paper towels and serve warm, paired with a spicy dipping sauce. The contrast of the hot, crispy onion with a cool dipping sauce is an irresistible combination.
Pro Tips for Perfect Homemade Bloomin’ Onion
- Choose the freshest Vidalia or sweet onion you can find; it makes a significant difference in flavor.
- Make sure your oil is at the right temperature before frying; too low and the onion will absorb oil, too high and it will burn.
- For an extra crispy coating, consider letting the coated onion rest for a few minutes before frying.
- Experiment with seasoning variations in the flour, such as adding cayenne pepper for heat or Parmesan cheese for extra flavor.
- When frying, handle the onion gently to prevent breaking the petals.
- Serve immediately for the best texture; fried foods are always best enjoyed fresh.
- Pair your homemade blooming onion with a tangy dipping sauce for an added layer of flavor.
Serving Ideas and Pairings
Elevate your dining experience by considering these delightful sides and accompaniments:
- Spicy dipping sauce made from mayonnaise and sriracha for a creamy, zesty kick.
- Classic ranch dressing to complement the onion’s sweetness.
- Fresh vegetable sticks (carrots, celery, cucumber) for a refreshing crunch.
- A crisp garden salad to balance the richness of the fried onion.
- Chilled beer or a fruity soda to wash it down.
- Garlic bread or cheesy breadsticks for a hearty side.
Variations and Swaps for Homemade Bloomin’ Onion
Restaurant-Style Version
To replicate the restaurant experience, serve your bloomin’ onion with a selection of dipping sauces like blue cheese, honey mustard, and a spicy ranch. You can also sprinkle some shredded cheese on top before serving for an indulgent touch.
Rustic Home-Cook Version
For a more rustic feel, try a thicker batter by adding a bit of cornmeal to the flour mixture. This will give the onion a heartier crunch and a beautiful texture.
Make-Ahead Version
Prep the onion in advance, coat it, and then freeze it. When you’re ready to fry, just drop it straight into the hot oil from the freezer—this helps maintain its shape and texture.
Seasonal Ingredient Version
Incorporate seasonal herbs into the flour mixture, like fresh thyme or rosemary, to give your bloomin’ onion a unique twist that reflects the time of year.
Leftovers and Storage Tips
- Leftover bloomin’ onion can be stored in an airtight container in the refrigerator for up to 2 days.
- Reheat in an oven at 350°F for about 10-15 minutes to restore some crispiness.
- While freezing is possible, it’s best consumed fresh, as the texture may not hold up after thawing.
Nutrition Notes
A serving of Homemade Bloomin’ Onion can range from 200 to 300 calories depending on the size and how much oil is absorbed during frying. The primary macronutrients include carbohydrates from the flour and fiber from the onion, with a modest amount of protein from the eggs and milk. To adjust for dietary preferences, you can use alternative flours like almond or coconut flour, but keep in mind that this may alter the final texture and flavor of the coating while still maintaining artisan quality.
Frequently Asked Questions About Homemade Bloomin’ Onion
What is a Homemade Bloomin’ Onion?
A Homemade Bloomin’ Onion is a large, sweet onion that is cut to resemble a flower, coated in a seasoned batter, and deep-fried until crispy. It is typically served with a dipping sauce.
Can I bake a Homemade Bloomin’ Onion instead of frying it?
While frying provides the best texture, you can bake it at high heat (around 425°F) for about 20-25 minutes. Just note that the results will differ in crispiness.
What type of onion is best for making a Bloomin’ Onion?
A large Vidalia or sweet onion is ideal due to its mild flavor and sweetness, which enhances the overall taste of the dish.
How do I prevent the petals from breaking when cutting the onion?
Make sure to use a sharp knife and cut gently, ensuring you do not cut all the way through the root. This will help keep the petals intact during the frying process.
Can I prepare the Bloomin’ Onion in advance?
Yes, you can prepare and coat the onion ahead of time. Store it in the refrigerator until you are ready to fry it for the best results.
With its impressive presentation and delightful crunch, a Homemade Bloomin’ Onion is a wonderful dish to try. I encourage you to gather your ingredients and embark on this culinary adventure. When you master this artisan recipe, you’ll not only be rewarded with a delicious snack but also the joy of creating something special for your loved ones. Enjoy the process and savor every bite of your homemade bloomin’ onion!

Bloomin' Onion Bliss
Ingredients
Method
- Begin by slicing off the top of the onion and peeling away the outer skin. Position the onion root-side down and make 4 vertical cuts, ensuring that the root remains intact. Continue making cuts between the segments until you achieve 16 evenly spaced petals.
- Gently immerse the onion in ice water for 10 minutes to encourage the petals to open, and then pat it completely dry.
- In a large mixing bowl, combine the flour, smoked paprika, garlic powder, dried oregano, salt, and black pepper and whisk them together.
- In another bowl, whisk the eggs and whole milk together until well blended.
- Take the onion and dip it into the flour mixture, making sure that each petal is coated. Next, dip it into the egg wash, then coat it thoroughly in the flour mixture a second time.
- Heat vegetable oil in a deep pot to 375°F. Carefully lower the onion into the hot oil, with the root-side facing up.
- Fry the onion for 3 minutes, then carefully flip it and fry for an additional 3 minutes, or until it turns golden brown and crispy.
- Once cooked, drain the onion on paper towels and serve warm, paired with a spicy dipping sauce.


")
