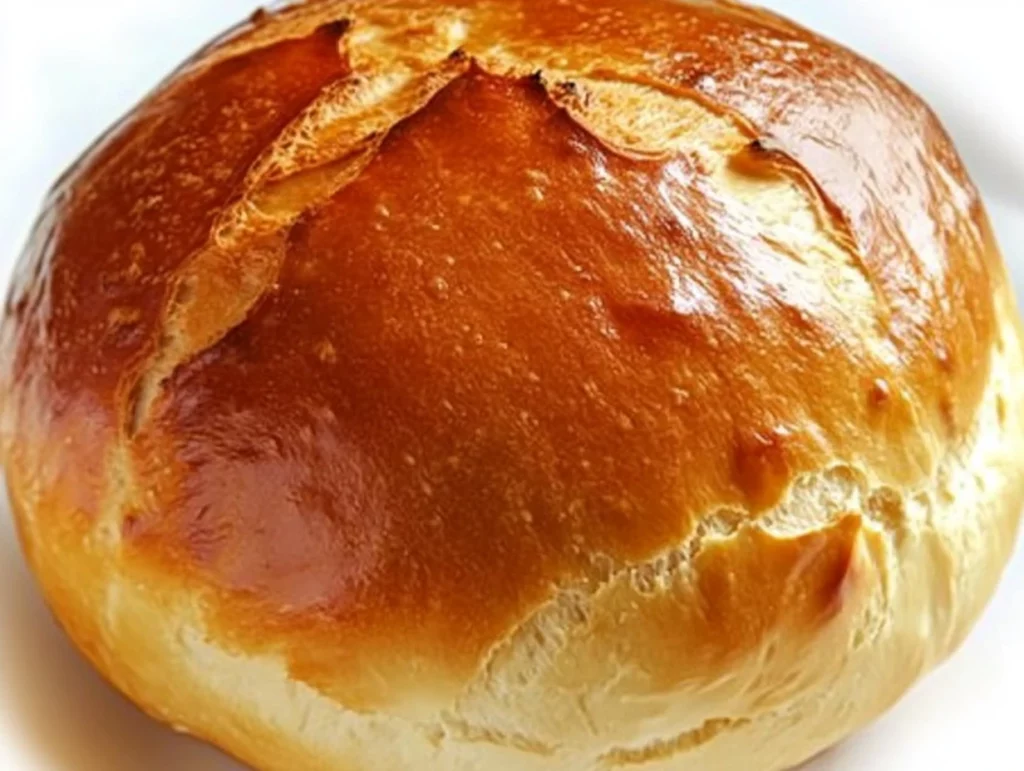
There’s something incredibly satisfying about the smell of fresh bread baking in the kitchen. The warm aroma that fills your home, the anticipation as the loaf cools down, and the simple pleasure of slicing into a soft, golden piece of homemade bread. But let’s be honest—making bread from scratch can feel a bit daunting. Kneading dough, waiting for it to rise, and keeping an eye on the oven to make sure it doesn’t burn… it’s a lot.
But what if I told you that you could make fresh bread without an oven at all? Yes, you can create a soft, warm loaf right in your slow cooker with just a few basic ingredients. This Crockpot bread recipe is a game changer. It requires little hands-on time and lets you enjoy homemade bread without the stress of traditional baking.
The slow cooker method makes the bread wonderfully soft and moist on the inside, while the outside forms a delicate, golden crust. Plus, with a few optional toppings like herbs or cheese, you can customize the bread to match any flavor profile you’re craving. So let’s get started!
Ingredients You’ll Need
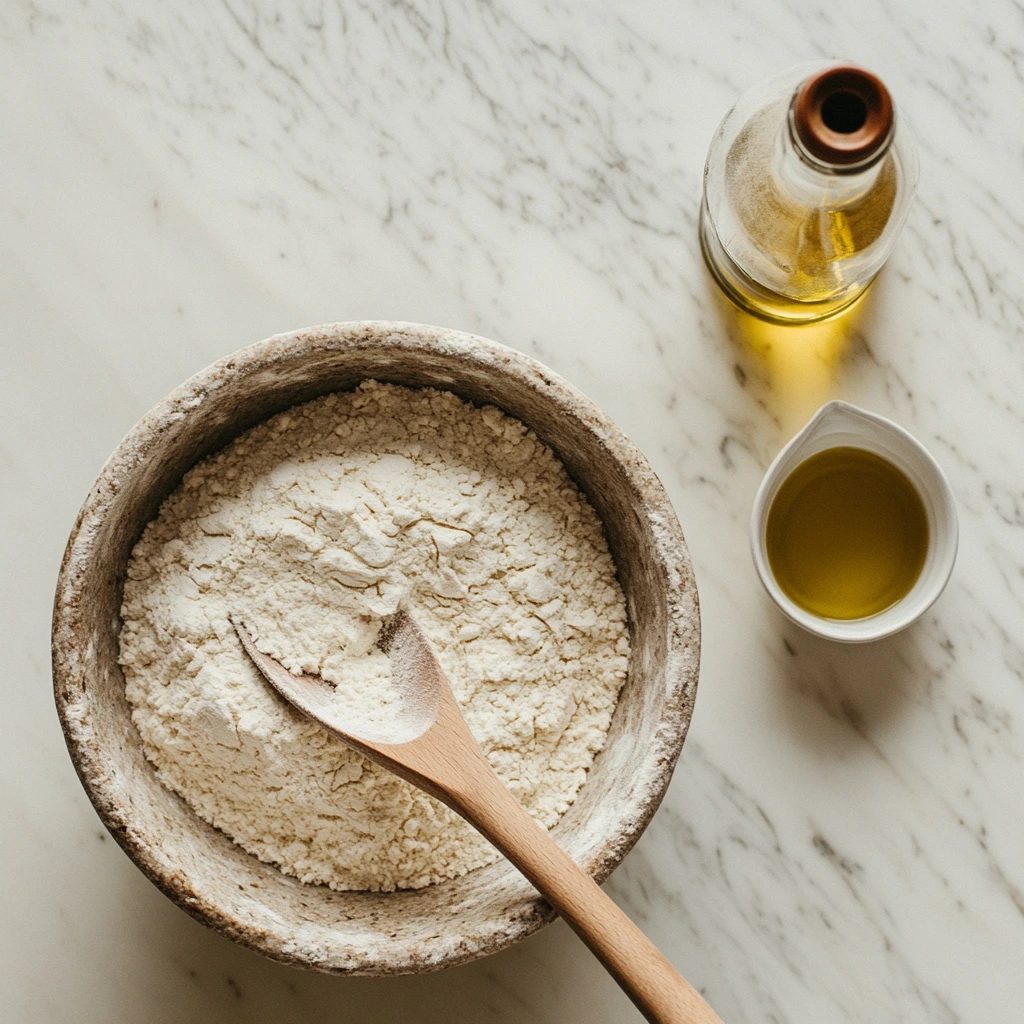
The beauty of this recipe lies in its simplicity. You only need a few basic ingredients to create a fresh loaf of bread:
-
3 cups all-purpose flour: This is the foundation of your bread. It gives the loaf a soft, tender texture that’s perfect for sandwiches or just enjoying with a bit of butter.
-
1 packet active dry yeast (2 1/4 teaspoons): The yeast helps the bread rise and gives it that airy, fluffy texture.
-
1 teaspoon salt: This balances out the flavors and enhances the taste of the bread.
-
1 1/2 cups warm water (110°F/43°C): Warm water activates the yeast, setting the stage for your dough to rise.
-
2 tablespoons olive oil: This adds moisture and a hint of richness to the bread.
Optional toppings to customize your bread:
-
Fresh or dried herbs (like rosemary, thyme, or oregano) for a flavorful twist.
-
Seeds (such as sesame, poppy, or sunflower seeds) for added crunch.
-
Grated cheese for a cheesy, golden crust that will make your bread irresistible.
You can play around with these toppings depending on your taste or what you have in your pantry. Whether you like your bread herby, cheesy, or seed-studded, there’s plenty of room to make it your own.
Step-by-Step Guide to Making Crockpot Bread
Let’s break this down into simple, easy-to-follow steps. By the end of this, you’ll have a warm, fluffy loaf of bread that you can proudly say you made yourself. Plus, you didn’t have to turn on the oven!
Step 1: Prepare the Dough
Start by combining the dry ingredients. In a large mixing bowl, add the 3 cups of flour, 1 teaspoon of salt, and 1 packet of active dry yeast. Give it a quick stir to mix everything together.
Now, it’s time to add the wet ingredients. Gradually pour in 1 1/2 cups of warm water and 2 tablespoons of olive oil while stirring with a wooden spoon or spatula. Keep stirring until the dough starts to come together. Once it does, turn the dough out onto a lightly floured surface and begin kneading.
Knead the dough for about 8–10 minutes. This might feel a little tiring, but it’s a crucial step! Kneading helps develop the gluten, which gives your bread structure and chewiness. If the dough feels sticky, sprinkle a little more flour, but don’t add too much. You want the dough to be soft, but not too sticky to handle.
After kneading, the dough should feel smooth and elastic. It’s now ready for the next step—allowing it to rise.

Step 2: Let the Dough Rise
Now comes the waiting part. This is where the magic happens. Place the kneaded dough into a lightly greased bowl and cover it with a clean kitchen towel or plastic wrap. Let it rise in a warm, draft-free place for about 1 to 1.5 hours. You’ll know it’s ready when the dough has doubled in size and looks puffy and airy. This means the yeast has been activated and your dough is ready for the Crockpot.
If you’re wondering, “How warm should the space be?”, a good rule of thumb is around 75°F (24°C). If your kitchen is cooler, you can place the dough in a slightly warmer spot, like near the oven or on top of the fridge.
Now that your dough is nicely risen, it’s time to get the Crockpot ready.
How to Finish Your Crockpot Bread and Make It Extra Special
Now that your dough has risen beautifully and you’re just about ready to bake, it’s time to take things to the next level. The best part about this Crockpot bread is that you don’t need to babysit it like you would with an oven. Plus, you can customize it with whatever toppings you like—herbs, cheese, or seeds—to make it even more delightful.
Let’s move on to the next steps!
Step 3: Prepare the Crockpot
Before you can bake your bread, you need to prepare the slow cooker. This is a crucial step to ensure your bread comes out easily and doesn’t stick to the sides.
Start by lining the bottom of your slow cooker with parchment paper. This helps the bread from sticking to the surface and makes cleanup a breeze. After the parchment paper is in place, lightly grease it with a bit of olive oil or butter. You can also dust it with a little flour, just to be extra sure that your bread won’t stick.
Greasing and lining the Crockpot may seem like a small step, but it’s essential for getting that perfect, easy-to-remove loaf.

Step 4: Shape and Add Toppings
Now comes the fun part—shaping your dough and adding any fun toppings! First, gently punch down the dough to release any air bubbles that have formed during the rise. This will ensure your bread has an even texture throughout.
Once the dough is deflated, shape it into a round loaf. Don’t worry about making it perfect—just aim for a nice round shape that will fit comfortably inside your slow cooker. The dough should hold its shape but still be soft and a bit sticky, which is exactly what you want.
If you want to get creative with flavor, now is the time to add some extra ingredients to the top of the bread. You can sprinkle fresh or dried herbs like rosemary, thyme, or oregano onto the surface of the loaf for a fragrant, herby touch. Alternatively, you can sprinkle seeds like sesame, sunflower, or poppy seeds for added crunch.
Feeling extra indulgent? Grate some cheese—parmesan, cheddar, or even mozzarella—and sprinkle it over the top for a cheesy, golden finish. The cheese will melt into the crust as the bread cooks, giving it a deliciously savory flavor.
Once your loaf is shaped and topped to your liking, gently place it into the prepared Crockpot. The slow cooker will work its magic and cook the bread to perfection.
Step 5: Cook the Bread
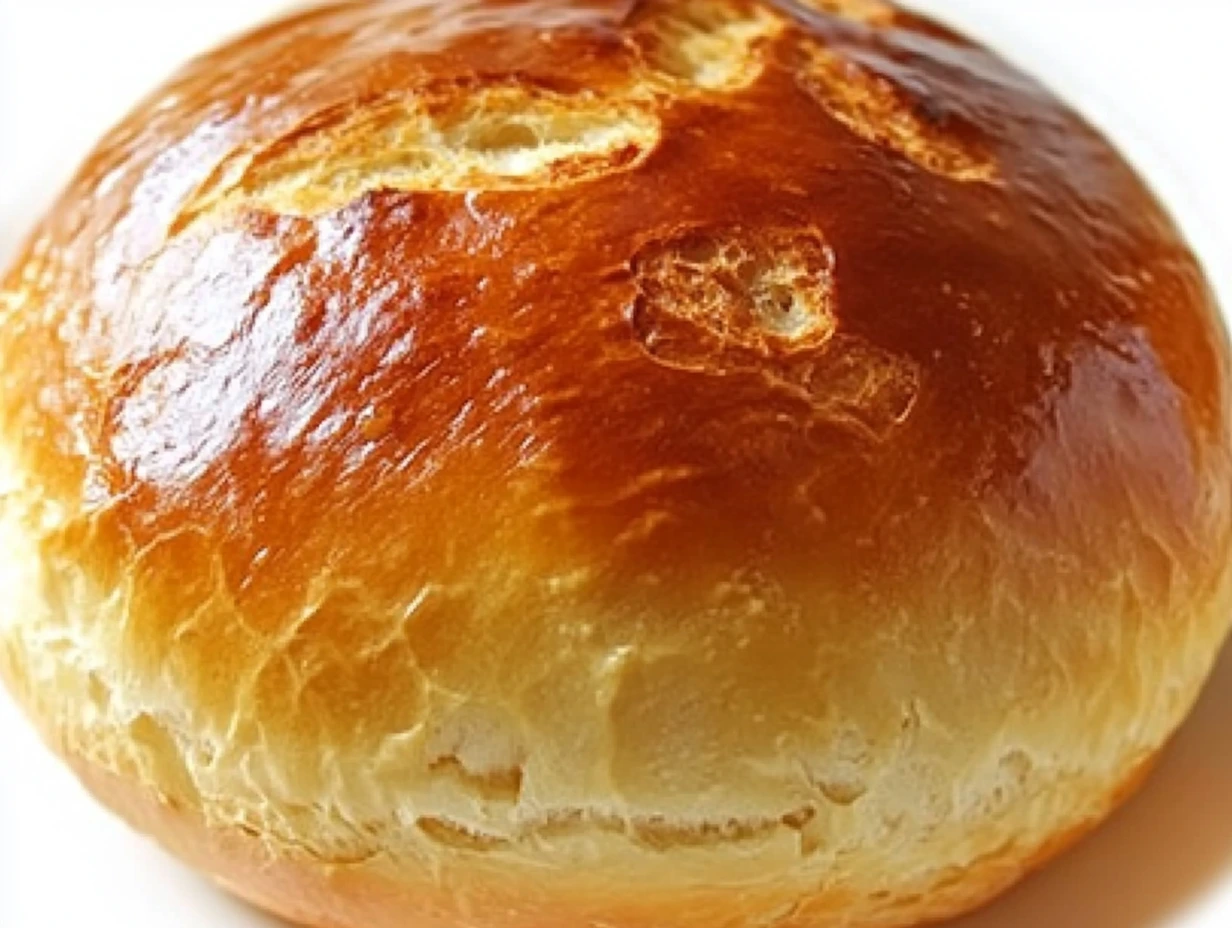
Cover your slow cooker with the lid and set it to cook on high for about 2 to 2.5 hours. I know that might sound like a long time, but trust me—it’s worth the wait. The bread will cook low and slow, becoming perfectly golden on the outside and soft and fluffy on the inside.
How do you know when it’s done? The bread is ready when the internal temperature reaches 190°F (88°C). You can check this using a kitchen thermometer, which is the most reliable way to ensure the bread is fully cooked. The loaf should also feel firm to the touch and the bottom should be golden brown. Don’t worry if it’s a little softer than a traditional oven-baked loaf—it’s supposed to be that way, and the texture is part of the charm.
If you’re anything like me and love a crispy, crunchy top on your bread, here’s a little trick you can try once the bread is done cooking.
Step 6: Crisp the Crust (Optional)
If you want your bread to have an extra-crispy, golden top, transfer it carefully from the slow cooker to a baking sheet. Then, place it under the broiler in your oven for about 2-3 minutes. This will give the bread a beautiful, crispy finish that’s just irresistible.
Be sure to keep a close eye on it while it’s under the broiler! Bread can go from perfectly golden to burnt in a matter of seconds, so don’t walk away. Once it’s reached your desired level of crispiness, remove it from the oven and let it cool on a wire rack.
Step 7: Cool and Serve
Now comes the hardest part—waiting! Let the bread cool on a wire rack for at least 20 minutes before slicing. This allows the bread to set and makes it easier to cut into neat slices. I know it’s tempting to slice into it right away, but trust me, waiting just a little bit will make all the difference.
Once it’s cooled slightly, slice it up and enjoy. Whether you prefer it with a little butter, as a sandwich, or just on its own, this Crockpot bread is bound to be a hit. It’s soft, fluffy, and packed with flavor, and the best part is you made it with minimal effort and no oven required.
FAQ: Your Crockpot Bread Questions Answered
Making bread in a slow cooker is a fun and rewarding experience, but it can come with a few questions—especially if this is your first time baking bread this way. To help you get the most out of this recipe, I’ve gathered some of the most common questions I’ve received about making Crockpot bread and answered them here.
1. Can I use whole wheat flour instead of all-purpose flour?
Absolutely! You can substitute some or all of the all-purpose flour with whole wheat flour. However, keep in mind that whole wheat flour absorbs more liquid than all-purpose flour, so you may need to add a little extra water. Start by replacing half of the all-purpose flour with whole wheat and see how the dough feels. You may need to add an extra tablespoon or two of warm water to get the right consistency.
2. What if I don’t have active dry yeast?
If you don’t have active dry yeast, you can substitute it with instant yeast. The great thing about instant yeast is that it doesn’t require proofing, so you can skip the step of dissolving it in warm water. Just mix the instant yeast directly with the dry ingredients and proceed with the recipe as usual. The dough may rise slightly faster, but the result will still be just as delicious!
3. How can I adjust the cooking time if I have a smaller or larger Crockpot?
Cooking time can vary depending on the size and heat of your slow cooker. For smaller Crockpots, the bread may cook faster, so start checking the bread around the 2-hour mark. On the other hand, if you have a larger slow cooker, it may take a little longer to cook. In this case, keep an eye on the bread and check for doneness by testing the internal temperature. If the internal temperature is below 190°F (88°C), let it cook for a little longer.
4. Can I make this recipe gluten-free?
Yes! To make this recipe gluten-free, use a gluten-free all-purpose flour blend. Many gluten-free flour blends are designed to work as a 1:1 replacement for regular all-purpose flour, so you can substitute it directly. However, gluten-free doughs often require a bit more liquid, so feel free to add an extra tablespoon or two of water to get the dough to the right consistency. You may also want to add a teaspoon of xanthan gum to help with structure if it’s not already included in your gluten-free flour blend.
5. Can I double this recipe to make more bread?
Yes, you can easily double the recipe to make a larger loaf. However, keep in mind that the cooking time might be slightly longer if you make a larger batch. If your Crockpot is large enough to accommodate the doubled recipe, just make sure to check the bread’s internal temperature before calling it done. If you’re unsure, it’s better to start checking the bread at the 2.5-hour mark to avoid overcooking it.
6. Can I freeze this bread for later?
Yes, you can absolutely freeze this bread! Once the bread has cooled completely, wrap it tightly in plastic wrap or aluminum foil, and then place it in a freezer-safe bag or container. To thaw, simply leave it at room temperature for a few hours or heat it in the oven for about 10–15 minutes at 350°F (175°C) to bring it back to life. The bread should taste just as fresh as the day you made it!
7. How do I store leftover Crockpot bread?
Store any leftover bread in an airtight container at room temperature for up to 3–4 days. If you find that the bread starts to get a bit stale, you can warm it up in the oven or toaster to bring back some of that fresh-baked softness. If you want to keep it longer, you can freeze the bread (as mentioned above) to preserve it for up to 2–3 months.
Conclusion: Why You’ll Love This Crockpot Bread Recipe
Making bread in a Crockpot is a brilliant way to enjoy fresh, homemade bread without having to fuss with an oven. This recipe is perfect for those who are short on time or don’t have access to an oven but still want to enjoy the comforting, warm goodness of freshly baked bread. Plus, the slow cooker does all the work for you, so you can spend your time doing other things while the bread rises and bakes.
Whether you choose to customize your bread with herbs, cheese, or seeds, or keep it simple with just the basics, this Crockpot bread recipe is sure to become a favorite in your kitchen. The soft, tender texture, the slightly crispy crust, and the undeniable aroma are the ultimate reward for minimal effort.
So, grab your Crockpot, gather your ingredients, and get ready to enjoy the magic of homemade bread—no oven required! Let me know how your loaf turns out in the comments, and feel free to share any fun variations you try. I’d love to hear how you make this recipe your own. Happy baking!
PrintCrockpot Bread Recipe
This easy Crockpot bread recipe results in a warm, soft, and fragrant loaf of bread made right in your slow cooker. With simple ingredients like flour, yeast, olive oil, and warm water, you can bake fresh homemade bread without needing an oven. The slow cooking method ensures that the bread comes out with a lovely texture—moist on the inside with a soft, golden crust. You can customize the loaf by adding your favorite herbs, seeds, or cheese for a unique twist on this classic bread.
- Author: Mark's Recipe
Ingredients
For the Bread:
3 cups all-purpose flour: The base of the bread, yielding a soft and tender loaf.
1 packet active dry yeast (2 1/4 teaspoons): Helps the bread rise.
1 teaspoon salt: Balances the flavor.
1 1/2 cups warm water (110°F/43°C): Activates the yeast.
2 tablespoons olive oil: Adds moisture and flavor.
Optional Toppings:
Fresh or dried herbs like rosemary, thyme, or oregano.
Seeds such as sesame, poppy, or sunflower seeds.
Grated cheese for a cheesy crust.
Instructions
Prepare the Dough
In a large mixing bowl, combine the flour, salt, and yeast. Gradually add the warm water and olive oil while mixing with a wooden spoon or spatula. Continue mixing until the dough starts to come together, and then turn it out onto a lightly floured surface. Knead the dough for about 8–10 minutes, or until it becomes smooth and elastic. This process helps develop the gluten and will give your bread structure.
Let the Dough Rise
Place the kneaded dough into a lightly greased bowl, then cover it with a clean kitchen towel or plastic wrap. Let it rise in a warm, draft-free place for 1–1.5 hours, or until it doubles in size. The dough should look puffy and airy when it’s ready, indicating that the yeast has been activated and is working properly.
Prepare the Crockpot
Line the bottom of your slow cooker with parchment paper to prevent sticking. Lightly grease the parchment paper or sprinkle it with a bit of flour. This step is important as it ensures the bread doesn’t stick to the sides, making it easier to remove once it’s done.
Shape and Add Toppings
Punch down the risen dough to release any air bubbles and shape it into a round loaf. Carefully place the loaf into the prepared crockpot. If you’d like to add extra flavor, sprinkle the top with herbs like rosemary, thyme, or oregano, or add seeds such as sesame, poppy, or sunflower seeds. For a cheesy crust, sprinkle some grated cheese on top. These toppings will bake into the bread, creating a delightful texture and flavor.
Cook the Bread
Cover the crockpot with its lid and cook the bread on high for 2–2.5 hours. The bread is done when the internal temperature reaches 190°F (88°C) and the bread feels firm to the touch. The bottom should be golden brown, and the loaf should have a slightly crispy edge, while remaining soft and fluffy inside.
Crisp the Crust (Optional)
If you prefer a crustier top, transfer the cooked bread to a baking sheet and place it under the oven broiler for 2–3 minutes. This step will give the top a beautiful, golden-brown finish. Be sure to keep a close eye on it to prevent it from burning.
Cool and Serve
Once the bread is done, allow it to cool on a wire rack for at least 20 minutes before slicing. This step helps the texture set properly, and it allows the bread to be easier to slice. Enjoy your fresh, homemade bread with butter, as a sandwich, or alongside your favorite meal.
Notes
This recipe is a fantastic way to enjoy homemade bread with minimal effort, and it’s perfect for those who don’t have access to an oven or simply prefer the convenience of a slow cooker. The bread’s flavor can be adjusted by experimenting with different herbs, cheeses, and seeds. If you want to make the loaf extra hearty, you can also try adding a bit of whole wheat flour or oats to the dough. Just keep in mind that the cooking time may vary slightly depending on the size and heat of your slow cooker.


")
