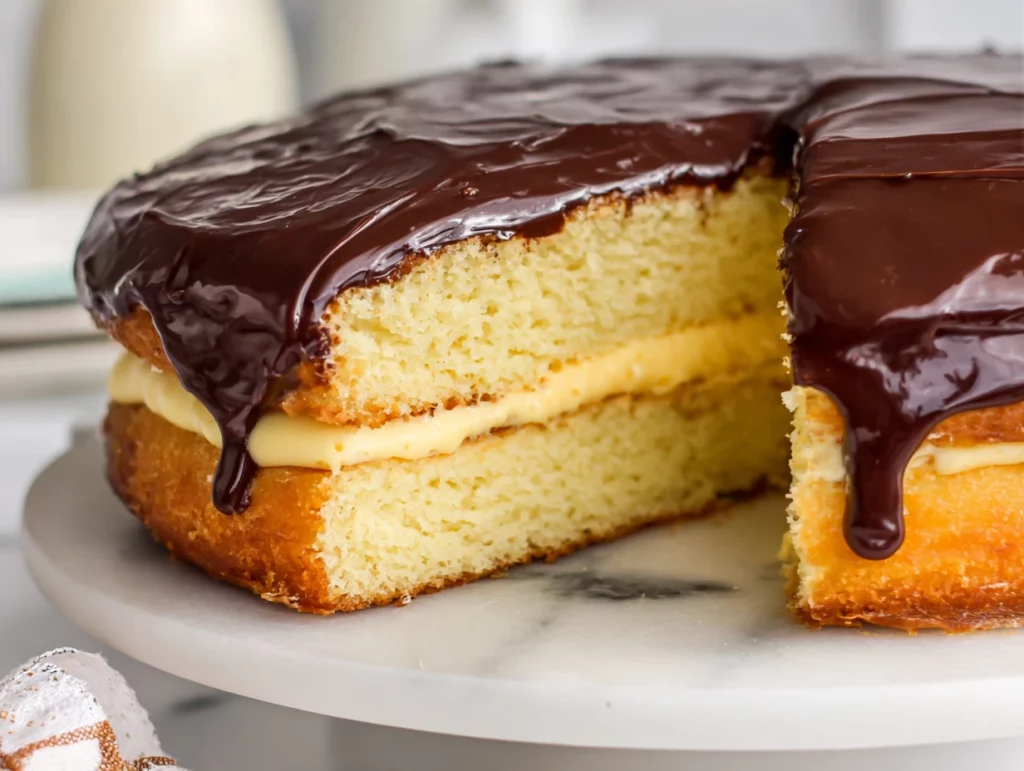
When I first made Boston Cream Pie from scratch, I remember thinking, How can something so elegant be so deceptively simple? It’s got everything you want in a dessert—light sponge cake, rich vanilla pastry cream, and that glossy chocolate ganache that just drips with decadence. And the kicker? It’s not even technically a pie!
This cake has been charming dessert lovers since the mid-1800s, with its origins rooted in—you guessed it—Boston. It’s the kind of showstopper you bring to a family celebration or a cozy Sunday dinner. There’s just something about those clean layers and that luxurious topping that makes it feel extra special.
I love this recipe because it doesn’t rely on any fancy tools or hard-to-find ingredients. You’ve probably already got most of this in your pantry. Plus, each component can be made ahead, so there’s no need to stress if you’re prepping for guests.
Let’s dive right in with the first few steps to get that perfect, fluffy sponge cake and smooth, silky pastry cream started.
LIGHT SPONGE CAKE AND LUXURIOUS PASTRY CREAM
Making Boston Cream Pie from scratch may seem like a tall order, but it’s really just about taking it one step at a time. In this first part, we’ll tackle the two most foundational elements: the sponge cake and the pastry cream. Once you’ve got these prepped and chilling, assembling the final dessert is a breeze.
Ingredients You’ll Need
For the sponge cake:
-
1 cup all-purpose flour
-
1 teaspoon baking powder
-
¼ teaspoon salt
-
4 large eggs
-
1 cup granulated sugar
-
¼ cup whole milk
-
2 tablespoons unsalted butter
-
1 teaspoon vanilla extract
For the pastry cream:
-
2 cups whole milk
-
½ cup granulated sugar
-
¼ cup cornstarch
-
4 large egg yolks
-
2 tablespoons unsalted butter
-
1 teaspoon vanilla extract
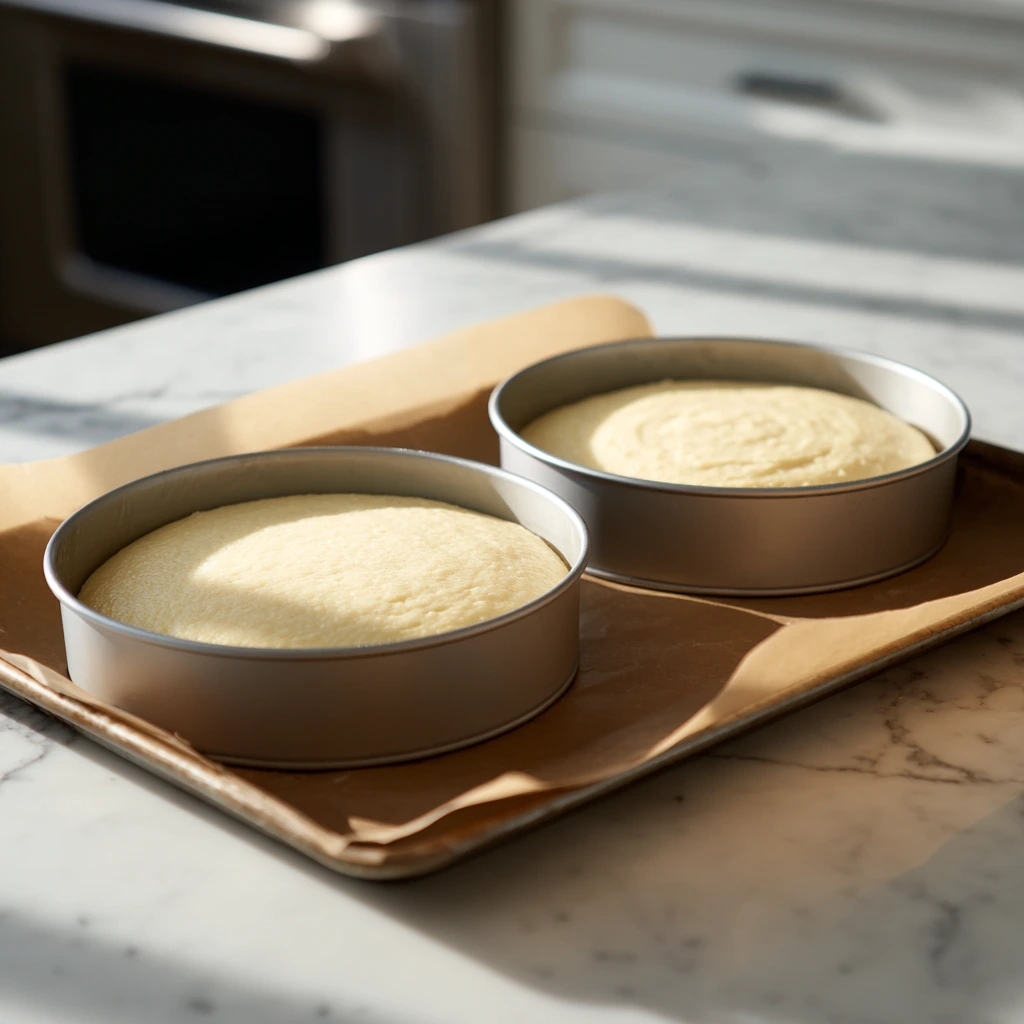
STEP 1: Preheat and Prepare Your Pans
Start by preheating your oven to 350°F. Grease and flour two 8-inch round cake pans. For extra insurance against sticking, line the bottoms with parchment paper. Trust me, this makes all the difference when it comes time to remove the cakes later on.
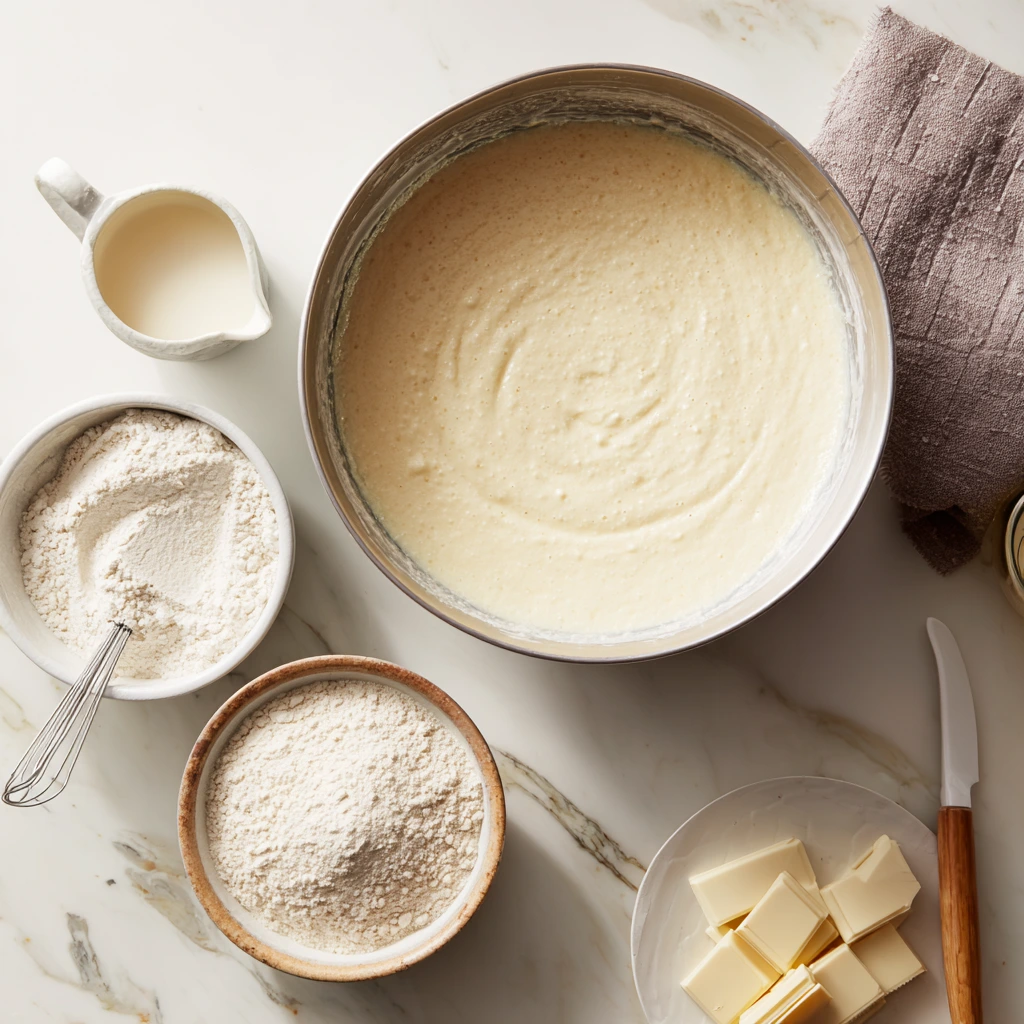
STEP 2: Make the Sponge Cake Batter
In a medium bowl, sift together the flour, baking powder, and salt. This helps keep the cake nice and airy.
In a separate large mixing bowl, beat the eggs and sugar on high speed for about 5–7 minutes. You’re looking for the mixture to become thick, pale, and almost ribbon-like. This step gives the cake its signature lightness.
Now, here’s a tiny but important move: warm the milk and butter in a small saucepan just until the butter melts—don’t let it boil. Stir in the vanilla extract and let it cool just slightly.
Next, gently fold the flour mixture into the egg-sugar mixture in batches. You want to keep all that lovely volume you’ve whipped in. Then, gradually add the warm milk mixture and fold it in gently until just combined.
STEP 3: Bake the Cake
Divide the batter evenly between your two prepared pans. Smooth the tops with a spatula and pop them in the oven.
Bake for 20–22 minutes, or until a toothpick inserted into the center comes out clean. The cakes should be golden on top and spring back when lightly touched.
Cool the cakes in the pans for about 10 minutes, then turn them out onto wire racks to cool completely. Letting them cool fully is crucial before adding the pastry cream later on, so don’t rush this step.
STEP 4: Cook the Pastry Cream
While the cakes are cooling, go ahead and start on the pastry cream. This part feels like a mini science experiment—and it’s so satisfying when it thickens up just right.
Heat the milk in a medium saucepan over medium heat until it’s just steaming—not boiling.
Meanwhile, in a separate bowl, whisk together the sugar, cornstarch, and egg yolks until smooth and well blended.
Once your milk is hot, slowly pour it into the egg yolk mixture while whisking constantly. This helps temper the eggs so you don’t end up with scrambled bits. Pour everything back into the saucepan and return it to the heat.
Cook the mixture over medium heat, whisking constantly. It should thicken up within a few minutes. You’ll know it’s ready when it holds its shape and bubbles start to break the surface.
Remove it from the heat, stir in the butter and vanilla, and pour the pastry cream into a bowl. Cover it with plastic wrap pressed directly against the surface to prevent a skin from forming. Chill for at least 2 hours—overnight works great if you’re planning ahead.
How to Finish and Assemble the Perfect Boston Cream Pie
Now that you’ve got your fluffy sponge cake layers baked and that luscious pastry cream chilling in the fridge, it’s time for the best part—putting it all together! There’s just something so satisfying about watching each layer come together. And once that silky chocolate ganache flows over the top? Game over.
In this second part, we’ll walk through the ganache and assembly steps, and I’ll share a few helpful tricks to make sure your Boston Cream Pie not only looks stunning but tastes even better than any bakery version.
CHOCOLATE GANACHE AND ASSEMBLY TIPS
Here’s where everything starts to come full circle. With your cake and cream ready to go, let’s move on to the ganache—because no Boston Cream Pie is complete without that shiny, chocolatey finish.
Ingredients You’ll Need for the Ganache:
-
½ cup heavy cream
-
4 ounces semi-sweet chocolate, chopped
-
1 tablespoon light corn syrup (optional, for added shine)
STEP 5: Make the Chocolate Ganache
Start by placing the chopped chocolate into a heat-safe bowl. If you’re using bar chocolate, chop it finely so it melts smoothly.
In a small saucepan, heat the heavy cream over medium heat until it just starts to simmer—don’t let it boil.
Pour the hot cream over the chocolate and let it sit for 1–2 minutes without stirring. This softens the chocolate, making it easier to blend.
Once it’s had a moment to sit, stir slowly and gently until the mixture becomes glossy and smooth. If you’re using corn syrup for that extra bit of shine, stir it in now. Let the ganache cool for a few minutes until it thickens slightly but is still pourable.
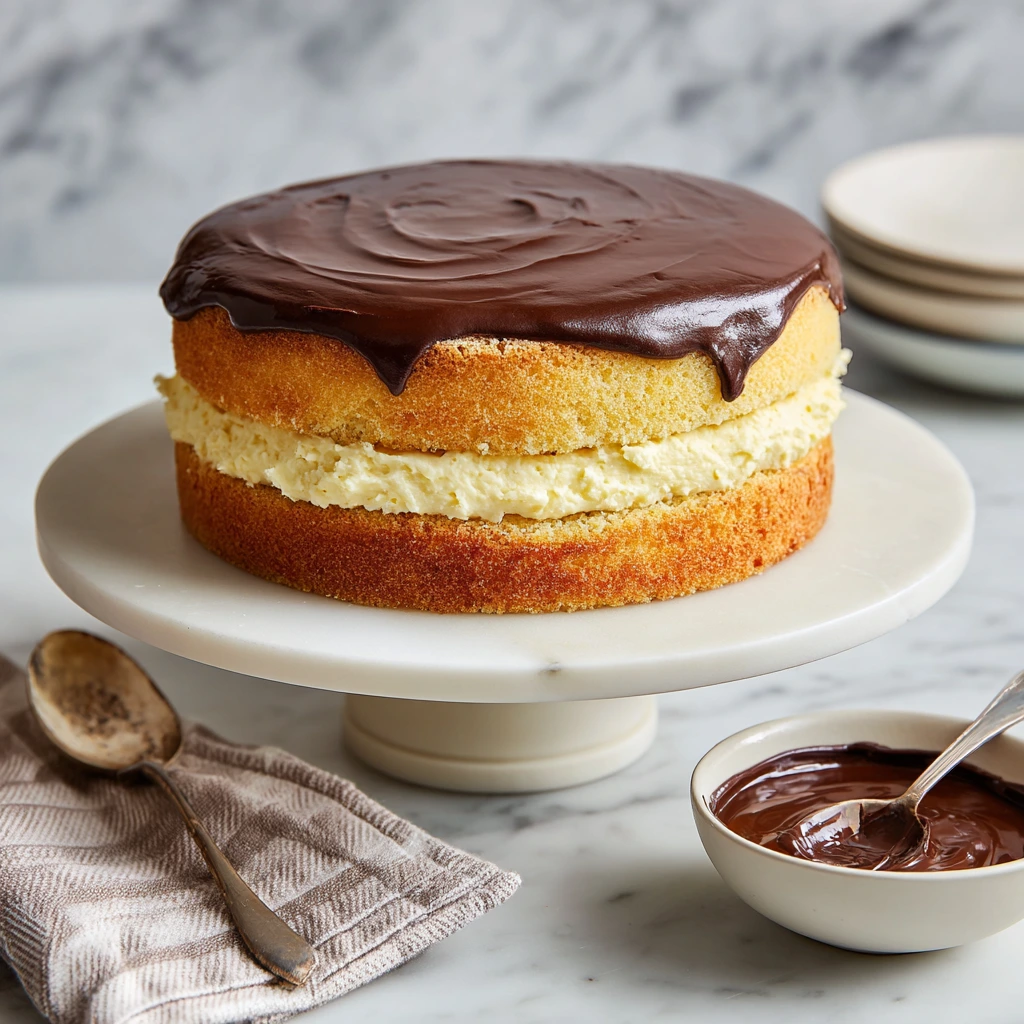
STEP 6: Assemble the Boston Cream Pie
Now the fun part—putting it all together!
Start with the base cake layer. Place one of the cooled sponge cakes on your serving plate or cake stand. If the tops of your cakes domed slightly during baking, you can trim them with a serrated knife to create flat layers. Totally optional, but it helps create a clean look.
Spread the pastry cream. Take the chilled pastry cream out of the fridge and give it a quick stir to loosen it up. Then, spread it evenly over the first cake layer. Use a small offset spatula to get right to the edges.
Add the second cake layer. Carefully place the second sponge layer on top of the cream. Line it up as best you can so it sits evenly.
STEP 7: Pour the Ganache
Once the ganache has cooled slightly and is a nice, pourable consistency, gently pour it over the top of the cake. Let it spread naturally toward the edges. If you want those beautiful drips down the side (and honestly, who doesn’t?), use a spoon to gently nudge a bit of ganache over the edge in a few spots.
You don’t need to cover the entire side of the cake—those elegant drips are what give a Boston Cream Pie its classic finish.

STEP 8: Chill Before Serving
Transfer the finished cake to the refrigerator and let it chill for at least an hour. This helps the pastry cream set up and the ganache to firm slightly for clean slices. If you’ve got the patience, it’s even better the next day after all the flavors have had time to meld.
Helpful Tips for Success
-
Make the pastry cream ahead. It needs time to chill anyway, and having it done the day before makes assembly a breeze.
-
Use room temperature eggs. This helps the sponge cake batter whip up to full volume and bake evenly.
-
For a firmer filling: Add an extra tablespoon of cornstarch to the pastry cream if you want a stiffer set, especially helpful if you’re transporting the cake.
-
Use high-quality chocolate. This really makes a difference in flavor and texture. Look for something with 50–60% cocoa content for a balanced ganache.
-
Don’t skip the parchment paper. It’s a lifesaver when it comes to removing your cakes from the pans cleanly.
Your Boston Cream Pie Questions, Answered + Final Thoughts
You’ve made it through the layers, the cream, the ganache, and now you’ve got a beautiful Boston Cream Pie sitting in your fridge. But maybe you still have a few questions—like how to store it, whether you can freeze it, or how to make it ahead for a party. Don’t worry, I’ve got you covered.
Let’s go through some of the most common questions I get whenever I share this dessert. After that, I’ll leave you with a few final thoughts (and a little encouragement to give this classic a go if you haven’t yet).
FREQUENTLY ASKED QUESTIONS
1. Can I make Boston Cream Pie ahead of time?
Yes! In fact, it’s one of those desserts that gets better as it sits. You can make the pastry cream up to 2 days ahead and store it in the fridge. The whole cake can be assembled the day before and kept chilled until serving. Just make sure to cover it loosely with plastic wrap to avoid drying out the cake.
2. How do I store leftovers?
Store any leftover Boston Cream Pie in the refrigerator, tightly covered, for up to 3 days. The pastry cream and ganache both need to stay cold, so this isn’t a cake you’ll want to leave on the counter.
3. Can I freeze Boston Cream Pie?
Freezing isn’t ideal for this cake once it’s fully assembled because the texture of the pastry cream can change. However, you can freeze the sponge cake layers ahead of time. Just wrap them tightly in plastic and foil, then thaw before assembling.
4. What kind of chocolate is best for the ganache?
Semi-sweet chocolate works perfectly here—it gives the ganache richness without being too bitter. You can also use dark chocolate if you prefer a more intense flavor. Just avoid milk chocolate, as it can be a bit too sweet and soft for this topping.
5. Why is it called a “pie” if it’s clearly a cake?
Great question! Boston Cream Pie got its name in the 1800s, back when pie plates were more common than cake pans. Cakes were often baked and served in pie tins, so the name stuck—even though there’s no pie crust in sight.
6. Can I use boxed cake mix or pudding instead?
You could, but I highly recommend trying it from scratch at least once. The homemade sponge is light and fluffy in a way that box mixes don’t quite replicate, and the real pastry cream has a rich flavor and smooth texture that’s hard to beat.
7. How can I get clean slices when cutting the cake?
Use a sharp knife and wipe it clean between each cut. If the ganache is firm, dip the knife in hot water and dry it off before slicing—it helps glide through the layers without dragging.
FINAL THOUGHTS: BRINGING IT ALL TOGETHER
Boston Cream Pie is a dessert that’s stood the test of time for a reason. It’s elegant without being fussy, nostalgic without feeling dated, and honestly—it just tastes really good. There’s something about that contrast between the airy cake, the cool, creamy filling, and the rich ganache that makes every bite feel balanced and satisfying.
Whether you’re making this for a special celebration, a birthday, or just because it’s a Sunday and you’re in the mood for something special, this recipe won’t disappoint.
PrintBoston Cream Pie
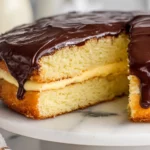
Boston Cream Pie is a timeless dessert that features soft, fluffy sponge cake layered with smooth vanilla pastry cream and topped with a rich chocolate ganache. Despite its name, it’s a cake—not a pie—and has been a beloved classic for over a century. Perfect for celebrations or as a sophisticated sweet finish to any meal.
- Author: Mark's Recipe
Ingredients
For the sponge cake:
1 cup all-purpose flour
1 teaspoon baking powder
¼ teaspoon salt
4 large eggs
1 cup granulated sugar
¼ cup whole milk
2 tablespoons unsalted butter
1 teaspoon vanilla extract
For the pastry cream:
2 cups whole milk
½ cup granulated sugar
¼ cup cornstarch
4 large egg yolks
2 tablespoons unsalted butter
1 teaspoon vanilla extract
For the chocolate ganache:
½ cup heavy cream
4 ounces semi-sweet chocolate, chopped
1 tablespoon light corn syrup (optional for shine)
Instructions
Preheat the oven to 350°F. Grease and flour two 8-inch round cake pans and line the bottoms with parchment paper.
To make the cake, sift together flour, baking powder, and salt. In a separate bowl, beat the eggs and sugar with a mixer on high speed for 5-7 minutes until thick and pale. Gently fold in the flour mixture. In a small saucepan, heat the milk and butter just until the butter melts, then stir in the vanilla. Gradually add this to the batter and fold until incorporated.
Divide the batter evenly between the prepared pans and bake for 20-22 minutes or until a toothpick comes out clean. Cool in the pans for 10 minutes, then transfer to wire racks to cool completely.
To make the pastry cream, heat milk in a saucepan until just steaming. In a bowl, whisk sugar, cornstarch, and egg yolks. Slowly pour the hot milk into the egg mixture while whisking, then return the mixture to the saucepan. Cook over medium heat, whisking constantly, until thickened. Remove from heat, stir in butter and vanilla, then transfer to a bowl and cover with plastic wrap directly on the surface. Chill for at least 2 hours.
To make the ganache, heat cream until it begins to simmer. Pour over chopped chocolate and let sit for 2 minutes, then stir until smooth. Add corn syrup if using. Let cool slightly until it thickens to a pourable consistency.
To assemble, place one cake layer on a serving plate. Spread the chilled pastry cream evenly on top. Place the second cake layer over the cream. Pour the ganache over the top, letting it drip slightly down the sides.
Refrigerate for at least 1 hour before serving to set.
Notes
For best results, make the pastry cream a day ahead. Use high-quality chocolate for a richer ganache. This cake is best served chilled but can be brought to room temperature just before serving for a softer texture.

")
