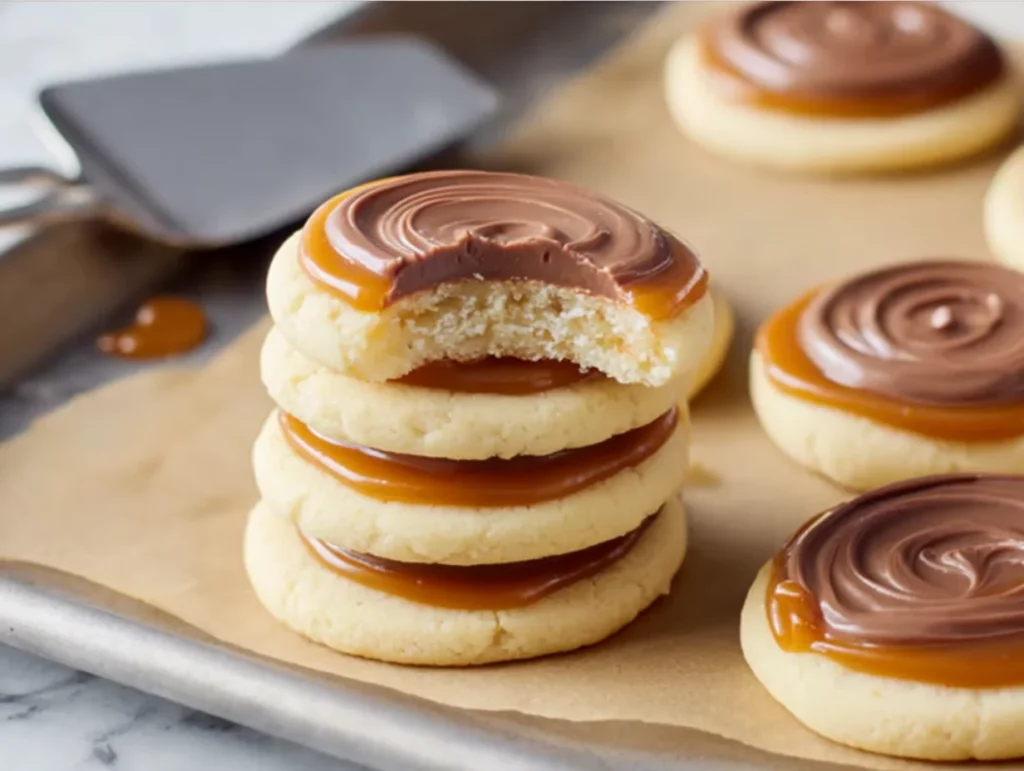
There are cookies… and then there are cookies. The kind that make you stop mid-bite and go, “Wait, what is this magic?” These Ultimate Twix Cookies fall firmly into that second category. If you’ve ever found yourself sneaking a Twix bar from the candy stash (no judgment—we’ve all been there), then you’re going to fall head over heels for this homemade twist on the classic treat.
I first made these cookies on a rainy Saturday afternoon when I was craving something indulgent but didn’t want to leave the house. I had all the basics—flour, butter, chocolate chips, and a forgotten bag of caramel candies in the pantry. That was the beginning of what’s now a regular go-to recipe in our kitchen. Every layer brings something special to the table: the buttery shortbread base, the gooey caramel center, and that rich, glossy chocolate topping that ties it all together.
Whether you’re baking for the holidays, hosting a cookie exchange, or just need a sweet fix, these Twix-inspired cookies are here to impress. They’re easy to make, they look like they came straight from a fancy bakery, and they taste even better.
So, let’s get baking!
Ingredients You’ll Need
For the Cookie Base:
-
1 cup unsalted butter, softened
-
½ cup powdered sugar
-
1 teaspoon vanilla extract
-
2 cups all-purpose flour
-
¼ teaspoon salt
For the Caramel Layer:
-
1 cup soft caramel candies, unwrapped
-
2 tablespoons heavy cream
For the Chocolate Topping:
-
1 ½ cups milk or semi-sweet chocolate chips
-
1 teaspoon vegetable oil
STEP 1: MAKE THE COOKIE BASE
We’re starting with a simple shortbread-style cookie that’s buttery, soft, and just the right amount of sweet. If you’ve never made shortbread before, don’t worry—it’s surprisingly easy and forgiving.
-
Preheat your oven to 350°F (175°C) and line a baking sheet with parchment paper. This helps prevent sticking and makes cleanup a breeze.
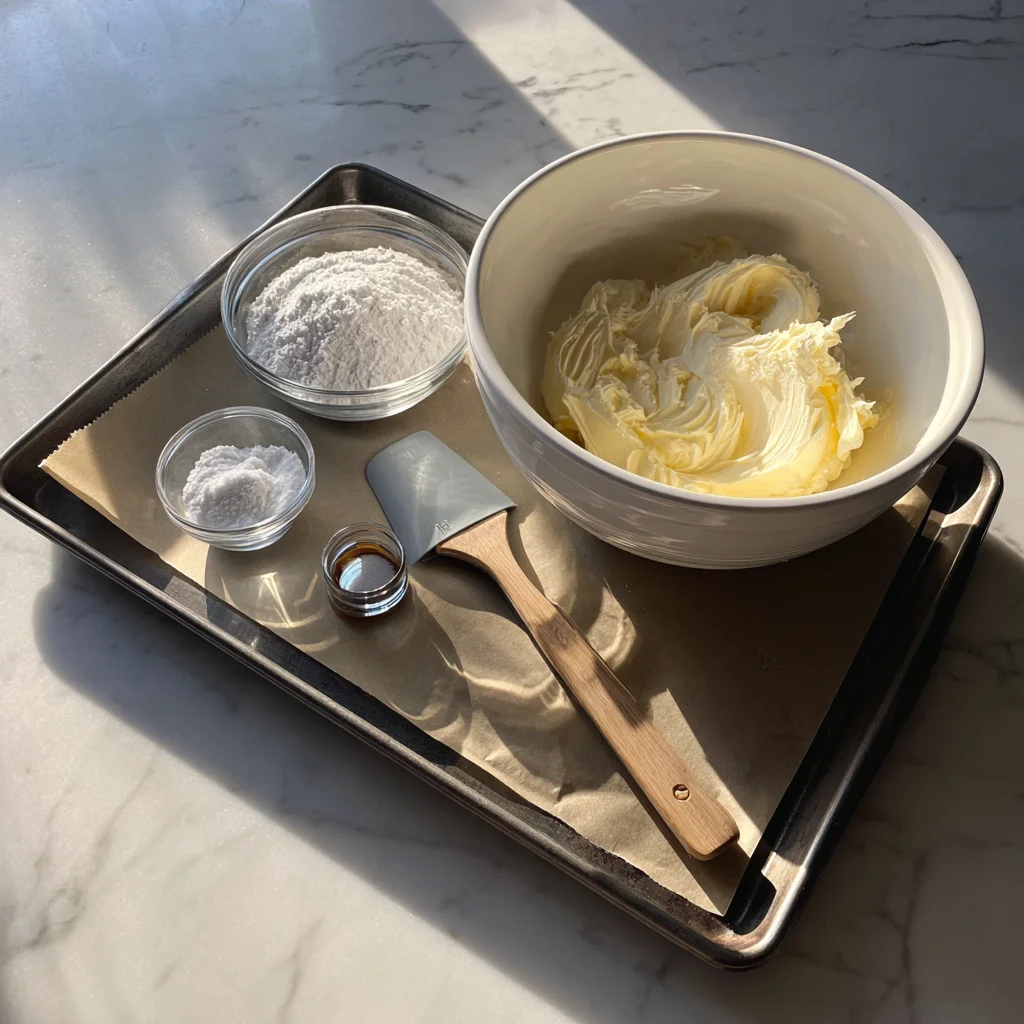
-
In a large mixing bowl, cream together the softened butter and powdered sugar. Use an electric mixer if you have one—it’ll make the texture super smooth and fluffy.
-
Add the vanilla extract, then mix in the flour and salt gradually. The dough will be soft and slightly crumbly, but it should hold together when you press it.
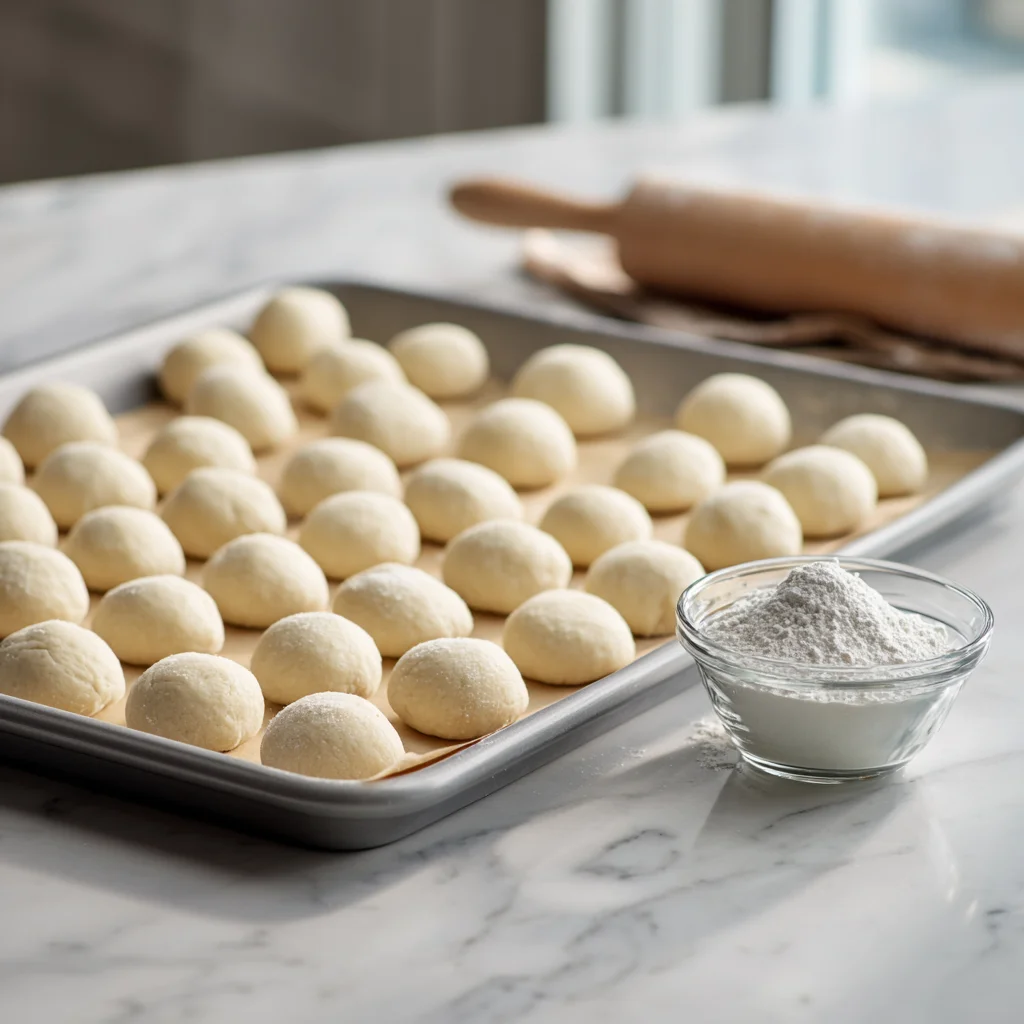
-
Roll the dough into 1-inch balls—I like to use a cookie scoop for even sizes—and place them on the prepared baking sheet, leaving about 2 inches between each.
-
Use the bottom of a glass or your palm to gently flatten each ball into a disk. You’re aiming for a cookie that can hold a little caramel and chocolate without spilling over the edges.
STEP 2: BAKE AND COOL
-
Bake the cookies for 10 to 12 minutes, or until the edges are just starting to turn golden. Keep an eye on them—they can go from golden to overdone quickly.
-
Once baked, let the cookies cool completely on a wire rack. This part is important because if the cookies are warm, the caramel will slide right off later.
Adding the Caramel and Chocolate Layers
Now that your buttery shortbread cookies are baked and cooled, it’s time to take them to the next level. This is where the magic happens — the gooey caramel center and rich chocolate topping come into play, transforming a simple cookie into something truly unforgettable.
Honestly, this part is my favorite. There’s something so satisfying about spooning silky caramel onto a perfect little cookie round, then watching the chocolate melt into a glossy layer on top. And the best part? You don’t need any fancy candy-making tools or skills to pull it off.
Let’s dive into how to get that signature Twix flavor in every bite.
STEP 3: MAKE THE CARAMEL LAYER
The caramel layer is key to nailing that classic Twix flavor. It adds a chewy, sweet contrast to the crisp cookie base and ties everything together beautifully.
-
In a small saucepan (or a microwave-safe bowl), add 1 cup of unwrapped soft caramel candies and 2 tablespoons of heavy cream.
-
If you’re using the stovetop, heat the mixture over low to medium heat, stirring constantly until everything is melted and smooth.
-
If you prefer the microwave, heat in 15 to 20-second intervals, stirring after each, until the caramel is fully melted and creamy.
-
Once melted, spoon a small amount of caramel onto the center of each cooled cookie. Don’t spread it all the way to the edges — it will naturally settle and spread just a bit on its own.
-
Let the caramel set for about 10 to 15 minutes at room temperature. If you’re in a hurry, pop the tray in the fridge to speed things up.
Tip: Be sure the cookies are completely cool before adding the caramel, or it might melt and slide off the top. If your caramel firms up too quickly while you’re working, just reheat it slightly.
STEP 4: ADD THE CHOCOLATE TOPPING
This chocolate layer is what gives these cookies their sleek, candy-bar finish. Smooth, shiny, and just the right amount of sweet.
-
In a microwave-safe bowl or double boiler, combine 1 ½ cups of chocolate chips (milk or semi-sweet, your choice) with 1 teaspoon of vegetable oil.
-
Heat the chocolate in short bursts (about 20 seconds) in the microwave, stirring between each round until completely melted and glossy.
-
Once smooth, spoon the chocolate over the caramel layer on each cookie. You can spread it gently with the back of the spoon or a small offset spatula for a more polished look.
-
Let the chocolate set at room temperature for about 30 minutes, or place the cookies in the fridge for 10–15 minutes if you’re feeling impatient.
Optional but delicious: Before the chocolate sets, sprinkle a tiny pinch of flaky sea salt on top. It gives the cookies a sweet-salty balance that’s just chef’s kiss perfect.
Storage Tips & Serving Ideas
Now that your Ultimate Twix Cookies are complete, you’ve got a couple of options for how to enjoy and store them:
-
Room Temp: Store them in an airtight container at room temperature for up to 5 days. Just keep them in a cool spot so the chocolate doesn’t get too soft.
-
Chilled: Want a firmer texture (or live somewhere warm)? Pop them in the fridge. The caramel firms up a bit more and the cookie gets that satisfying snap when you bite in.
-
Freezer Friendly: Yep, these freeze beautifully! Place them in a single layer on a tray to freeze, then transfer to a freezer bag. Just let them thaw a bit before eating.
Serving tip: These cookies are rich, so they pair perfectly with a hot cup of coffee or a tall glass of milk. And don’t be surprised if people ask you what bakery you got them from — they really do look that good.

FAQs and Final Thoughts
You’ve made it to the final stretch of this sweet adventure, and by now your kitchen is likely filled with the dreamy aroma of buttery cookies, warm caramel, and melty chocolate. These Ultimate Twix Cookies are a showstopper from the first bite, and whether you’re gifting them, serving them at a party, or sneaking one with your morning coffee, they’re bound to become a household favorite.
Before we wrap things up, let’s cover some of the most common questions people have when making these irresistible cookies. These quick answers should help you troubleshoot, adjust for preferences, or plan ahead for your next batch.
Frequently Asked Questions
1. Can I make the dough ahead of time?
Absolutely! You can prepare the cookie dough up to 2 days in advance. Just store it tightly wrapped in the fridge. Let it sit at room temperature for 10–15 minutes before rolling into balls if it’s too firm to work with.
2. What kind of caramel should I use?
Look for soft, chewy caramel candies (like Kraft or Werther’s Soft Caramels). Avoid hard caramels, as they won’t melt properly or give you that smooth, spreadable texture.
3. Can I use homemade caramel instead of store-bought?
Yes! If you’re comfortable making your own caramel, go for it. Just make sure it’s thick enough to sit on the cookie without running off. A slightly firm, chewy caramel works best here.
4. How do I keep the chocolate layer from cracking?
Make sure the caramel layer is fully set before adding the chocolate, and avoid refrigerating too quickly. Letting the chocolate cool slowly at room temperature helps prevent cracking.
5. Can I use dark chocolate instead of milk or semi-sweet?
Definitely. Dark chocolate will give the cookies a more intense flavor and slightly less sweetness. It’s a great option if you prefer a more grown-up version of this treat.
6. Do these cookies freeze well?
Yes! These cookies freeze beautifully. Just layer them between parchment paper in a freezer-safe container or zip-top bag. Let them thaw at room temperature for 15–20 minutes before serving.
7. How do I make a salted version?
Right after you spread the chocolate on top, sprinkle a pinch of flaky sea salt over each cookie. It adds a delicious sweet-salty contrast and gives them that trendy bakery-style finish.
Final Thoughts: Why You’ll Love These Cookies
These Ultimate Twix Cookies are everything you love about the candy bar—but better. The homemade shortbread base melts in your mouth, the creamy caramel adds that chewy, gooey bite, and the rich chocolate brings the whole thing together in the most delicious way.
What I really love about this recipe is how flexible it is. Want to switch up the chocolate? Go for it. Prefer a little extra caramel? Add a thicker layer. You can make them your own and they still come out looking and tasting amazing.
They’re also the perfect make-ahead dessert for holidays, birthdays, or just a rainy-day baking session. I’ve brought these to cookie swaps, family gatherings, and even mailed them in care packages—they always disappear fast.
PrintUltimate Twix Cookies
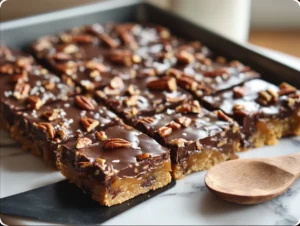
These Ultimate Twix Cookies bring together all the best parts of the classic candy bar in a soft, decadent cookie form. With a buttery shortbread-style cookie base, a layer of rich caramel, and a smooth chocolate topping, each bite delivers that irresistible Twix flavor and texture. They’re easy to make, fun to share, and guaranteed to satisfy any sweet craving.
- Author: Mark's Recipe
Ingredients
For the cookie base
1 cup unsalted butter, softened
½ cup powdered sugar
1 teaspoon vanilla extract
2 cups all-purpose flour
¼ teaspoon salt
For the caramel layer
1 cup soft caramel candies, unwrapped
2 tablespoons heavy cream
For the chocolate topping
1 ½ cups milk or semi-sweet chocolate chips
1 teaspoon vegetable oil
Instructions
Preheat the oven to 350°F (175°C) and line a baking sheet with parchment paper.
In a large bowl, cream together the softened butter and powdered sugar until smooth and fluffy. Add vanilla extract, then mix in flour and salt until a soft dough forms.
Roll the dough into 1-inch balls and place them on the baking sheet, spacing them about 2 inches apart. Flatten each ball gently with the bottom of a glass or your palm to form a disk.
Bake for 10 to 12 minutes or until the edges are just turning golden. Let the cookies cool completely on a wire rack.
In a small saucepan or microwave-safe bowl, melt the caramel candies with the heavy cream, stirring until smooth. Spoon a small amount of caramel onto the center of each cooled cookie and let it set for about 10 to 15 minutes.
Melt the chocolate chips with the vegetable oil until smooth. You can do this in a double boiler or in short bursts in the microwave, stirring between each.
Spoon or spread the melted chocolate over the caramel layer on each cookie. Allow the chocolate to set at room temperature or place the cookies in the refrigerator for quicker setting.
Notes
Use high-quality caramel for the best texture and flavor. If you prefer a salted version, sprinkle a touch of flaky sea salt over the chocolate before it sets. These cookies store well in an airtight container at room temperature for several days, but can also be chilled for a firmer bite. They’re great for cookie exchanges, gifting, or keeping on hand for a luxurious treat.


")
