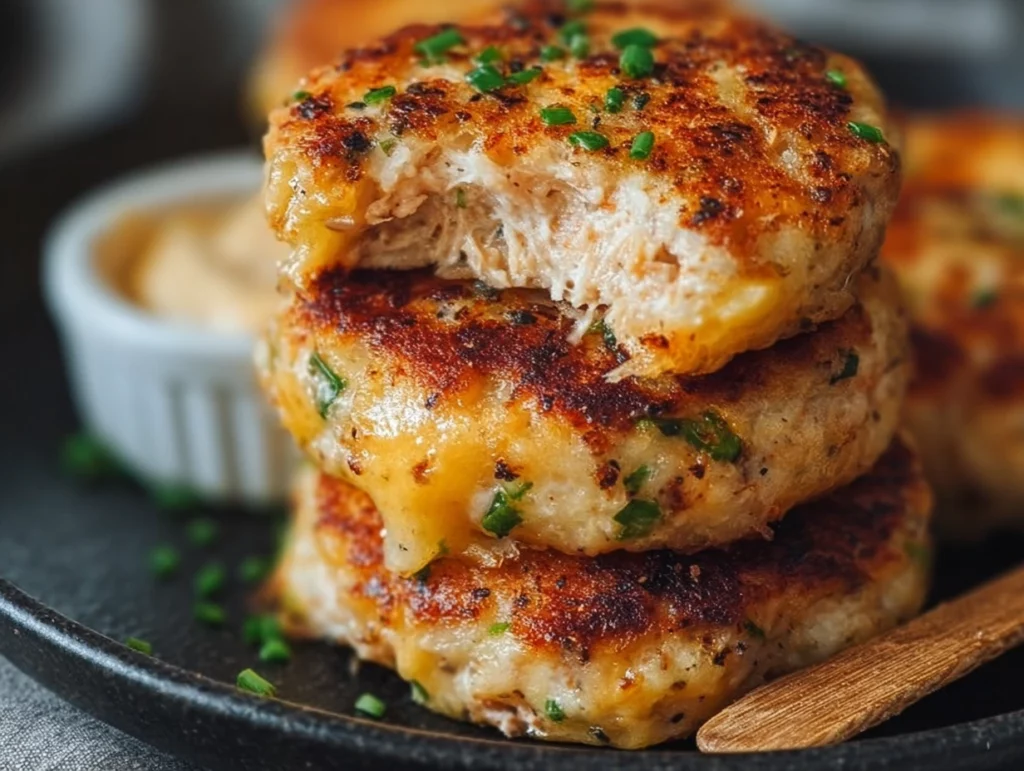
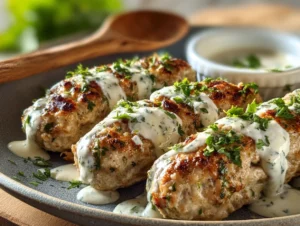
If there’s one pantry staple I lean on when dinner needs to happen fast, it’s tuna. These Tuna Melt Patties are the best kind of weeknight magic: inexpensive, cheesy, golden on the outside, and soft and satisfying on the inside. Think classic tuna melt vibes—but in patty form—so you can serve them on their own with a salad, tuck them into a sandwich with lettuce and tomato, or slide a couple next to crispy fries. However you plate them, they’re a total win.
I first made these on a night when my fridge looked a little empty and I needed something warm and comforting without a trip to the store. Two cans of tuna, a handful of cheddar, and a few simple seasonings later, I had sizzling patties that smelled like diner perfection. They’ve been on repeat ever since—especially for meal prep lunches. They reheat like a dream and taste just as good on day two (or three).
What makes these extra special is the texture: a little crunch from the breadcrumbs, melty cheddar throughout, and those fresh pops of green onion. Dijon and garlic powder give them a savory boost that keeps the flavor from ever feeling flat. And because they come together in one bowl, clean-up is quick—always a bonus when you’d rather spend your evening on the couch instead of at the sink.
Why You’ll Love These Tuna Melt Patties
-
Budget-friendly and pantry-ready (hello, canned tuna!)
-
Quick: ready in about 20 minutes from start to finish
-
Versatile: serve solo, on a bun, or over greens
-
Family-friendly flavors without being boring
-
Easy to batch, freeze, and reheat
What You’ll Need
You’ll mix together two cans of drained tuna, shredded cheddar cheese, breadcrumbs, mayonnaise, one egg, chopped green onions, Dijon mustard, garlic powder, salt, and pepper—then cook in a little olive oil. That’s it. Simple ingredients you probably already have on hand.
STEPS
1. Mix the Patty Base
In a large mixing bowl, add the drained tuna, 1/2 cup shredded cheddar, 1/4 cup breadcrumbs, 1/4 cup mayonnaise, 1 large egg, 2 finely chopped green onions, 1 teaspoon Dijon mustard, 1/2 teaspoon garlic powder, plus a good pinch of salt and pepper. Use a fork to break up the tuna and stir everything together until the mixture looks evenly combined and cohesive.
Tip: If your tuna is packed a little wet, press it gently with paper towels before mixing. Drier tuna helps the patties hold together and brown better.
2. Check the Consistency
You’re aiming for a mixture that holds when pressed but isn’t dry or crumbly. If it feels too loose, add another tablespoon of breadcrumbs. If it feels dry, stir in a teaspoon of mayo. Small adjustments can make the shaping easier and help the patties cook up neatly.
3. Shape the Patties
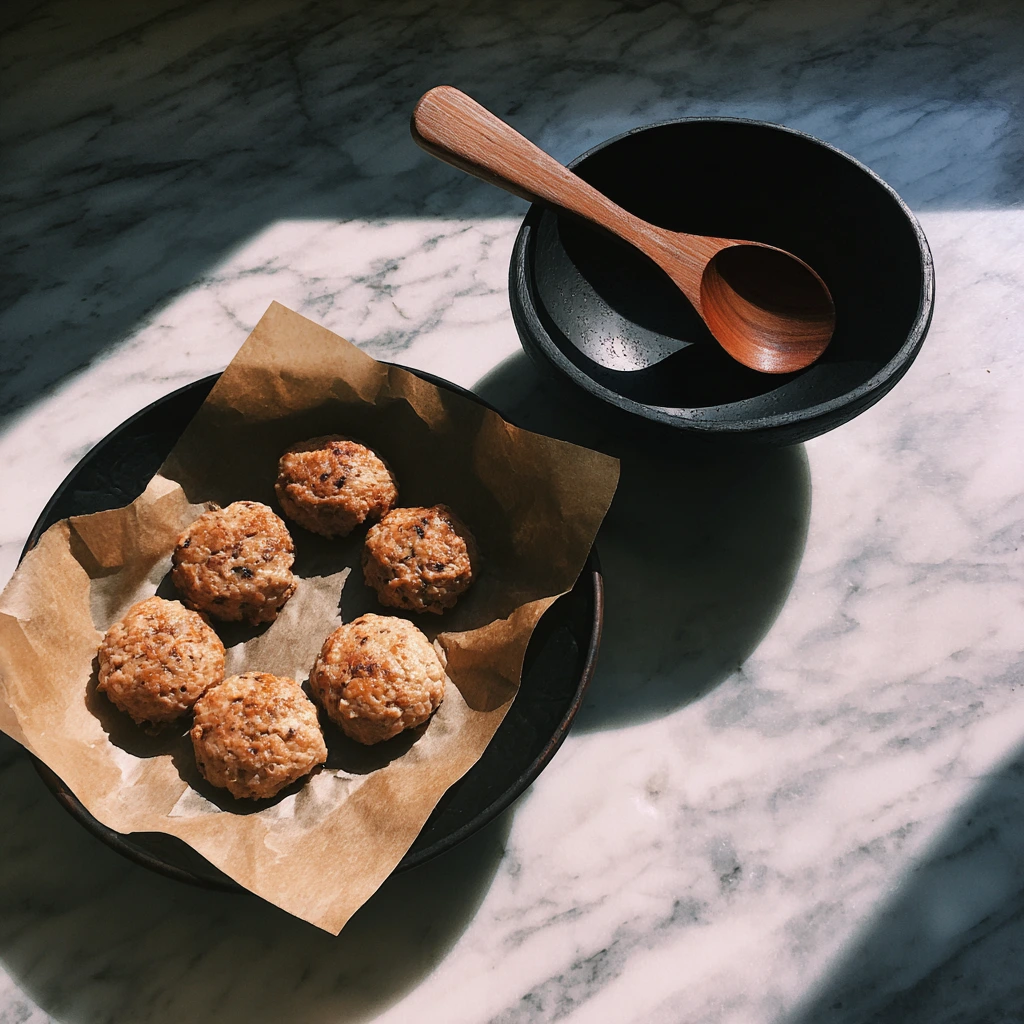
Divide the mixture into 6 equal portions. Lightly dampen your hands and shape each portion into a patty about 3 to 3 1/2 inches wide and roughly 1/2 inch thick. Press the edges gently to keep them tidy so they don’t crack while cooking.
Optional but helpful: Pop the patties into the fridge for 10 minutes. A quick chill firms them up and makes flipping easier later.
4. Preheat Your Pan
Set a large skillet over medium heat and add 2 tablespoons of olive oil. Give it a minute or two to warm up so the patties hit hot oil—this is the secret to that golden, crispy exterior without sticking.
Sear, Serve & Simple Variations
You’ve got your patties prepped and your skillet warm—now it’s time to turn that golden, cheesy promise into dinner. This part moves fast, so keep your spatula handy and resist the urge to fuss with the patties. A little patience gives you that crisp exterior and tender middle that makes these feel like a diner-style tuna melt…minus the sandwich press.
STEPS
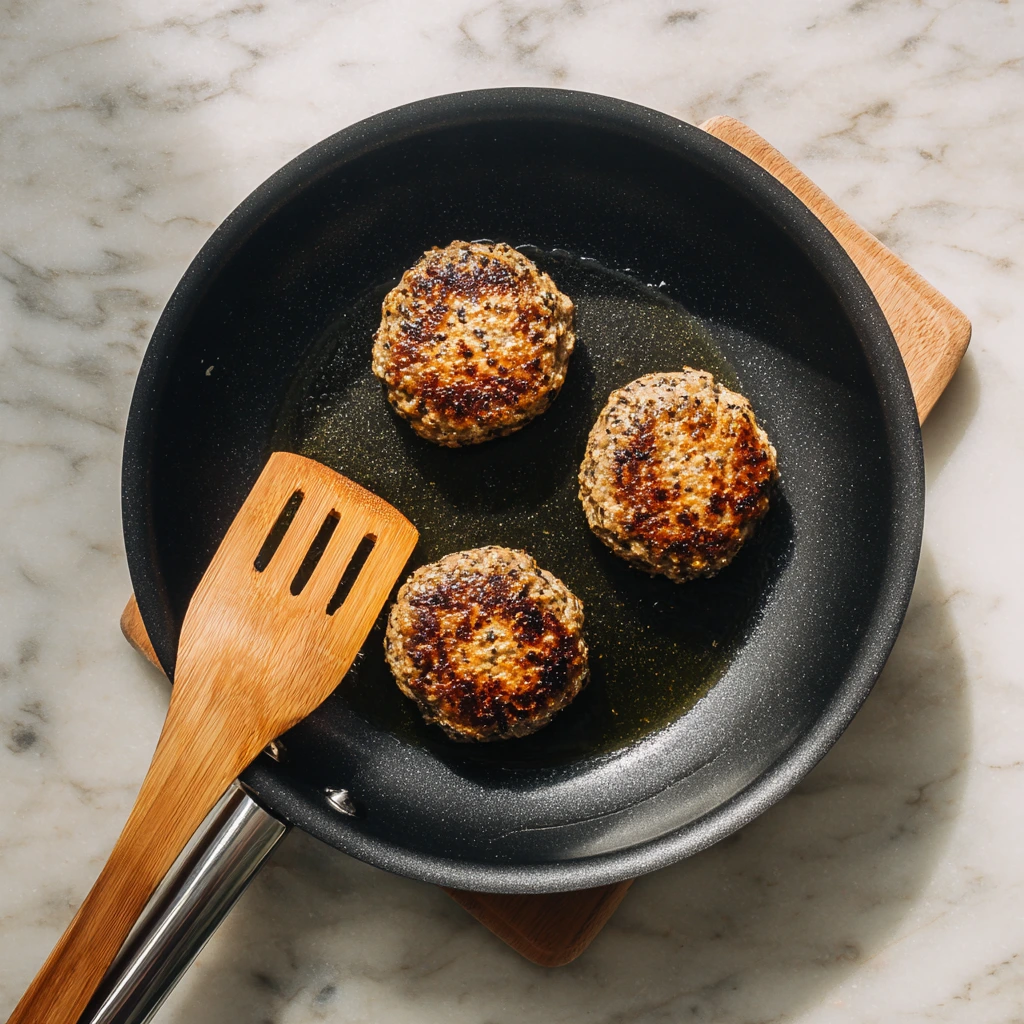
5. Sear the First Side
Gently lay the patties into the hot oil, leaving a little space between each (work in batches if needed). Cook for 3 to 4 minutes, undisturbed, until the bottoms are deep golden and the edges look set. If they resist when you try to slide a spatula underneath, give them another 30 seconds. That’s the crust forming—don’t rush it.
6. Flip and Finish (Add the Melt!)
Carefully flip each patty. Cook another 3 to 4 minutes, until the centers are heated through and the cheese inside is melty. For extra “melt” drama, top each patty with a thin slice of cheddar during the last minute of cooking and cover the pan to steam it into gooey perfection.
7. Rest and Plate
Transfer patties to a paper towel–lined plate for a minute to let any excess oil wick away. Sprinkle with a pinch of salt while they’re hot. Serve right away for the best texture.
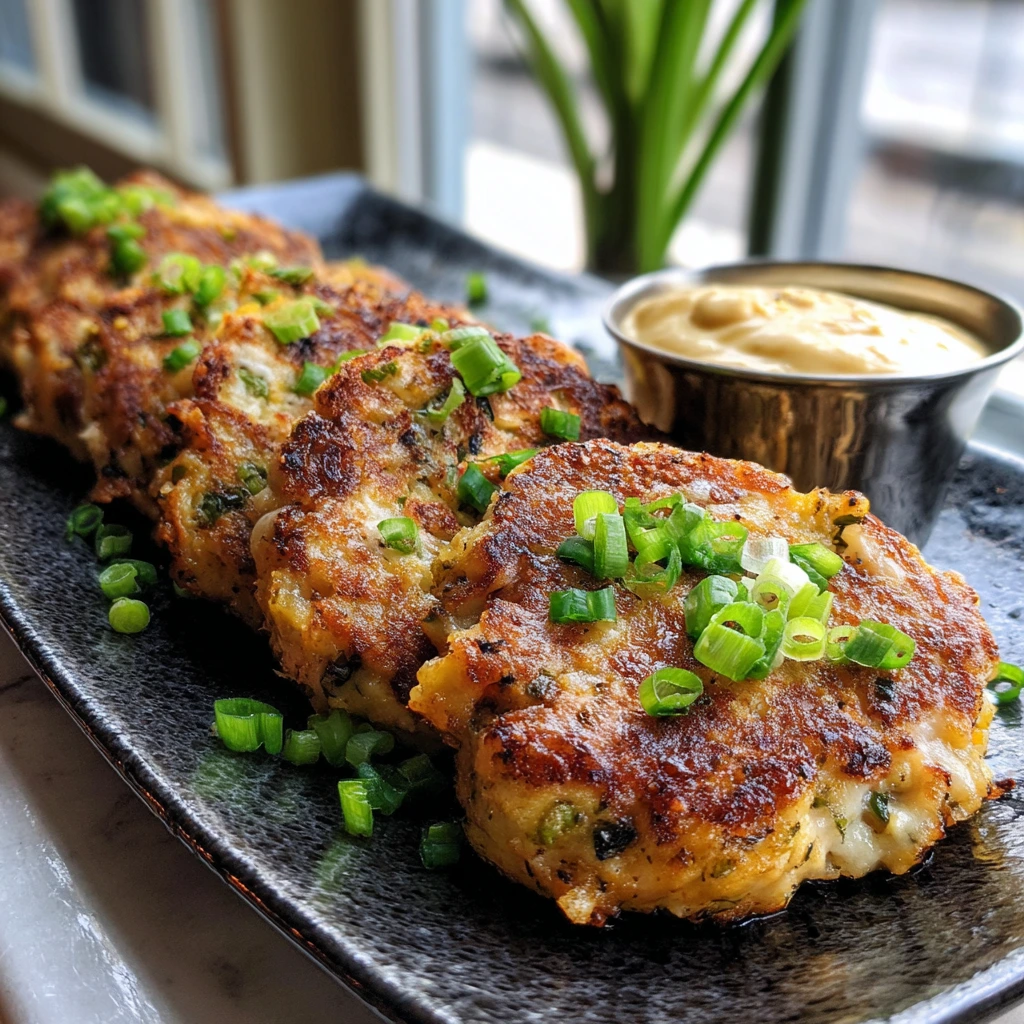
8. Sandwich or Platter
Go classic tuna melt style by tucking patties into toasted buns or sandwich bread with lettuce, tomato, and a swipe of Dijon or mayo. Or keep it simple: plate with a quick salad, lemon wedges, and a pile of crispy fries.
Serving Ideas
-
Diner Plate: Two patties, dill pickles, coleslaw, and kettle chips.
-
Salad Bowl: Serve warm patties over mixed greens with cherry tomatoes, cucumbers, and a tangy vinaigrette.
-
Mini Sliders: Shape smaller patties and stack on Hawaiian rolls with a pickle chip.
-
Breakfast Twist: Top a warm patty with a jammy fried egg and a dash of hot sauce.
Quick Tips for Success
-
Heat Matters: Medium heat is the sweet spot. Too hot and the outside browns before the inside warms through; too low and they won’t crisp.
-
Don’t Crowd the Pan: Crowding drops the temperature and leads to pale patties. Give them breathing room and cook in two batches if necessary.
-
Handle Gently: These are tender by design. Slide the spatula underneath in one confident move rather than poking and prodding.
-
Season at the End: A light sprinkle of salt right after frying wakes up the flavors.
Easy Flavor Twists
-
Pickle Pop: Stir 2 tablespoons finely chopped dill pickles into the mixture (or serve with pickle relish on the side).
-
Heat Lovers: Add a dash of hot sauce or 1/4 teaspoon crushed red pepper flakes to the mix.
-
Herb Brightness: Fold in 2 tablespoons chopped parsley or dill and finish with lemon zest.
-
Cheese Swap: Try pepper jack for spice, Swiss for classic melt flavor, or Colby for extra gooey goodness.
-
Crunch Factor: Replace half the breadcrumbs with crushed buttery crackers for a nostalgic crisp.
Bake Instead (Lighter Option)
Prefer to skip the stovetop? These bake up beautifully. Preheat the oven to 375°F (190°C). Arrange patties on a parchment-lined baking sheet and lightly mist with cooking spray or brush with a touch of olive oil. Bake for 12 to 15 minutes, flipping halfway through, until they’re set and lightly golden. For extra color, broil for 1 to 2 minutes at the end—watch closely. You can still add a cheese slice during the final minute for that signature “melt.”
Make-Ahead & Meal Prep Notes
These patties are fantastic for planning ahead. Mix and shape the patties up to a day in advance and keep them covered in the fridge. Cooked patties reheat well in a skillet over medium-low heat (a minute or two per side) or in a 350°F oven for about 8 minutes. They also freeze like a dream—just cool completely, wrap tightly, and stash for later. They’re the kind of meal you’ll be thrilled to find waiting in your freezer on a busy night.

Tuna Melt Patties FAQs
Can I use a different fish (or protein) instead of tuna?
Absolutely. Canned salmon works beautifully—just remove any skin/bones and reduce the added salt since salmon can be a bit richer. Canned chicken is also a solid swap for a milder, less “seafood-forward” flavor.
How do I keep the patties from falling apart?
Make sure the tuna is well-drained and the mixture is cohesive before shaping. If it feels loose, add 1 to 2 tablespoons extra breadcrumbs. Chilling shaped patties for 10 minutes before frying helps them hold together and flip cleanly.
Can I make these gluten-free?
Yes! Use certified gluten-free breadcrumbs or finely crushed gluten-free crackers. Double-check your Dijon and any add-ins (like hot sauce) to ensure they’re gluten-free.
What cheese works best if I don’t have cheddar?
Pepper jack adds heat, Swiss gives classic “melt” flavor, and Colby or Monterey Jack melt ultra-smooth. Even mozzarella works in a pinch—just add an extra pinch of salt and a little paprika for flavor.
Can I cook these in the air fryer?
You can. Lightly mist the patties with oil and air fry at 375°F for 8 to 10 minutes, flipping halfway, until golden and heated through. Add a cheese slice during the last minute to melt.
How should I store and reheat leftovers?
Cool completely, then refrigerate in an airtight container for up to 3 days or freeze up to 2 months. Reheat in a skillet over medium-low heat (a minute or two per side) or in a 350°F oven for about 8 minutes. From frozen, thaw in the fridge overnight before reheating for best texture.
What can I serve with Tuna Melt Patties?
They’re great with a simple green salad, roasted veggies, or crispy fries. For a sandwich, use toasted sourdough or buns with lettuce, tomato, and a swipe of Dijon or mayo. Add pickles for crunch and brightness.
Troubleshooting & Pro Tips
-
Pale instead of golden? Bump the heat slightly or give the oil a minute to preheat before adding patties.
-
Greasy patties? You might be frying too cool. Hot oil prevents excess absorption. Drain briefly on paper towels.
-
Too dense? Loosen the mix with a teaspoon of mayo or a splash of lemon juice, and avoid overpacking when shaping.
-
Need more zing? A squeeze of lemon, chopped dill pickles, or a dash of hot sauce brightens everything up.
Serving & Variations Recap
-
Classic Melt: Pan-fry and top with a cheddar slice, then sandwich with lettuce and tomato.
-
Lighter Bake: 375°F for 12 to 15 minutes on a parchment-lined sheet, flipping halfway.
-
Herby Upgrade: Fold in chopped dill or parsley and finish with lemon zest.
-
Spicy Spin: Pepper jack cheese + crushed red pepper or hot sauce in the mix.
-
Crunch Swap: Half breadcrumbs, half crushed buttery crackers for nostalgic texture.
Conclusion
If you’ve been craving something warm, comforting, and ridiculously easy, these Tuna Melt Patties are your new go-to. They’re built from pantry staples, come together in one bowl, and give you that golden, melty payoff in minutes—no fancy ingredients, no complicated steps. Serve them on their own for a quick dinner, stack them into sandwiches for a diner-style moment, or meal prep a batch for the week. They freeze well, reheat like a charm, and play nicely with whatever you’ve got in the fridge.
PrintTuna Melt Patties

Tuna Melt Patties are a quick, budget-friendly twist on the classic tuna melt sandwich. Packed with flaky tuna, melted cheese, and seasonings, these golden patties are crispy on the outside and tender on the inside. They’re perfect for a light lunch, weeknight dinner, or even meal prep, and they pair wonderfully with a fresh salad or crispy fries.
- Author: Mark's Recipe
Ingredients
2 cans (5 oz each) tuna, drained
1/2 cup shredded cheddar cheese
1/4 cup breadcrumbs
1/4 cup mayonnaise
1 large egg
2 green onions, finely chopped
1 teaspoon Dijon mustard
1/2 teaspoon garlic powder
Salt and pepper to taste
2 tablespoons olive oil for frying
Instructions
In a large mixing bowl, combine tuna, cheddar cheese, breadcrumbs, mayonnaise, egg, green onions, Dijon mustard, garlic powder, salt, and pepper. Mix until well combined.
Divide mixture into 6 equal portions and shape into patties.
Heat olive oil in a skillet over medium heat. Add patties and cook for 3 to 4 minutes per side, or until golden brown and heated through.
Serve warm, either on their own or in a sandwich with lettuce and tomato.
Notes
or extra flavor, mix in chopped pickles or a dash of hot sauce.
You can bake the patties at 375°F (190°C) for 12 to 15 minutes for a lighter version.
Leftover patties can be stored in the refrigerator for up to 3 days or frozen for up to 2 months.


")
