
When a recipe goes viral, there’s usually a good reason behind it. And let me tell you, Tini’s Mac & Cheese earns every bit of the internet buzz. It’s not your average stovetop mac—it’s the kind of ultra-creamy, extra-cheesy, velvety pasta dish that makes you forget all about the boxed stuff. Think bold cheddar flavor, silky sauce, and just the right kick of seasoning to bring it all together.
I first stumbled across this gem during one of those late-night scroll sessions (you know the ones). At first, I thought, “Okay, how different can mac & cheese really be?” But then I made it—and wow. I was hooked after the first bite. The texture? Spot-on. The flavor? Deep, cheesy, a little savory, and full of nostalgic comfort. And the best part? It comes together in just 30 minutes.
Whether you’re prepping for a holiday dinner, making a weeknight meal extra special, or just craving a bowl of cheesy goodness, this recipe fits the bill. Let’s get started with Part 1 of this legendary dish.
Why Tini’s Mac & Cheese Stands Out
What sets this mac apart is the homemade cheese sauce—no shortcuts, no weird fillers. Just real cheese, cream, and a buttery roux that binds it all together. The combo of sharp cheddar, Monterey Jack, and Parmesan gives it layers of flavor: sharp, melty, and slightly nutty. Plus, there’s just enough seasoning to elevate without overpowering.
This version also holds up beautifully for leftovers (if you even have any). Just add a splash of milk when reheating and it returns to its original creamy glory. It’s low-maintenance but delivers high reward, which is exactly the kind of recipe I love sharing.
Ingredients You’ll Need
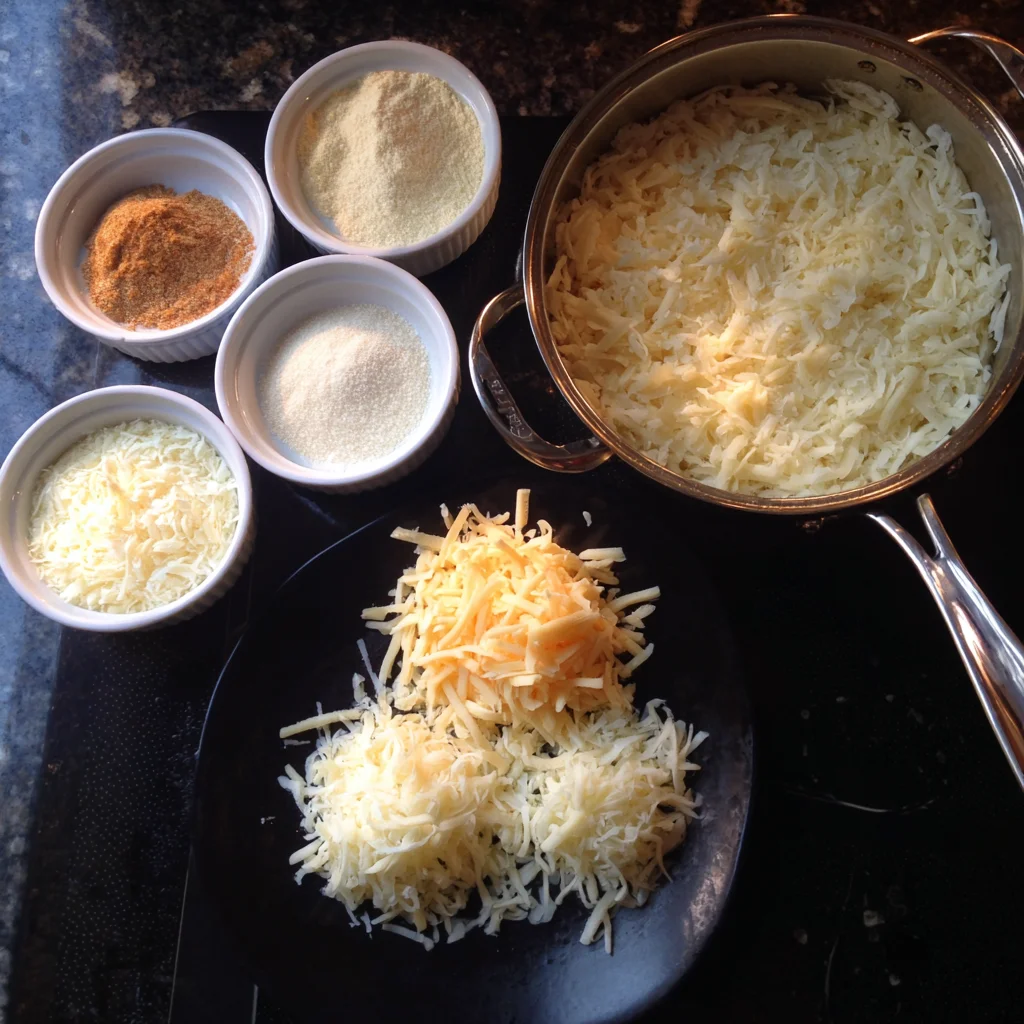
Let’s break down what you’ll need to make this rich, creamy masterpiece. Nothing fancy here—just real, simple ingredients that make a big impact.
-
16 ounces elbow macaroni
-
4 tablespoons unsalted butter
-
¼ cup all-purpose flour
-
3 cups whole milk, warmed
-
1 cup heavy cream
-
1 teaspoon garlic powder
-
1 teaspoon onion powder
-
1 teaspoon mustard powder
-
Salt and black pepper, to taste
-
3 cups sharp cheddar cheese, shredded
-
1 cup Monterey Jack cheese, shredded
-
½ cup grated Parmesan cheese
Optional Add-ins for Extra Richness:
-
2 to 3 tablespoons of cream cheese for an ultra-luxurious texture
-
Pinch of cayenne or a dash of hot sauce for a spicy twist
STEP 1: Cook the Macaroni
Start by bringing a large pot of salted water to a boil. Once it’s rolling, toss in your elbow macaroni and cook it until it’s just al dente—meaning it still has a bit of bite. This is key because the pasta will continue to cook slightly when mixed with the hot cheese sauce. Drain the noodles and set them aside while you move on to the sauce.
STEP 2: Make the Roux
In a large saucepan, melt 4 tablespoons of unsalted butter over medium heat. Once fully melted and bubbling, sprinkle in ¼ cup of all-purpose flour. Whisk it constantly for 1 to 2 minutes until the mixture is golden and smells a little nutty. This step creates a roux, which is the base for a silky cheese sauce that won’t separate or turn grainy.
STEP 3: Add Milk and Cream
Gradually whisk in the warm milk (3 cups) and heavy cream (1 cup), stirring continuously to prevent lumps. Warming the milk beforehand helps it blend into the roux more smoothly and speeds up the thickening process. Keep stirring as the mixture comes to a gentle simmer—after 3 to 4 minutes, it should start to thicken enough to coat the back of a spoon.
STEP 4: Season the Sauce
Once thickened, it’s time to bring the flavor. Add in:
-
1 teaspoon garlic powder
-
1 teaspoon onion powder
-
1 teaspoon mustard powder
-
Salt and freshly ground black pepper to taste
Reduce the heat to low so the sauce stays warm but doesn’t burn, and get ready for the best part: the cheese.
STEP 5: Stir in the Cheese
With the heat still low, start adding the cheese one handful at a time. First the sharp cheddar, then the Monterey Jack, followed by the grated Parmesan. Stir each handful until fully melted before adding the next. The sauce should be velvety smooth and thick enough to coat your spoon without running.
Pro tip: Don’t rush this step. Let the cheeses melt gently to avoid a gritty or separated sauce. Once everything is melted, you’ll be looking at a pot of the creamiest cheese sauce imaginable—basically gold.
Tini’s Viral Mac & Cheese: Irresistibly Creamy, Deeply Cheesy
Welcome back! If you’re here, that means you’re probably already drooling from the cheesy goodness we started in Part 1. We’ve built a rich, creamy cheese sauce from scratch using real ingredients, and it’s already looking like something out of a comfort food dream. Now it’s time to bring it all together, add a few finishing touches, and talk about how to take this already incredible dish to the next level.
Whether you’re keeping things classic or looking to dress it up for a dinner party, this part of the recipe is where the magic really happens. Let’s finish strong!
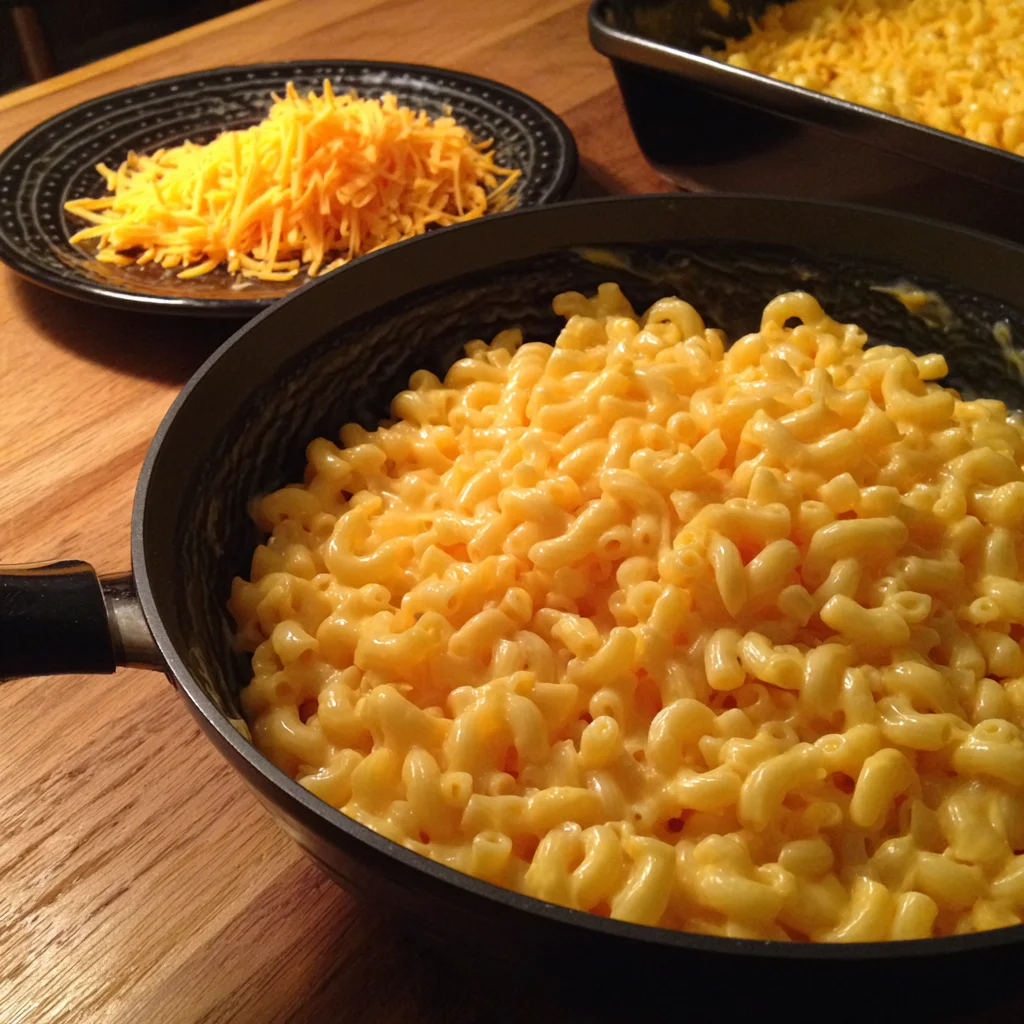
STEP 6: Combine Pasta with Cheese Sauce
Now that your cheese sauce is smooth, melty, and full of flavor, it’s time to bring back the cooked macaroni. Add the drained pasta directly into the pot of cheese sauce and stir gently until every noodle is coated in that luxurious sauce. You’ll see it start to cling to the pasta right away—this is where using al dente macaroni really pays off.
At this point, it’s hard not to just grab a spoon and dig in. But if you can wait a few more minutes, the texture will get even better.
STEP 7: Let It Rest
This part might seem small, but it makes a big difference: let your mac & cheese sit for about 5 minutes before serving. This short resting period allows the sauce to thicken slightly and stick perfectly to the pasta. It goes from silky to spoon-coating in no time—and trust me, the difference is noticeable.
You can serve it straight from the pot as-is, or you can take it one step further for an upgraded finish (especially if you’re serving guests).

Optional Upgrade: Broil for a Crispy Top
Want that picture-perfect, golden-brown top layer? Here’s how:
-
Preheat your broiler.
-
Transfer the mac & cheese into a lightly greased baking dish.
-
Sprinkle a generous handful of shredded cheddar (or even a little extra Parmesan) over the top.
-
Broil for 2 to 3 minutes, watching closely, until the top is bubbly and lightly browned.
This adds a little crunch to each bite and makes it feel more like a baked mac & cheese, without committing to baking it for 30 minutes.
Tips to Customize Your Mac & Cheese
This base recipe is already super flavorful, but there are plenty of ways to make it your own:
-
Add Cream Cheese for Extra Richness: If you’re after an even silkier texture, stir in 2–3 tablespoons of cream cheese just before adding the shredded cheeses. It adds body and a subtle tang that’s irresistible.
-
Spice It Up: Add a pinch of cayenne pepper, a few dashes of your favorite hot sauce, or a spoonful of Dijon mustard to enhance the depth of flavor. It won’t taste spicy unless you want it to—it’ll just have a little more dimension.
-
Mix Up the Cheese: Sharp cheddar is non-negotiable here, but feel free to swap in other cheeses. Fontina, gouda, or pepper jack can all bring something different to the table.
-
Add Mix-Ins: Crumbled bacon, sautéed onions, or even a handful of cooked broccoli can be stirred in just before serving if you want to bulk it up.
-
Make It Ahead: This recipe reheats really well with just a splash of milk to loosen the sauce. Great for leftovers or prepping a day in advance.
What to Serve with Tini’s Mac & Cheese
While this mac & cheese is absolutely the star of the show, it pairs beautifully with:
-
Grilled or roasted meats (especially BBQ-style)
-
A simple green salad with a tangy vinaigrette
-
Roasted veggies like Brussels sprouts or green beans
-
Garlic bread (for the carb-lovers among us)
Honestly, this mac is so rich and satisfying that it doesn’t need much. But if you’re planning it as part of a larger meal, keeping the sides light will help balance things out.
Leftovers & Storage Tips
If you’re lucky enough to have leftovers, here’s how to keep them creamy:
-
Storage: Store in an airtight container in the fridge for up to 4 days.
-
Reheat: Add a splash of milk before reheating in the microwave or on the stovetop. Stir often to restore the sauce’s creaminess.
-
Freezing: While mac & cheese can be frozen, the texture might change slightly. If you do freeze it, thaw in the fridge overnight and reheat gently with extra milk or cream.
Tini’s Viral Mac & Cheese: All Your Questions Answered
We’ve whisked, stirred, melted, and mixed our way to the creamiest, dreamiest mac & cheese—and now it’s time to wrap things up. But before we dive into the conclusion, let’s answer some of the most common questions readers ask about this recipe. Whether you’re making it for the first time or planning to put your own twist on it, these quick answers will help you get it just right every time.
FAQ: Your Mac & Cheese Questions, Answered
1. Can I use pre-shredded cheese instead of shredding it myself?
Yes, you can—but for best results, I recommend shredding your own. Pre-shredded cheeses often contain anti-caking agents that can affect how smoothly the cheese melts into the sauce. If you’re in a pinch, it’ll still work, but freshly shredded cheese melts more evenly and gives a creamier finish.
2. What’s the best pasta shape for this mac & cheese?
Elbow macaroni is the classic choice (and what Tini uses), but other small pasta shapes like shells, cavatappi, or rotini also work well. You want something with curves or ridges that can really hold onto the sauce.
3. Can I make this mac & cheese ahead of time?
Absolutely. You can make the full recipe ahead of time, let it cool, and refrigerate it. When reheating, add a splash of milk or cream to loosen the sauce and stir well over low heat. It reheats beautifully, so it’s perfect for parties or meal prepping.
4. Is this recipe kid-friendly?
Very! It’s rich, cheesy, and flavorful without being spicy. If you’re making it for little ones, you can always leave out optional add-ins like cayenne or hot sauce. It’s a guaranteed hit at family dinners or holiday gatherings.
5. Can I freeze mac & cheese?
You can freeze it, but be aware the texture may change a bit upon reheating. For best results, cool it completely before freezing in an airtight container. When ready to reheat, thaw in the fridge overnight, then warm gently with extra milk to restore creaminess.
6. What if my cheese sauce turns out grainy?
A grainy sauce usually means the cheese was added when the sauce was too hot or boiled after the cheese was added. Keep your heat low while stirring in the cheese and add it in small batches. Stir gently and don’t rush it—slow melting leads to the smoothest sauce.
7. Can I make this gluten-free?
Yes! Just swap the regular elbow macaroni with a gluten-free pasta of your choice, and use a 1:1 gluten-free all-purpose flour for the roux. The results will still be creamy and delicious.
Final Thoughts: Why You’ll Keep Coming Back to Tini’s Mac & Cheese
Tini’s viral mac & cheese isn’t just another internet trend—it’s a comfort food classic with real staying power. The balance of bold cheddar flavor, creamy texture, and simple, everyday ingredients makes it the kind of recipe you’ll find yourself coming back to over and over again.
It’s easy enough for a weeknight but rich enough for a special occasion. It works as a cozy dinner side, a potluck star, or even a satisfying main dish when you just want something indulgent. And honestly, who doesn’t need a go-to mac & cheese recipe that actually lives up to the hype?
If you give this one a try, I’d love to hear how it turns out for you. Did you add cream cheese? Try a different cheese blend? Broil the top for that crispy finish? Let me know in the comments—I’m always curious to see the creative ways you make it your own.
PrintTini’s Viral Mac & Cheese

Tini’s viral mac & cheese is ultra creamy, deeply cheesy, and unapologetically rich—the kind of mac that breaks the internet for good reason. This version ditches the boxed shortcut in favor of a homemade cheese sauce that clings to every noodle, with a smooth, velvety texture and bold cheddar flavor. It’s comfort food at its finest, perfect for holidays, gatherings, or whenever you want to impress with minimal effort.
- Author: Mark's Recipe
Ingredients
16 ounces elbow macaroni
4 tablespoons unsalted butter
¼ cup all-purpose flour
3 cups whole milk, warmed
1 cup heavy cream
1 teaspoon garlic powder
1 teaspoon onion powder
1 teaspoon mustard powder
Salt and black pepper to taste
3 cups sharp cheddar cheese, shredded
1 cup Monterey Jack cheese, shredded
½ cup grated Parmesan cheese
Instructions
Bring a large pot of salted water to a boil and cook the macaroni until just al dente. Drain and set aside.
In a large saucepan, melt the butter over medium heat. Whisk in the flour and cook for 1 to 2 minutes until lightly golden and bubbling to form a roux.
Slowly whisk in the warm milk and cream, stirring constantly to prevent lumps. Bring the mixture to a gentle simmer and cook for 3 to 4 minutes until thickened.
Add garlic powder, onion powder, mustard powder, salt, and pepper to taste. Reduce heat to low and stir in the cheddar, Monterey Jack, and Parmesan cheeses, a handful at a time, until melted and smooth.
Add the cooked pasta to the cheese sauce and stir to coat evenly.
Let the mac & cheese sit for 5 minutes before serving so the sauce thickens slightly and clings to the pasta.
Notes
For extra richness, fold in a few tablespoons of cream cheese. To make it crispy on top, pour the mac & cheese into a baking dish, sprinkle with more cheddar, and broil for 2 to 3 minutes until golden. Tini’s version is all about bold flavor, so don’t be afraid to add a pinch of cayenne or hot sauce if you like heat. Leftovers reheat beautifully with a splash of milk to restore creaminess.


")
