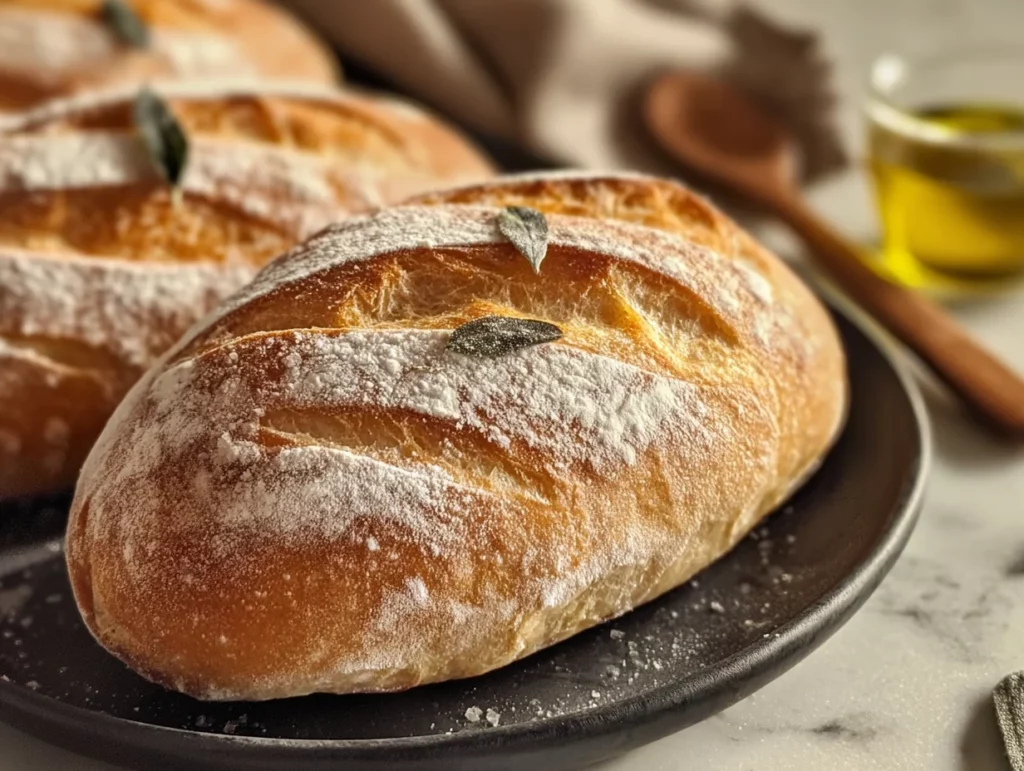
There’s something truly magical about the smell of freshly baked bread wafting through the kitchen. It wraps you up in warmth and comfort before you’ve even had a slice. This Crusty Homemade Italian Bread is one of those recipes that hits every note—crispy golden crust, soft airy center, and an old-world flavor that takes you straight to an Italian bakery. Whether you’re mopping up a hearty bowl of spaghetti sauce or making the perfect panini, this loaf’s got your back.
Now I’ll be honest—this isn’t a quick, throw-it-together-in-15-minutes kind of bread. But that’s the beauty of it. It’s simple, but with just enough process to make you feel like a total rockstar in the kitchen. It’s the kind of recipe I keep coming back to when I want something classic, cozy, and just plain satisfying.
I remember the first time I tried making this style of bread. I’d been on the hunt for something crusty, not too dense, and perfect for dunking in olive oil with a little balsamic drizzle. Most store-bought options just weren’t cutting it. Too soft, or too bland. So I gave this recipe a try—and let’s just say, I haven’t bought a loaf from the store since.
Let’s walk through the beginning steps to make this crusty Italian bread from scratch. You won’t need a mixer or any fancy equipment—just a bowl, your hands, and a little bit of patience.
Ingredients You’ll Need:
-
4 cups all-purpose flour
-
1 tablespoon sugar
-
2 teaspoons salt
-
1 tablespoon instant yeast
-
1 ½ cups warm water (about 110°F)
-
2 tablespoons olive oil
Note: If you have bread flour on hand, feel free to swap it in for a chewier texture and a slightly taller rise. Totally optional, but it does give you a more classic bakery finish.
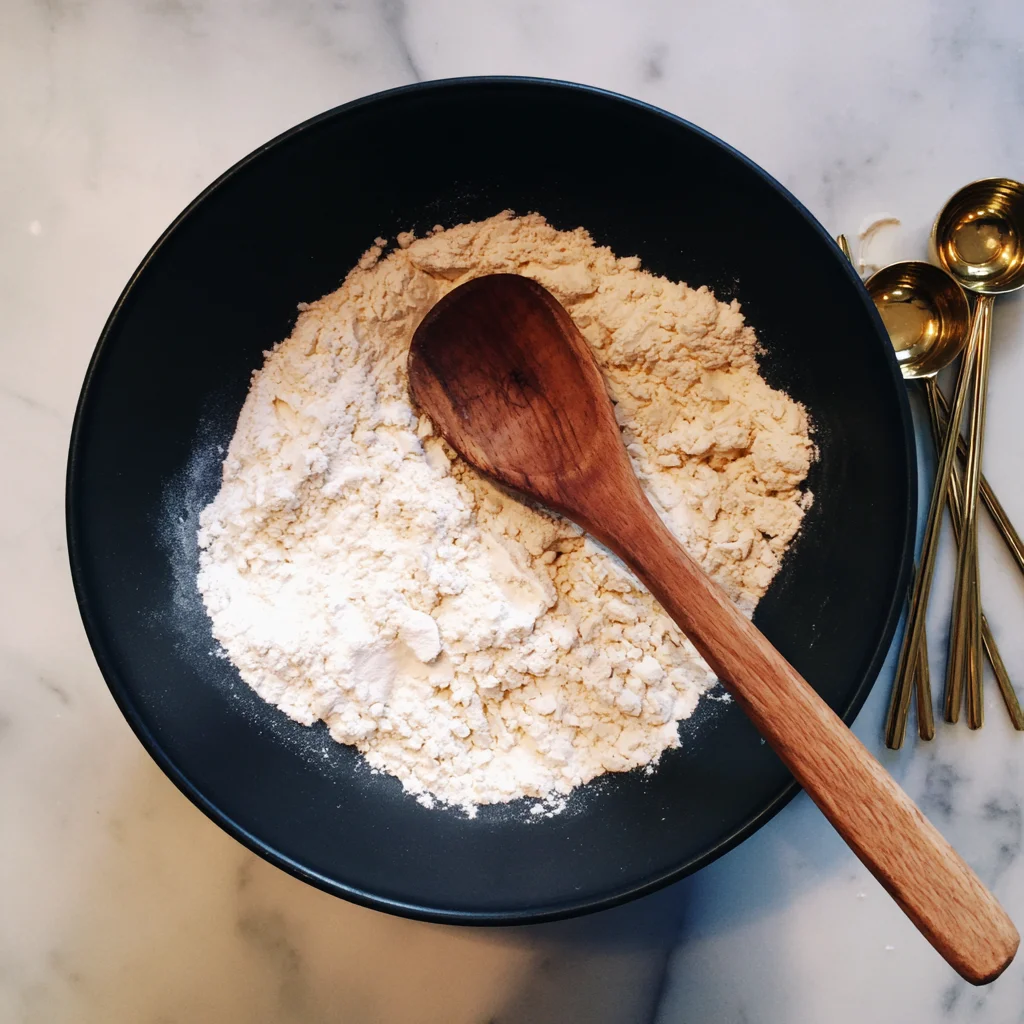
STEP 1: Mix the Dry Ingredients
In a large mixing bowl, add your flour, sugar, salt, and instant yeast. Give everything a good stir to make sure the ingredients are evenly distributed. You want the yeast to be scattered throughout so it activates properly once the warm water hits.
Quick Tip: Make sure you’re using instant yeast—not active dry. Instant yeast can go straight into the dry mix without needing to bloom first, which makes the process so much easier.
STEP 2: Add Wet Ingredients and Form the Dough
Next, pour in your warm water (about 110°F) and olive oil. Stir it all together using a wooden spoon or spatula until a shaggy dough forms. It’ll look a bit messy at first—totally normal!
Once everything starts to come together, transfer the dough to a lightly floured surface and start kneading. You’ll want to knead it for about 8 to 10 minutes, or until it becomes smooth, elastic, and just slightly tacky. Don’t skimp on this step—this is where the gluten starts to develop and gives your bread that amazing texture.
Kneading Tip: If the dough is sticking to your hands too much, sprinkle a little more flour over the surface—but don’t overdo it. Too much flour can make the bread dry.
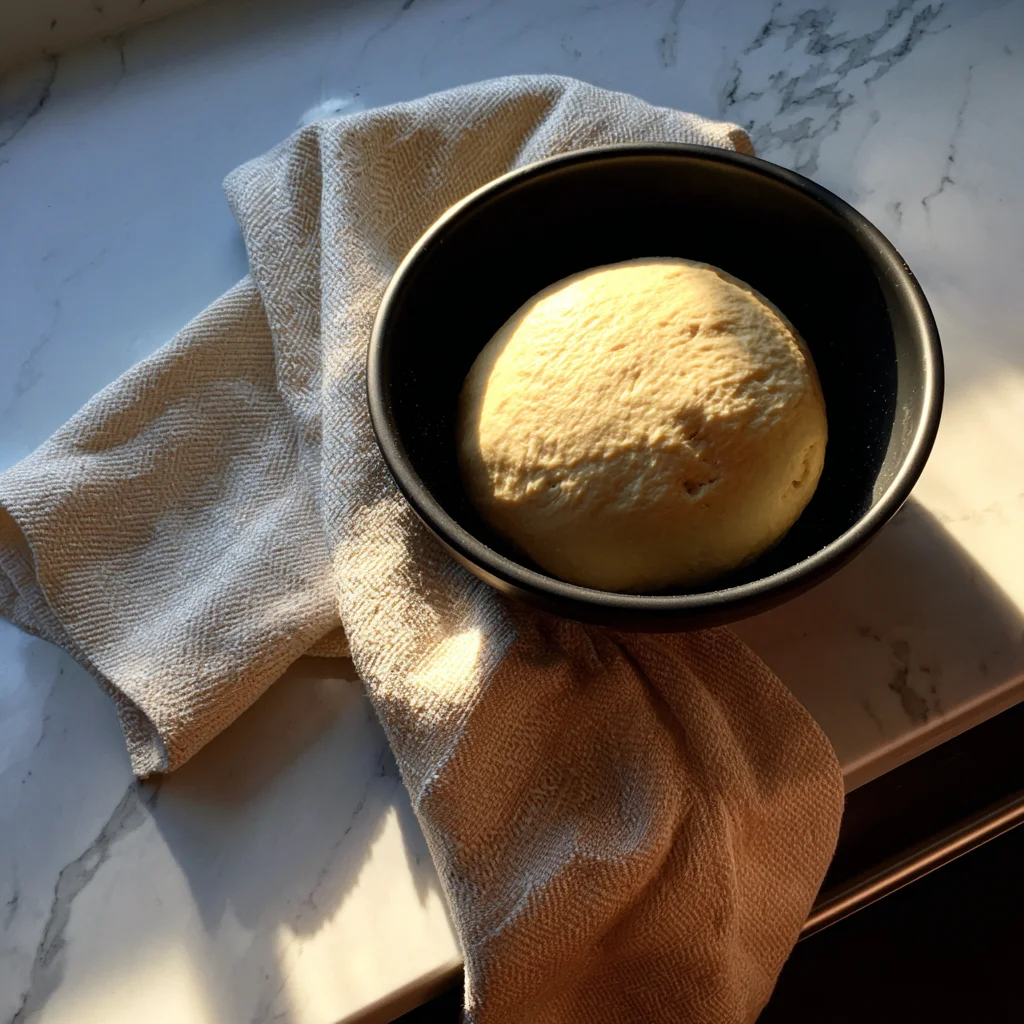
STEP 3: First Rise (Let the Dough Work Its Magic)
Now, take a clean bowl and lightly grease it with a bit of olive oil. Place your dough inside, turning it once so it’s coated in the oil (this keeps the surface from drying out). Cover the bowl with a damp kitchen towel or plastic wrap and set it in a warm, draft-free spot.
Let the dough rise for 1 to 1½ hours, or until it’s doubled in size. This is when all that kneading pays off—you’ll see it puff up beautifully.
Pro Tip: If your kitchen runs cool, preheat your oven for just a couple of minutes, turn it off, and then place the bowl inside. Just be careful not to let it get too warm—you don’t want to cook the dough!
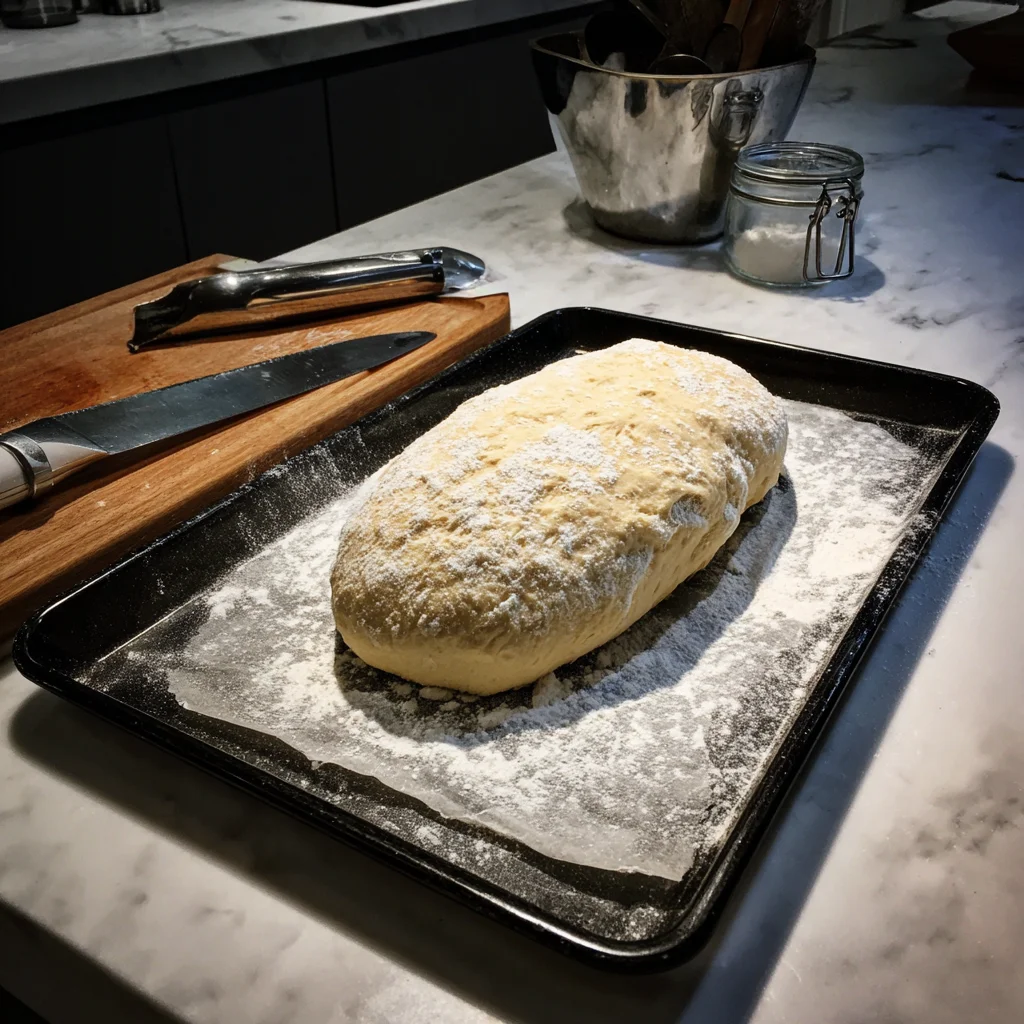
STEP 4: Shape the Loaf
Once your dough has risen, gently punch it down to release any air bubbles. Turn it out onto a floured surface and shape it into a loaf. You can go for a long baguette-style shape or a shorter oval loaf—whatever you like best.
Place the shaped dough on a parchment-lined baking sheet or directly onto a floured baking stone if you have one. This step sets you up for that gorgeous artisan look and crunchy bottom crust.
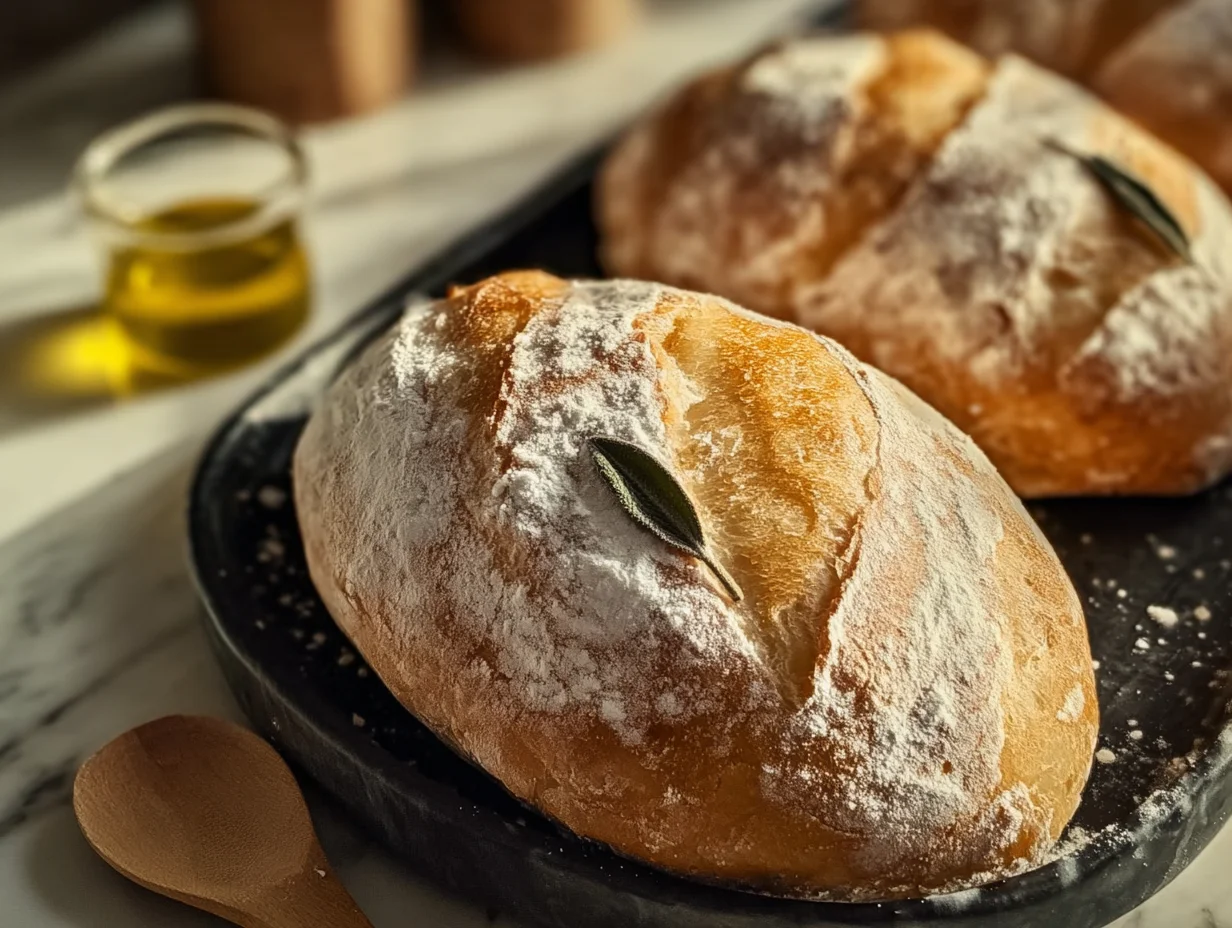
Rustic Touch: If you want that bakery-style appearance, dust the top lightly with flour before baking.
Crusty Homemade Italian Bread – Just Like Your Favorite Bakery Loaf!
Alright, now that we’ve mixed, kneaded, and shaped our dough, it’s time to bring this beautiful loaf to life. Part 2 is where the magic really starts to happen—this is when we coax that perfect crust and pillowy center out of our humble ingredients. If you’ve never created steam in your oven before, you’re in for a treat. It’s a simple trick that turns a good loaf into a great one.
Let’s jump back in right where we left off. Your dough is shaped and resting on its baking sheet, ready for its final rise.
STEP 5: Let It Rest and Puff Up
After shaping, cover your loaf loosely with a clean towel and let it rest at room temperature for 30 to 45 minutes. You’re looking for it to get nice and puffy—not quite doubled, but noticeably fuller.
This step is called the second rise or proofing. It allows the dough to relax and develop its final structure before heading into the oven. Skip this, and your bread might turn out dense or misshapen.
Helpful Tip: If you notice the surface of the dough drying out during this rest, gently mist it with water or loosely cover it with plastic wrap instead of a towel.
STEP 6: Preheat the Oven and Score the Bread
While your dough is proofing, preheat your oven to 425°F. If you want that real-deal crusty finish, here’s a professional trick: place a metal pan (like an old cake or roasting pan) on the bottom rack of your oven while it preheats.
We’ll use this pan to create steam in the next step—but more on that in a second.
Now, just before your loaf goes into the oven, use a sharp knife or razor blade to score the top of the bread. Make a few diagonal slashes about ¼-inch deep. This step isn’t just for looks—it also helps control how the bread expands in the oven so you don’t end up with cracks in random places.
Scoring Tip: If the blade drags or sticks, wet it slightly for a smoother cut.
STEP 7: Bake with Steam for Maximum Crustiness
Carefully slide your loaf into the oven, placing it on the middle rack. Now comes the fun part: quickly pour 1 cup of hot water into the preheated metal pan on the bottom rack, then close the oven door as fast (and safely) as you can.
This burst of steam is what gives the bread its signature golden, crackly crust. It keeps the outside from setting too quickly, allowing the loaf to rise more in the early part of baking.
Bake for 25 to 30 minutes, or until the crust is deep golden brown and the loaf sounds hollow when you tap the bottom. If you have a thermometer, the internal temperature should read about 190–200°F when fully baked.
Bonus Tip: For an even deeper color and crunch, leave the loaf in for an extra 2-3 minutes—just keep an eye on it to avoid burning.
STEP 8: Cool Completely Before Slicing
As tempting as it is to cut into the bread while it’s still warm, resist the urge and let it cool completely on a wire rack. This step is key for maintaining that crispy crust and ensuring the interior finishes setting up.
Cutting too soon can make the inside gummy and collapse slightly, so give it at least 30 to 45 minutes to cool before slicing in. It’s totally worth the wait.
Storage Tip: This bread keeps well at room temperature for about 3 days. Just wrap it in a clean towel or paper bag—avoid plastic, which can soften the crust.
Optional Variations and Serving Suggestions
Once you’ve mastered the basic version of this Italian bread, feel free to play around with it a bit. Here are a few of my go-to ideas when I want to switch things up:
-
Add Herbs: Mix in 1-2 teaspoons of dried rosemary, oregano, or Italian seasoning with the dry ingredients for a flavorful twist.
-
Garlic Lover’s Loaf: Rub a cut garlic clove over the crust right after baking for a subtle garlicky touch—or go bold and add roasted garlic directly into the dough.
-
Crusty Rolls: Divide the dough into smaller rounds and bake for 18–20 minutes for individual rolls. Perfect for sandwiches or soup night.
-
Flour-Dusted Finish: For that rustic, artisan look, lightly dust the top of the shaped dough with flour right before baking.
And let’s not forget the best part—eating it! Serve it warm with olive oil and balsamic vinegar, dip it in hearty soups, or turn it into the ultimate sandwich bread. It also makes incredible crostini or bruschetta when sliced thin and toasted.
Crusty Homemade Italian Bread – Just Like Your Favorite Bakery Loaf!
You’ve mixed, kneaded, shaped, steamed, and baked your way through this beautiful loaf—and if you’re anything like me, the hardest part was waiting for it to cool before slicing into it. There’s something deeply satisfying about pulling a loaf of freshly baked bread out of the oven and hearing that telltale crackle as it cools. That golden crust? Absolute perfection.
Before we wrap things up, let’s go over a few commonly asked questions that might pop up if this is your first (or fifth) time making homemade bread like this. Whether you’re troubleshooting a soggy center or wondering how to store leftovers, I’ve got you covered.
FAQ: Your Homemade Italian Bread Questions Answered
1. Can I use active dry yeast instead of instant yeast?
Yes, you can! Just make sure to activate it first. Dissolve the active dry yeast in the warm water with the sugar and let it sit for about 5–10 minutes until it becomes foamy. Then proceed with the recipe as written.
2. My bread didn’t rise much—what went wrong?
A few things could be the culprit: your yeast might be expired, your water may have been too hot (which kills the yeast), or your kitchen was too cool during the rise. Make sure to store yeast properly and try proofing in a slightly warmer spot next time.
3. How do I get a really crispy crust?
Steam is the secret! Make sure to preheat that metal pan in the oven and add hot water right after placing your loaf inside. Also, avoid cutting into the bread too soon—cooling on a wire rack allows the crust to set.
4. Can I make this bread ahead of time?
Absolutely. You can make the dough and refrigerate it after the first rise. Just let it come to room temperature before shaping and proceeding with the second rise and bake. Baked bread can also be frozen and reheated.
5. What’s the best way to store leftovers?
Store your loaf at room temperature, wrapped in a clean kitchen towel or paper bag. Avoid plastic bags—they trap moisture and soften the crust. For longer storage, slice and freeze the bread in a zip-top freezer bag.
6. Can I add cheese or other mix-ins?
Yes, but keep it balanced. Adding grated Parmesan, olives, or roasted garlic can be delicious. Just fold them in during the kneading process. Too many mix-ins can weigh the dough down, so don’t go overboard.
7. My crust turned out too hard—what happened?
If your crust feels more like a brick than a crunch, it might have baked too long or without enough steam. Try reducing the bake time slightly or check your oven temp with a thermometer to make sure it’s accurate.
Final Thoughts – Your New Go-To Bread Recipe
There’s a real sense of accomplishment that comes from making your own bread. It’s not just about the ingredients—it’s about slowing down, working with your hands, and enjoying the process. This Crusty Homemade Italian Bread is a great introduction to artisan-style baking because it’s forgiving, simple, and produces truly delicious results.
Once you get the hang of it, don’t be surprised if you start baking it every week. It’s that kind of recipe—the one that becomes part of your routine, whether you’re planning a cozy family dinner or just want something special for a weekday sandwich.
If you give this recipe a try, I’d love to hear how it turns out! Did you add fresh herbs? Try a different shape? Let me know in the comments—your variations and tips might just inspire someone else. And if you’re new to bread baking, trust me—you’ve got this.
PrintTasty Homemade Crusty Italian Bread

This homemade crusty Italian bread delivers a golden, crunchy exterior with a soft and airy interior, just like the loaves you’d find in a traditional Italian bakery. With a simple ingredient list and straightforward technique, this recipe brings artisan-style bread right to your kitchen. It’s perfect for sandwiches, dipping in olive oil, or serving alongside soups and pasta dishes.
- Author: Mark's Recipe
Ingredients
4 cups all-purpose flour
1 tablespoon sugar
2 teaspoons salt
1 tablespoon instant yeast
1 ½ cups warm water (about 110°F)
2 tablespoons olive oil
Instructions
1 In a large mixing bowl, combine flour, sugar, salt, and instant yeast. Stir to evenly distribute the dry ingredients.
2 Add warm water and olive oil to the dry mixture. Stir until a shaggy dough forms. Transfer the dough to a floured surface and knead for about 8 to 10 minutes until smooth and elastic.
3 Place the dough in a lightly greased bowl, cover with a damp cloth or plastic wrap, and let rise in a warm area for 1 to 1½ hours, or until doubled in size.
4 Punch down the dough and turn it out onto a floured surface. Shape it into a long loaf or oval, depending on your preference. Place it on a parchment-lined baking sheet or a lightly floured baking stone.
5 Cover the shaped dough with a towel and let it rest for another 30 to 45 minutes until puffy.
6 Preheat the oven to 425°F. For extra crustiness, place a metal pan on the bottom rack while preheating. Just before baking, score the top of the loaf with a sharp knife or razor blade.
7 Place the bread in the oven and carefully pour 1 cup of hot water into the preheated pan to create steam. Quickly close the oven door and bake for 25 to 30 minutes until the crust is deep golden brown and the loaf sounds hollow when tapped on the bottom.
8 Let the bread cool completely on a wire rack before slicing to preserve the crust and interior texture.
Notes
Use bread flour instead of all-purpose for a chewier texture and even better rise. For a rustic appearance, dust the loaf lightly with flour before baking. This bread stores well at room temperature for up to 3 days or can be frozen for longer storage. Reheat in a 350°F oven for 5 to 10 minutes to refresh the crust.


")
