There’s something undeniably crave-worthy about a Taco Bell Beefy Melt Burrito. The combination of seasoned beef, creamy cheese, crunchy chips, and warm tortillas just hits different, right? It’s got all the best textures and flavors in one easy-to-eat package. But here’s the best part—you don’t have to make a late-night run to the drive-thru to get your fix. You can make your very own Beefy Melt Burrito at home, and dare I say…it might even be better than the original.
We’re talking about the ultimate comfort food here. This recipe captures everything we love about the fast-food version but lets you control the ingredients (and pile on a little extra cheese, because why not?). It’s hearty, cheesy, and hits that perfect balance between soft and crispy with a quick pan-sear that takes things to the next level.
The first time I tried making this at home, it was one of those “let’s see if I can do it” experiments—and I was blown away. My family didn’t just like it—they devoured it. It’s become one of our go-to weekend meals because it’s easy, fun to assemble, and seriously satisfying. Plus, it’s a great way to use up leftover rice or those half-bags of chips hanging around the pantry.
Alright, let’s jump right into making your own copycat Beefy Melt Burrito. You’re just a few steps away from a cheesy, beefy, crunchy bite of heaven.
Ingredients You’ll Need
-
450 g lean ground beef
-
1 packet (28 g) taco seasoning
-
60 ml water or beef broth
-
240 g refried beans
-
340 g cooked Mexican rice
-
4 large flour tortillas
-
100 g corn chips (Fritos or Doritos both work great)
-
240 ml cheese dip, warmed
-
110 g shredded Mexican cheese blend
-
120 ml sour cream
-
Salsa, for serving
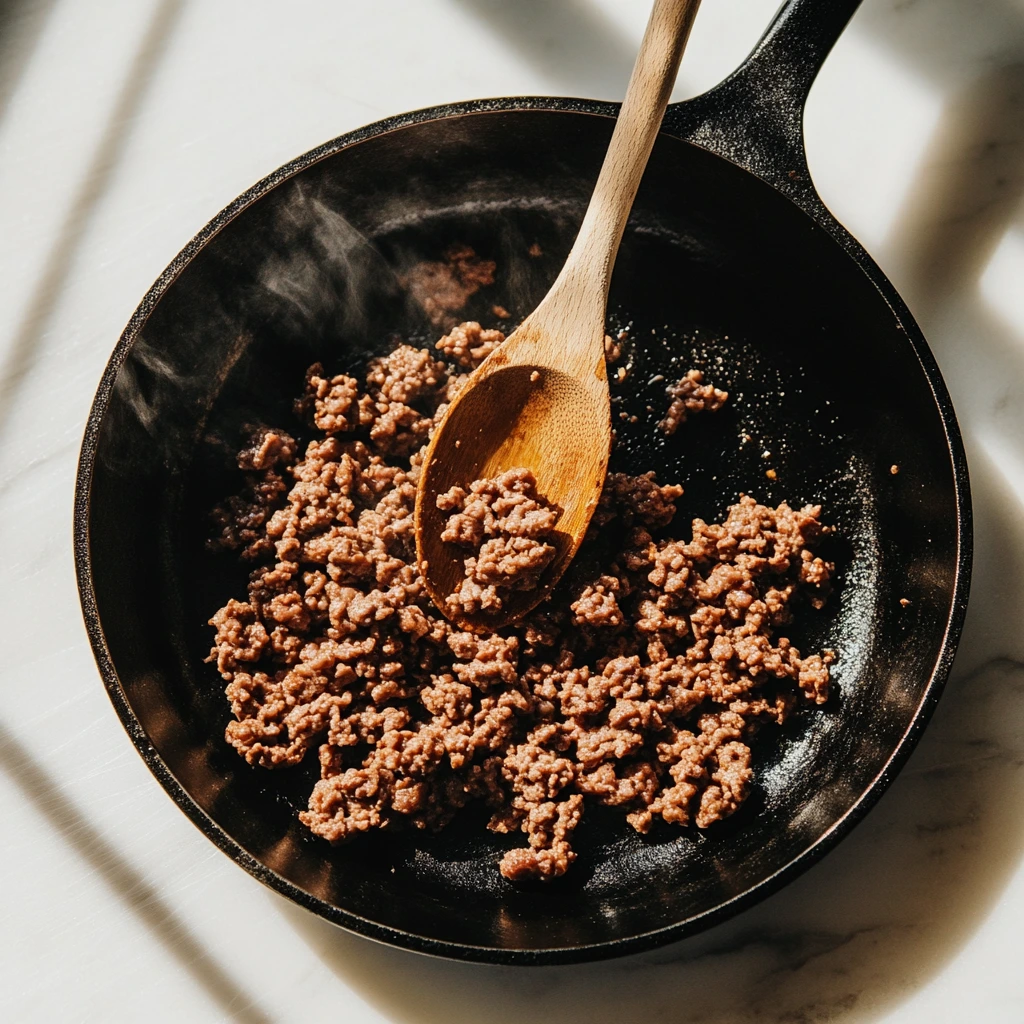
STEP 1: Brown the Beef
Start by heating a large sauté pan over medium heat. Add the ground beef and break it up into small crumbles as it cooks. Keep stirring and cooking until there’s no pink left in the meat. If there’s excess fat in the pan, go ahead and drain it off. You want the beef to be flavorful, not greasy.
STEP 2: Season and Combine with Beans
Now, sprinkle in that taco seasoning and pour in the water or beef broth. Stir it all together and let it simmer for about a minute. This is when those delicious Tex-Mex aromas start filling your kitchen. Once the seasoning is fully absorbed, stir in the refried beans. The beans make the filling super creamy and satisfying. If it starts to look a bit thick, add a splash more water to get it to a nice, spreadable consistency.
STEP 3: Warm Your Rice and Tortillas
This step is all about making assembly easy. If you’re using leftover rice, just warm it in the microwave until it’s heated through. You don’t want to bite into a cold burrito, trust me. As for the tortillas, microwave each one for 20–30 seconds so they’re soft and pliable. This will make them way easier to fold without tearing.
STEP 4: Assemble Like a Pro
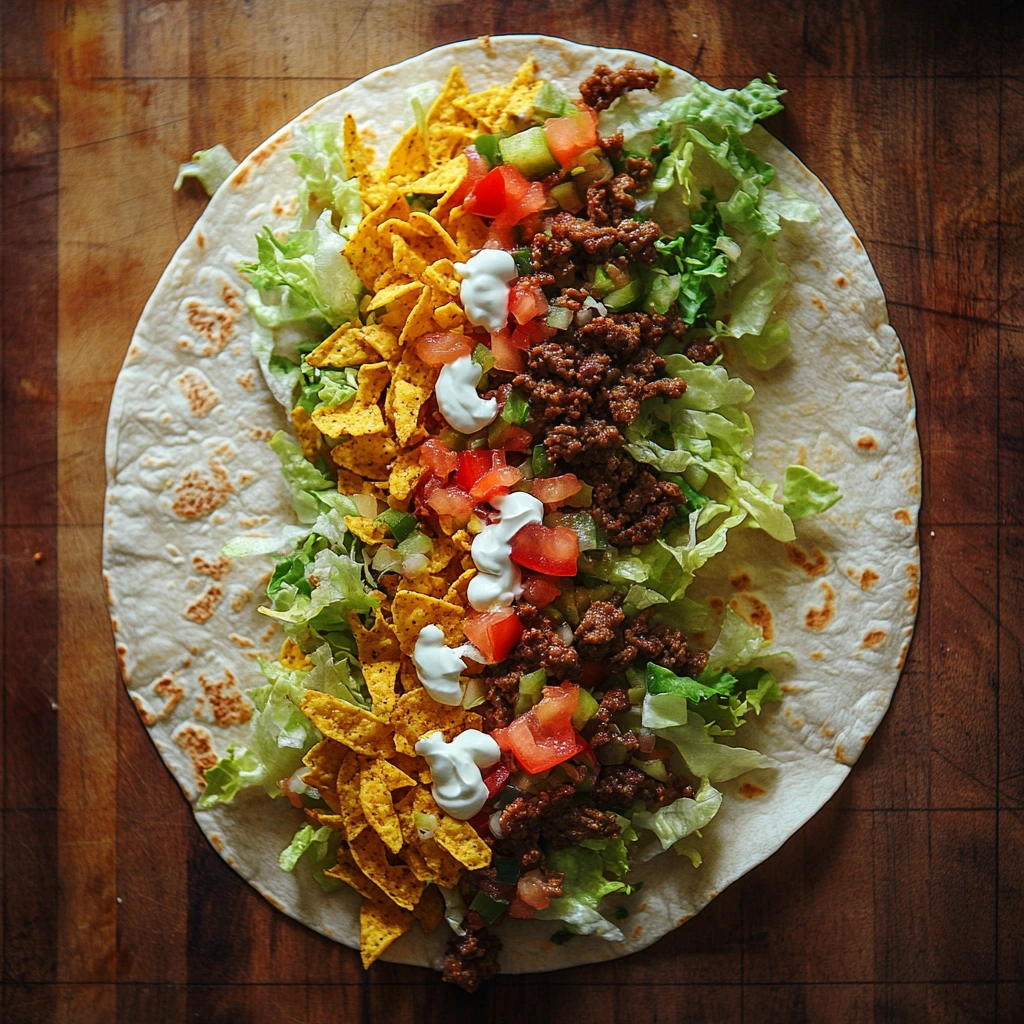
Lay one tortilla flat on your counter or a large plate. Start with a line of the beef-bean mixture right down the center. Don’t overload it—you want to be able to roll this thing up without a burrito explosion. Next, add a scoop of warm Mexican rice on top of the meat.
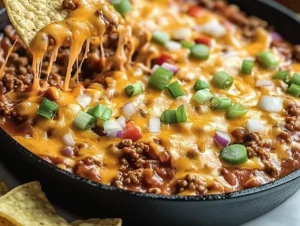
From here, it’s all about layering the textures: a small handful of corn chips for that signature crunch, a generous spoonful of warm cheese dip, a sprinkle of shredded Mexican cheese blend, and a little dollop of sour cream. It’s starting to look (and smell) like something pretty amazing, right?

How to Wrap, Crisp, and Serve the Ultimate Beefy Melt Burrito
So now that your fillings are perfectly prepped and your tortillas are warm, it’s time to bring everything together and make these burritos shine. This part is where the magic happens—the crisped, golden tortilla takes an already delicious meal and gives it that irresistible finish you didn’t know you were missing. Let’s dive right in!
STEP 5: Wrap It Up Tight
Okay, this step is important—rolling your burrito properly keeps all those tasty fillings right where they belong.
Once your burrito is filled (starting with the beef-bean mix and ending with sour cream), fold in the short ends of the tortilla first. This keeps the fillings from spilling out the top or bottom. Then, starting from one of the long edges, roll it up tightly over the fillings. Keep it snug, but don’t force it. If you’ve heated your tortillas enough, they should bend easily without cracking.
Place the burrito seam-side down on a plate while you finish rolling the rest. It helps keep everything together before you move to the skillet.
STEP 6: Crisp in a Dry Skillet
Now for the real game-changer. This step is optional but highly recommended if you love that slightly crunchy, toasted texture on the outside of your burrito.
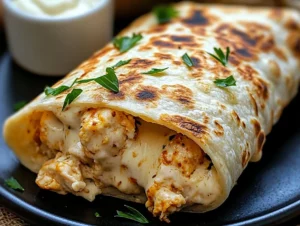
Heat a dry skillet over medium heat. Once it’s hot, place your burrito seam-side down and cook for 1 to 2 minutes per side. The goal is to get a nice golden-brown crust without burning the tortilla. You’ll know it’s ready when it’s crisp and lightly blistered on each side.
Crisping not only makes the burrito easier to hold (less floppiness = less mess), but it also adds that fast-food-style finish you’re craving.
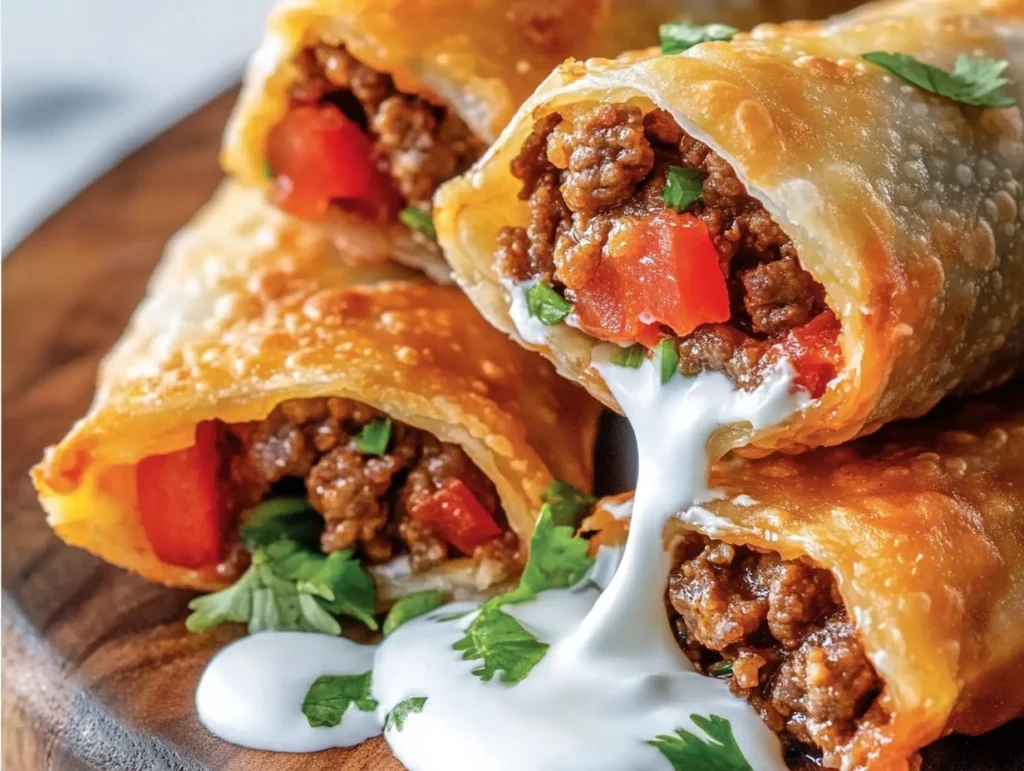
STEP 7: Slice and Serve
Once the burritos are crisped, you can serve them whole or slice them in half diagonally for a restaurant-style presentation. Trust me—cutting them in half and seeing that cheesy, beefy, crunchy center is incredibly satisfying.
Serve with your favorite salsa on the side for dipping or drizzling, and you’re ready to dig in. This is one of those meals that hits every note—comforting, flavorful, and just a little indulgent.
![]()
Helpful Tips and Customization Ideas
Let’s talk quick ways to make this recipe your own, because once you’ve made the base version, it’s easy to tweak it to your preferences or what you have on hand.
-
Use Leftover Rice: If you’ve got leftover takeout rice, that’s perfect here. You can also use store-bought frozen Mexican rice and just warm it up.
-
Switch Up the Chips: Classic Fritos add a corn-forward crunch, but Nacho Cheese Doritos? Game changer. Even tortilla strips work if that’s what you’ve got.
-
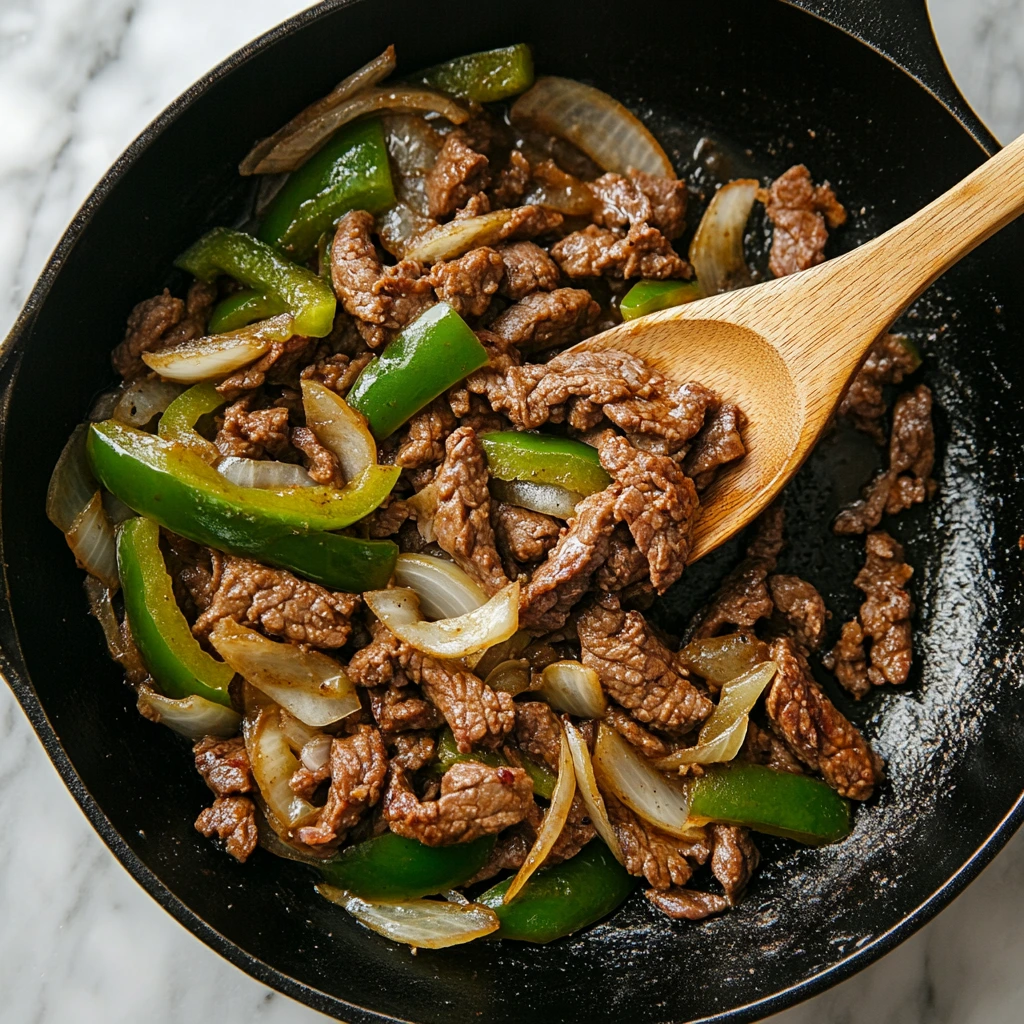
Add Veggies: Diced onions, sautéed bell peppers, or even a little sweet corn can add freshness and color to the filling.
-
Spice It Up: Add chopped pickled jalapeños or a drizzle of hot sauce before rolling if you want a bit more heat.
-
Make It Vegetarian: Just swap the ground beef for seasoned lentils, black beans, or a meatless crumble. The cheese, rice, and crunch will still make it satisfying.
-
Baking Instead of Crisping: If you’re making a bunch for a crowd, skip the skillet and wrap each burrito in foil. Bake them at 180°C (350°F) for about 10 minutes to warm everything through. It’s a softer tortilla but just as delicious.
FAQs About the Copycat Taco Bell Beefy Melt Burrito
You’ve got your burritos rolled, crisped, and ready to devour—but before we wrap things up (pun totally intended), let’s go over a few frequently asked questions. These are the things I get asked most often when I share this recipe, especially from folks making it for the first time. If you’re wondering about storage, substitutions, or just how to get that perfect cheese pull, I’ve got you covered.
Can I make these burritos ahead of time?
Absolutely. You can prep and roll the burritos, then store them in the fridge for up to two days. When you’re ready to eat, just pop them in a preheated 180°C (350°F) oven for about 10 minutes or crisp them up in a skillet to reheat. They hold up really well!
What’s the best way to reheat leftovers?
Reheating in the oven or a panini press works best—it keeps the tortilla from getting soggy. Skip the microwave if you want that crispy finish. If you do use the microwave, wrap the burrito in a paper towel to help absorb moisture.
Can I freeze these burritos?
Yes, these freeze beautifully. Just skip the skillet step before freezing. Wrap each burrito tightly in foil, then place them in a freezer bag. When you’re ready to eat, unwrap, thaw in the fridge overnight, and reheat in the oven. You can also crisp them in a skillet straight from thawed for that golden exterior.
What cheese dip should I use?
A store-bought nacho cheese sauce or queso works great here—especially the kind you’d use for dipping chips. You can also use a homemade cheese sauce if you’re feeling extra fancy, but something like Tostitos queso or Velveeta-based dips gets the job done with ease.
Is there a way to make this a little healthier?
Sure thing! Use ground turkey or chicken instead of beef, go for a low-fat cheese and sour cream, and swap the corn chips for baked tortilla strips. You can also add more veggies like sautéed peppers, onions, or even spinach for an extra nutrition boost.
How spicy is this recipe as written?
It’s pretty mild, especially if you use a basic taco seasoning and regular cheese dip. If you want more kick, choose a spicy taco mix or stir in a spoonful of hot salsa or diced jalapeños with the beef and beans.
What’s the best way to keep the burritos from falling apart?
The key is not to overfill them and to warm the tortillas beforehand so they’re soft and flexible. Rolling them tightly and crisping them in the skillet seam-side down also helps lock everything in place.
Conclusion: Bring Taco Bell Vibes to Your Kitchen
There you have it—your very own homemade version of Taco Bell’s Beefy Melt Burrito. It’s everything you love about the fast-food original, but even better because you get to make it exactly how you like it. Whether you keep it classic with beef and cheese or throw in your own twists, this recipe is a total win for lunch, dinner, or those “I need something cheesy and comforting right now” moments.
PrintTaco Bell Beefy Melt Burrito

A copycat of Taco Bell’s beloved Beefy Melt Burrito, featuring seasoned beef and beans, Mexican rice, crunchy corn chips, and creamy cheese sauce, all wrapped in a warm flour tortilla and lightly crisped for the perfect handheld meal.
- Author: Mark's Recipe
Ingredients
450 g lean ground beef
1 packet (28 g) taco seasoning
60 ml water or beef broth
240 g refried beans
340 g cooked Mexican rice
4 large flour tortillas
100 g corn chips (Fritos or Doritos)
240 ml cheese dip, warmed
110 g shredded Mexican cheese blend
120 ml sour cream
Salsa, for serving
Instructions
1️⃣ Brown the ground beef in a sauté pan over medium heat, breaking it into small pieces until no pink remains. Drain excess fat if needed.
2️⃣ Stir in the taco seasoning and water or broth, cook for 1 minute, then fold in the refried beans. If the mixture seems too thick, add a little extra water to reach a spreadable consistency.
3️⃣ Warm the cooked Mexican rice and the flour tortillas: microwave the rice until heated through, and heat each tortilla for 20–30 seconds until pliable.
4️⃣ Lay a warm tortilla flat. Spoon a line of the beef-bean mixture down the center, followed by a layer of Mexican rice.
5️⃣ Top with a handful of corn chips, a generous spoonful of warmed cheese dip, a sprinkle of shredded cheese, and a dollop of sour cream.
6️⃣ Fold the short edges of the tortilla over the filling, then roll tightly from one long side to enclose everything securely.
7️⃣ For a crisp finish, place the assembled burrito seam-side down in a dry skillet over medium heat and cook 1–2 minutes per side, until golden brown.
8️⃣ Transfer to a plate, slice in half if desired, and serve immediately with salsa on the side.
Notes
To simplify prep, use leftover or store-bought Mexican rice. For extra depth, sauté finely diced onion and garlic with the beef before adding seasoning. If you prefer a softer tortilla, wrap each burrito in foil and bake at 180 °C (350 °F) for 10 minutes instead of skillet-crisping. Leftover burritos can be refrigerated for up to two days; reheat in a 180 °C (350 °F) oven for 10 minutes or in a panini press for best texture. Add chopped cilantro or pickled jalapeños as garnish for a fresh, tangy contrast.

")
