If you’ve ever craved fresh, homemade bread but didn’t want to turn on your oven—or maybe you don’t even have one—then this Stove Top Bread Recipe is about to become your new best friend. This bread is soft, fluffy, and golden on the outside, all made with just a skillet and some pantry staples. Perfect for small kitchens, hot summer days, or those spur-of-the-moment baking cravings!
I discovered this recipe one summer afternoon when I was house-sitting in a cabin with no oven in sight. I needed something to go with my soup, and the idea of stovetop bread came to the rescue. I wasn’t sure it would work, but wow—it turned out to be a game-changer. Ever since then, I’ve kept this recipe in my back pocket for those times when I need something warm and homemade without heating up the whole house.
This recipe is incredibly forgiving, easy enough for beginner bakers, and doesn’t require any fancy equipment. If you have a bowl, a spoon, and a skillet with a lid, you’re good to go!
Why You’ll Love This Stove Top Bread
-
No oven needed: Great for dorms, RVs, or hot summer days.
-
Quick and easy: No complicated steps or special tools.
-
Soft and fluffy texture: With a golden crust that’s hard to resist.
-
Customizable: Add herbs, garlic, or cheese to make it your own.
Let’s get started!
Ingredients You’ll Need:
-
2 cups all-purpose flour
-
1 teaspoon instant yeast
-
1 teaspoon sugar
-
½ teaspoon salt
-
¾ cup warm water
-
1 tablespoon olive oil
That’s it! Nothing fancy, just your basic baking staples coming together in a delicious way.
STEPS: Making the Dough
1. Mix the Dry Ingredients
In a large mixing bowl, whisk together the flour, instant yeast, sugar, and salt. You want everything evenly distributed before you add the wet ingredients.
2. Add the Wet Ingredients
Slowly pour in the warm water and olive oil while stirring with a wooden spoon or spatula. The goal here is to create a soft, sticky dough that comes together but isn’t too wet.
3. Knead the Dough
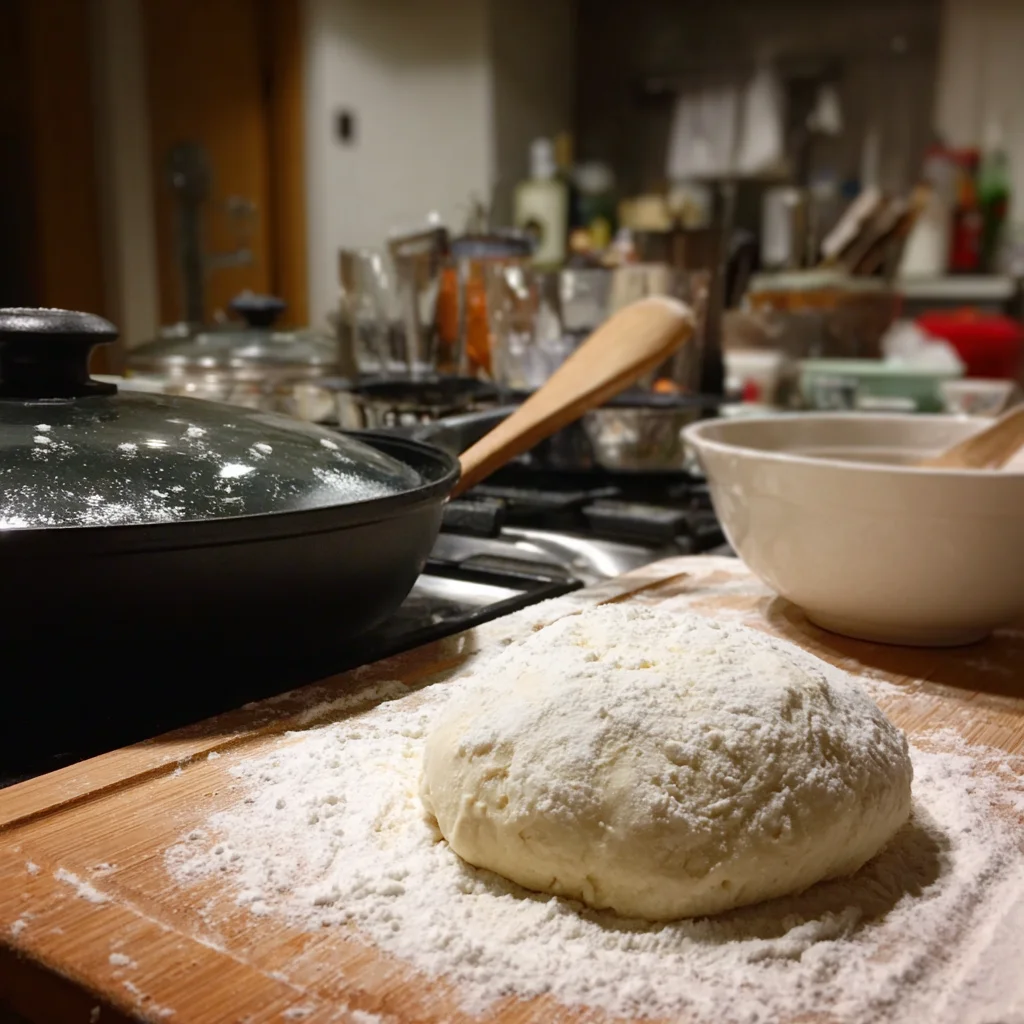
Turn the dough out onto a lightly floured surface. Knead it for about 8 minutes until it becomes smooth and elastic. Don’t be afraid to get your hands into it—this step builds the structure that gives the bread its nice chew. If the dough sticks too much to your hands or the surface, sprinkle in a little extra flour, but try not to overdo it.
4. Let It Rise
Once your dough is smooth and elastic, place it back into a lightly greased bowl. Cover the bowl with a kitchen towel or plastic wrap, and let it rest in a warm place for about 45 minutes. It should double in size during this time. I usually pop it into my (turned-off) oven with the light on—it creates just enough warmth for a perfect rise.
Why This Method Works So Well
Cooking bread on the stovetop might sound unconventional, but it’s actually a very traditional technique in many parts of the world. By using low heat and a covered pan, you create a mini-oven environment that allows the bread to steam, rise, and cook through evenly—while still getting that lovely golden crust from the direct heat of the skillet.
How to Cook Bread on the Stove: Easy No-Oven Method
Now that your dough has doubled in size and is ready to go, let’s move on to the fun part—cooking the bread! This method is seriously a lifesaver when the oven isn’t an option. Whether you’re in a small kitchen, trying to save energy, or just not in the mood to heat things up, this stovetop technique delivers soft, fluffy bread with a perfectly golden crust every time.
You’ll only need one pan with a lid (a non-stick skillet or heavy-bottomed pan works best) and a little patience as your dough transforms into beautiful, homemade bread.
STEPS: Cooking the Dough
5. Shape the Dough
Once your dough has risen, gently punch it down to release the air. Turn it out onto a lightly floured surface and shape it into a round or oval loaf—whatever best fits your skillet or pan. You don’t need to be too precise here; just try to keep the loaf about 1 to 1½ inches thick so it cooks evenly.
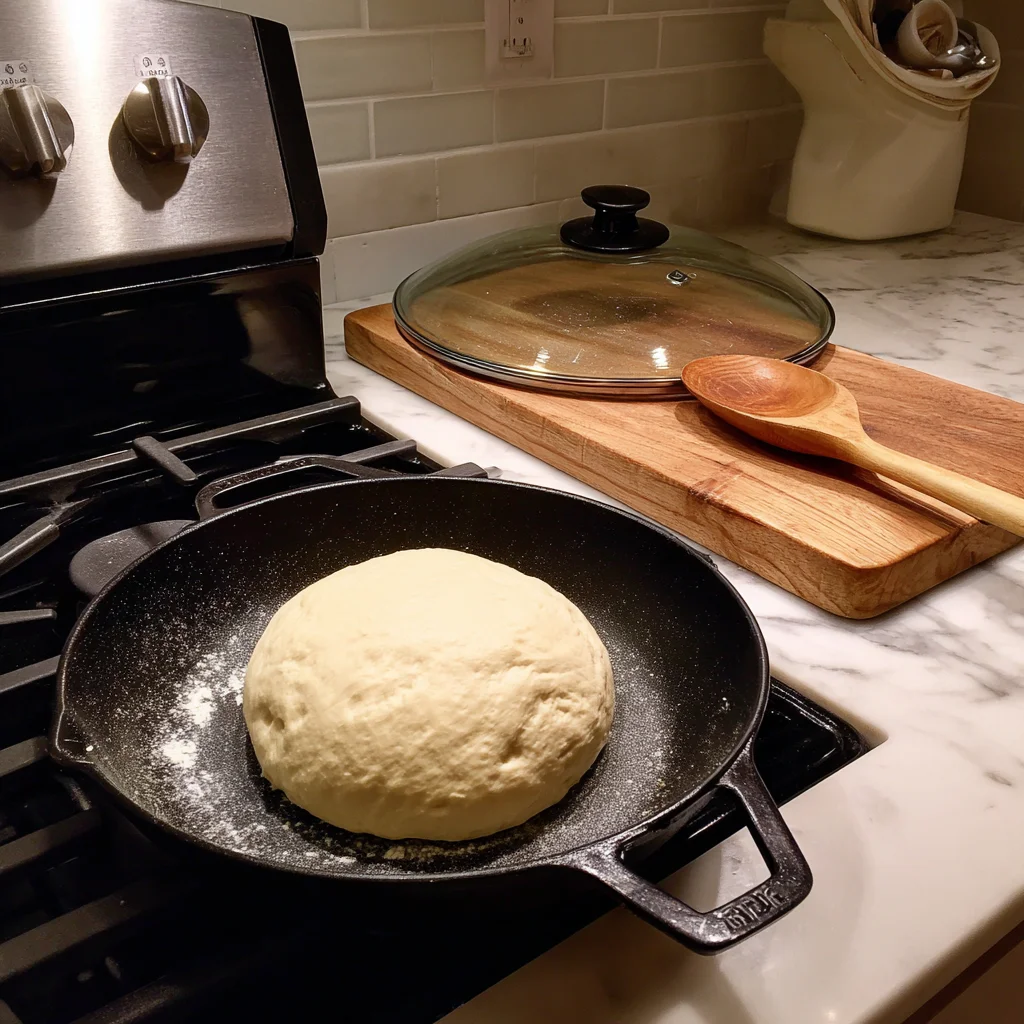
6. Preheat the Skillet
Place a non-stick skillet or heavy-bottomed pan on the stove and turn the heat to low. Let it warm up for a couple of minutes, then lightly oil the bottom with a bit of olive oil. This helps create a nice golden crust and prevents sticking.
7. Cook the First Side
Place your shaped dough into the warm skillet and cover it with a tight-fitting lid. If your skillet doesn’t come with a lid, no worries—just cover it tightly with foil to trap in the heat. Let it cook on low heat for about 10 to 12 minutes. Avoid lifting the lid too often; you want that steam to build up inside for the perfect texture.
8. Flip and Finish Cooking
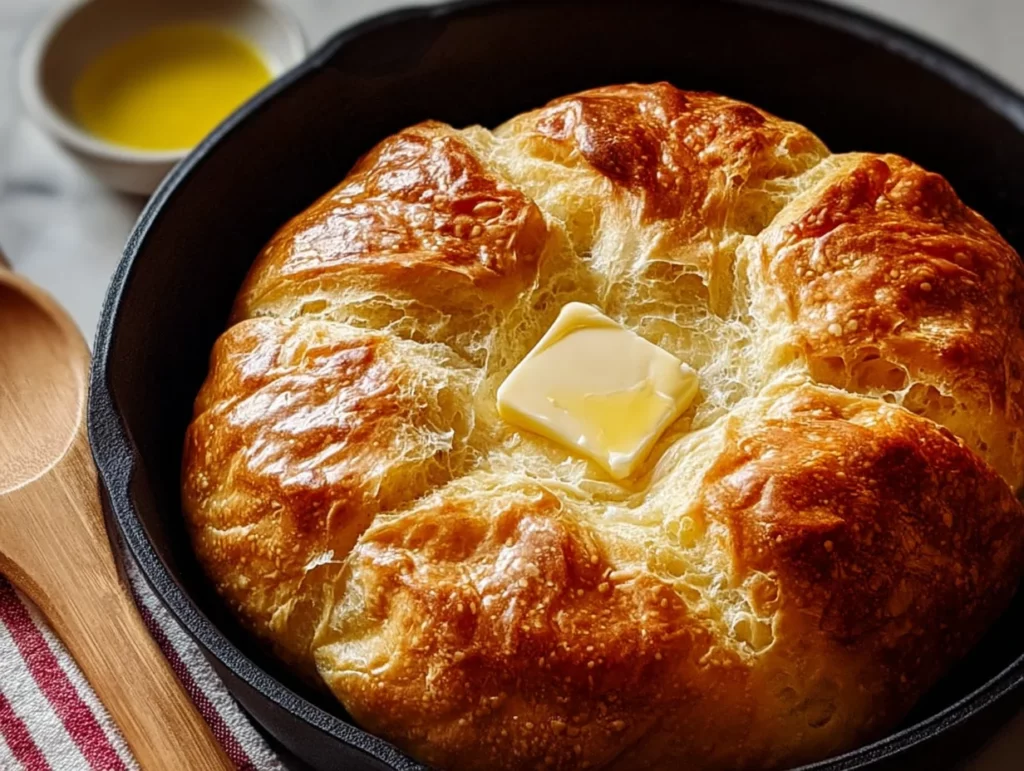
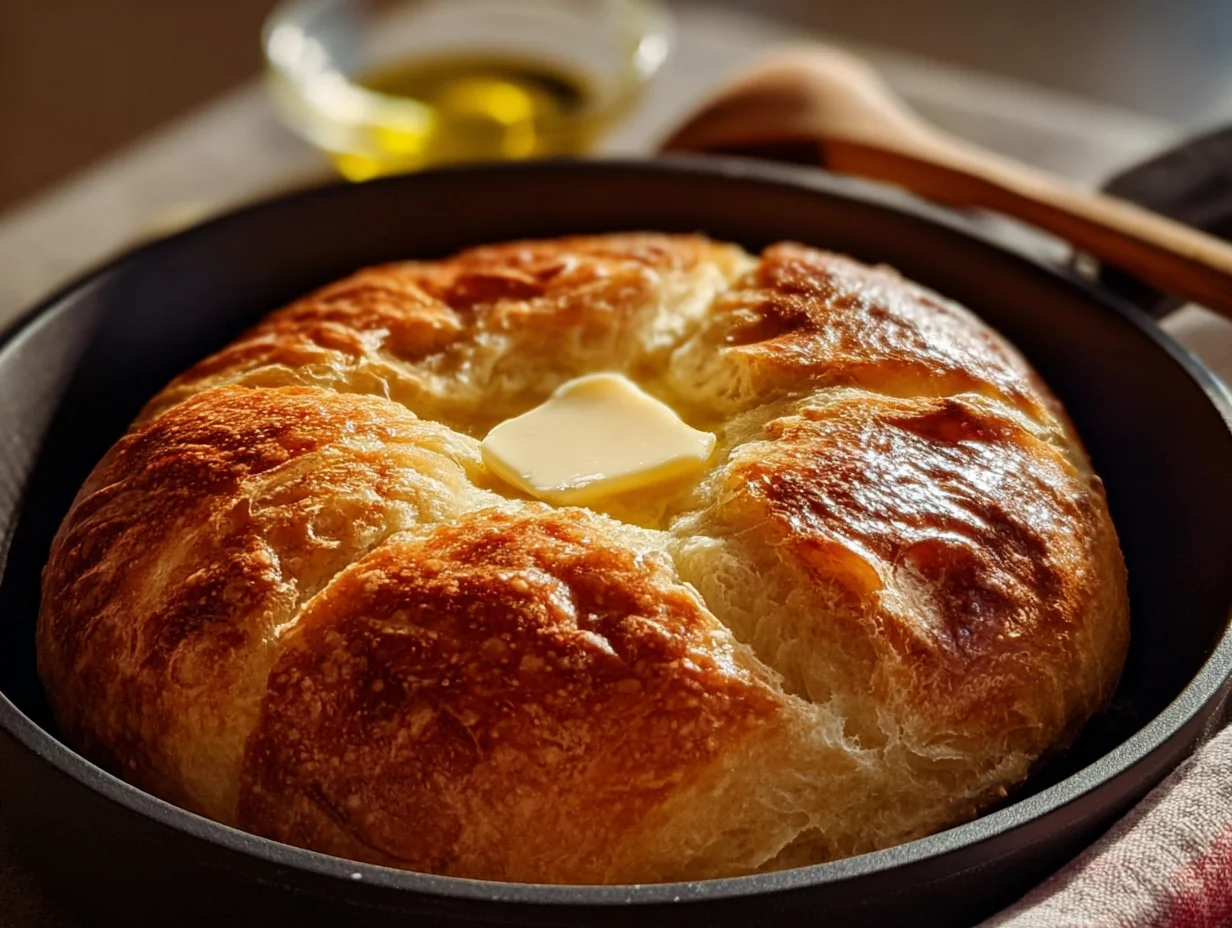
Once the bottom is golden brown (you can peek after 10 minutes), gently flip the bread using a spatula or your hands—just be careful, it’s hot! Cover again and cook for another 8 to 10 minutes. The second side should become just as golden, and the bread should sound hollow when tapped. That’s a good sign it’s cooked through.
9. Let It Cool
When your bread is done, transfer it to a wire rack or cutting board and let it cool for at least 10–15 minutes before slicing. This rest time helps finish the cooking process and prevents the inside from becoming gummy.
Tips for Success
This stove top bread recipe is incredibly straightforward, but here are a few helpful tips to make sure you get perfect results every time:
-
Keep the heat low: This is the most important tip. High heat will burn the crust before the inside is fully cooked. Low and slow is the way to go.
-
Use a heavy lid or foil: Trapping the steam inside helps mimic oven baking and ensures the bread cooks through without drying out.
-
Don’t skip the rise: It may be tempting to rush things, but giving the dough time to rise makes a huge difference in texture.
-
Customize it: This is a great base recipe! You can add a handful of shredded cheese, minced garlic, or dried herbs to the dough before shaping. Rosemary and sea salt? Yes, please.
-
Choose the right pan: A non-stick skillet is easiest for beginners, but a cast iron pan works beautifully too—just be sure to oil it well.
Serving Suggestions
This bread is super versatile. It’s great warm with butter, dunked into soup, used for sandwiches, or served alongside eggs in the morning. We’ve even sliced it, toasted it, and topped it with avocado and a poached egg for a hearty breakfast.
The texture is soft and pillowy inside with a light chew—perfect for soaking up sauces or spreading with jam. And because it’s made with basic pantry ingredients, you can whip it up anytime you’re in the mood for fresh bread without much fuss.
Storing and Reheating
Fresh is best, of course, but if you have leftovers, just let the bread cool completely and store it in an airtight container or zip-top bag at room temperature. It’ll stay soft for about 2 days. You can also slice and freeze it for longer storage—just pop it into the toaster straight from the freezer.
To reheat, warm slices in a skillet for a couple of minutes per side, or wrap the loaf in foil and heat it in a covered pan for a few minutes to bring back that just-baked softness.
Stove Top Bread: FAQs and Final Thoughts
By now, your kitchen probably smells like fresh-baked heaven, and you’ve got a warm, golden loaf cooling on your counter. Before we wrap up this stovetop bread adventure, I want to answer some common questions that tend to pop up—especially if this is your first time making bread without an oven. Then, I’ll leave you with a few final thoughts to help make this recipe a go-to in your kitchen.
Frequently Asked Questions
1. Can I use active dry yeast instead of instant yeast?
Yes, you can. Just dissolve the active dry yeast in the warm water with the sugar and let it sit for about 5 to 10 minutes until it becomes foamy. Then proceed with the recipe as written. This extra step helps activate the yeast properly.
2. My dough is too sticky—what should I do?
Sticky dough is normal at first, especially during mixing. When kneading, sprinkle in a little more flour, a tablespoon at a time, until the dough becomes manageable. Be careful not to add too much, though—you still want the dough to be soft, not dry.
3. Can I double the recipe?
You can absolutely double it if you want to make more! Just divide the dough in half after the first rise and cook each loaf separately. Overcrowding the pan won’t allow the bread to cook evenly.
4. What if I don’t have a non-stick skillet?
If you don’t have non-stick, a well-seasoned cast iron skillet or heavy-bottomed stainless steel pan can work. Just make sure to oil the bottom generously and keep the heat low to prevent sticking or burning.
5. How do I know when the bread is done?
Tap the loaf gently—if it sounds hollow and the crust is golden on both sides, it’s done. You can also insert a thermometer into the center; it should read around 190°F to 200°F if you want to be extra precise.
6. Can I make this bread gluten-free?
This recipe hasn’t been tested with gluten-free flour, so results may vary. A 1:1 gluten-free baking flour might work, but the texture will be different. If you try it, let me know how it turns out!
7. What herbs or add-ins go well with this bread?
This dough is a great base for flavor! Try mixing in a teaspoon of dried rosemary, thyme, or Italian seasoning. You can also fold in grated cheese, chopped olives, or minced garlic before shaping the loaf.
Final Thoughts: Easy Homemade Bread, Anytime
There’s something so satisfying about making your own bread, and this stove top version proves you don’t need a fancy kitchen—or even an oven—to do it. With just a few ingredients, a skillet, and a little time, you can create a soft, fluffy loaf with a golden crust right on your stovetop.
This recipe has become one of my go-tos, especially on busy weeknights or when the oven is already in use. It’s perfect for beginners, great for improvising with whatever flavors you love, and so rewarding to make.
So next time you find yourself without an oven or just craving something homemade and comforting, give this recipe a try. I’d love to hear how it turns out for you—drop a comment, share your favorite add-ins, or let me know how you served it up. There’s always room for a new twist on a classic.
PrintStove Top Bread Recipe

This stove top bread recipe is perfect for those who want fresh, homemade bread without using an oven. Made with simple ingredients and cooked in a skillet or covered pan, the result is a soft, fluffy loaf with a golden crust. It’s ideal for small kitchens, hot days, or anyone looking for an easy alternative to traditional baking.
- Author: Mark's Recipe
Ingredients
2 cups all-purpose flour
1 teaspoon instant yeast
1 teaspoon sugar
½ teaspoon salt
¾ cup warm water
1 tablespoon olive oil
Instructions
In a large mixing bowl, combine the flour, yeast, sugar, and salt. Mix well. Slowly add the warm water and olive oil while stirring to form a soft dough.
Turn the dough onto a floured surface and knead for about 8 minutes until smooth and elastic. If the dough is too sticky, sprinkle a little more flour as needed.
Place the dough back into a lightly greased bowl, cover with a towel or plastic wrap, and let it rest in a warm place for about 45 minutes or until doubled in size.
After rising, punch down the dough and shape it into a round or oval loaf that will fit in your skillet or pan.
Heat a non-stick skillet or heavy-bottomed pan with a lid over low heat. Lightly oil the bottom of the pan, then place the dough inside.
Cover with the lid and cook over low heat for 10 to 12 minutes on one side. Flip the bread carefully and cook for another 8 to 10 minutes on the other side, or until both sides are golden brown and the loaf sounds hollow when tapped.
Remove from the skillet and let cool on a wire rack before slicing.
Notes
Keep the heat low to prevent burning and ensure even cooking. If your skillet doesn’t have a lid, use foil to trap the heat and steam. This bread can be customized with herbs, garlic, or cheese mixed into the dough. It’s best eaten fresh but can be stored in an airtight container for up to two days.


")
