There’s something magical about a recipe that feels like home. The kind of dish that you can pull together with a few basics from your pantry, yet it fills the kitchen with the warm aroma of comfort and love. This Rustic Golden Potato Bake is exactly that kind of recipe. Crispy on the edges, soft in the center, and endlessly customizable, it’s the kind of dish you’ll find yourself making again and again—whether it’s for a cozy brunch, a hearty dinner side, or even a last-minute meal when the fridge looks bare.
I first threw this together on a weekend morning when we had a few leftover potatoes and not much else. I wasn’t expecting much, just something to serve alongside some scrambled eggs. But once I took it out of the oven and saw that golden crust and smelled the buttery, savory potatoes mingling with a hint of thyme—I knew this recipe was going to become a regular in our house. It’s like a cross between a giant hash brown and a baked casserole, and honestly, it works for just about any time of day.
Whether you’re cooking for your family, making a quick meal for yourself, or hosting brunch with friends, this golden potato bake is here to save the day. Let’s dive into how you can whip it up in under an hour with minimal fuss.
Ingredients You’ll Need
For the Potato Base:
-
3 large russet potatoes (or any starchy variety)
-
2 tablespoons olive oil or butter
-
Salt and pepper to taste
Optional Add-Ins:
-
1 cup shredded cheddar cheese (or any melty cheese)
-
1/4 cup chopped green onions or fresh parsley (for garnish)
-
Crumbled bacon or cooked sausage (for extra protein)
-
Dried thyme, rosemary, or paprika (for seasoning flair)
STEP 1: Prep the Potatoes
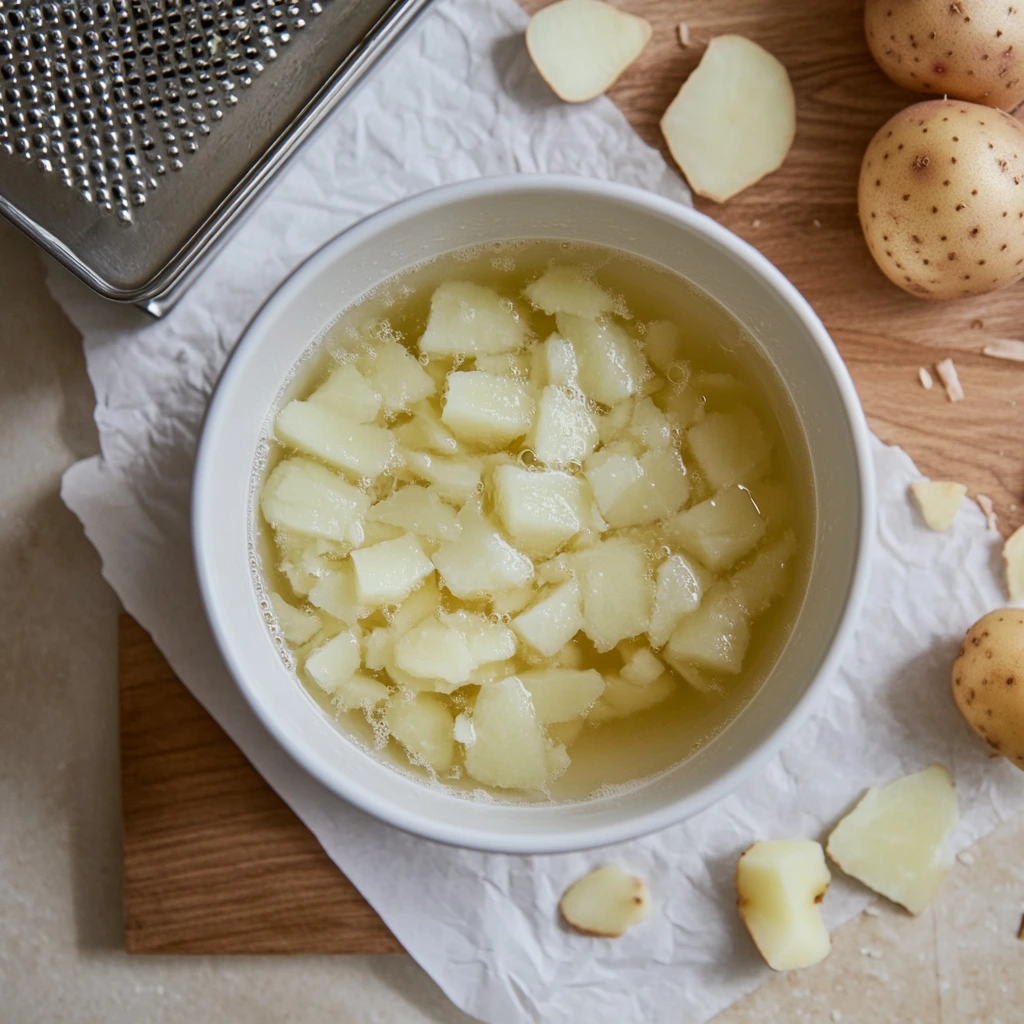
Start by peeling your potatoes and grating them using a box grater or a food processor with a grating attachment. Russets are great for this recipe because they’re starchy and crisp up beautifully in the oven, but you can use whatever you have on hand. Once grated, place the potatoes in a large bowl of cold water. This helps to remove some of the excess starch and prevents them from turning brown while you prep everything else.
STEP 2: Dry Thoroughly
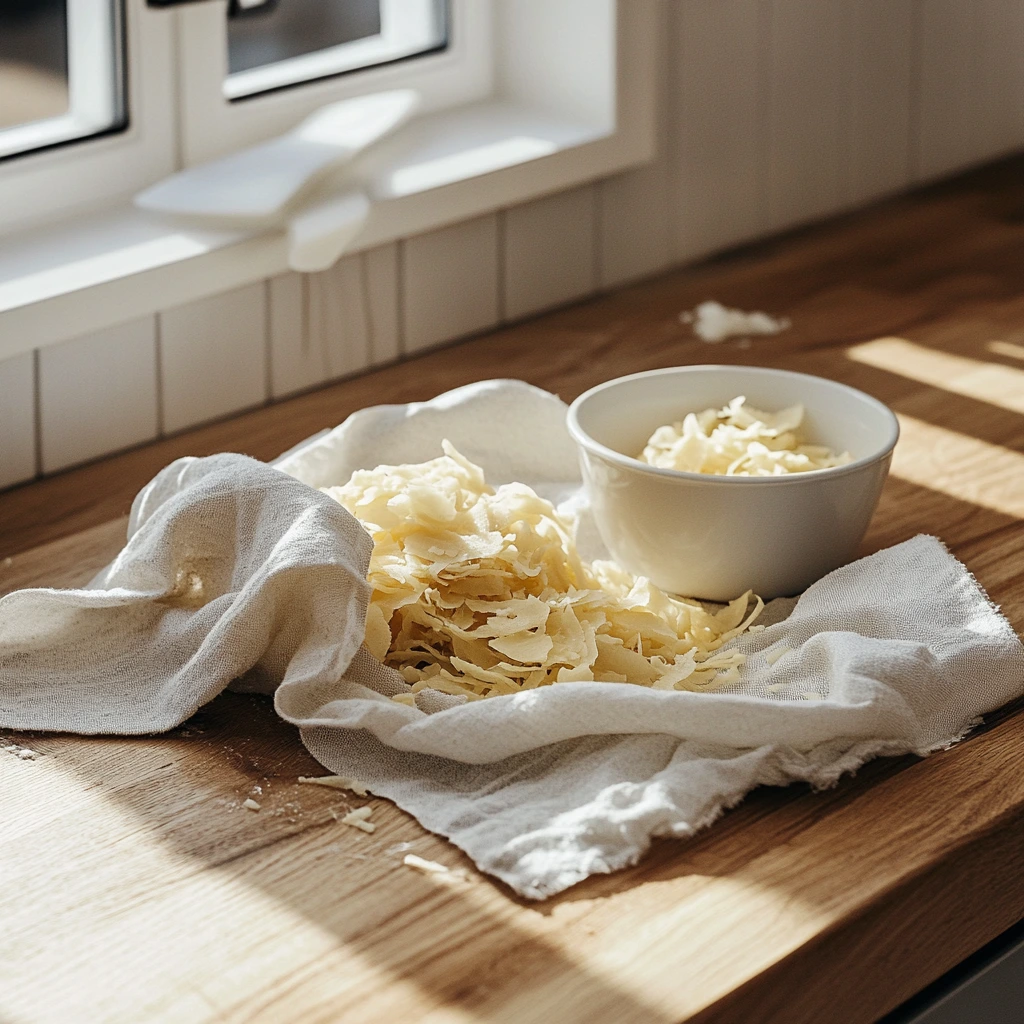
After a quick soak (about 5 to 10 minutes is perfect), drain the grated potatoes and spread them out on a clean kitchen towel or a few layers of paper towels. Pat them dry thoroughly. This step is super important—if your potatoes are too wet, they’ll steam instead of getting that gorgeous, crispy texture we’re going for.
STEP 3: Preheat and Prep Your Pan
Set your oven to 400°F (or 200°C) and let it heat up while you finish prepping. Grab a 9×9-inch baking dish and lightly grease it with olive oil or butter. If you’re in a hurry or want an easier cleanup, you can line it with parchment paper. Either way, make sure your dish is ready to go once the potato mixture is assembled.
STEP 4: Season and Mix
Transfer your dried potatoes to a large mixing bowl and drizzle in the olive oil or melted butter. Give it a good toss until everything’s well-coated. Then season with a generous pinch of salt and pepper. Now’s the time to get creative: if you’re adding cheese, cooked bacon, sausage, or herbs like thyme or rosemary, mix them in now. I love adding a bit of smoked paprika for an extra layer of flavor—it’s not required, but it really makes the dish pop.
Rustic Golden Potato Bake: Crispy, Cheesy, and Full of Flavor
Now that you’ve got your seasoned potato mixture ready, it’s time to get this dish into the oven and bake it to crispy, golden perfection. This is where the magic really happens. The oven brings out all those rich, savory flavors and transforms a humble pile of grated potatoes into something seriously irresistible.
Whether you’re making this for a crowd or just treating yourself to a cozy homemade side, this next part is quick, easy, and totally worth the wait. Let’s keep going!
STEP 5: Spread and Bake
Once your potato mixture is seasoned and mixed, go ahead and spread it evenly into your greased or parchment-lined 9×9-inch baking dish. Use a spatula or the back of a spoon to press it down gently—you don’t want it too packed, but giving it a light press helps everything stick together and cook evenly.
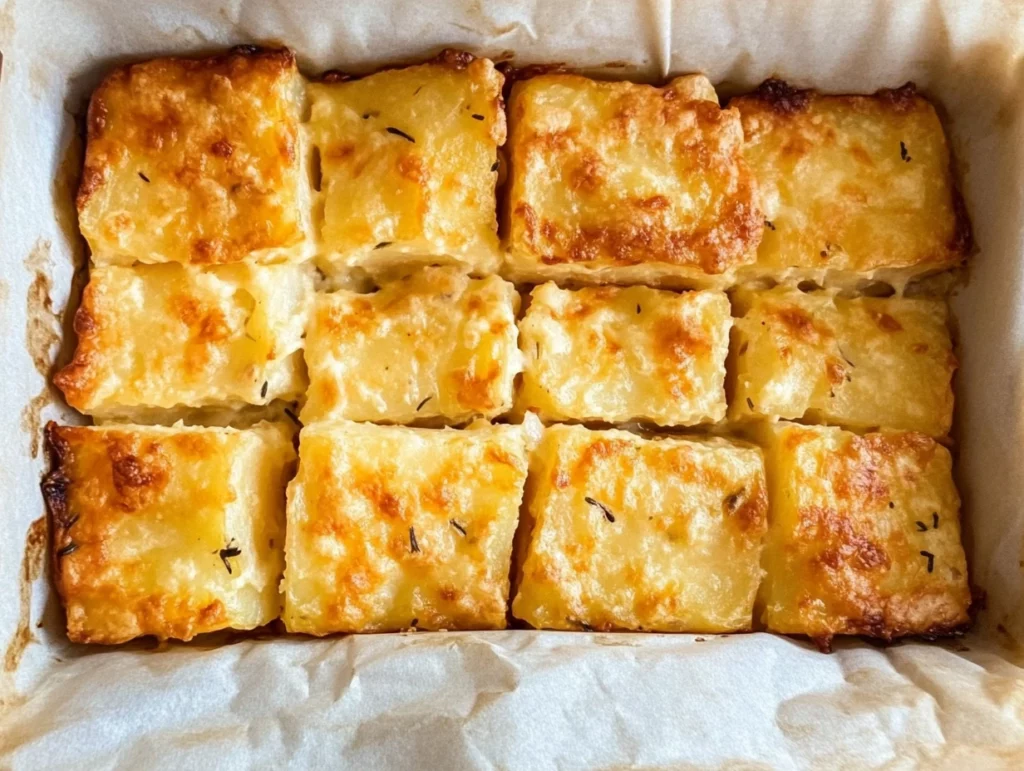
Slide the dish into your preheated 400°F oven and bake for 30 to 35 minutes. You’re looking for a golden-brown top and crisp edges. The smell at this point? Absolutely mouthwatering.
If you’re like me and love a little extra crunch, turn your broiler on for the last 2 to 3 minutes of baking. Just be sure to watch it closely—those delicious crispy edges can go from golden to burnt fast under the broiler.
STEP 6: Cool, Garnish, and Serve
After your bake is perfectly golden and crisp, remove it from the oven and let it cool for a few minutes. This not only helps it set, but also makes it easier to cut into nice, neat squares.
At this point, you can go simple or get a little fancy with toppings. I like to sprinkle chopped green onions or fresh parsley over the top for a pop of color and freshness. A little extra shredded cheese melted over the top? Always a good idea.
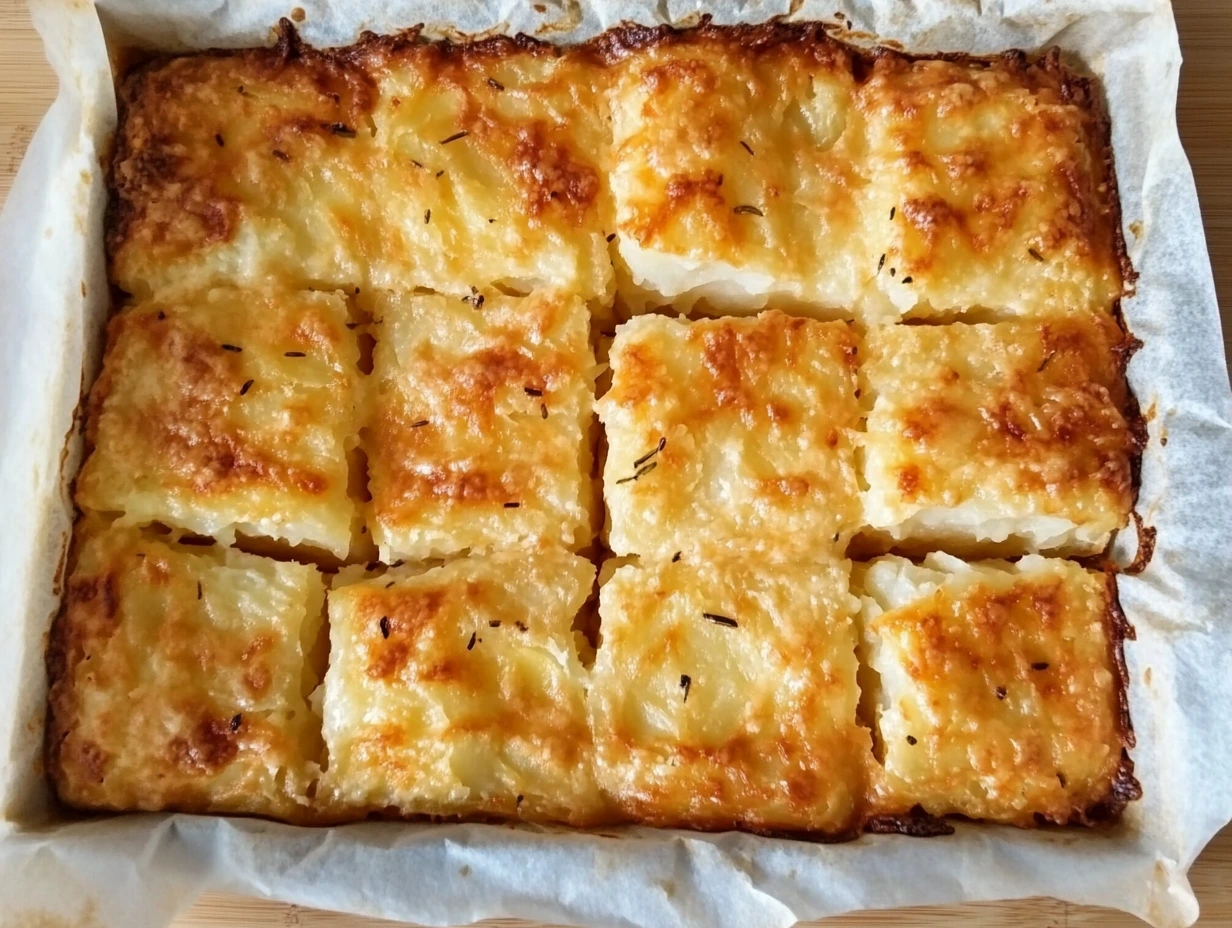
Cut it into squares and serve warm. You’ll get bites of crispy edges, soft seasoned potato in the middle, and (if you added it) little pockets of melted cheese or savory bacon throughout. It’s everything you want from a comfort food side dish.
Tips, Variations, and Serving Ideas
This dish is already a winner as-is, but here are a few ideas to make it your own:
-
Add Protein: Mix in cooked crumbled sausage, diced ham, or bacon to turn this into a more filling main dish.
-
Go Cheesy: Try different cheeses like Gruyère, Monterey Jack, or even a pepper jack for a little kick.
-
Make it Veggie-Packed: Fold in some sautéed onions, bell peppers, or even shredded zucchini (just make sure it’s squeezed dry).
-
Top it Off: A fried egg on top of a warm slice turns this bake into a hearty brunch or even dinner.
-
Switch Up the Herbs: Dried thyme or rosemary adds a rustic flair, while paprika gives a gentle smoky kick.
Make-Ahead & Reheating Tips
One of the best things about this rustic potato bake is how well it holds up as leftovers. You can make the whole dish ahead of time and either refrigerate or freeze it.
-
To Refrigerate: Let it cool completely, then cover tightly with foil or transfer to an airtight container. It’ll keep in the fridge for 3 to 4 days.
-
To Reheat: Pop it in the oven at 350°F for about 10-15 minutes until warmed through. You can also reheat slices in a skillet over medium heat to bring back some of that crispy texture.
-
To Freeze: Freeze baked and cooled slices in a single layer, then transfer to a freezer-safe bag or container. Reheat straight from frozen in the oven or microwave.
Rustic Golden Potato Bake: All Your Questions Answered
So now you’ve got the full recipe down, from prepping the potatoes to pulling that golden, crispy masterpiece out of the oven. But if you’re like me, you might still have a few questions before jumping in—or maybe after your first try, you’re already thinking about what to tweak next time. That’s exactly why I’ve pulled together this quick FAQ section.
Whether you’re wondering about substitutions, storage tips, or how to make it even crispier, I’ve got you covered.
FAQ: Common Questions About Rustic Golden Potato Bake
1. Can I use a different type of potato?
Yes! While russet potatoes work best because of their high starch content, you can also use Yukon Golds for a creamier interior or even sweet potatoes for a sweeter, earthier twist. Just know the texture might be slightly different.
2. How do I keep the bake from getting soggy?
The biggest key is making sure your grated potatoes are completely dry before baking. Any excess water will create steam and prevent that crisp top from forming. Also, don’t overcrowd the baking dish—spread the mixture evenly and press it down lightly.
3. Can I make this recipe ahead of time?
Absolutely. You can prep and bake it ahead, then refrigerate and reheat it when you’re ready to serve. It reheats beautifully in the oven and can even be frozen in individual portions.
4. What’s the best way to reheat leftovers?
For the crispiest texture, reheat slices in the oven at 350°F for 10–15 minutes or warm them in a skillet over medium heat. Microwaving works in a pinch but won’t bring back that crispiness.
5. Can I add vegetables or other mix-ins?
Definitely. This recipe is super flexible. Try folding in sautéed onions, bell peppers, mushrooms, or even spinach (just make sure to cook off the moisture first). Adding cooked meat like sausage or bacon also turns this into a heartier main.
6. How can I make this dairy-free?
Simply skip the cheese and use olive oil instead of butter. You’ll still get that great crispy texture and rich potato flavor without any dairy.
7. What size pan should I use if I want to double the recipe?
If you’re feeding a crowd and want to double up, use a 9×13-inch baking dish. You may need to bake it a little longer—about 40–45 minutes—just keep an eye on the top for that golden brown finish.
Conclusion: Why You’ll Keep Coming Back to This Potato Bake
There’s just something so satisfying about a dish that takes simple ingredients and turns them into something that feels a little special. This Rustic Golden Potato Bake hits that sweet spot between easy and impressive. It’s not fancy, but it’s packed with flavor, texture, and versatility. And once you make it, it’ll likely become one of those recipes you just know by heart.
What I love most is how customizable it is. You can serve it plain as a brunch side, load it up with cheese and herbs for dinner, or even make a full meal out of it with a few protein-packed add-ins. And the best part? You probably already have most of the ingredients sitting in your kitchen right now.
So next time you’re staring down a few potatoes and wondering what to do with them, give this recipe a try. And if you do? Come back and let me know how it turned out! I’d love to hear what you added, how you served it, or any creative spins you came up with. Happy baking!
PrintRustic Golden Potato Bake

Rustic and comforting, this golden potato bake delivers a crisp top with a tender, savory interior. With just a few pantry staples, you can create a dish that feels both hearty and homey. It’s perfect as a side for brunch, dinner, or even as a stand-alone dish with added protein or cheese.
- Author: Mark's Recipe
Ingredients
For the Potato Base
3 large russet potatoes (or any starchy variety)
2 tablespoons olive oil or butter
Salt and pepper to taste
Optional Add-Ins
1 cup shredded cheddar cheese (or any melty cheese)
1/4 cup chopped green onions or fresh parsley (for garnish)
Crumbled bacon or cooked sausage (for extra protein)
Dried thyme, rosemary, or paprika (for seasoning flair)
Instructions
Step 1: Peel the potatoes and grate them using a box grater or food processor. To prevent the potatoes from browning, place the grated pieces in a bowl of cold water while you prep the rest of the ingredients.
Step 2: Drain the grated potatoes and dry them thoroughly using paper towels or a clean kitchen towel. Removing as much moisture as possible is key to achieving a crisp texture during baking.
Step 3: Preheat your oven to 400°F (200°C). Grease a 9×9-inch baking dish with olive oil or butter, or line it with parchment paper for easier cleanup and release.
Step 4: In a large bowl, toss the dried grated potatoes with the olive oil or melted butter. Season with salt and pepper. If using cheese, herbs, or cooked meat, fold them into the mixture now for even distribution.
Step 5: Spread the seasoned potato mixture evenly into the prepared baking dish, pressing it down slightly to form a compact, uniform layer. Bake in the preheated oven for 30 to 35 minutes until the top is golden brown and edges are crispy. For extra crunch, broil for 2 to 3 minutes at the end—just be sure to watch closely to avoid burning.
Step 6: Let the dish cool for a few minutes after baking. Sprinkle with chopped green onions, parsley, or a bit more cheese if desired. Cut into squares and serve warm.
Notes
This dish can be made ahead and reheated in the oven for quick meals. For a more indulgent version, add extra cheese or top with a fried egg. It pairs well with roasted vegetables, salad, or grilled proteins for a complete meal.


")
