There are chocolate cakes, and then there’s this chocolate cake — rich, velvety, and packed with that deep cocoa flavor we all crave when we need something truly indulgent. Whether you’re baking it up for a birthday party, a special celebration, or just a weekend dessert (because why not?), this recipe delivers every time.
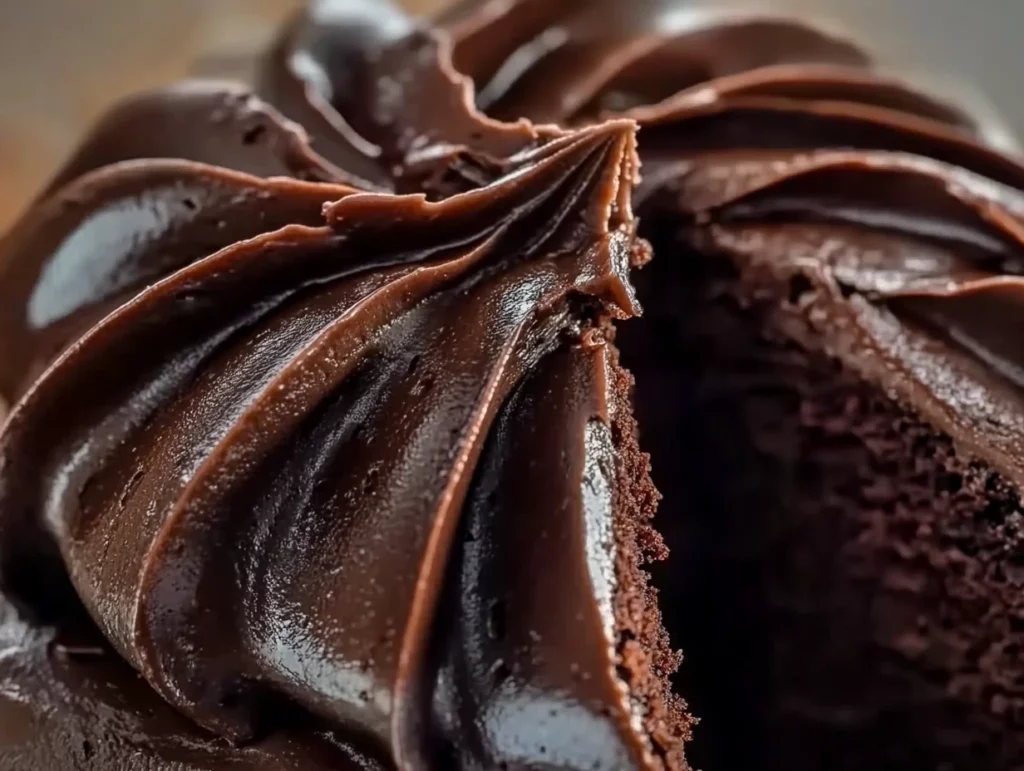
I’ve made this rich chocolate cake more times than I can count, and let me tell you, it never fails to impress. The texture is moist and tender, the flavor is bold and chocolaty without being too sweet, and the ganache… oh, the ganache. It’s silky, smooth, and just the right amount of decadent.
This cake also wins major points for versatility. You can keep it simple with just the cake layers and a light dusting of powdered sugar, or go all-out and dress it up with the creamy chocolate ganache that’s included in the recipe. I personally love to go the extra mile because who ever complained about too much chocolate?
Alright, let’s get into it — we’ve got a cake to make!
Ingredients You’ll Need
For the Cake:
-
1 ¾ cups all-purpose flour
-
¾ cup unsweetened cocoa powder (preferably high-quality)
-
2 cups granulated sugar
-
1 ½ tsp baking powder
-
1 ½ tsp baking soda
-
1 tsp salt
-
2 large eggs, room temperature
-
1 cup whole milk (or buttermilk for extra tenderness)
-
½ cup vegetable oil (or melted butter for added richness)
-
2 tsp vanilla extract
-
1 cup boiling water (or hot coffee for a deeper chocolate flavor)
Optional Ganache Frosting:
-
1 cup heavy cream
-
8 oz semi-sweet chocolate chips or chopped semi-sweet chocolate
Step-by-Step Instructions
Step 1: Preheat the Oven
First things first, go ahead and preheat your oven to 350°F (175°C). You’ll want to grease and flour two 9-inch round cake pans, or line them with parchment paper. I like using parchment — it makes getting the cake out of the pans so much easier and cleaner.
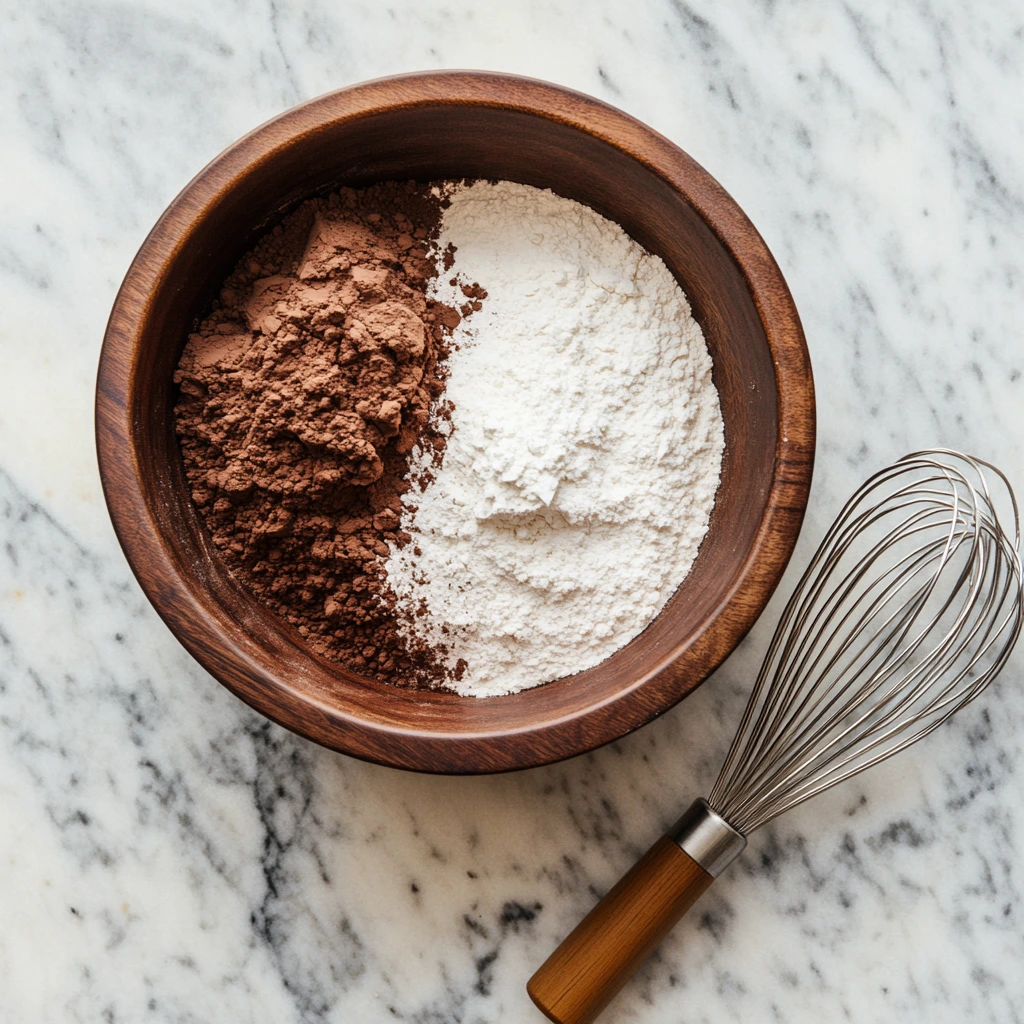
Step 2: Mix the Dry Ingredients
In a large bowl, whisk together the flour, unsweetened cocoa powder, granulated sugar, baking powder, baking soda, and salt. Make sure everything is evenly combined — this step sets the foundation for a well-balanced cake, so don’t rush it.
Step 3: Add the Wet Ingredients
In a separate mixing bowl, beat together your eggs, milk (or buttermilk), vegetable oil (or melted butter), and vanilla extract. Once that’s all nice and smooth, slowly add the wet ingredients to the dry mixture. Stir until you’ve got a thick, chocolatey batter with no lumps in sight.
If you’re using buttermilk instead of milk, you’re in for an even richer texture. And if you’re feeling adventurous, melted butter adds a wonderful depth of flavor — a little extra love never hurts when it comes to cake.
Step 4: Incorporate the Hot Water (or Coffee)
Now comes the part where the batter transforms — carefully pour in 1 cup of boiling water (or hot coffee if you want to intensify the chocolate flavor). Stir slowly as you pour, and don’t worry if the batter seems a bit thin. That’s actually what gives this cake its famously moist crumb. It might look a little runny at this point, but trust the process — it’s all going to come together beautifully in the oven.
How to Bake and Frost the Perfect Rich Chocolate Cake
Alright, now that we’ve mixed up that silky chocolate batter, it’s time to bake it to perfection and bring this cake to life. In this part, we’ll finish up the baking steps, talk about how to make that luscious chocolate ganache, and go over a few of my favorite tips to ensure your cake turns out bakery-level beautiful every single time.
One thing I really love about this recipe is how forgiving it is. You don’t need fancy equipment or any advanced decorating skills. If you can stir, pour, and spread, you’re already more than qualified to pull this off like a pro.
Let’s get into it — the oven’s hot and your kitchen is probably starting to smell like pure chocolate heaven.
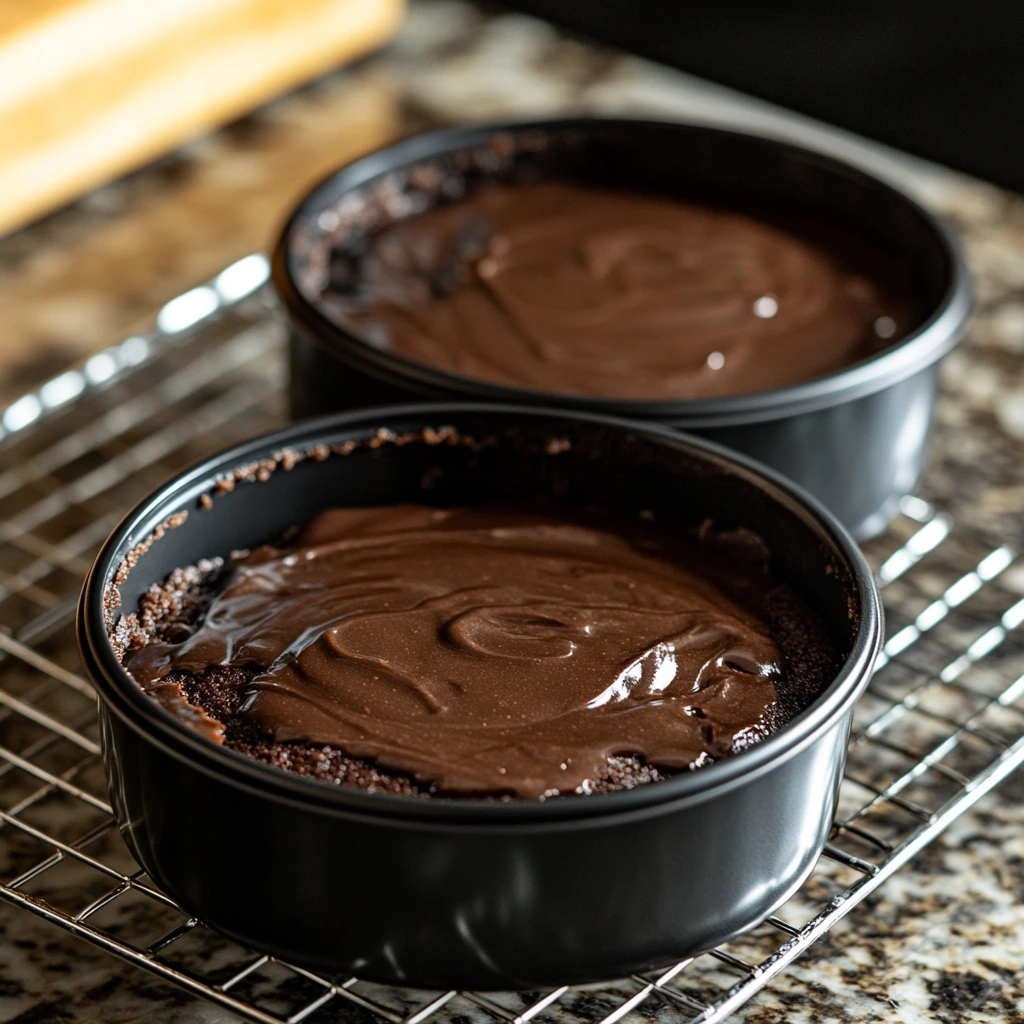
Step 5: Bake the Cake
Take the chocolate batter you just mixed and divide it evenly between the two prepared cake pans. If you’re like me and want your layers to be as even as possible, a kitchen scale can help here — or just eyeball it and smooth the tops with a spatula.
Slide them into your preheated oven and bake for 30–35 minutes. You’ll know they’re done when a toothpick inserted into the center comes out clean or with just a few moist crumbs. Be careful not to overbake; the key to that ultra-moist texture is pulling them out at just the right time.
Let the cakes cool in their pans for about 10 minutes, then gently turn them out onto a wire rack to cool completely. You definitely want them at room temperature before adding any ganache or frosting — warm cake + ganache = melty mess.
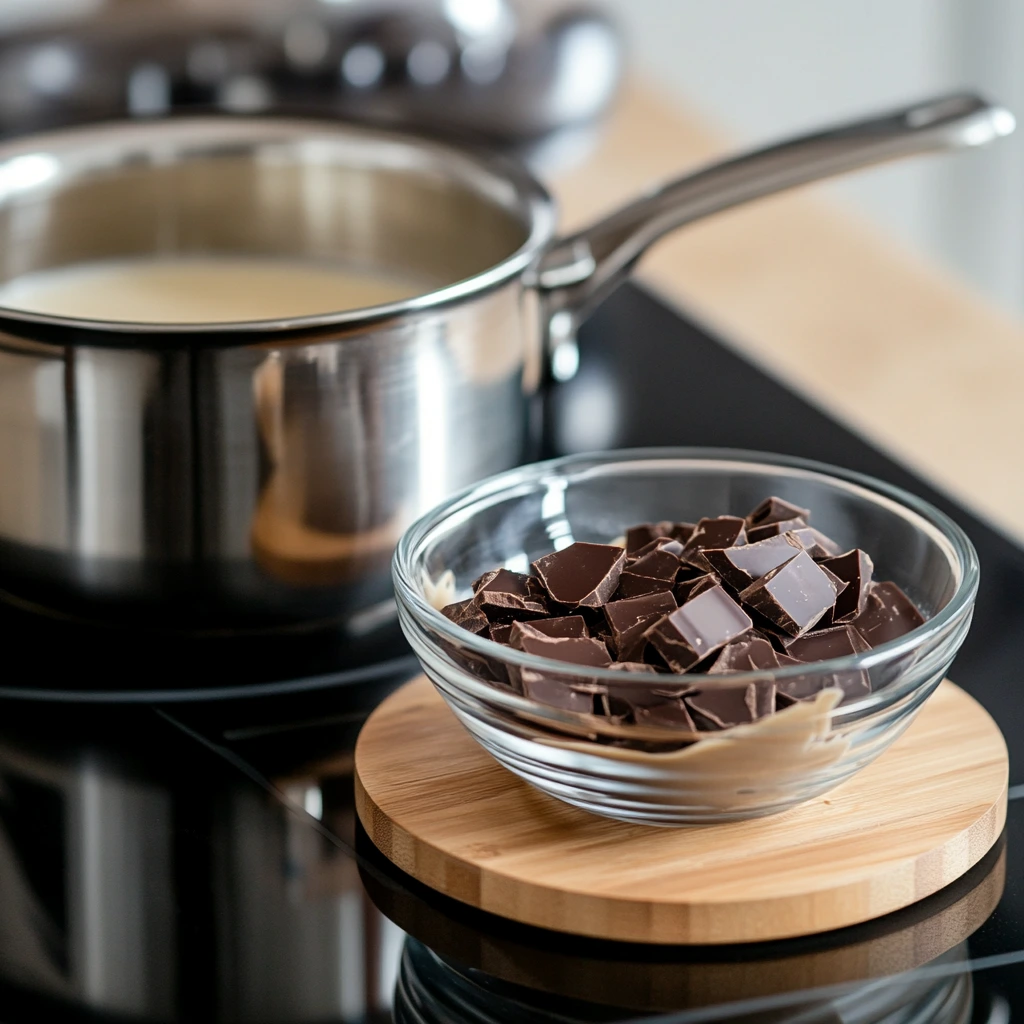
Step 6: Make the Chocolate Ganache (Optional But Highly Recommended)
Now, let’s talk about ganache. If you’ve never made it before, don’t worry — it’s surprisingly easy and only takes two ingredients: heavy cream and semi-sweet chocolate.
Here’s how to do it:
-
Heat 1 cup of heavy cream in a small saucepan over medium heat.
-
As soon as it begins to simmer (don’t let it boil!), pour it over 8 oz of semi-sweet chocolate chips or chopped chocolate in a heatproof bowl.
-
Let it sit for 2–3 minutes. This gives the chocolate time to soften.
-
Whisk until smooth and glossy. That’s it!
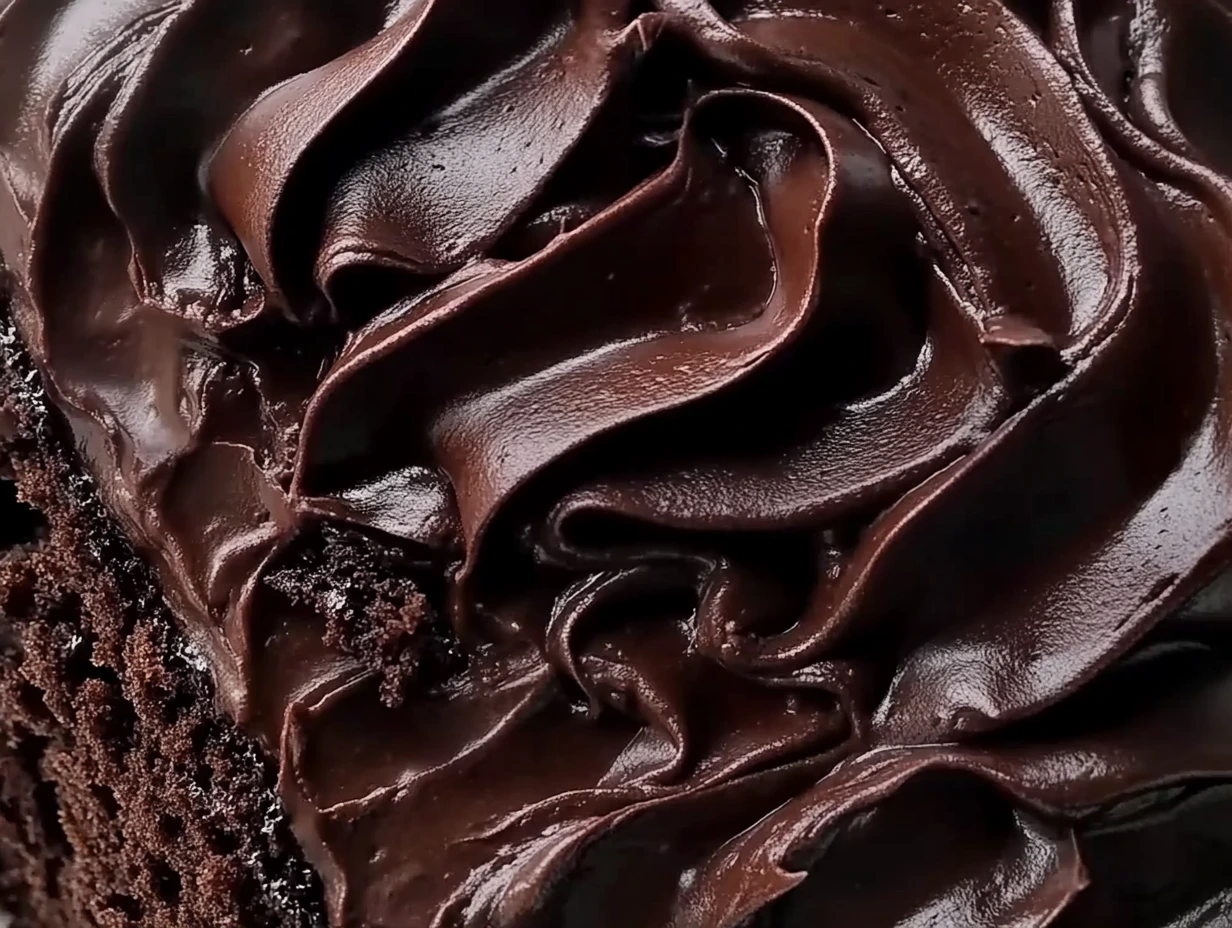
Let the ganache sit and cool slightly so it thickens. You want it spreadable but not too runny. If it cools too much and gets stiff, just gently warm it again for a few seconds.
This ganache can double as a glaze if you pour it over the cake while it’s still warm, or it can be whipped into a fluffier frosting once fully cooled. Personally, I like that glossy ganache finish — it just looks and tastes so luxurious.
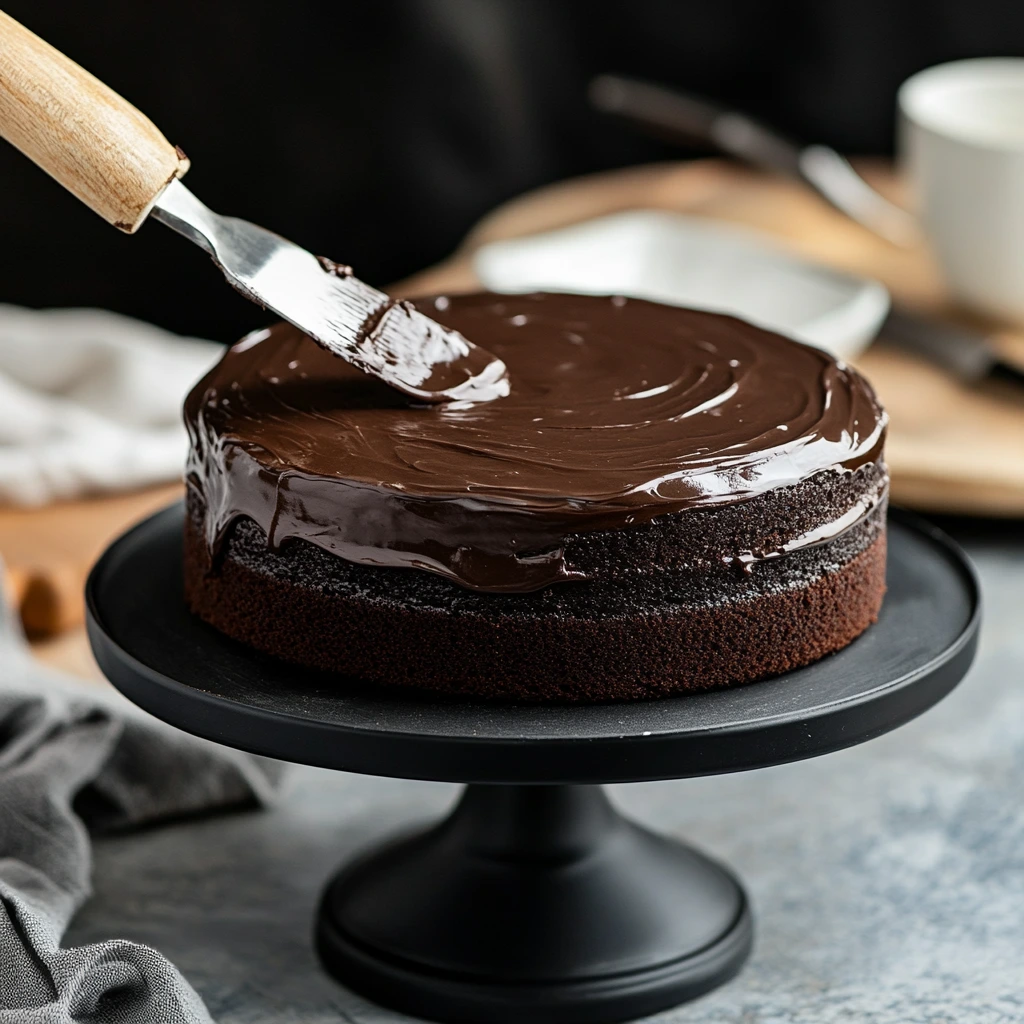
Step 7: Assemble and Frost the Cake
Once your cakes are completely cooled, you’re ready to build your masterpiece.
-
Place one cake layer on your serving plate or cake stand.
-
Spread a generous layer of ganache across the top. Use an offset spatula for a smooth finish if you have one.
-
Gently place the second layer on top and press down just enough to secure it.
-
Frost the top and sides of the cake with the rest of the ganache, swirling it to your heart’s content.
If you’re feeling fancy, you can add chocolate shavings, a sprinkle of sea salt, or even some fresh berries on top — but honestly, this cake is a stunner all on its own.
Tips for Chocolate Cake Success
-
Use buttermilk and coffee for extra richness: These ingredients deepen the flavor and keep the cake unbelievably moist. If you don’t have buttermilk, you can make a quick substitute by adding 1 tablespoon of lemon juice or vinegar to a cup of milk and letting it sit for 5–10 minutes.
-
Don’t skip the cooling time: Trying to frost a warm cake is a recipe for frustration. Letting the layers cool completely ensures your ganache stays smooth and doesn’t melt right off.
-
Use good-quality cocoa powder: It really does make a difference. Look for Dutch-processed or natural cocoa depending on your taste — Dutch-processed gives a slightly milder, more chocolatey flavor, while natural cocoa tends to be a bit sharper.
-
Store it right: This cake keeps beautifully for a couple of days at room temperature if wrapped tightly. If you’re making it ahead, you can also refrigerate it — just let it come to room temp before serving for the best texture.
Rich Chocolate Cake FAQ + Final Thoughts
By now, you’ve got a beautifully frosted, ultra-decadent chocolate cake sitting on your counter — or maybe it’s already half-eaten, no judgment here. Whether you’re planning to serve this for a special occasion or just because it’s Wednesday and you felt like baking, this recipe always hits the mark.
Before we wrap up, let’s answer some of the most common questions people have when making this rich chocolate cake. These tips can help you troubleshoot or make the recipe your own.
Frequently Asked Questions
1. Can I use this recipe for cupcakes instead of a layer cake?
Absolutely! This recipe works great for cupcakes. Fill your cupcake liners about two-thirds full and bake at 350°F (175°C) for 18–22 minutes. You’ll get roughly 24 cupcakes out of one batch.
2. What’s the best way to store this cake?
You can store the cake tightly wrapped at room temperature for up to 2 days. If your kitchen is warm or you’ve frosted it with ganache, refrigerate it instead. Just be sure to bring it to room temp before serving for the best texture and flavor.
3. Can I freeze this cake?
Yes! The cake layers freeze beautifully. Wrap them tightly in plastic wrap and aluminum foil, then freeze for up to 2 months. Thaw in the fridge overnight, then bring to room temperature before frosting.
4. What if I don’t have buttermilk?
You can make a quick substitute by adding 1 tablespoon of white vinegar or lemon juice to 1 cup of milk. Let it sit for 5–10 minutes until it curdles slightly, then use it as directed.
5. Can I use butter instead of oil in the cake?
Yes, melted butter can be swapped in for the oil. It adds a slightly richer flavor but may make the cake a tiny bit denser. I’ve tried both ways, and honestly, you can’t go wrong.
6. Do I have to use coffee in the batter?
Not at all. The coffee is there to enhance the chocolate flavor — you won’t taste it in the final cake. But if you prefer not to use it, boiling water works just fine and still delivers a wonderfully moist result.
7. How do I keep the cake from sticking to the pans?
Make sure to grease and flour your pans well, or line them with parchment paper. I like cutting circles of parchment to fit the bottoms of my pans — it guarantees the layers come out clean every time.
Final Thoughts: Time to Bake!
This rich chocolate cake isn’t just a dessert — it’s a statement. It’s the kind of cake people remember. The kind they ask you for the recipe after the first bite. It’s soft, chocolaty, perfectly moist, and topped with a silky ganache that takes it straight over the top.
What I love most about this recipe is how simple it really is. It doesn’t need complicated steps or hard-to-find ingredients. Just a few pantry staples and a bit of love, and you’ve got a showstopper on your hands.
So whether you’re baking for a birthday, a holiday, or just treating yourself, I hope this becomes a go-to in your kitchen. If you try it, I’d love to hear how it turns out! Leave a comment, share your favorite twist (maybe a peanut butter frosting or raspberry filling?), or just let me know what you think.
PrintRich Chocolate Cake
This rich chocolate cake is deeply chocolaty, moist, and decadent—perfect for birthdays, celebrations, or any time you’re craving an indulgent treat. Made with high-quality cocoa and finished with a smooth chocolate ganache, this cake delivers bold flavor and tender texture in every slice.
- Author: Mark's Recipe
Ingredients
For the Cake
1 ¾ cups all-purpose flour
¾ cup unsweetened cocoa powder (preferably high-quality)
2 cups granulated sugar
1 ½ tsp baking powder
1 ½ tsp baking soda
1 tsp salt
2 large eggs, room temperature
1 cup whole milk (or buttermilk for extra tenderness)
½ cup vegetable oil (or melted butter for added richness)
2 tsp vanilla extract
1 cup boiling water (or hot coffee for a deeper chocolate flavor)
For the Chocolate Ganache (Optional)
1 cup heavy cream
8 oz semi-sweet chocolate chips (or chopped semi-sweet chocolate)
Instructions
Step 1: Preheat the Oven
Preheat your oven to 350°F (175°C). Grease and flour two 9-inch round cake pans, or line them with parchment paper to ensure easy removal after baking.
Step 2: Mix the Dry Ingredients
In a large mixing bowl, sift or whisk together the flour, cocoa powder, sugar, baking powder, baking soda, and salt until thoroughly combined.
Step 3: Add the Wet Ingredients
In a separate bowl, beat together the eggs, milk, oil, and vanilla extract. Gradually add the wet mixture to the dry ingredients, mixing until smooth and no lumps remain.
Step 4: Incorporate the Hot Water
Slowly pour in the boiling water or hot coffee while gently stirring. The batter will be thin—this helps achieve a moist, tender cake with a deep chocolate flavor.
Step 5: Bake the Cake
Divide the batter evenly between the prepared pans. Smooth the tops with a spatula if needed. Bake for 30–35 minutes, or until a toothpick inserted into the center comes out clean or with a few moist crumbs. Let the cakes cool in their pans for 10 minutes before turning them out onto a wire rack to cool completely.
Step 6: Make the Chocolate Ganache (Optional)
Heat the heavy cream in a small saucepan over medium heat until it just begins to simmer—do not let it boil. Place the chocolate chips or chopped chocolate in a heatproof bowl and pour the hot cream over them. Let it sit undisturbed for 2–3 minutes, then whisk until smooth and glossy. Allow the ganache to cool slightly so it thickens enough for spreading.
Step 7: Assemble and Frost
Once the cake layers are completely cooled, place one on a serving plate. Spread a layer of ganache or your favorite frosting over the top. Place the second layer on top and frost the top and sides of the cake with the remaining ganache or frosting.
Notes
For an ultra-rich texture, use buttermilk and coffee. This cake can be made ahead and stored tightly wrapped for up to 2 days at room temperature or refrigerated. Ganache can be used as a glaze while warm, or whipped into a fluffy frosting once cooled.


")
