
There’s just something magical about fall baking. The air turns crisp, the sweaters come out, and suddenly your kitchen becomes a cozy haven filled with warm spices and sweet, comforting smells. If you’re anything like me, once the calendar hits September, it’s game on for all things pumpkin. But if you’re also craving that gooey nostalgia of summer campfires, I’ve got the perfect cookie for you.
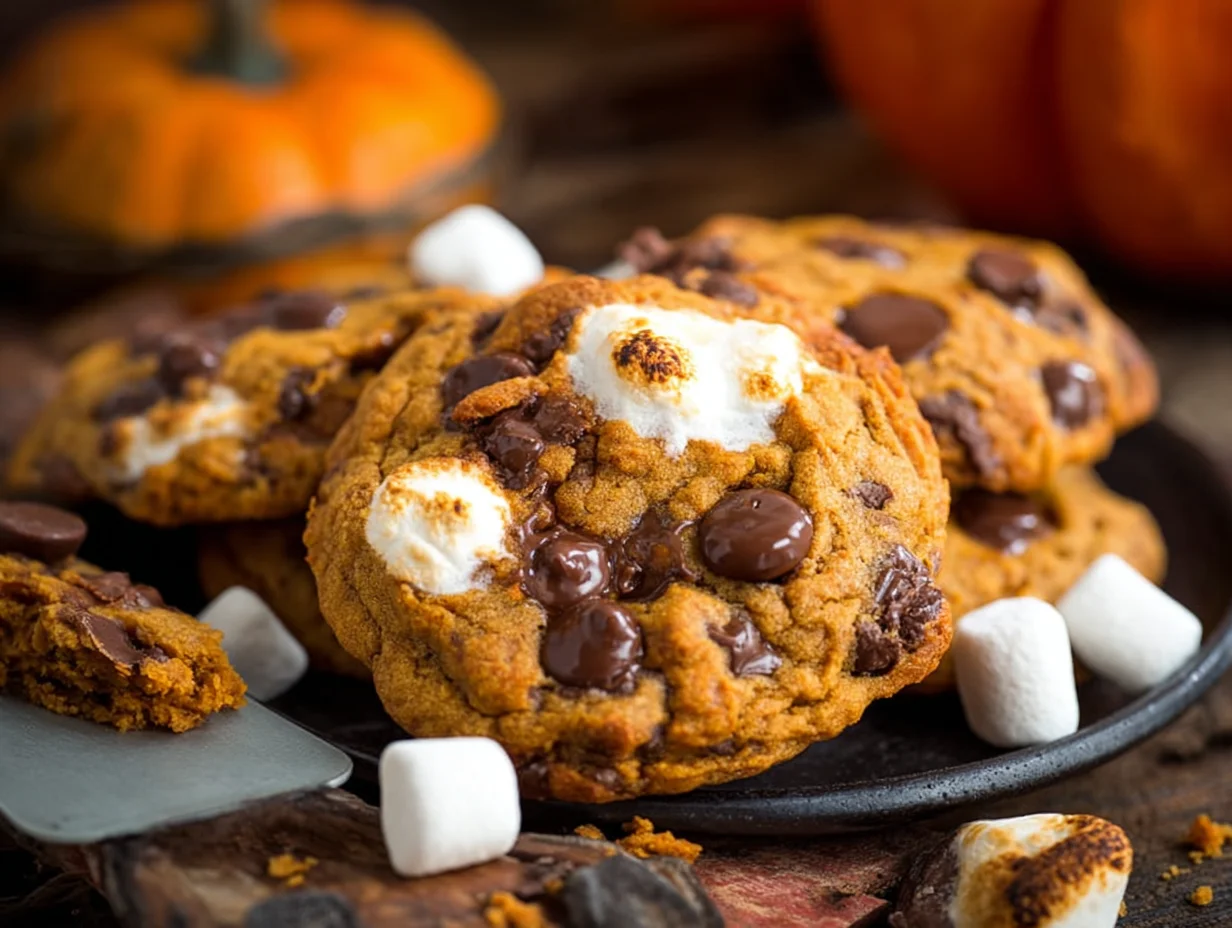
These Pumpkin S’mores Cookies are a fun mash-up of two of my all-time favorite treats: classic pumpkin spice cookies and ooey-gooey s’mores. Imagine soft, thick pumpkin cookies laced with cinnamon and nutmeg, loaded with melty chocolate chips, sticky marshmallows, and the irresistible crunch of graham crackers. They’re basically fall and summer getting together for the ultimate dessert collab—and trust me, it works.
I made a batch of these last weekend for a family movie night, and they barely made it to the opening credits. Everyone kept sneaking back to the kitchen for “just one more.” They’re chewy, gooey, and packed with so much flavor that even non-pumpkin lovers were asking for the recipe. So if you’re looking for something a little different from the usual pumpkin muffin or loaf cake, these cookies are definitely the move.
Alright, let’s get baking!
Ingredients You’ll Need
Before we get into the how-to, here’s a quick rundown of what you’ll need to make these cozy cookies happen:
-
½ cup unsalted butter, softened
-
⅓ cup pumpkin puree (make sure it’s pure pumpkin, not pie filling)
-
½ cup brown sugar
-
¼ cup granulated sugar
-
1 tsp vanilla extract
-
1 egg yolk
-
1¼ cups all-purpose flour
-
½ tsp baking soda
-
½ tsp cinnamon
-
¼ tsp nutmeg
-
¼ tsp salt
-
¾ cup chocolate chips or chopped chocolate
-
½ cup mini marshmallows
-
½ cup crushed graham crackers, plus more for topping
STEP 1: Preheat and Prep
Start by preheating your oven to 175°C (about 350°F). Line a baking sheet with parchment paper—you’ll want an easy cleanup and no sticking when those marshmallows get all gooey in the oven.
STEP 2: Cream Butter and Sugars
In a large mixing bowl, use a hand mixer or stand mixer to cream together the softened butter, brown sugar, and granulated sugar. This should take about 2–3 minutes, until the mixture is light and fluffy. It’s the base of your cookie dough and helps give the cookies that perfect chewy texture.

STEP 3: Add Pumpkin, Vanilla, and Egg Yolk
Next, mix in the pumpkin puree, vanilla extract, and egg yolk. Just one yolk—no full egg here. It’s all about achieving a rich, soft texture without making the dough too cakey (which pumpkin recipes can sometimes do). Stir until everything is well combined.
STEP 4: Combine Dry Ingredients
In a separate bowl, whisk together your dry ingredients: flour, baking soda, cinnamon, nutmeg, and salt. This step helps ensure the spices get evenly distributed, so you’re not biting into one cookie that tastes like a cinnamon stick and another that tastes like nothing.
STEP 5: Mix the Dough
Gradually add the dry ingredients to your wet mixture. You can do this in two or three additions, stirring until just combined. You don’t want to overmix here—stop as soon as the flour disappears and you’ve got a soft, slightly sticky dough.
At this point, your kitchen is probably already smelling pretty amazing—but hang tight, it’s about to get even better.

Pumpkin S’mores Cookies – Bringing It All Together
Alright, now that we’ve got our dough mixed and full of cozy pumpkin spice flavor, it’s time to take these cookies to the next level. This is where the s’mores magic really starts to happen.
The key to the perfect Pumpkin S’mores Cookie is balance—you want gooey bits of chocolate and marshmallow in every bite, with just the right amount of graham cracker crunch. It’s like a mini campfire experience baked into a cookie. Let’s pick up right where we left off.
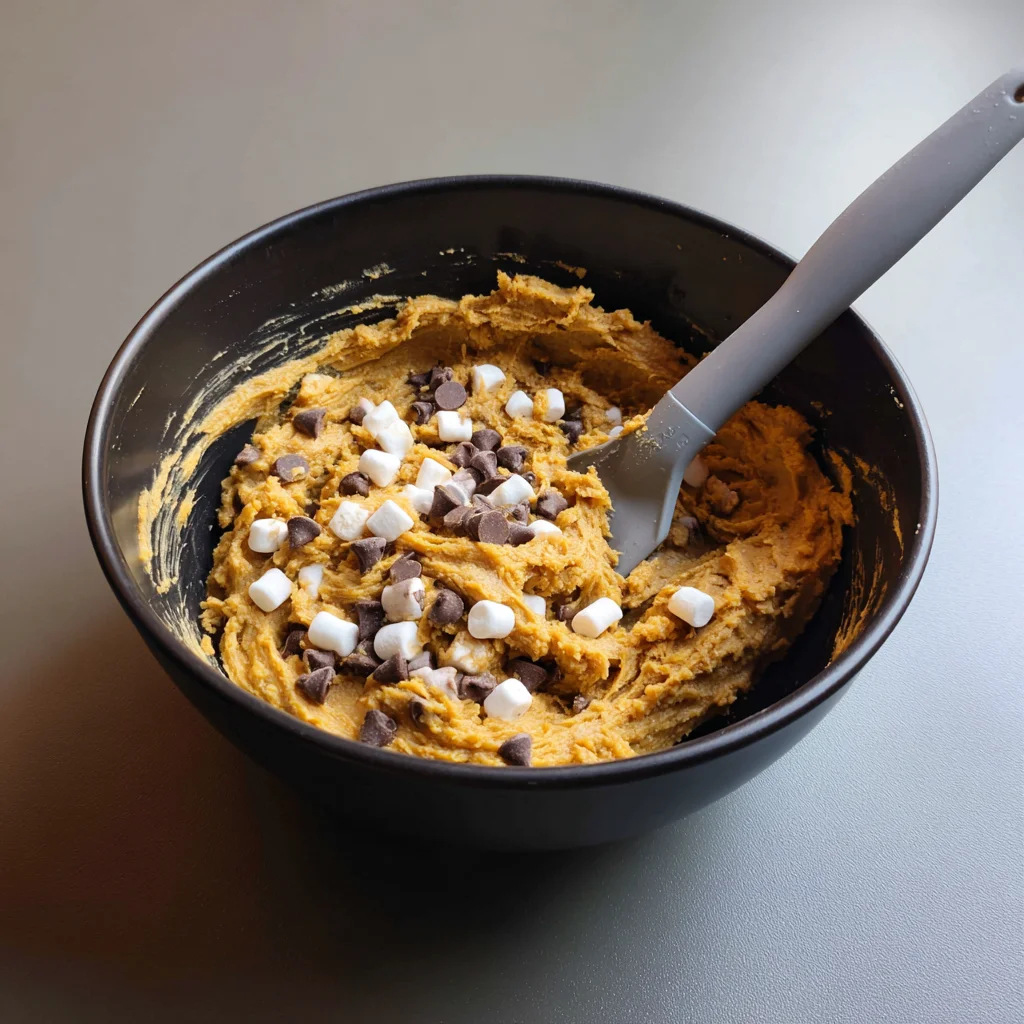
STEP 6: Fold in the S’mores Add-ins
Now that your dough is ready, gently fold in:
-
¾ cup chocolate chips or chopped chocolate
-
½ cup mini marshmallows
-
½ cup crushed graham crackers
You want to be gentle here so you don’t smash the marshmallows too much. Stir just until everything is evenly distributed throughout the dough. At this point, you’ll start to see those beautiful chunks of chocolate and fluffy marshmallows peeking through, and that’s exactly what you want.
Pro Tip: If you’re using chopped chocolate instead of chips, you’ll get those gooey chocolate puddles that melt just a little more dramatically. I love using a mix of semi-sweet chips and a chopped milk chocolate bar for variety.
STEP 7: Scoop and Shape the Dough
Using a cookie scoop or a spoon, scoop the dough into rounded balls—about 2 tablespoons each. Place them on your prepared baking sheet, leaving enough space between each one (these cookies will spread a little).
Now here’s a little trick for a bakery-style look: press a few extra mini marshmallows and crushed graham crackers right on top of each cookie before baking. This not only makes them look prettier but also adds a nice toasted texture after baking.
STEP 8: Bake to Perfection
Slide your tray into the oven and bake at 175°C (350°F) for 10 to 12 minutes. Keep a close eye on them around the 10-minute mark.
You’ll know they’re ready when:
-
The edges are just starting to set and turn golden
-
The centers still look a little underbaked (this is what gives them that chewy center)
Don’t worry if they seem too soft when you take them out—they’ll firm up as they cool. Let them sit on the pan for about 5 minutes, then transfer them to a wire rack to cool completely.
Optional: Broil for Toasty Marshmallows
If you want to take things even further (and I totally recommend it), you can pop the baked cookies under the broiler for 30 seconds to 1 minute to toast the marshmallows on top. Just watch them like a hawk—they can go from golden to burnt in seconds.
That little bit of extra toastiness gives the cookies that classic campfire flavor and adds an irresistible finish. It’s optional, but so worth it.
How to Store Your Cookies
If you don’t eat them all right away (which is honestly a challenge), store your Pumpkin S’mores Cookies in an airtight container at room temperature. They’ll stay soft and chewy for up to three days.
You can also freeze the unbaked dough balls—just scoop them onto a tray, freeze until solid, and then store in a freezer-safe bag. When you’re ready to bake, just add a minute or two to the bake time (no need to thaw).
Fun Variations to Try
These cookies are already loaded with flavor, but if you’re in the mood to switch things up, here are a few fun ideas:
-
Add white chocolate chips for a sweeter twist
-
Use cinnamon graham crackers for an extra spice kick
-
Mix in chopped pecans or walnuts for added texture
-
Sprinkle with sea salt after baking for a salty-sweet balance
Whatever version you go with, this recipe is super forgiving and easy to play around with.
Pumpkin S’mores Cookies – FAQs and Final Thoughts
So, by now your kitchen probably smells like a mix of a pumpkin patch and a cozy campfire—and honestly, what could be better? These Pumpkin S’mores Cookies are everything you love about fall desserts and classic s’mores, all wrapped up into one chewy, melty, chocolatey cookie. But before we wrap things up, let’s go over a few commonly asked questions to help make sure your cookies turn out just right every time.
Frequently Asked Questions
1. Can I use pumpkin pie filling instead of pumpkin puree?
No, it’s important to use pure pumpkin puree, not pumpkin pie filling. Pie filling has added sugars and spices that can throw off the texture and flavor of your cookies.
2. Why do I only use the egg yolk and not the whole egg?
Using just the egg yolk helps keep the cookies chewy and soft, rather than cakey. Pumpkin already adds a lot of moisture, so one yolk is enough to bind the dough without overdoing it.
3. Can I make the dough ahead of time?
Yes! You can refrigerate the dough for up to 24 hours. Just let it sit at room temperature for about 15 minutes before scooping and baking, as it may be a little firm straight from the fridge.
4. How do I keep the marshmallows from melting too much in the oven?
Fold them in gently and avoid placing too many near the edges of the cookies, as those tend to melt faster. Also, adding a few on top after scooping helps them toast nicely without disappearing into the dough.
5. Can I freeze these cookies?
Absolutely. Freeze the unbaked cookie dough balls on a tray, then transfer them to a freezer-safe bag. You can bake them straight from frozen—just add an extra 1–2 minutes to the baking time.
6. What kind of chocolate works best?
You can use chocolate chips, but chopped chocolate bars give the cookies those nice gooey pools of melted chocolate. A mix of semi-sweet and milk chocolate works great, depending on how sweet you like your cookies.
7. My cookies look underbaked in the center. Is that okay?
Yes! That’s exactly how they should look when you take them out of the oven. They’ll firm up as they cool, but keeping that soft center is what makes them perfectly chewy and gooey.
Final Thoughts: Cozy Up with These Irresistible Cookies
Whether you’re baking for a fall gathering, a Halloween party, or just craving something sweet and seasonal, these Pumpkin S’mores Cookies are a guaranteed crowd-pleaser. They’ve got everything going for them—warm spices, gooey chocolate, toasty marshmallows, and that nostalgic graham cracker crunch. Best of all, they’re super easy to make and impossible to mess up.
I’ve made these more times than I can count now, and they never last more than a day in my house. They’re the kind of cookie that gets you asked for the recipe on repeat, and once you try them, you’ll totally understand why.
If you give this recipe a try, I’d love to hear how it turned out for you! Leave a comment below and let me know if you added your own twist, swapped out any ingredients, or even just how fast they disappeared from the cookie jar.
PrintPumpkin S’mores Cookies
Pumpkin S’mores Cookies are a cozy twist on the classic campfire treat, combining gooey marshmallows, melty chocolate, and crunchy graham crackers with the warm spices and soft texture of pumpkin cookies. These cookies are thick, chewy, and packed with fall flavor, making them a perfect treat for cool evenings, bake sales, or festive gatherings.
- Author: Mark's Recipe
Ingredients
½ cup unsalted butter, softened
⅓ cup pumpkin puree
½ cup brown sugar
¼ cup granulated sugar
1 tsp vanilla extract
1 egg yolk
1¼ cups all-purpose flour
½ tsp baking soda
½ tsp cinnamon
¼ tsp nutmeg
¼ tsp salt
¾ cup chocolate chips or chopped chocolate
½ cup mini marshmallows
½ cup crushed graham crackers, plus more for topping
Instructions
1 Preheat the oven to 175°C and line a baking sheet with parchment paper.
2 In a large bowl, cream together the butter, brown sugar, and granulated sugar until light and fluffy. Mix in the pumpkin puree, vanilla extract, and egg yolk until fully combined.
3 In a separate bowl, whisk together the flour, baking soda, cinnamon, nutmeg, and salt. Gradually add the dry ingredients to the wet ingredients, mixing until a soft dough forms.
4 Gently fold in the chocolate chips, mini marshmallows, and crushed graham crackers.
5 Scoop the dough into rounded balls and place them on the prepared baking sheet, spacing them a few inches apart. Lightly press a few extra marshmallows and graham cracker pieces on top for a more rustic look.
6 Bake for 10 to 12 minutes, or until the edges are set and the centers look slightly underbaked. Let the cookies cool on the pan for 5 minutes before transferring to a wire rack.
Notes
Use pure pumpkin puree, not pumpkin pie filling, for the best texture and flavor. The cookies may appear soft at first but will firm up as they cool, maintaining a chewy, gooey center. For extra toasted marshmallow flavor, you can broil the cookies briefly after baking, but watch closely to prevent burning. Store leftovers in an airtight container for up to three days.
")
