
If you’re looking for a chicken recipe that’s absolutely foolproof, incredibly delicious, and easy to prepare, this Melt In Your Mouth Chicken is the one you’ve been searching for. Whether you’re a busy parent or someone who just doesn’t want to spend hours in the kitchen, this recipe checks all the boxes. It’s comforting, flavorful, and so tender, it will have you wondering why you didn’t try it sooner.
Now, I know what you’re probably thinking: how can something as simple as chicken breasts taste so divine? Well, this recipe uses just a handful of ingredients you probably already have in your pantry, like mayonnaise, Parmesan cheese, garlic powder, and a few seasonings. And the best part? It’s all baked in the oven with zero fuss. This is truly the chicken recipe that’ll melt in your mouth with every bite.
Why This Chicken Recipe is a Game-Changer
We all love a quick dinner that doesn’t require a ton of effort, and this recipe fits the bill perfectly. The mayonnaise and Parmesan mixture creates the most delectable, creamy topping that seals in the chicken’s juiciness. It’s rich and savory without being overwhelming, and the best part? It comes together in just a few simple steps.
Plus, it’s versatile! You can pair this Melt In Your Mouth Chicken with a variety of sides, from roasted vegetables to creamy mashed potatoes or a refreshing green salad. Whether it’s a weeknight meal or something you’re serving for guests, it’s a guaranteed crowd-pleaser.
Now, let’s dive into how to make this dish!
Steps to Make Melt In Your Mouth Chicken
Step 1: Preheat the Oven
Start by preheating your oven to 375°F (190°C). This will ensure it’s nice and hot when you’re ready to bake the chicken. Don’t forget to lightly grease a baking dish—this will prevent the chicken from sticking to the bottom and make cleanup a breeze. A little non-stick spray or a dab of butter will do the trick.
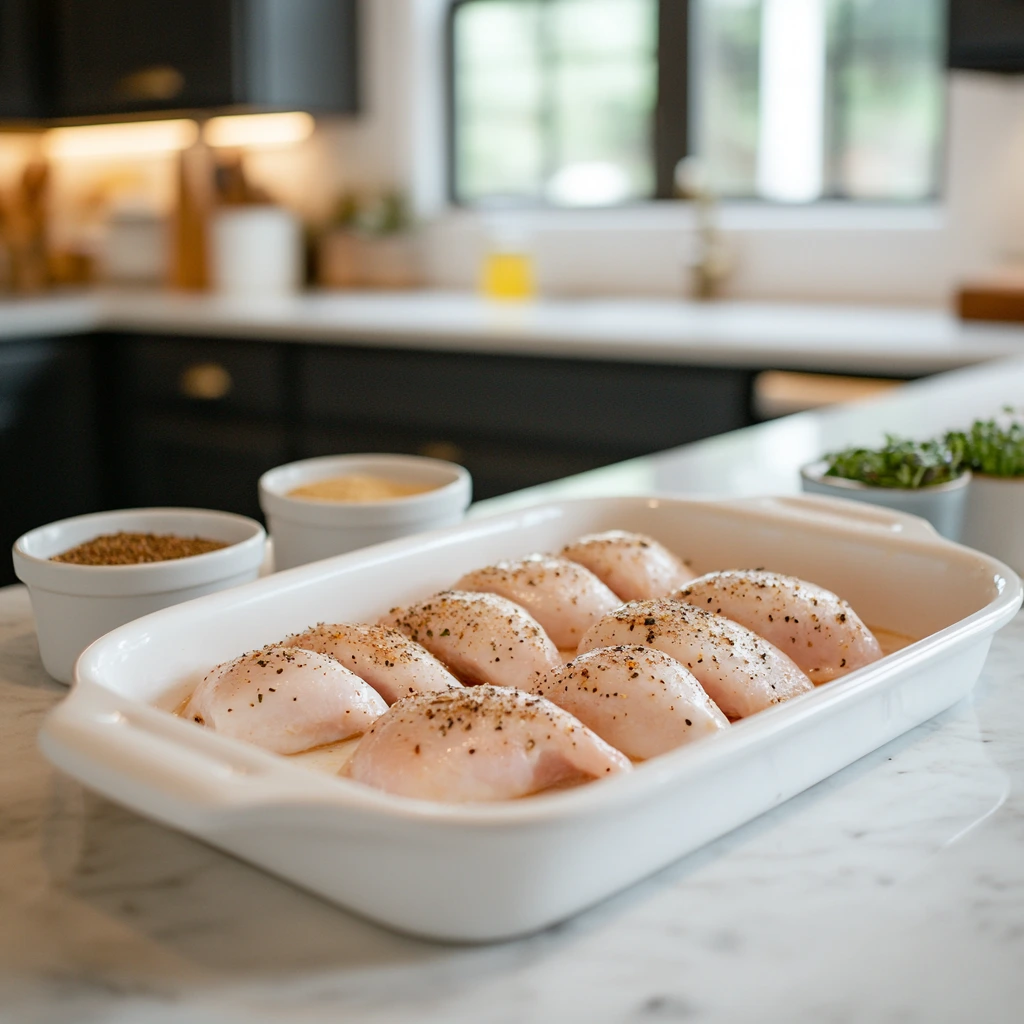
Step 2: Prepare the Chicken
Next, take your chicken breasts (4 boneless, skinless halves) and arrange them in the baking dish. Make sure there’s a little space between each piece, so the heat can circulate and cook them evenly. If they’re stacked on top of each other, you might not get that perfect, tender result, so spread them out as much as possible.
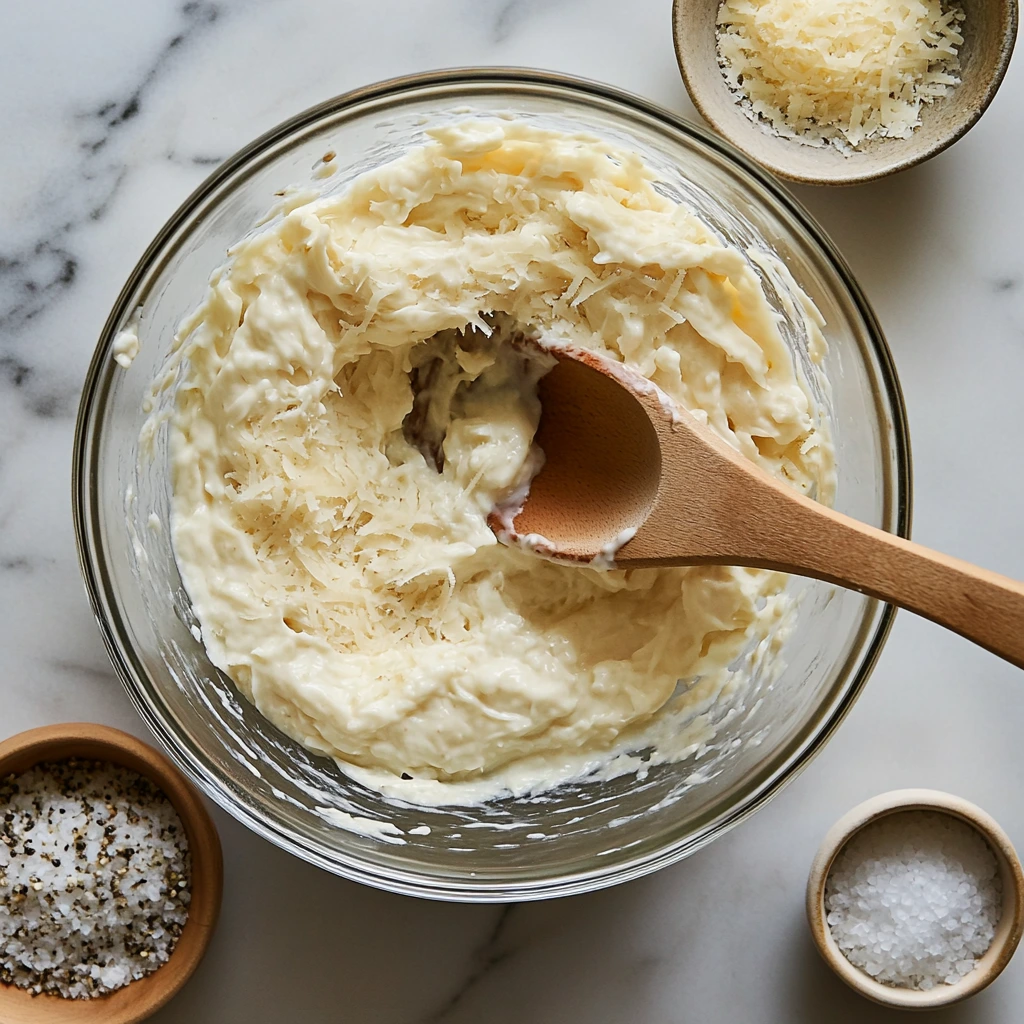
Step 3: Make the Coating
Now, it’s time to prepare the creamy coating that’ll make this chicken melt in your mouth. In a bowl, mix together the full-fat mayonnaise, freshly grated Parmesan cheese, salt, pepper, and garlic powder. Stir it all together until it’s smooth and well-combined. This mixture is what’s going to coat the chicken and give it that irresistibly creamy, cheesy flavor. I love using full-fat mayonnaise for that extra richness, but you could always lighten things up a bit with Greek yogurt or sour cream if you’re looking to cut some calories.
Step 4: Coat the Chicken
Once your coating is ready, generously spread it over the top of each chicken breast. Make sure to cover each piece completely, as this will help seal in all the moisture and create that golden, crispy top. It’s okay if the coating is a little thick – it’s what makes the chicken so juicy and flavorful!
Step 5: Bake to Perfection
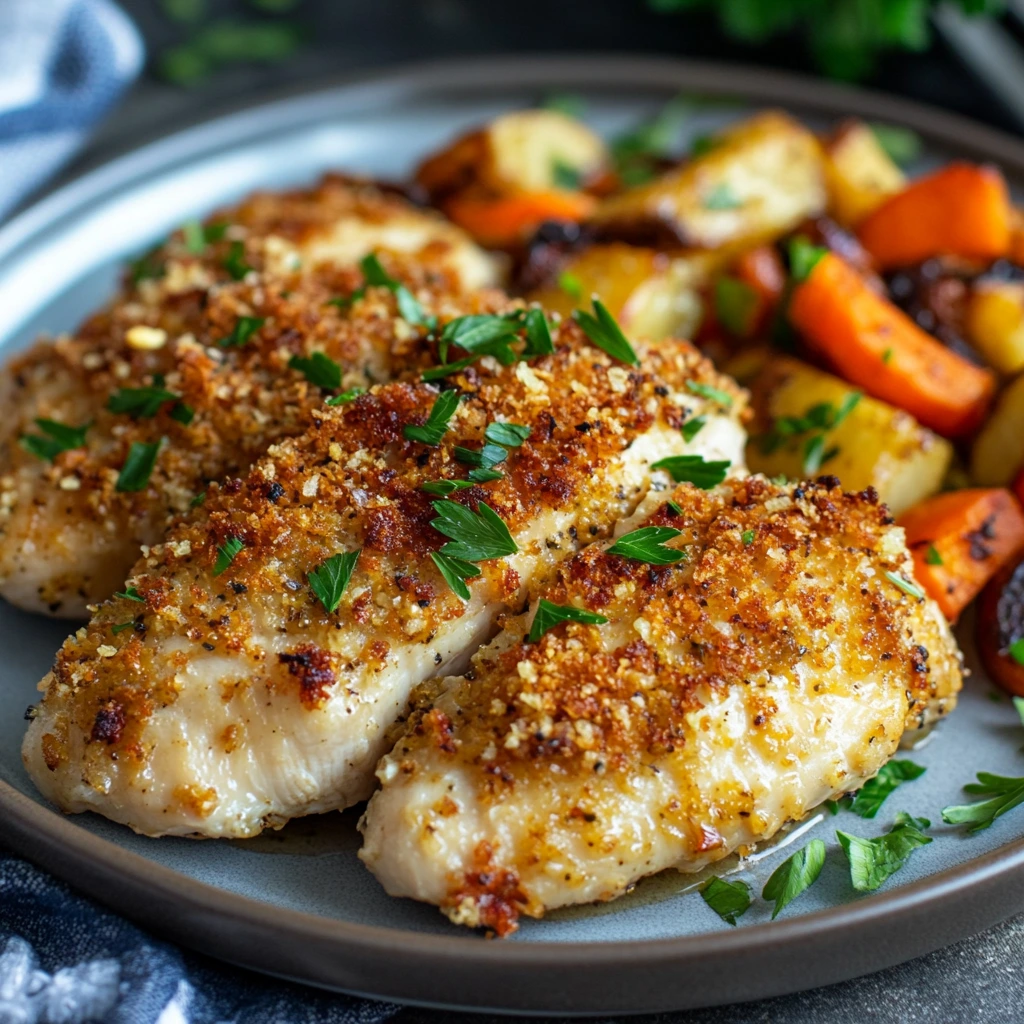
Pop the baking dish into the preheated oven and bake for 45 minutes. During this time, the chicken will cook through, and the creamy topping will become golden brown and slightly crispy. To make sure your chicken is fully cooked, use a meat thermometer to check that the internal temperature has reached 165°F (74°C). This is the magic number to ensure your chicken is safe to eat and perfectly tender.
Once done, take the chicken out of the oven and let it rest for a few minutes before serving. This little rest time helps the juices settle, making each bite even more delicious.
Serving Suggestions
Now that your Melt In Your Mouth Chicken is ready, it’s time to serve it up! It pairs beautifully with roasted vegetables, mashed potatoes, or even a fresh green salad. The creamy, savory topping is rich enough to make any side feel extra special.
If you’re feeling adventurous, you can even sprinkle a little paprika or Italian seasoning on top for a bit of extra flavor. You could also throw a quick side of roasted asparagus or garlic bread in the oven while the chicken bakes, so everything comes together in perfect timing.
This dish is perfect for family dinners, meal prep, or even entertaining guests—because who doesn’t love a meal that’s both easy to make and looks impressive? It’s so simple, yet so incredibly satisfying.
Continuing with Melt In Your Mouth Chicken – Tips, Variations, and Extra Flavor Boosts
By now, your kitchen probably smells amazing, and your Melt In Your Mouth Chicken is baking away in the oven. But what if I told you there are some easy tweaks you can make to elevate this already incredible dish even further? In this section, we’ll dive into some helpful tips, variations, and flavor boosts that’ll allow you to make this recipe truly your own. Whether you like your chicken a bit spicier, or you want to try a different twist, I’ve got you covered.
Steps for Perfecting Melt In Your Mouth Chicken
Step 6: Consider Flavor Variations
As much as I love the classic combination of mayonnaise, Parmesan, garlic powder, and seasonings, there’s always room to get creative. Here are a few ideas to give your chicken a unique flavor profile:
-
Italian Seasoning: If you want to add a little more depth, try mixing in some dried Italian seasoning to the coating. This will bring hints of basil, oregano, and thyme to the dish, giving it an aromatic boost that’s perfect for anyone who loves Italian-inspired flavors.
-
Paprika: For a little smokiness and color, a sprinkle of paprika is a great addition. It’s subtle but adds just enough flavor to enhance the overall dish. You can use regular paprika or smoked paprika depending on your preference.
-
Lemon Zest: Adding some freshly grated lemon zest to the mayonnaise mixture can bring a zesty, refreshing burst to balance out the richness of the chicken. It’s especially great if you’re pairing the chicken with roasted veggies or a fresh salad.
-
Hot Sauce or Red Pepper Flakes: Want a little heat? Add a dash of hot sauce to the coating or sprinkle red pepper flakes over the chicken before baking. This will add a nice kick without overpowering the creamy texture.

Step 7: Experiment with Different Cheeses
The Parmesan cheese in this recipe is a huge part of what makes the topping so creamy and golden, but you can absolutely experiment with different types of cheese for varying textures and flavors. Here are some ideas:
-
Mozzarella: If you love cheesy, melty goodness, try adding some shredded mozzarella to the mixture. It will make the topping extra gooey and stretchy—perfect for those who love a cheesy crust.
-
Cheddar: For a more tangy and sharp flavor, try swapping some of the Parmesan for freshly grated cheddar cheese. The combo of Parmesan and cheddar brings a nice balance of creamy and sharp, making each bite even more indulgent.
-
Asiago or Romano: For a bolder flavor, consider using asiago or Romano cheese. These cheeses are stronger in flavor than Parmesan, and they’ll make your chicken taste even more gourmet.
Step 8: Make It Extra Crispy
If you love a crispy, golden-brown topping (who doesn’t?), there’s a simple way to get that perfect crunch. After the chicken has baked for the full 45 minutes and the coating is golden, turn on the broiler in your oven for the last 2-3 minutes of cooking. Keep an eye on it so that it doesn’t burn, but the broiler will crisp up the top beautifully and give your chicken that perfect texture. Just be careful—broiling can quickly go from crispy to burnt, so it’s best to watch closely!
Step 9: Add a Little Crunch with Panko Breadcrumbs
Another trick to add some extra texture is to sprinkle a layer of panko breadcrumbs over the chicken before baking. You’ll still spread the creamy mayonnaise mixture on top, but the breadcrumbs will give the coating that extra crunch. You can even mix some Parmesan into the breadcrumbs for an added cheesy flavor boost.
If you’re gluten-free, you can easily swap the panko for gluten-free breadcrumbs or even crushed gluten-free crackers for that same satisfying crunch.
Step 10: Make It Lighter
This recipe is already pretty simple and decadent, but if you’re looking to lighten it up a bit, here are a couple of options:
-
Greek Yogurt or Sour Cream Swap: Instead of using full-fat mayonnaise, swap half of it with Greek yogurt or sour cream. This gives the dish a slightly tangier flavor, but it still keeps the chicken juicy and moist. Plus, you get a little extra protein from the yogurt!
-
Chicken Thighs: For a richer, more flavorful cut of chicken, you can also use boneless, skinless chicken thighs. Chicken thighs are naturally more tender and juicy than chicken breasts, so if you love those, this recipe works beautifully with them too. Just be sure to adjust the cooking time slightly, as chicken thighs may need a little longer to reach that perfect internal temperature.
Steps for Serving Your Melt In Your Mouth Chicken
Step 11: Pair with Delicious Sides
This Melt In Your Mouth Chicken is fantastic on its own, but it shines even more when paired with a delicious side dish or two. Here are a few ideas to round out the meal:
-
Roasted Vegetables: Think roasted carrots, Brussels sprouts, or a medley of zucchini and bell peppers. The crispy edges of roasted vegetables complement the creamy chicken, making for a perfectly balanced plate.
-
Mashed Potatoes: Creamy mashed potatoes are the ultimate comfort food and go wonderfully with this chicken. The smooth, buttery potatoes balance out the richness of the chicken and add a hearty element to the meal.
-
Green Salad: If you want something lighter to balance the richness of the chicken, a simple green salad with a lemony vinaigrette would do the trick. It adds a refreshing contrast and makes for a more well-rounded dinner.
-
Rice Pilaf: A simple rice pilaf, maybe with a little bit of garlic and parsley, can also make a wonderful base for the chicken, soaking up all the creamy goodness from the topping.
Step 12: Leftovers and Storage Tips
One of the best things about this recipe is how well it keeps. If you happen to have any leftovers (which, let’s be honest, is rare), simply store them in an airtight container in the fridge. The chicken will stay fresh for up to 3 days. When you’re ready to eat it again, I recommend reheating it in the oven to maintain that crispy topping. Simply place it in a baking dish at 350°F (175°C) for about 10 minutes or until heated through. This method keeps the chicken juicy and the topping nice and crispy.
Frequently Asked Questions and Final Thoughts on Melt In Your Mouth Chicken
Now that you’re equipped with all the tips, tricks, and variations to make this Melt In Your Mouth Chicken recipe your own, let’s tackle some of the common questions you might have. These FAQs will help ensure you feel confident in the kitchen and give you even more helpful tips to perfect your dish.
Frequently Asked Questions
1. Can I use chicken thighs instead of chicken breasts?
Absolutely! Chicken thighs work wonderfully in this recipe. They tend to be juicier and more flavorful than chicken breasts, and the coating will still work perfectly with them. Just be sure to check the internal temperature to ensure they reach 165°F (74°C), as thighs may need a little longer to cook than breasts, depending on their size.
2. Can I make this recipe ahead of time?
Yes, this recipe can be made ahead! You can assemble the chicken with the mayonnaise and Parmesan coating, then cover it tightly and refrigerate it for up to 24 hours before baking. When you’re ready to cook, just pop it in the oven as directed. This is a great option for meal prep or if you’re hosting a dinner and want to save time on the day of.
3. Can I freeze this dish?
Yes, you can freeze this Melt In Your Mouth Chicken. After baking, let it cool completely, then wrap it tightly in plastic wrap and foil or place it in an airtight container. When ready to reheat, thaw it in the refrigerator overnight and reheat in the oven at 350°F (175°C) until warmed through. The coating may not be as crispy as when freshly baked, but it will still taste amazing!
4. Can I use a different kind of cheese?
Definitely! Parmesan is fantastic in this recipe, but if you want to experiment, feel free to use other cheeses. Mozzarella will give you a cheesy, melty topping, while cheddar will add a tangy, sharp flavor. Asiago or Romano would also work well for a stronger, more pronounced cheese flavor. Mix and match according to your preference!
5. How do I know when my chicken is fully cooked?
The best way to check for doneness is by using a meat thermometer. Insert it into the thickest part of the chicken breast, and when it reads 165°F (74°C), the chicken is fully cooked. If you don’t have a thermometer, you can also cut into the chicken and check that the juices run clear, and the meat is no longer pink.
6. Can I add vegetables to the baking dish?
Absolutely! Adding vegetables to the baking dish is a great way to make this a one-pan meal. You can add things like carrots, broccoli, or bell peppers to the dish. Just make sure they’re cut into bite-sized pieces, and arrange them around the chicken. You may want to toss them in a little olive oil, salt, and pepper to help them cook evenly and develop some flavor. Keep in mind that some vegetables may take longer to cook, so you might need to adjust the cooking time or add them a bit earlier.
7. What should I serve with this chicken?
This chicken pairs wonderfully with so many different sides. For a classic, comforting dinner, try mashed potatoes, roasted vegetables, or rice. A fresh green salad with a tangy vinaigrette is also a great way to balance the richness of the chicken. If you’re in the mood for something a little more decadent, some buttery garlic bread would be a perfect addition.
Conclusion: A Chicken Recipe You’ll Love Again and Again
There you have it! Melt In Your Mouth Chicken is a dish that’s not only easy to prepare, but also packed with flavor and guaranteed to satisfy. Whether you’re making it for a busy weeknight dinner or preparing it for company, this recipe is a true crowd-pleaser. With just a few simple ingredients and minimal prep time, you can create a meal that feels both indulgent and comforting.
If you try out any variations, I’d love to hear about it! Feel free to leave a comment and share your twists on the recipe. And don’t forget to serve this chicken with your favorite sides for a meal that’s sure to please everyone at the table.
Remember, cooking doesn’t have to be complicated to be delicious. With this Melt In Your Mouth Chicken recipe, you’ll be enjoying flavorful, tender chicken in no time! Happy cooking!
Melt In Your Mouth Chicken

This Melt In Your Mouth Chicken is a creamy, flavorful dish that’s incredibly easy to prepare. The combination of mayonnaise, Parmesan cheese, and seasonings creates a rich and tangy coating that keeps the chicken juicy and tender. With minimal ingredients and a simple baking process, this recipe is perfect for busy weeknights or a comforting family meal.
- Author: Mark's Recipe
Ingredients
- 1 cup full-fat mayonnaise
- ½ cup freshly grated Parmesan cheese
- ½ teaspoon salt
- ½ teaspoon ground black pepper
- 1 teaspoon garlic powder
- 4 boneless, skinless chicken breast halves
Instructions
Preheat the Oven – Set your oven to 375°F (190°C) and lightly grease a baking dish to prevent sticking.
Prepare the Chicken – Place the chicken breasts in the baking dish, ensuring they are evenly spaced and not overlapping.
Make the Coating – In a bowl, mix together the mayonnaise, Parmesan cheese, salt, black pepper, and garlic powder until smooth and well combined.
Coat the Chicken – Spread the creamy mixture evenly over the chicken breasts, covering the tops completely.
Bake – Place the dish in the preheated oven and bake for 45 minutes, or until the chicken is fully cooked and the topping is golden brown. Use a meat thermometer to check that the internal temperature reaches 165°F (74°C).
Serve – Let the chicken rest for a few minutes before serving. Pair with roasted vegetables, mashed potatoes, or a fresh green salad for a complete meal.
Notes
- For a lighter version, swap half of the mayonnaise with Greek yogurt or sour cream.
- Add a sprinkle of paprika or Italian seasoning for extra flavor.
- For extra crispiness, broil the chicken for the last 2-3 minutes of baking.
- Leftovers can be stored in an airtight container in the refrigerator for up to 3 days and reheated in the oven.


")
