
If there’s one thing I love more than a homemade biscuit, it’s a quick homemade biscuit. And let me tell you, these Melt-in-Your-Mouth 2-Ingredient Biscuits are about to become your new go-to. They’re buttery, fluffy, and taste like you spent all afternoon in the kitchen—even though they come together in about 15 minutes. Yes, really!
I stumbled across this two-ingredient combo years ago while in a pinch. I had unexpected guests for breakfast, zero energy for anything complicated, and a strong craving for something warm and comforting on the table. I reached for the self-rising flour and heavy cream, crossed my fingers, and prayed for biscuit magic. And guess what? These beauties came out of the oven soft, golden, and ridiculously delicious. I’ve never looked back since.
Whether you’re a seasoned baker or someone who usually leaves the biscuit-making to the pros, this recipe is foolproof. There’s no cutting in butter, no chilling dough, no fancy techniques. Just mix, cut, bake, and enjoy. If you’ve got 20 minutes and two ingredients, you’re good to go!
Let’s get into it and whip up a batch of the easiest biscuits you’ll ever make.
Ingredients You’ll Need
-
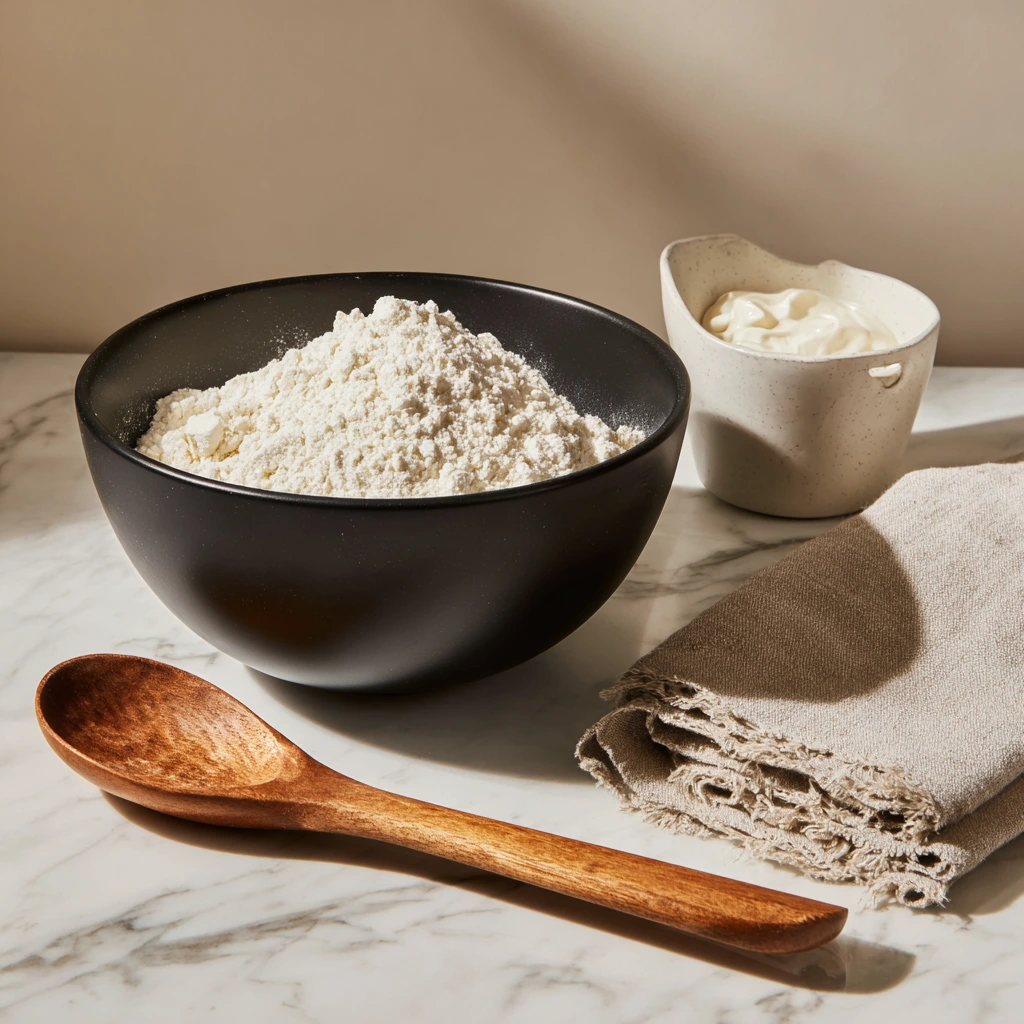
2 cups self-rising flour
-
1½ cups heavy cream
That’s it. No eggs, no butter, no stress.
STEP 1: Preheat Your Oven
Go ahead and preheat your oven to 450°F (230°C). A hot oven is key to getting those biscuits to rise beautifully and develop that perfect golden-brown top.
While the oven heats up, line a baking sheet with parchment paper. This makes cleanup a breeze and prevents the bottoms from getting too brown.
STEP 2: Mix Your Dough
Grab a large mixing bowl and combine your 2 cups of self-rising flour with 1½ cups of heavy cream.
Now, here’s the important part: stir just until a soft dough forms. You want everything combined, but don’t overmix. Overworking the dough can make your biscuits tough instead of soft and tender. We’re going for that dreamy, melt-in-your-mouth texture here.
If the dough looks a little shaggy, that’s totally fine. As long as there aren’t large pockets of dry flour, you’re good.
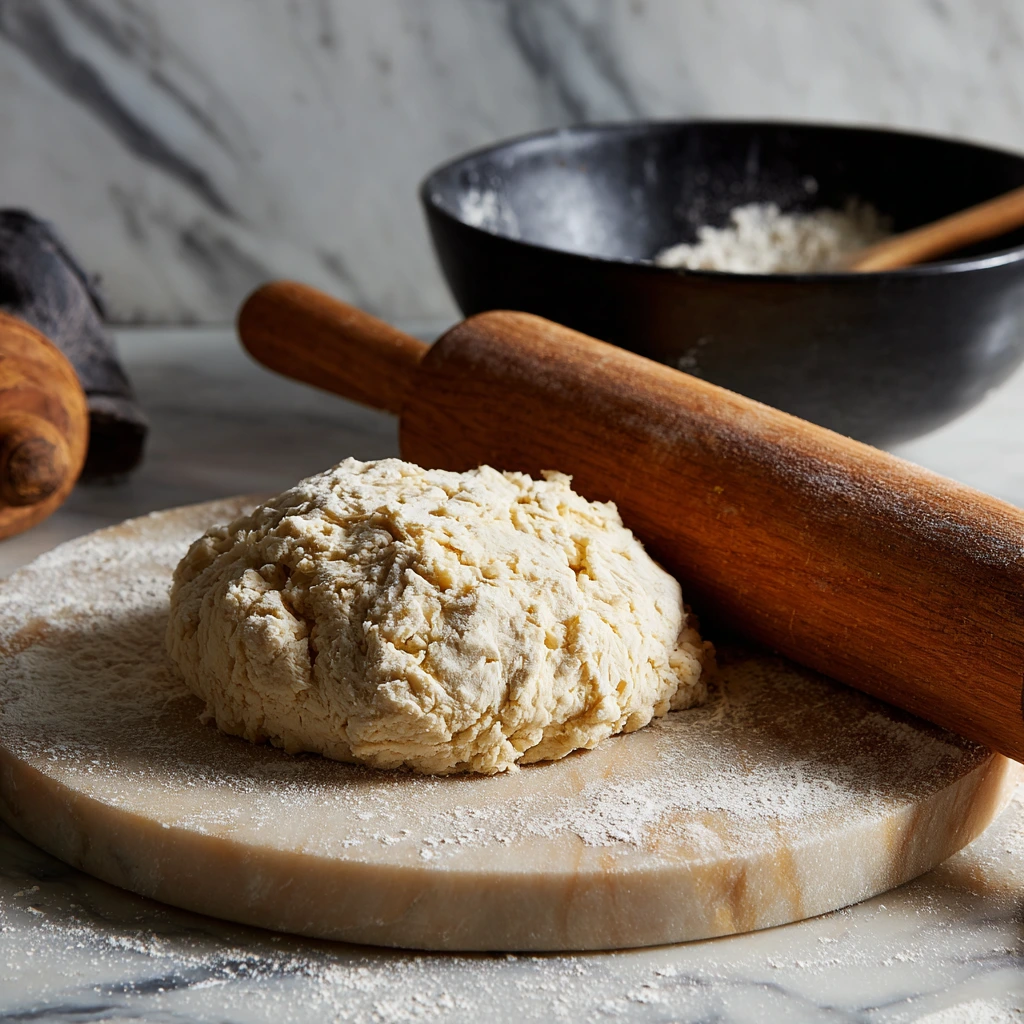
STEP 3: Shape the Dough
Lightly flour a clean surface—your countertop, a cutting board, whatever works. Turn your dough out and gently pat or roll it out to about 1-inch thickness.
For extra layers (and a little more rise), try folding the dough over on itself once or twice before flattening it out again. This trick gives you those lovely, buttery layers you usually only get from more complicated biscuit recipes.
STEP 4: Cut Out Your Biscuits
Using a round biscuit cutter, cut out your biscuits by pressing straight down—no twisting! Twisting the cutter can seal the edges and keep the biscuits from rising as much.
Gather any leftover dough scraps, gently press them back together, and cut a few more biscuits until all the dough is used up.
How to Bake the Perfect 2-Ingredient Biscuits (And Make Them Even Better)
Alright, let’s jump back in! At this point, your biscuit dough is cut and ready to go. You’ve probably already got the kitchen smelling like warm, buttery heaven—and we haven’t even put anything in the oven yet.
This next part is where the real magic happens. We’re talking golden tops, fluffy centers, and that soft, melt-in-your-mouth texture that makes it hard to stop at just one. Whether you’re planning to serve these with jam, gravy, or just a pat of butter, they’re about to be a hit.
Let’s finish baking these beauties and talk through a few helpful tips to take them from good to oh wow, did you make these yourself?! good.
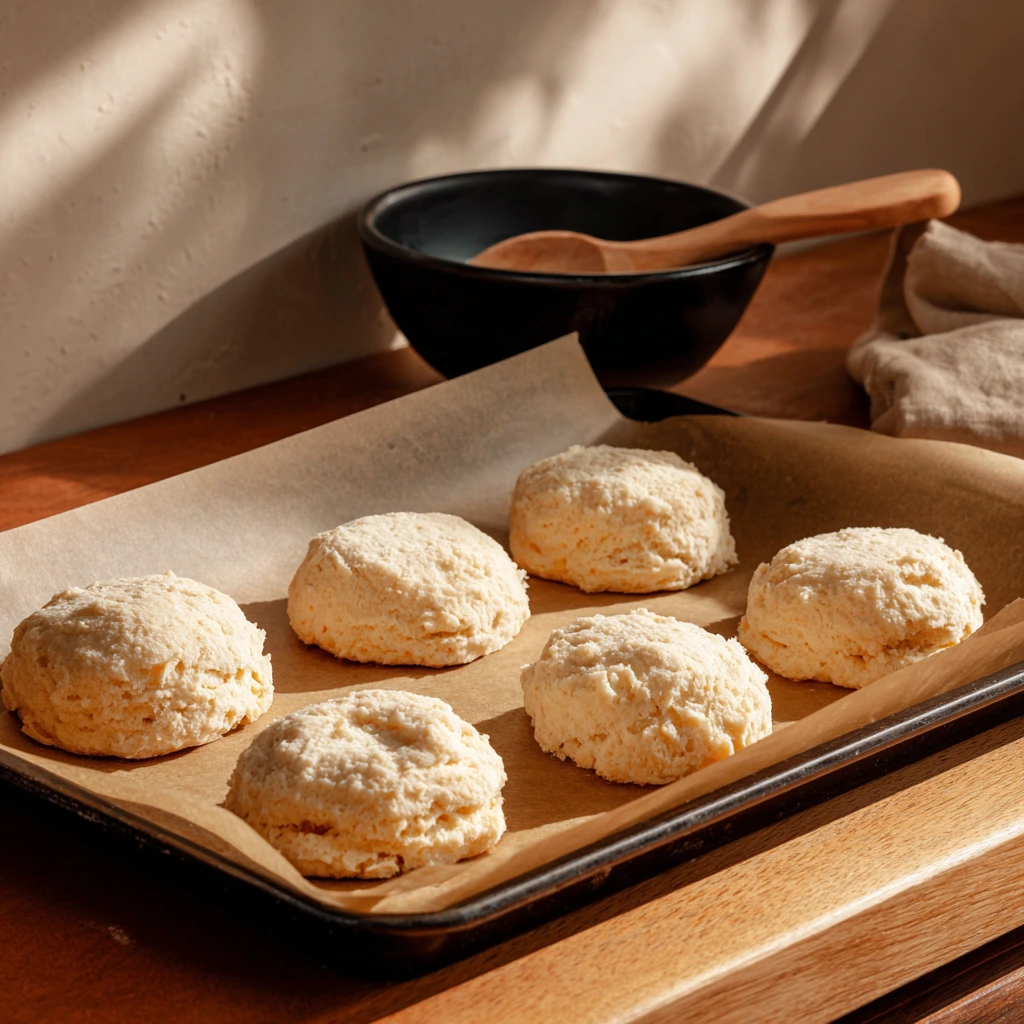
STEP 5: Arrange Biscuits on the Baking Sheet
Now, gently transfer your cut biscuits onto the prepared baking sheet you lined earlier with parchment paper.
Here’s a quick choice you get to make depending on your biscuit preference:
-
For soft sides: Place the biscuits close together, so they’re touching slightly. This keeps the edges tender as they bake up.
-
For crispier edges: Space them out, about 1 to 2 inches apart. This allows hot air to circulate and gives each biscuit a golden, slightly crisp exterior.
There’s no wrong answer—it all depends on the texture you love.
STEP 6: Bake Until Golden
Slide the tray into your preheated 450°F (230°C) oven and bake for 10 to 12 minutes, or until the tops are lightly golden.
Keep an eye on them during the last few minutes of baking. Oven temps can vary, and you want that perfect balance of golden brown on top without overbaking.
Once done, remove them from the oven and take a moment to admire your work. Seriously, don’t skip this part—they’re beautiful.
STEP 7: Add a Buttery Finishing Touch (Optional, But Recommended)
As soon as the biscuits come out of the oven, you can brush the tops with melted butter for an extra-rich, flavorful finish. It’s totally optional, but trust me—it takes these biscuits to another level.
Just melt a tablespoon or two of butter and use a pastry brush (or even the back of a spoon in a pinch) to give each biscuit a quick swipe. Not only does it add flavor, but it also gives them a gorgeous glossy look.
Serving Suggestions
These 2-ingredient biscuits are incredibly versatile. Here are a few ways we love to serve them at my house:
-
Classic with Butter and Honey – Warm, simple, and perfect for breakfast.
-
Smothered in Sausage Gravy – Southern-style comfort at its finest.
-
Mini Sandwiches – Split them and fill with egg, bacon, or ham for an easy breakfast sandwich.
-
Sweet Side – Try them with fruit preserves or a drizzle of maple syrup.
Honestly, they work just as well at breakfast as they do next to a bowl of chili or a roast chicken dinner. You might find yourself making them more often than you planned—consider yourself warned.
Tips & Variations
Here are a few handy tips to help make your biscuit game even stronger:
-
No self-rising flour? No problem. Make your own by whisking together 1 tablespoon of baking powder and ½ teaspoon of salt per cup of all-purpose flour. For this recipe, that’s 2 cups of flour, 2 tablespoons of baking powder, and 1 teaspoon of salt.
-
Want cheesy biscuits? Add ½ cup of shredded cheddar to the flour before mixing in the cream. You’ll end up with rich, cheesy, savory biscuits that pair perfectly with soups or eggs.
-
Freezing Instructions: These biscuits freeze like a dream. Bake a batch, let them cool, and then store in a freezer-safe bag. Reheat in the oven at 350°F for about 10 minutes, and they’re just like fresh-baked.
-
Don’t have a biscuit cutter? Use a drinking glass or even cut the dough into squares with a knife—no need to be fancy.
Your Questions Answered: 2-Ingredient Biscuit FAQ
If you’re anything like me, once you find a recipe that’s this easy and this good, your brain starts buzzing with questions. Can I freeze them? What if I don’t have self-rising flour? Can I make these dairy-free?
I’ve rounded up some of the most frequently asked questions about these biscuits so you can feel totally confident making (and tweaking) them in your own kitchen.

FAQ: 2-Ingredient Biscuit Basics
1. Can I use all-purpose flour instead of self-rising flour?
Yes, absolutely! Just make your own self-rising mix by adding 1 tablespoon of baking powder and ½ teaspoon of salt per cup of all-purpose flour. For this recipe, that means mixing 2 cups flour + 2 tablespoons baking powder + 1 teaspoon salt.
2. Can I use milk instead of heavy cream?
You technically can, but I wouldn’t recommend it. Heavy cream gives these biscuits their soft, rich texture. Using milk will make the dough much wetter and the biscuits won’t be as tender or fluffy. If you only have milk, try mixing it with a bit of melted butter to replicate the richness of cream.
3. Can I make these biscuits ahead of time?
Yes! You can mix and cut the dough ahead of time, then refrigerate it (covered) for up to 1 day before baking. Alternatively, bake the biscuits, let them cool completely, and store in an airtight container at room temp for up to 2 days, or freeze for longer storage.
4. How do I reheat leftover biscuits?
For the best texture, pop them in a 350°F oven for 5–8 minutes until warm. You can also microwave them for about 15–20 seconds, but they’ll be softer and lose that fresh-baked texture.
5. Can I add mix-ins like cheese, herbs, or bacon?
Definitely! This base recipe is super flexible. Stir in ½ cup shredded cheese, a tablespoon of chopped herbs, or even crumbled cooked bacon before adding the cream. Just keep the add-ins dry so they don’t mess with the dough texture.
6. What’s the best way to store leftover biscuits?
If you plan to eat them within a day or two, store them in an airtight container at room temp. For longer storage, place them in a freezer bag and freeze for up to 2 months. Reheat from frozen at 350°F for 10–12 minutes.
7. Why did my biscuits turn out tough or flat?
Most likely, the dough was overmixed or the flour was too packed. Be sure to mix gently just until combined, and spoon and level your flour into the measuring cup—don’t scoop it straight from the bag.
Final Thoughts: Comfort Food at Its Simplest
These 2-Ingredient Biscuits are everything I love about simple baking: minimal ingredients, no stress, and big payoff. You don’t need special tools, fancy techniques, or even a ton of time. And yet, what comes out of the oven is warm, fluffy, and seriously satisfying.
What makes this recipe a winner isn’t just the taste (though they’re amazing), it’s how approachable it is. Whether you’re cooking for your family on a busy weekday morning or hosting brunch with friends, this is one of those no-fail recipes that delivers every single time.
PrintMelt-in-Your-Mouth 2-Ingredient Biscuits

These Melt-in-Your-Mouth 2-Ingredient Biscuits are the ultimate in simplicity and comfort. With just self-rising flour and heavy cream, you’ll have tender, fluffy biscuits that come together in minutes. No fuss, no extra steps—just pure biscuit bliss. They’re perfect for breakfast, dinner sides, or smothered in gravy.
- Author: Mark's Recipe
Ingredients
2 cups self-rising flour
1 ½ cups heavy cream
Instructions
Preheat the oven to 450°F (230°C). Line a baking sheet with parchment paper.
In a large mixing bowl, combine the self-rising flour and heavy cream. Stir just until a soft dough forms. Do not overmix.
Turn the dough out onto a floured surface and gently pat or roll it to about 1-inch thickness. Fold the dough over once or twice to create layers.
Cut out biscuits using a round cutter, pressing straight down without twisting. Gather scraps and repeat.
Place biscuits on the prepared baking sheet, close together for soft sides or spaced apart for crisp edges.
Bake for 10-12 minutes, or until golden on top.
Serve warm with butter, jam, or honey.
Notes
For extra flavor, brush the tops with melted butter before or after baking. If you don’t have self-rising flour, you can make your own by adding 1 tablespoon of baking powder and ½ teaspoon of salt to every cup of all-purpose flour. These biscuits freeze well—just reheat in the oven before serving.


")
