There’s something so magical about a dessert that tastes like sunshine—and this no-bake lemonade pie totally delivers. It’s one of those recipes that’s been in my family’s summer rotation for as long as I can remember. We’d make it for pool parties, potlucks, and those lazy Sunday afternoons when the last thing you want is to turn on the oven.
What I love most about this pie (besides the fact that it’s ridiculously easy) is the way the tart lemon blends with the creamy filling and crunchy graham cracker crust. It’s light, zesty, and just the right amount of sweet. Think key lime pie vibes, but way less fussy.
So if you’re craving something simple, cool, and crowd-pleasing—this lemonade pie is the one. Bonus: you only need five ingredients and about 10 minutes of prep time. The rest is just chilling (literally and figuratively).
Let’s get into it.
Ingredients You’ll Need
-
4 ounces cream cheese (that’s half a standard block), softened to room temperature
-
1 (14-ounce) can sweetened condensed milk
-
6 ounces frozen lemonade concentrate, thawed
-
1 (8-ounce) tub whipped topping, thawed (Cool Whip works great)
-
1 (9-ounce) premade graham cracker crust – try to find the one labeled “2 extra servings” for best results
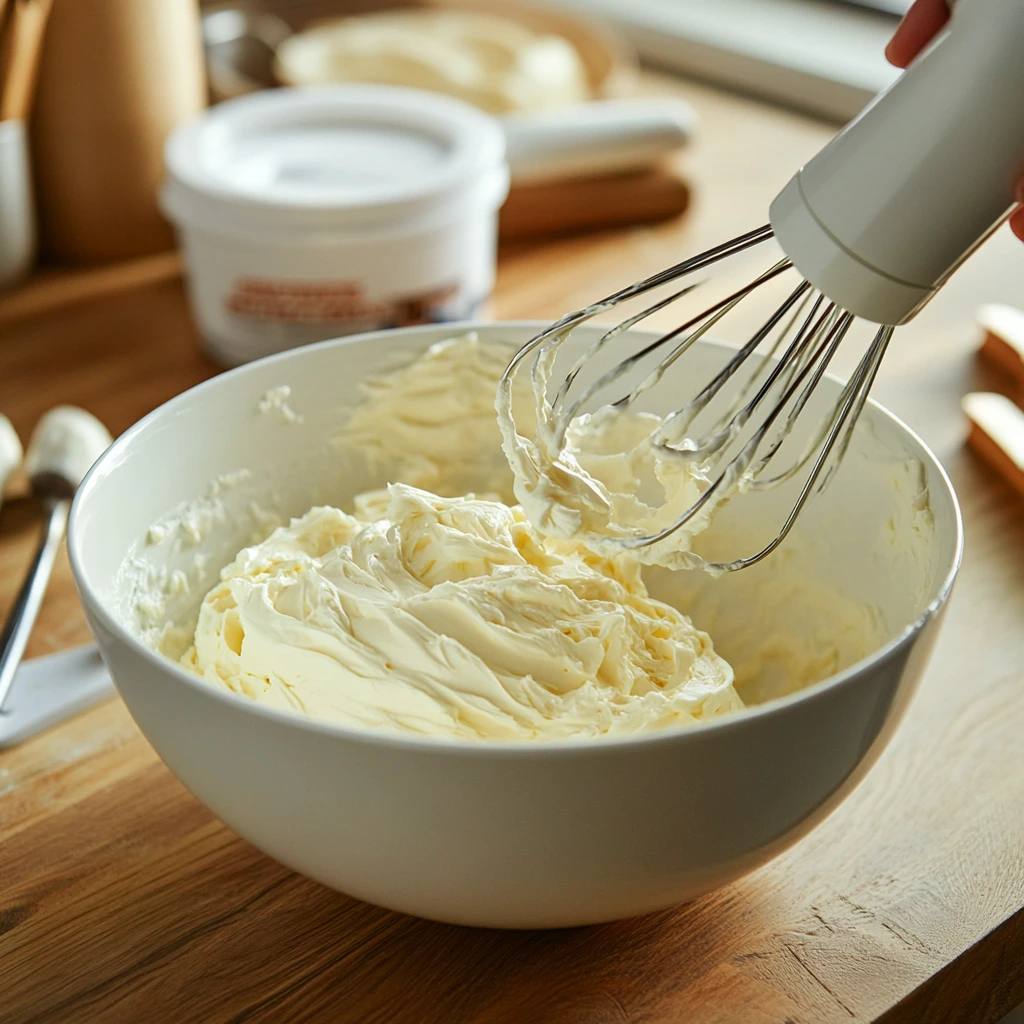
STEP 1: Whip the Cream Cheese
This step sets the tone for the texture of your pie, so don’t skip it. In a large mixing bowl, use an electric hand mixer to whip the softened cream cheese until it’s completely smooth. You want all those little lumps gone so your pie turns out creamy and luscious.
STEP 2: Mix in the Sweetened Condensed Milk
Now pour in the entire can of sweetened condensed milk and keep mixing. Make sure everything is fully combined. Scrape down the sides of the bowl as you go so nothing gets left behind.
You’ll notice the mixture becoming smooth and glossy—just the way we want it!
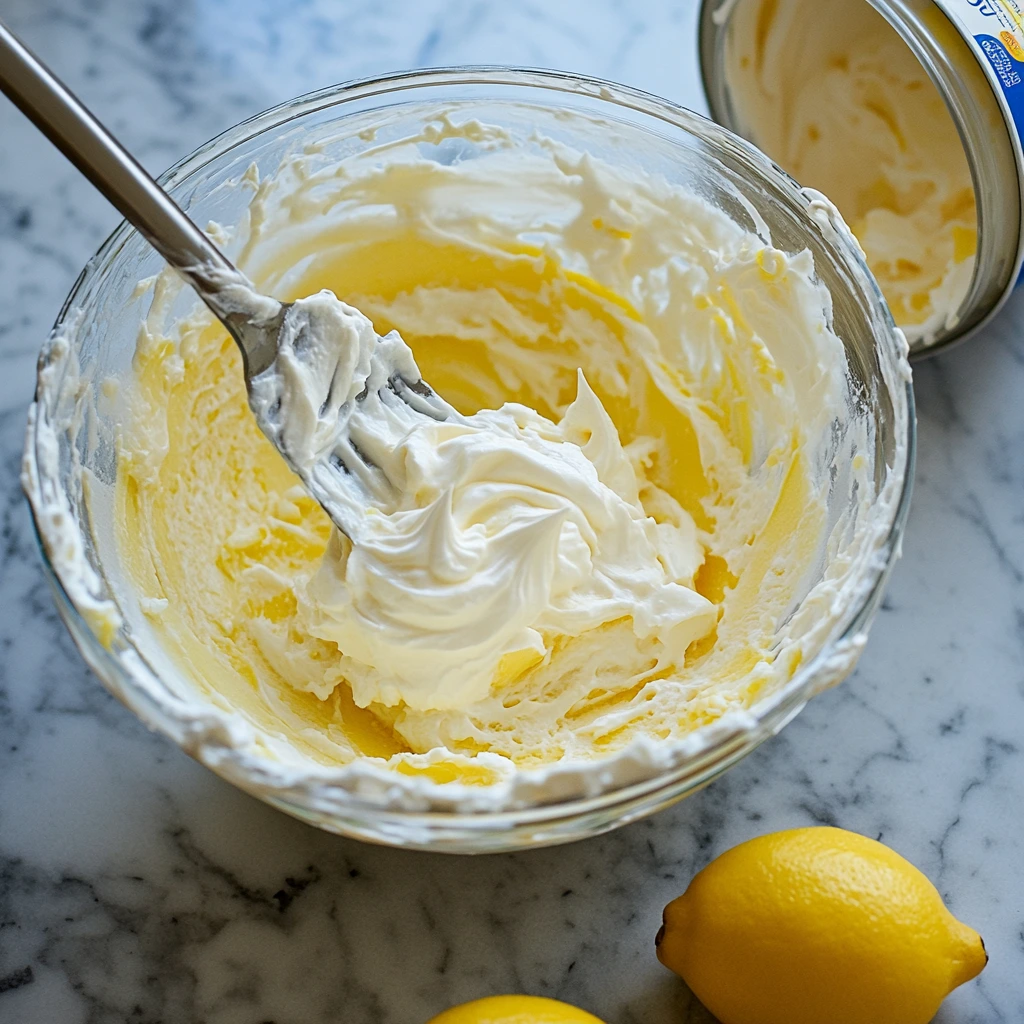
STEP 3: Add the Lemonade Concentrate
Time to bring in the star of the show: the lemonade! Add the thawed concentrate to your bowl and mix until it’s fully blended. This gives your pie that signature tart kick. At this stage, the filling should be silky and starting to thicken just a bit.
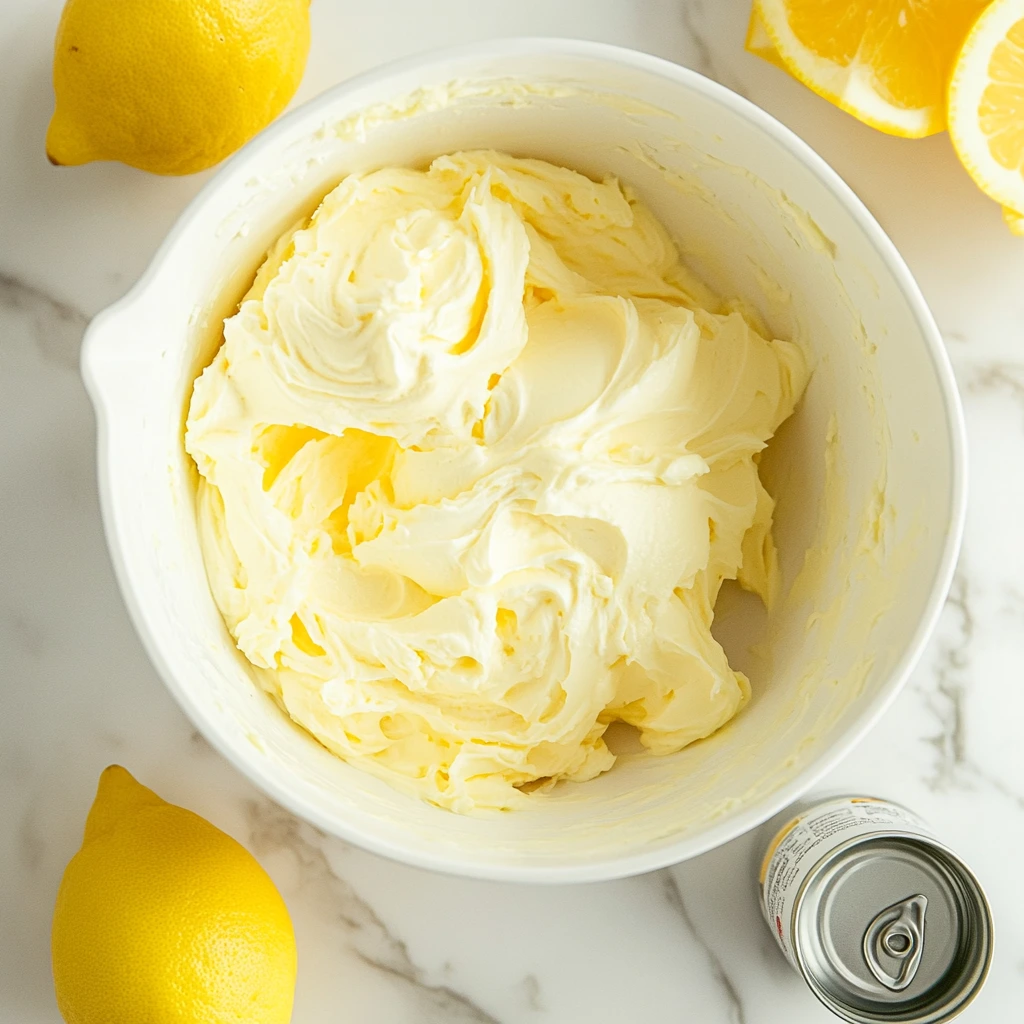
STEP 4: Fold in the Whipped Topping
Add in the thawed whipped topping and beat everything together until it’s smooth and fluffy. Be patient here—take your time and make sure there are no streaks of whipped topping left. You want one uniform, dreamy lemon mixture.
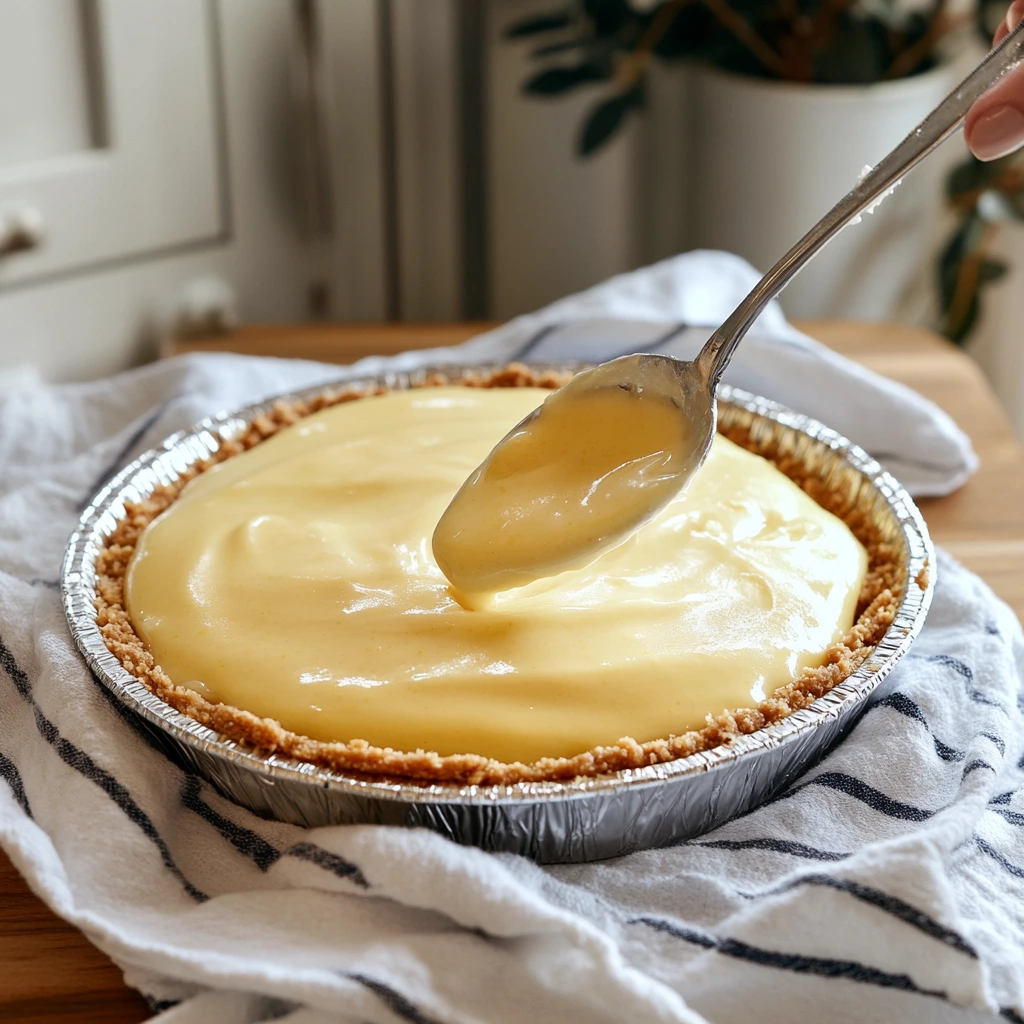
STEP 5: Pour Into the Crust
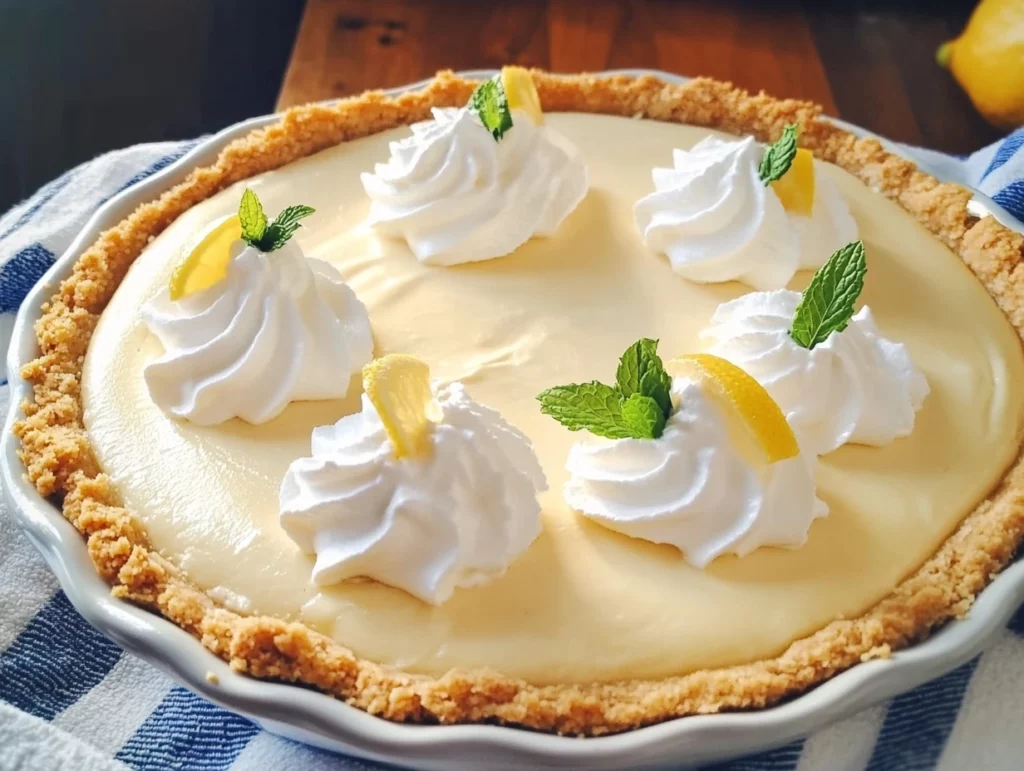
Grab your premade graham cracker crust and pour the lemony filling right in. Use a spatula to smooth out the top—this gives it that clean, bakery-style look. It’s okay if it looks a little soft right now; the magic happens in the fridge.
How to Finish and Serve the Perfect Lemonade Pie
Now that your pie is chilling away in the fridge (hopefully overnight!), let’s talk about the finishing touches. This pie is already a showstopper with its creamy texture and citrusy flavor, but a few simple add-ons can take it from everyday to special occasion-worthy.
I’ve made this lemonade pie more times than I can count—sometimes I keep it classic, and other times I dress it up depending on the occasion. Whether you’re serving it at a summer BBQ, a baby shower, or just because it’s a Tuesday, this pie is going to be a hit.
Let’s go over how to finish it off, slice it just right, and a few tricks to make it truly your own.
STEP 6: Chill and Set the Pie
This step technically started in Part 1, but let’s reinforce it: you must let the pie chill for a minimum of 8 hours. Overnight is even better. The chilling process allows all the ingredients to firm up into that smooth, sliceable consistency.
If you cut into it too soon, you’ll have more of a lemon pudding in a crust—and while that still tastes good, it won’t have the same wow factor when it comes to presentation.
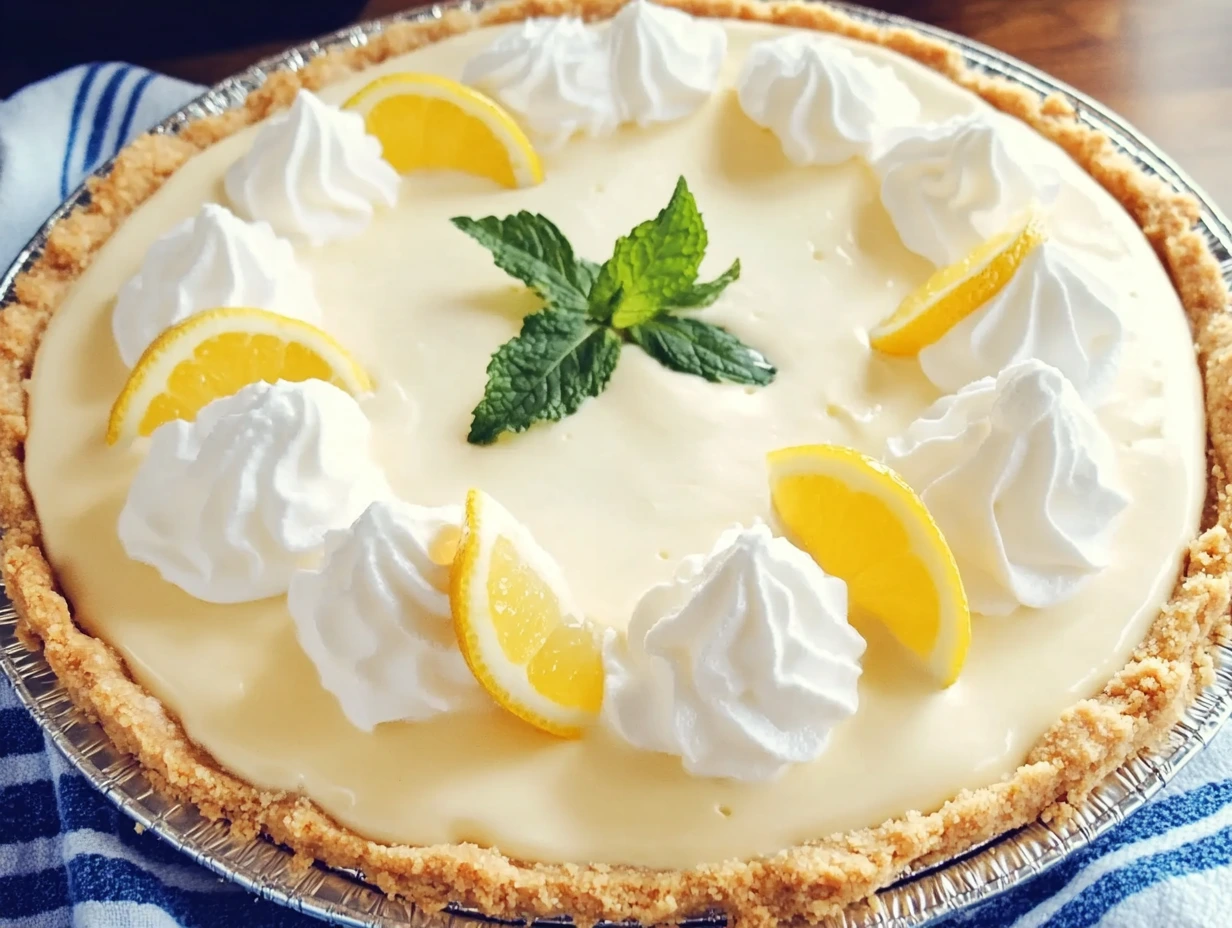
STEP 7: Garnish (Optional, But Recommended)
Okay, so the pie is fully set. Now comes the fun part: garnishing. This is where you can add a little personality to your dessert.
Here are a few easy topping ideas:
-
Fresh lemon zest – Use a microplane to zest a lemon right over the top. It adds a pop of color and amps up the citrus scent.
-
Thin lemon slices – Arrange a few slices in a fan pattern or around the edges for a classic bakery look.
-
Whipped cream dollops – Pipe or spoon on little swirls of whipped cream for added creaminess.
-
Fresh berries – Strawberries, raspberries, or blueberries pair beautifully with the lemon and add a colorful contrast.
Of course, you can skip the garnish entirely and serve it as-is. It’s just as delicious!
Serving Tips
To slice the pie cleanly:
Run a sharp knife under hot water before cutting each slice. Wipe the blade between cuts for the best presentation.
Serving suggestion:
I like to serve the pie slightly chilled (not straight from the freezer unless you want an ice-cream-like texture). If you’ve frozen the pie, let it sit at room temp for about 10 minutes before slicing.
Portions:
This pie typically serves 8 generous slices, but you can stretch it to 10 if you’re feeding a crowd or pairing it with other desserts.
Fun Variations to Try
This base recipe is super flexible, which means you can have fun experimenting. Here are a few of my favorite twists:
-
Pink Lemonade Pie – Swap in pink lemonade concentrate for a fun color and slightly different flavor.
-
Limeade Pie – Use limeade instead of lemonade for a tangy lime twist (tastes a lot like key lime pie!).
-
Berry Lemonade Pie – Add a handful of crushed fresh raspberries or strawberries to the filling before pouring it into the crust.
-
Homemade Crust – If you’re up for a few extra minutes of work, you can make a homemade graham cracker crust using crushed graham crackers, sugar, and melted butter. It adds a rustic touch and a little extra crunch.
Storage Tips
This pie stores beautifully, which makes it perfect for prepping ahead of time.
-
Refrigerator: Keep it covered with plastic wrap or a pie lid in the fridge for up to 3 days.
-
Freezer: You can freeze the pie for a firmer, almost ice-cream-like consistency. Just make sure it’s tightly wrapped to avoid freezer burn. It’ll keep well for up to 1 month.
Let it thaw in the fridge or sit out for about 10-15 minutes before serving from frozen. The flavor stays just as amazing.
Lemonade Pie FAQs and Final Thoughts
You’ve got your pie chilling, your garnishes ready, and your fork in hand—but before you dive in, let’s take a moment to go over a few questions that pop up pretty often when it comes to this recipe. Whether you’re wondering about substitutions, freezing options, or making it ahead for a party, I’ve got you covered.
Frequently Asked Questions
Can I use fresh lemon juice instead of frozen concentrate?
Technically, yes—but the result won’t be the same. Frozen lemonade concentrate is more concentrated in flavor and sweetness, so using fresh lemon juice alone will give you a pie that’s more tart and less rich. If you want to go the fresh route, you’d need to adjust by adding extra sugar and possibly some lemon zest for more flavor. Honestly, I recommend sticking with the frozen concentrate for the best results.
Can I make this pie ahead of time?
Absolutely, and it’s actually better that way! Since the pie needs to chill for at least 8 hours (or overnight), making it the day before is ideal. You can even make it up to two days in advance and store it covered in the fridge until ready to serve.
Can I freeze lemonade pie?
Yes, this pie freezes beautifully. Once it’s set in the fridge, wrap it tightly with plastic wrap and then a layer of foil if you’re freezing it for more than a few days. When you’re ready to serve, just let it sit out for 10–15 minutes to soften slightly for cleaner slicing. It’ll have more of an ice-cream pie texture when frozen.
Is there a dairy-free or vegan version of this pie?
You can make a dairy-free version using plant-based alternatives:
-
Use a dairy-free cream cheese substitute.
-
Swap in sweetened condensed coconut milk (many grocery stores carry this now).
-
Use a non-dairy whipped topping, like So Delicious CocoWhip.
It won’t taste exactly the same, but it’ll still be creamy, sweet, and delicious.
What if I don’t have an electric mixer?
A hand whisk will work in a pinch, especially if your cream cheese is very soft. Just be prepared to whisk a bit longer to ensure everything gets fully incorporated and smooth. A food processor or stand mixer also works great if you have one.
Can I use a homemade graham cracker crust?
Yes! If you prefer to make your own crust, combine about 1½ cups of crushed graham crackers, ¼ cup of sugar, and 6 tablespoons of melted butter. Press it into a 9-inch pie pan and bake at 350°F for 7–8 minutes, then let it cool completely before adding the filling.
Can I use a different flavor concentrate?
Definitely! Limeade, pink lemonade, even orange juice concentrate could all be fun to experiment with. Just remember that the sweetness and tartness will vary slightly, so the end result might taste a bit different—but still yummy.
Final Thoughts
If you’re looking for a dessert that’s easy to throw together but still feels special, this lemonade pie is a total winner. I’ve made it for everything from neighborhood cookouts to quick weeknight treats, and it always disappears fast. It’s got that perfect mix of creamy, tart, and sweet that keeps people coming back for seconds.
What I really love is that it doesn’t require any fancy techniques or hard-to-find ingredients. Just a bowl, a mixer, and a little fridge time, and you’ve got a refreshing, sliceable pie that tastes like summer in every bite.
Give this recipe a try, and don’t forget to get creative with the toppings or try one of the variations I mentioned! And if you do make it, I’d love to hear how it turned out. Share your twist in the comments or tag your version online—it’s always fun to see how others make it their own.
PrintLemonade Pie

This Maraschino Cherry Cake is a vibrant, sweet, and delightfully moist dessert that combines the flavor of cherries with a soft vanilla cake base and a luscious cream cheese frosting. The hint of almond extract adds a nostalgic, bakery-style touch, while the cherry juice gives both the cake and frosting a beautiful pink hue.
- Author: Mark's Recipe
Ingredients
For the cake:
3 large eggs
½ cup oil
¾ cup water
¼ cup maraschino cherry juice
½ teaspoon almond extract
1 box vanilla cake mix
16 maraschino cherries, cut into quarters
For the frosting:
4 ounces (½ block) cream cheese, softened
⅓ cup salted butter, softened
2 cups powdered sugar
½ teaspoon almond extract
1 tablespoon maraschino cherry juice
Instructions
Preheat your oven to 350°F. Lightly grease a 9×13-inch baking dish with non-stick spray to prevent the cake from sticking and to ensure easy removal.
In a large bowl, use an electric or stand mixer to beat together the eggs, oil, water, maraschino cherry juice, and almond extract until well combined. This mixture should be smooth and uniform in texture.
Add the vanilla cake mix to the wet ingredients and mix until just combined. Scrape down the sides of the bowl as needed to ensure all the ingredients are fully incorporated.
Gently fold in the quartered maraschino cherries. Stir just enough to evenly distribute the cherries throughout the batter without breaking them up too much.
Pour the batter into the prepared baking dish and smooth the top with a spatula. Bake for about 30 minutes or until a toothpick inserted into the center comes out clean.
Allow the cake to cool completely in the pan before frosting. This helps the frosting spread smoothly and prevents it from melting.
To make the frosting, beat the softened cream cheese and butter together until creamy and smooth. Slowly add the powdered sugar, mixing on low speed at first to prevent it from scattering. Beat until well incorporated.
Add the almond extract and maraschino cherry juice to the frosting and continue to beat until the mixture is fluffy and evenly tinted a light pink.
Spread the frosting over the cooled cake in an even layer. Serve as is or garnish with additional maraschino cherries if desired.
Notes
For extra cherry flavor, add finely chopped cherries into the frosting. This cake can be made a day ahead and stored in the refrigerator. It pairs wonderfully with vanilla ice cream or a glass of milk.


")
