
If you’re anything like me, you have those days where you need dessert now—no mixer, no fuss, just something sweet and comforting with minimal cleanup. That’s where this Lemon Cream Cheese Dump Cake comes in. It’s one of those magical recipes that tastes like you pulled off a baking miracle, when really, you just dumped a few ingredients into a dish and let the oven do the rest.
This dreamy dessert layers together tangy lemon pie filling, sweet and creamy pockets of cream cheese, and a buttery cake topping that bakes into golden perfection. The result? A warm, gooey, sweet-tart treat that hits all the right notes—no whisking, no complicated prep, and absolutely no stress. Whether you’re baking for a last-minute get-together or just need a little sunshine on a plate, this dump cake delivers every time.
The beauty of dump cakes is in their simplicity. You don’t mix the layers together; instead, you just “dump” each one in and let them work their magic in the oven. The cake mix soaks up the butter, forming a golden crust on top, while the cream cheese softens into luscious, creamy bites nestled into the lemon filling. Every spoonful is a surprise—some bites more cakey, some more gooey, all of them delicious.
And here’s a little secret: I first made this on a whim during a weekend baking binge, and it’s been on repeat ever since. It’s just that easy and that good.
Let’s get into how to whip this up—spoiler alert: it’s going to be your new go-to.
Ingredients You’ll Need
-
1 can (21 oz) lemon pie filling
-
1 package (8 oz) cream cheese, cubed
-
1 box yellow cake mix
-
½ cup unsalted butter, melted
-
1 teaspoon vanilla extract
-
Powdered sugar for dusting (optional)
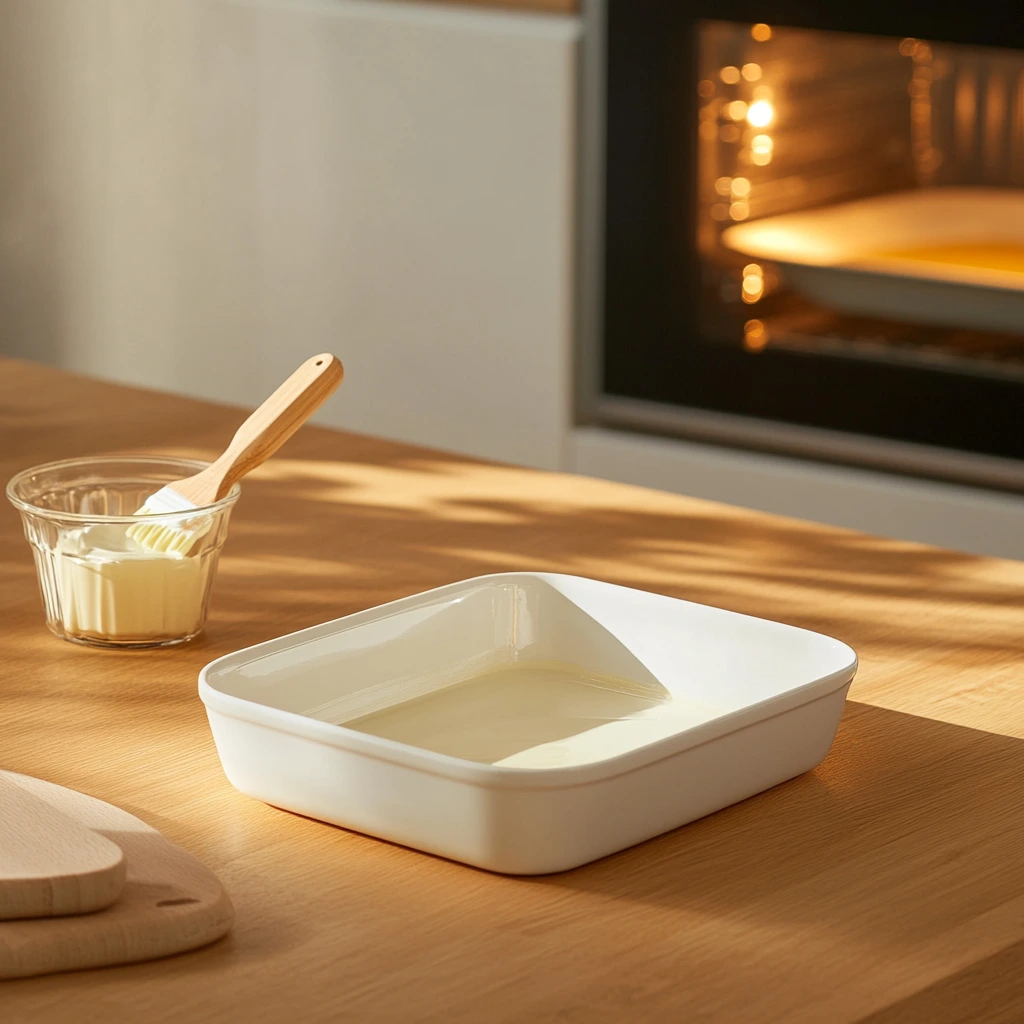
STEP 1: Preheat and Prep Your Baking Dish
Start by preheating your oven to 350°F (175°C). You’ll want to give your 9×13-inch baking dish a light coat of cooking spray or a thin swipe of butter to prevent any sticking. This also helps get those perfectly crispy golden edges (my favorite part, honestly).
STEP 2: Add the Lemon Pie Filling
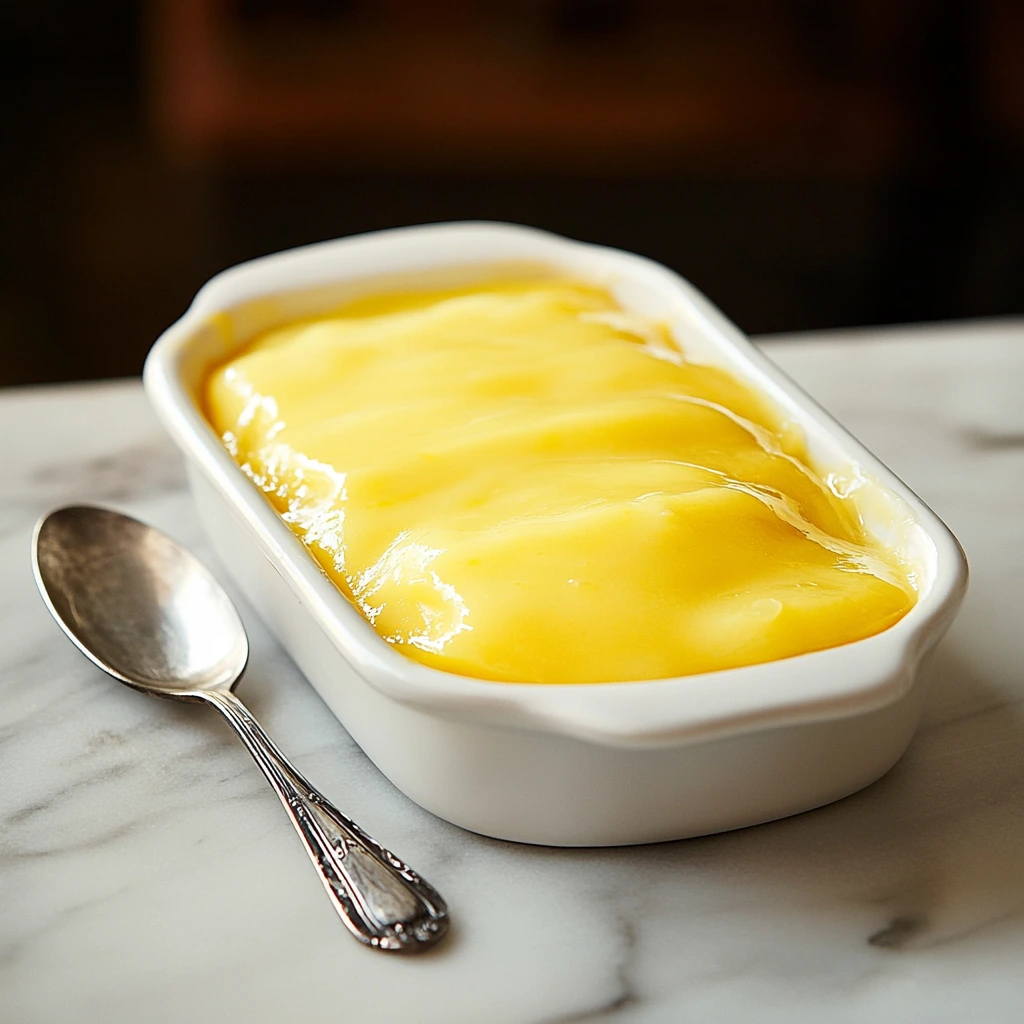
Grab that can of lemon pie filling and spread it evenly over the bottom of your prepared baking dish. This layer is what gives the dump cake its bold, citrusy flavor and gooey texture. Don’t be tempted to skimp—it’s the foundation of the whole thing.
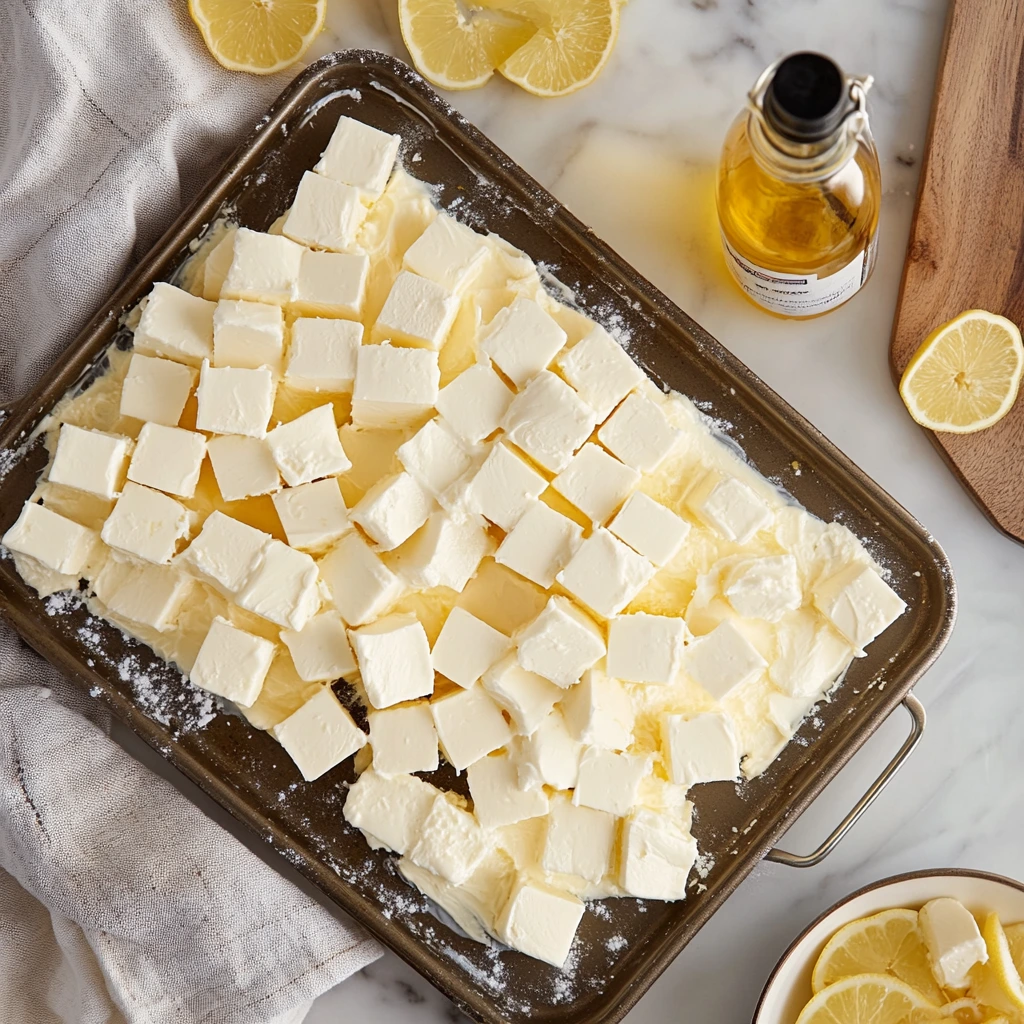
STEP 3: Dot with Cream Cheese Cubes
Next, cube your cream cheese into small bite-sized pieces and scatter them over the lemon pie filling. You want to space them fairly evenly so every bite has a little burst of creamy goodness. The cream cheese softens as it bakes, creating these sweet, tangy pockets that melt into the filling like a dream.
STEP 4: Add a Splash of Vanilla
This might seem like a tiny step, but trust me—it makes a difference. Drizzle the teaspoon of vanilla extract over the cream cheese. It enhances the flavor and adds just a touch of warmth that balances the tart lemon perfectly.
How to Finish the Perfect Lemon Cream Cheese Dump Cake (Plus Pro Tips!)
Alright, now that we’ve layered in all that zesty lemon goodness and those dreamy cream cheese bites, it’s time for the final steps that bring everything together. This is where the magic really happens—your kitchen’s going to start smelling amazing, and in under an hour, you’ll be pulling out a warm, golden, gooey dessert that tastes like sunshine.
One of the best things about this Lemon Cream Cheese Dump Cake is how it walks the line between rustic and indulgent. There’s no need for precision here, just a little layering love and the power of a warm oven.
Let’s finish this beauty up.
STEP 5: Sprinkle on the Cake Mix
Take your box of yellow cake mix and sprinkle the dry mix evenly over the cream cheese and lemon filling. Try to cover the entire surface, working gently to avoid disrupting the layers underneath. It’s important not to stir—dump cakes rely on the layers staying distinct while they bake.
You might be tempted to mix it in to make it look more uniform, but don’t do it! The dry cake mix absorbs the moisture from below and the butter on top, creating a perfect crumbly, buttery crust that’s golden and slightly crisp. That contrast between the gooey lemon base and the soft cakey topping is exactly what makes this dessert irresistible.
STEP 6: Pour on the Melted Butter
Now for the finishing touch before the oven does its job: melted butter.
Slowly drizzle the ½ cup of melted unsalted butter evenly over the cake mix layer. Try to moisten as much of the dry mix as possible. You don’t have to saturate every corner, but the more even the coverage, the more consistent the crust will be. If you notice any dry patches after baking, you can always brush on a little extra butter or even a light syrup drizzle once it’s out of the oven—but we’ll talk more about that in a minute.
Pro tip: if you want a little extra richness and flavor, you can mix a tablespoon of lemon juice or zest into the butter before drizzling. It enhances the citrus flavor without overwhelming the cake.
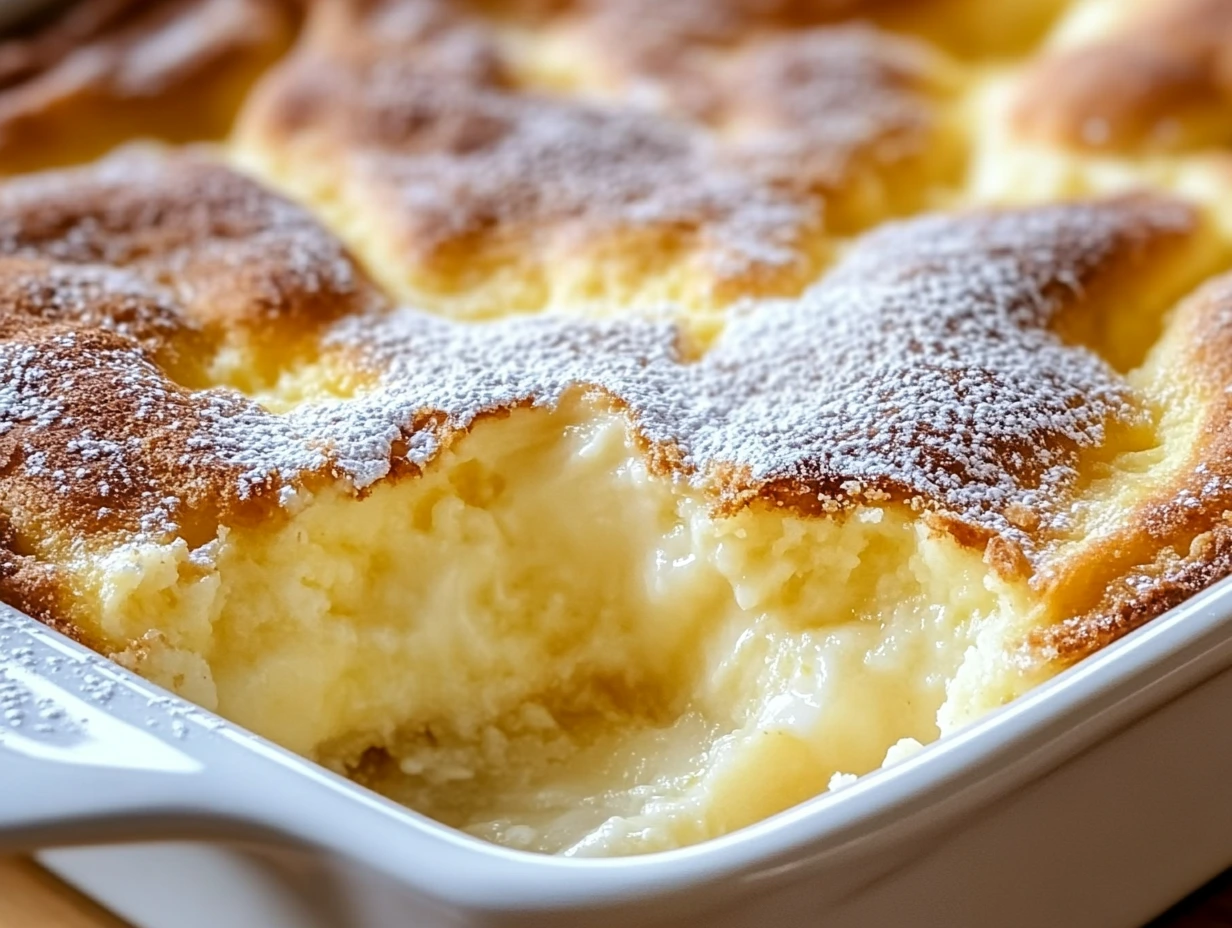
STEP 7: Bake to Golden Perfection
Pop the whole thing into your preheated 350°F oven and bake for 40 to 45 minutes, or until the top is golden brown and bubbly around the edges. Keep an eye on it during the last few minutes—depending on your oven, it might need a few extra minutes for the top to really get that perfect toasty color.
The edges will start to brown first, and you’ll see some bubbling around the sides, which is a good sign the lemon filling is nice and hot underneath.
Once it’s done, remove it from the oven and let it cool for at least 15-20 minutes before serving. It will be super gooey right out of the oven, and this resting time helps it set up just enough so that it’s spoonable but not a total mess.
Tips and Tricks for Dump Cake Success
While this recipe is simple by design, here are a few extra tips that can take it to the next level:
-
Use room temperature cream cheese: Cold cream cheese can stay too firm and won’t melt as smoothly. Let it sit out for about 30 minutes before cubing.
-
Change up the cake mix: Want a more citrusy kick? Try lemon cake mix instead of yellow. If you like a milder flavor, white cake mix works beautifully too.
-
Serve it your way: This dessert is fabulous warm out of the oven, but equally delicious cold the next day. Pair it with vanilla ice cream, whipped cream, or just a dusting of powdered sugar for a simple finish.
-
Storing leftovers: If you have any (which, let’s be honest, might not happen), store them in the fridge for up to 4 days. Just cover the baking dish with foil or transfer to an airtight container. You can reheat individual portions in the microwave or eat it cold—it’s like a lemon cheesecake-meets-cobbler situation either way.

Optional Add-Ins and Variations
If you’re feeling creative or want to switch things up a bit, here are a few easy ways to customize your dump cake:
-
Add a layer of crushed graham crackers under the lemon filling for a mock “crust.”
-
Toss in some fresh blueberries or raspberries before baking for a pop of color and flavor.
-
Top with sliced almonds or shredded coconut before baking for a bit of texture and crunch.
-
Drizzle a lemon glaze after baking to intensify that citrus flavor.
Lemon Cream Cheese Dump Cake: FAQs and Final Thoughts
By now, your kitchen is either smelling incredible or you’re already dreaming about your next slice of this buttery, citrusy masterpiece. But before we wrap things up, I want to answer a few of the most common questions people have when they’re making this dessert. Whether you’re new to dump cakes or a seasoned baker, these quick tips can help ensure your cake turns out just right every time.
Frequently Asked Questions
1. Can I use homemade lemon filling instead of canned?
Absolutely! If you have a go-to homemade lemon curd or lemon pie filling, feel free to use it in place of the canned version. Just make sure it’s thick enough to hold up during baking—anything too runny may throw off the texture.
2. What’s the best way to prevent dry spots on top?
The key is to pour the melted butter as evenly as possible over the dry cake mix. If you still notice some dry patches after baking, you can lightly brush those areas with a bit of melted butter or even a splash of milk. Some folks also like to add a few tablespoons of melted butter in extra spots before baking if they notice gaps.
3. Can I make this ahead of time?
Yes! This dump cake holds up really well in the fridge. You can make it a day in advance, cover it tightly, and chill until you’re ready to serve. Warm it up in the oven at 300°F for about 15-20 minutes, or serve it cold—it’s delicious both ways.
4. What other cake mix flavors work with this recipe?
Lemon cake mix amps up the citrus flavor if you want something super zesty. White cake mix offers a softer flavor that lets the lemon and cream cheese shine. You can even try vanilla or butter cake mix for a more decadent twist.
5. Is there a dairy-free version?
To make this dairy-free, you’ll need to use a dairy-free cream cheese substitute and plant-based butter. Just make sure your cake mix is dairy-free as well (some contain milk powder). The texture might be slightly different, but it will still be tasty.
6. Can I freeze leftovers?
Yes, you can freeze portions of the dump cake. Once it’s completely cooled, transfer it to an airtight container or wrap slices tightly in foil and plastic wrap. Freeze for up to 2 months. When you’re ready to enjoy, thaw in the fridge overnight and reheat if desired.
7. Do I need to refrigerate it after baking?
Since the cake contains cream cheese, it’s best to store leftovers in the refrigerator. Let it cool completely first, then cover and refrigerate for up to 4 days.
Final Thoughts: Why You’ll Make This Lemon Cream Cheese Dump Cake Again and Again
There’s just something so comforting about this dessert. It’s low-effort but high reward, with that unbeatable combo of tangy lemon, creamy bites of cheese, and a warm, buttery cake topping that hits every single time. Whether you’re baking it for a weekend treat, a holiday potluck, or a random Tuesday night when you need a pick-me-up, it never disappoints.
What I love most is how forgiving this recipe is. You don’t need to be a professional baker or have a pantry full of ingredients. It’s simple, satisfying, and endlessly customizable based on what you’ve got on hand.
So go ahead—make it your own! Add berries, switch up the cake mix, serve it with ice cream or a little whipped cream on top. However you serve it, just be ready for everyone to ask for the recipe.
And if you do end up trying it, I’d love to hear how it turned out! Drop a comment, share your favorite twist, or let me know what you paired it with. Happy baking!
PrintLemon Cream Cheese Dump Cake

Lemon cream cheese dump cake is a zesty, indulgent dessert that comes together with minimal effort and just a handful of ingredients. With layers of tangy lemon filling, sweet cream cheese, and a buttery cake topping, this no-fuss treat bakes into a warm, gooey delight that tastes like you spent hours in the kitchen. Perfect for potlucks, family dinners, or whenever you’re craving something sweet and citrusy.
- Author: Mark's Recipe
Ingredients
1 can (21 oz) lemon pie filling
1 package (8 oz) cream cheese, cubed
1 box yellow cake mix
½ cup unsalted butter, melted
1 teaspoon vanilla extract
Powdered sugar for dusting (optional)
Instructions
Preheat the oven to 350°F (175°C) and lightly grease a 9×13-inch baking dish.
Spread the lemon pie filling evenly across the bottom of the dish.
Dot the top with cubes of cream cheese, spacing them evenly over the lemon filling. Drizzle the vanilla extract over the cream cheese for added flavor.
Sprinkle the dry cake mix evenly over the top, covering the filling completely.
Pour the melted butter evenly over the cake mix, making sure to moisten as much of the surface as possible.
Bake for 40 to 45 minutes, or until the top is golden and bubbly and the edges begin to brown.
Let it cool slightly before serving. Dust with powdered sugar if desired.
Notes
For best results, don’t stir the layers before baking—dump cakes work best with their signature layering. You can use a white or lemon-flavored cake mix for an extra citrus punch. This dessert is delicious served warm with a scoop of vanilla ice cream or chilled straight from the fridge the next day.


")
