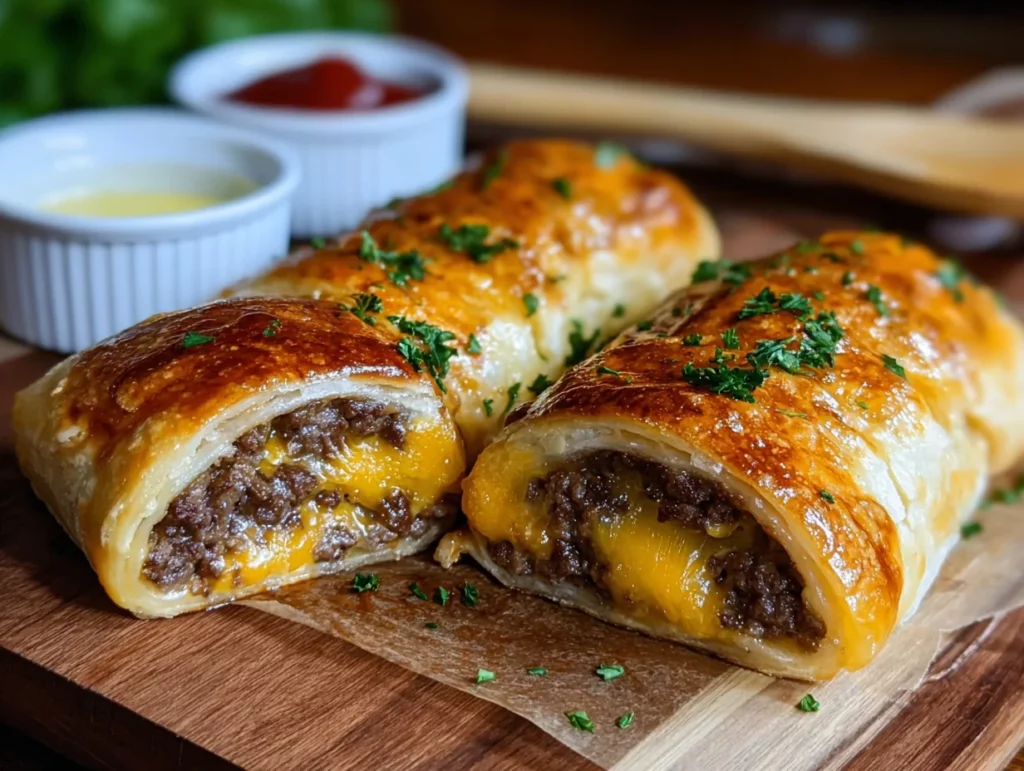
If there’s one thing I’ve learned about cooking for a hungry crowd—whether it’s my kids after school, friends during game night, or even just me needing a little indulgence—it’s that handheld food always wins. And these Garlic Butter Cheeseburger Rollups? Oh, they’re next-level delicious.
They take everything you love about a juicy, cheesy cheeseburger and wrap it up in a buttery crescent dough blanket. The best part? That irresistible garlic butter brushed on top that crisps up in the oven and makes every bite seriously drool-worthy. I swear, I can’t make a batch of these without them disappearing in minutes—literally. They’re that good.
So if you’re looking for something fun, flavorful, and easy (we’re talking 30 minutes start to finish), you’re in the right place. These rollups are perfect for quick weeknight dinners, tailgating parties, potlucks, or even a Saturday snack fest. And trust me, once you try them, you’ll want to keep crescent dough stocked in your fridge 24/7.
Let’s dive into the delicious details!
Why You’ll Love These Cheeseburger Rollups
-
Quick and easy: Ready in 30 minutes with just a few ingredients.
-
Family-approved: Even the picky eaters will gobble these up.
-
Perfectly portable: Great for lunchboxes, parties, or grab-and-go meals.
-
Customizable: Add bacon, pickles, or switch up the cheese—go wild!
Ingredients You’ll Need
Here’s what you’ll want to grab before getting started:
-
1 lb ground beef
-
1 small onion, finely diced
-
1 tsp garlic powder
-
Salt and pepper, to taste
-
1 tbsp ketchup
-
1 tbsp yellow mustard
-
1½ cups shredded cheddar cheese
-
1 can refrigerated crescent roll dough
-
2 tbsp unsalted butter, melted
-
1 garlic clove, minced
-
1 tsp dried parsley or chives (optional, but adds great color and flavor)
STEP 1: PREHEAT AND PREP
Start by preheating your oven to 375°F and lining a baking sheet with parchment paper. You want those rollups to bake evenly and not stick—plus, easy cleanup is always a win in my book.
STEP 2: COOK THE BEEF MIXTURE
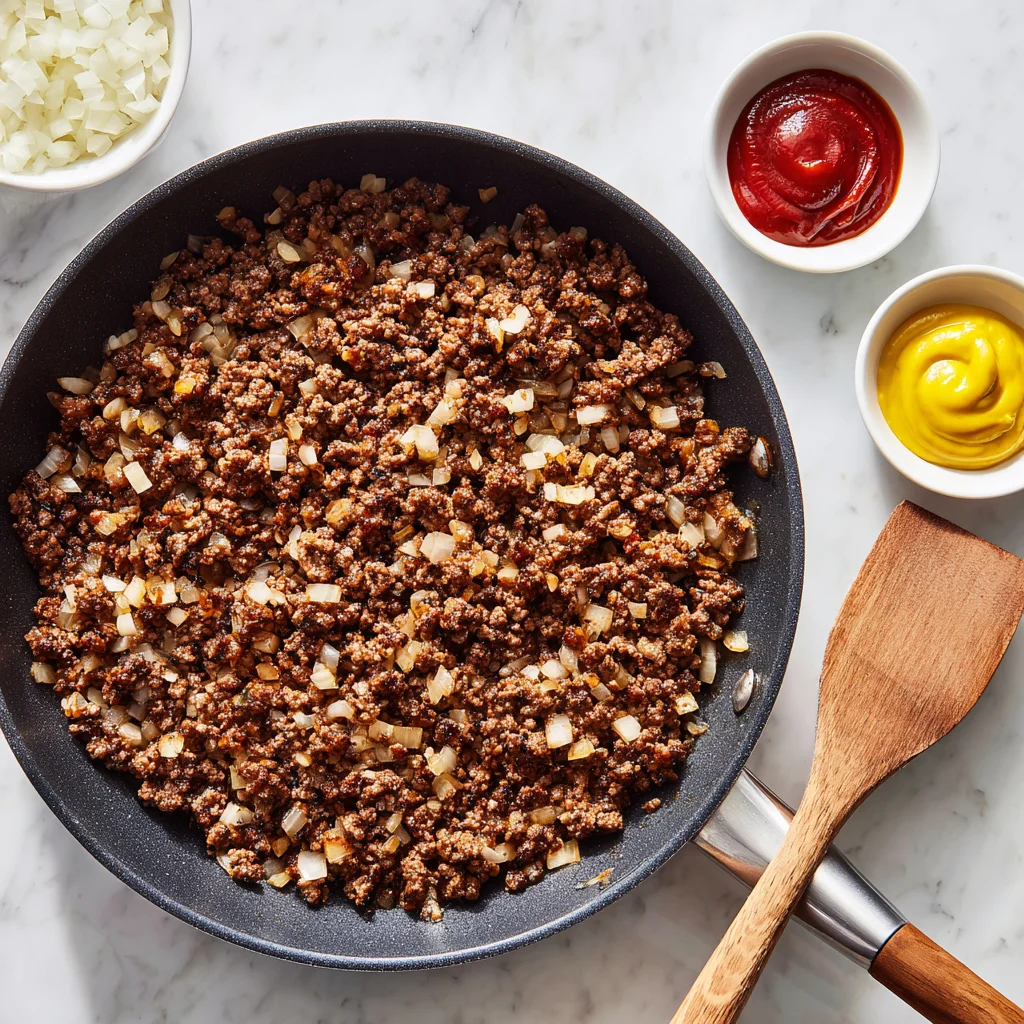
In a skillet over medium heat, cook the ground beef and diced onion together until the beef is browned and fully cooked. I like to break the meat up with a wooden spoon as it cooks so you don’t get any big chunks.
Once it’s cooked, drain off any excess fat, then stir in the garlic powder, ketchup, mustard, salt, and pepper. Let that simmer for 2-3 minutes so everything gets nice and flavorful.
Tip: Don’t skip the mustard and ketchup—they give the beef that classic cheeseburger flavor that really makes these rollups shine.

STEP 3: PREP THE CRESCENT DOUGH
Next, unroll your crescent dough and separate it into individual triangles. Place them on a flat surface (I use a cutting board or clean countertop), and get ready to fill them up.
Spoon a generous portion of the beef mixture onto the wide end of each triangle. Top with a handful of shredded cheddar cheese—don’t skimp here. More cheese = more gooey, melty goodness.
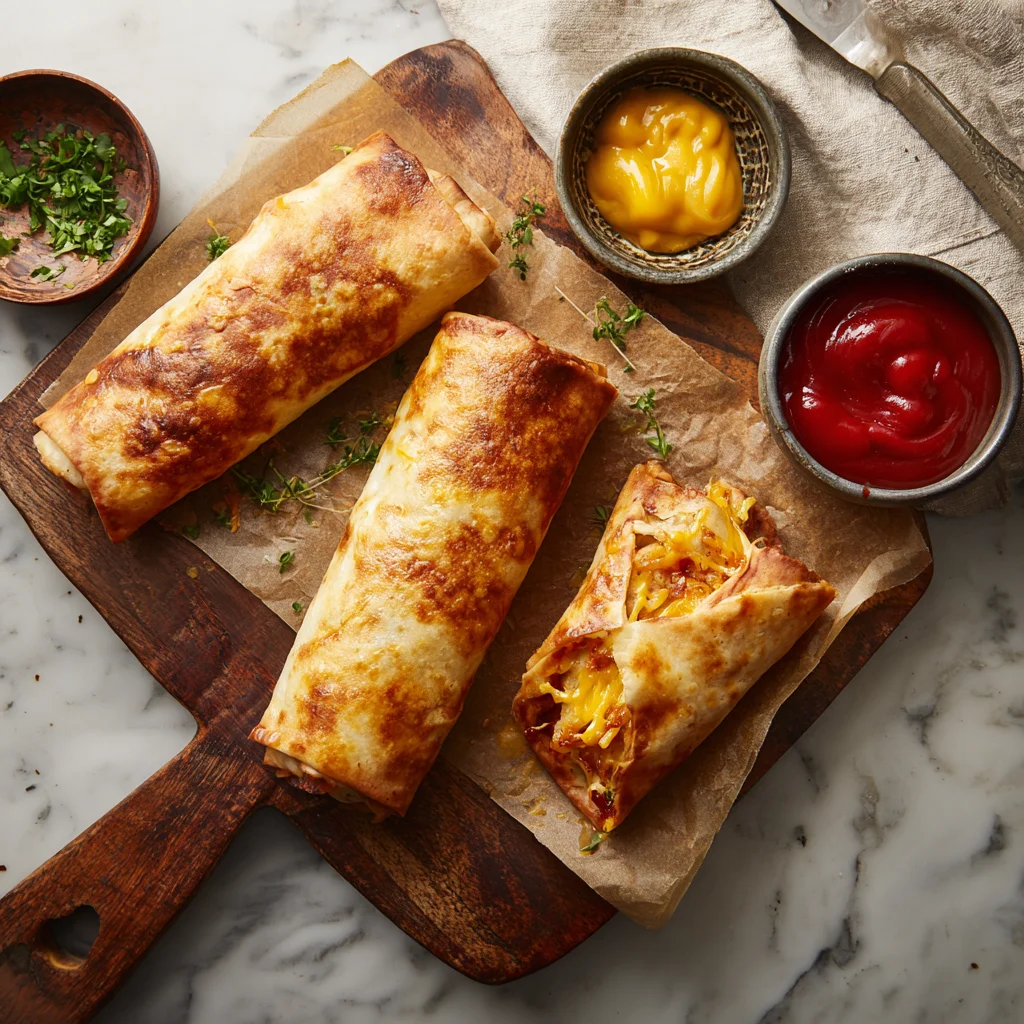
STEP 4: ROLL ‘EM UP
Starting from the wide end, roll each triangle up, tucking in the sides a bit as you go to help hold that cheesy beef filling inside. Place each rollup on your prepared baking sheet, seam side down.
They don’t have to look perfect, by the way—mine always look a little rustic, and they still bake up beautifully every time.
How to Bake the Perfect Garlic Butter Cheeseburger Rollups
Alright, now that your rollups are all tucked and ready to go, it’s time for the best part: baking them to golden, cheesy, garlicky perfection. This is where all that prep pays off, and your kitchen is about to smell absolutely amazing.
These little bundles come out of the oven with crisp edges, a warm, gooey center, and that savory garlic butter on top that makes them taste like you spent way more time on them than you actually did. Let’s finish these off strong!
STEP 5: BRUSH WITH GARLIC BUTTER
Before these go in the oven, it’s time for the secret weapon—the garlic butter.
In a small bowl, mix together your melted butter and minced garlic. If you’re using dried parsley or chives, now’s the time to toss those in as well. That little sprinkle adds color and a pop of fresh flavor that really makes the rollups look (and taste) extra special.
Brush the tops of each rollup generously with the garlic butter mixture. This helps the crescent dough get that perfect golden brown color, plus it adds a delicious buttery flavor that soaks right in while baking.
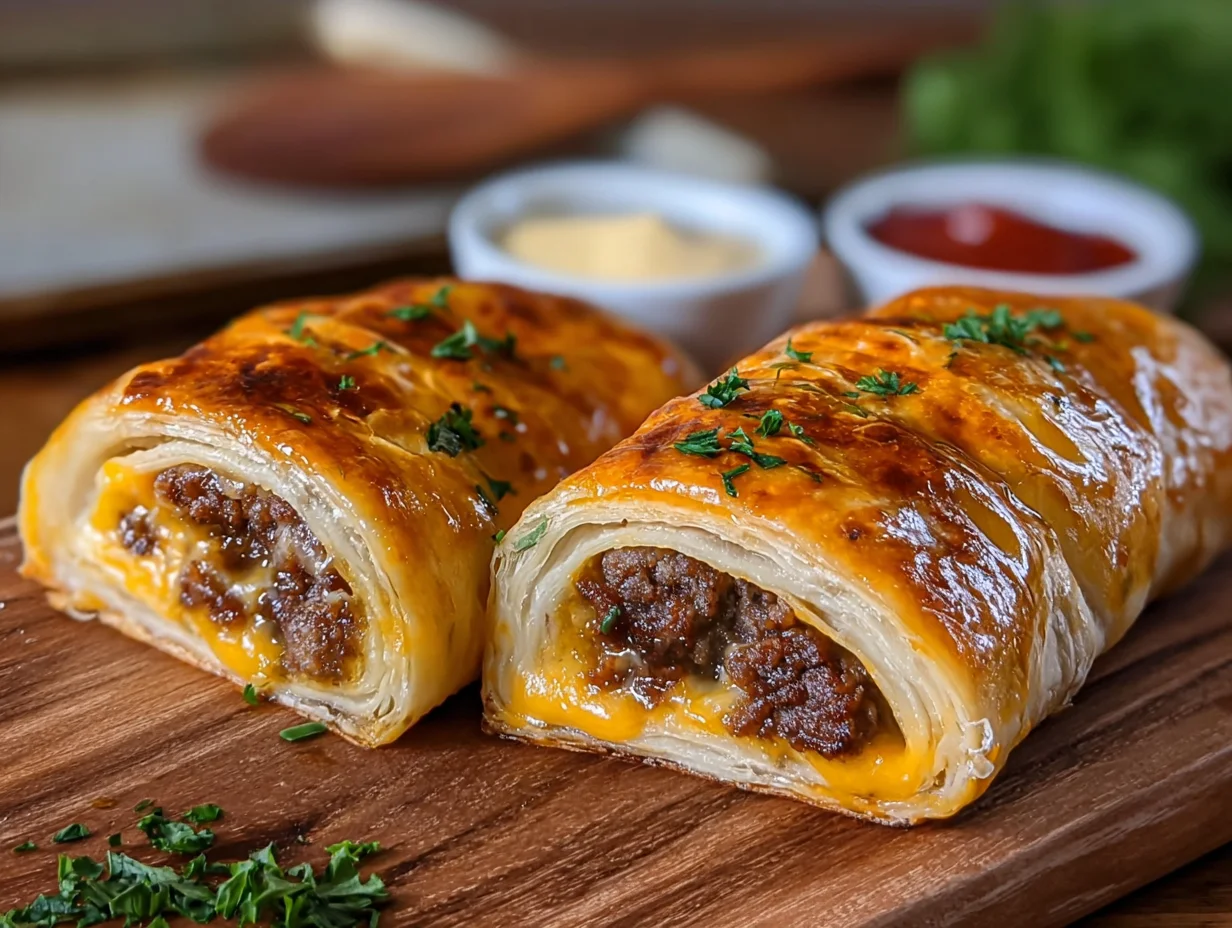
STEP 6: BAKE UNTIL GOLDEN AND MELTY
Pop your baking sheet into the oven and bake for 12 to 15 minutes, or until the rollups are golden brown and the cheese is melted inside.
Keep an eye on them around the 12-minute mark—every oven is a little different, and you want that perfect balance of crispy on the outside and cheesy on the inside. If you see the tops turning golden and the edges puffing up, you’re right on track.
STEP 7: LET COOL AND SERVE
Once baked, let the rollups cool slightly for about 5 minutes. I know it’s hard to wait, but this helps the cheese set a little and makes them easier to pick up and eat without everything falling apart.
Then just plate them up and serve! These are delicious on their own, but if you want to take things up a notch, serve them with little bowls of ketchup, mustard, or burger sauce for dipping. Ranch is also a surprisingly tasty option.
Easy Tips & Flavor Variations
One of the best things about this recipe is how flexible it is. Once you’ve made them the classic way, you can start customizing to match your taste—or whatever’s in your fridge. Here are a few ideas:
-
Add pickles: Chop up a few dill pickles and mix them right into the cooked beef mixture. It gives that tangy bite you’d expect from a real cheeseburger.
-
Make it spicy: Add a pinch of cayenne pepper to the beef mixture or use pepper jack cheese for some extra kick.
-
Swap the cheese: Mozzarella, Monterey Jack, or even a smoky gouda work beautifully here.
-
Bacon it up: Crumbled cooked bacon takes this recipe straight into indulgent territory.
-
Make mini versions: Use half a triangle of dough and a teaspoon of filling to create bite-sized rollups for parties or appetizers.
Storage and Reheating Tips
These rollups are best fresh, but if you have leftovers (which honestly doesn’t happen often at my house), here’s how to keep them tasty:
-
Store in an airtight container in the fridge for up to 3 days.
-
Reheat in the oven at 350°F for 5-7 minutes to bring back that crispy texture.
-
Avoid microwaving if possible—it makes the dough soft and a little soggy.
If you want to make a big batch ahead of time for a party or event, you can assemble the rollups earlier in the day and keep them chilled on the baking sheet in the fridge. Then just pop them in the oven right before serving.
Garlic Butter Cheeseburger Rollups FAQ + Final Thoughts
Before you rush off to grab that can of crescent dough (and believe me, you’ll want to), let’s go over a few common questions I often get about these Garlic Butter Cheeseburger Rollups. Whether you’re a first-timer or looking to tweak the recipe to fit your preferences, this FAQ section has you covered.
Frequently Asked Questions
Can I make these ahead of time?
Yes! You can prep the rollups earlier in the day—just assemble them and store on a parchment-lined baking sheet in the fridge, covered with plastic wrap. When you’re ready to bake, brush with garlic butter and pop them straight in the oven. Add 1-2 extra minutes of baking time if they’re going in cold.
Can I freeze these rollups?
Absolutely. Bake them as instructed, let them cool completely, then freeze in an airtight container or freezer-safe bag. To reheat, bake from frozen at 350°F for about 10-12 minutes or until heated through. This makes them great for quick snacks or lunches later in the week.
What kind of cheese works best?
Cheddar is classic and gives that familiar cheeseburger flavor, but feel free to experiment. Pepper jack adds a little heat, mozzarella melts beautifully, and even Swiss or American cheese can work if that’s what you have on hand.
Can I use homemade dough instead of crescent rolls?
Definitely. If you have a go-to homemade crescent dough or biscuit dough, you can use that instead. Just be sure to roll it thin enough to wrap around the filling and bake until golden and cooked through. The texture may vary slightly, but it’s still delicious.
What dipping sauces go well with these?
Ketchup and mustard are obvious choices, but don’t stop there. Burger sauce, ranch dressing, spicy mayo, BBQ sauce, or even a creamy sriracha dip all pair perfectly. It’s a great way to let everyone customize their own flavor experience.
Can I make these vegetarian?
Sure! Just swap the ground beef for a plant-based alternative like Beyond Beef or cooked lentils, and follow the same instructions. You could also add sautéed mushrooms or black beans for extra texture and flavor.
How do I keep the filling from falling out while baking?
When rolling the crescent dough, make sure not to overfill each triangle. Tuck in the sides slightly as you roll from the wide end to the tip. Placing them seam-side down on the baking sheet also helps keep everything sealed in while baking.
Final Thoughts: Why You Need These in Your Recipe Rotation
These Garlic Butter Cheeseburger Rollups are proof that sometimes, the simplest recipes are the most satisfying. With minimal prep, a short ingredient list, and just 30 minutes from start to finish, they’re a total lifesaver on busy nights. But what really sets them apart is how crowd-pleasing they are. Whether you’re feeding kids, hosting friends, or just craving something cozy and comforting, these rollups hit the spot every single time.
They’ve quickly become a staple in my kitchen—not just because they’re easy, but because everyone actually wants to eat them. No leftovers, no complaints. Just buttery, cheesy goodness wrapped up in a golden crust.
If you give these a try, I’d love to hear how they turn out! Did you add bacon? Try a new cheese? Serve them with a fun dipping sauce? Drop your ideas in the comments and let’s swap notes—because once you’ve made them once, trust me, you’ll be coming back for more.
PrintIrresistible Garlic Butter Cheeseburger Rollups

Irresistible Garlic Butter Cheeseburger Rollups are a fun, flavorful spin on the classic burger. Wrapped in soft crescent dough and brushed with garlic butter, each rollup is filled with juicy seasoned ground beef, melted cheese, and all the savory goodness of a cheeseburger in a compact, handheld form. Perfect for quick dinners, game days, or party appetizers, these rollups are sure to disappear fast.
- Author: Mark's Recipe
Ingredients
1 lb ground beef
1 small onion, finely diced
1 tsp garlic powder
Salt and pepper to taste
1 tbsp ketchup
1 tbsp yellow mustard
1½ cups shredded cheddar cheese
1 can refrigerated crescent roll dough
2 tbsp unsalted butter, melted
1 garlic clove, minced
1 tsp dried parsley or chives (optional)
Instructions
1️⃣ Preheat the oven to 375°F and line a baking sheet with parchment paper.
2️⃣ In a skillet over medium heat, cook the ground beef and diced onion until the beef is browned and fully cooked. Drain any excess fat. Stir in garlic powder, ketchup, mustard, salt, and pepper. Simmer for 2 to 3 minutes to let the flavors blend, then remove from heat.
3️⃣ Unroll the crescent dough and separate into triangles. Spoon a generous portion of the beef mixture and some shredded cheddar onto the wide end of each triangle.
4️⃣ Roll each triangle up, starting from the wide end and rolling toward the tip, tucking in the sides slightly to seal the filling inside. Place on the prepared baking sheet.
5️⃣ In a small bowl, mix the melted butter with the minced garlic. Brush the tops of the rollups with the garlic butter and sprinkle with parsley or chives if using.
6️⃣ Bake for 12 to 15 minutes, or until the rollups are golden brown and the cheese is melted.
7️⃣ Let cool slightly before serving. Serve with ketchup, mustard, or burger sauce for dipping if desired.
Notes
For added flavor, mix in chopped pickles or crumbled bacon with the beef. You can also use a mix of cheeses like pepper jack or mozzarella for variation. These are best served warm, but leftovers can be reheated in the oven to bring back the crispy texture. Great for kids and adults alike.

")
