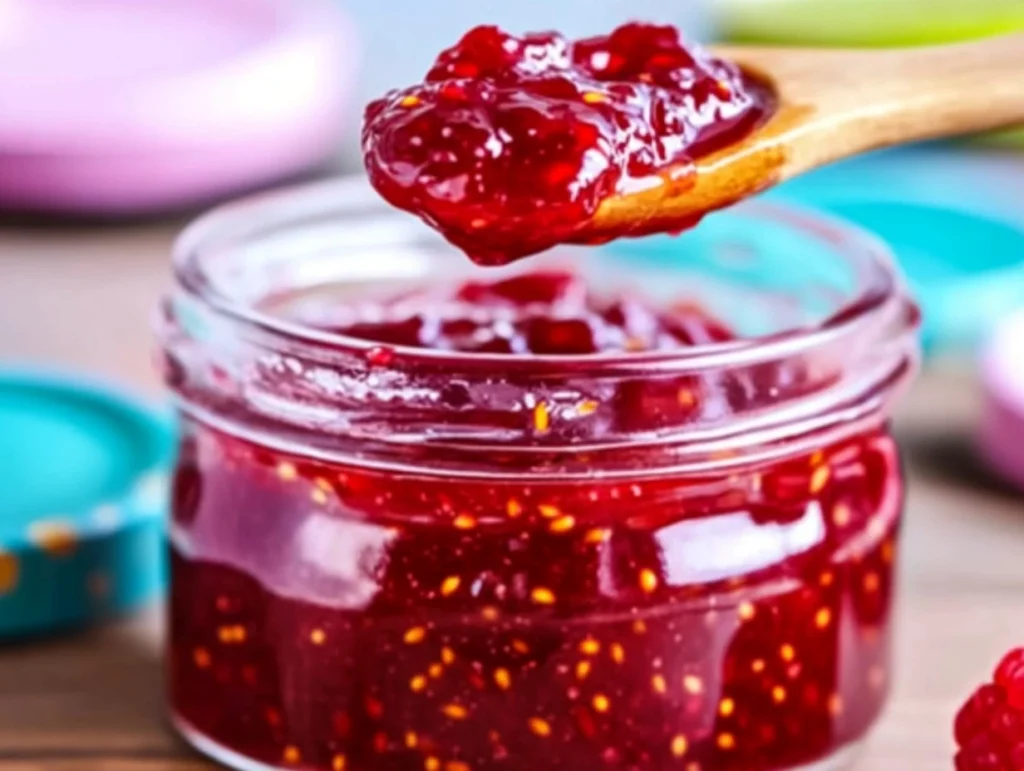
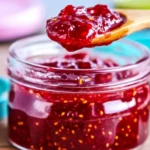
There’s something just so comforting about a spoonful of homemade jam. It’s like capturing a little bit of summer in a jar—and this Homemade Raspberry Jam recipe is one of my go-to favorites. It’s incredibly simple to make (seriously, just three main ingredients!), and there’s no need for fancy equipment or added pectin. Whether you’re spreading it on warm toast, spooning it over your morning yogurt, or gifting a jar to a friend, this jam brings a bright, sweet-tart flavor that just feels special.
I started making this jam during a week when my local farmers’ market had a huge haul of ripe raspberries—and let’s just say I may have gone a little overboard. I couldn’t resist their vibrant color and juicy sweetness, but once I got them home, I realized I had way more than we could eat fresh. That’s when I remembered my grandma’s no-pectin jam method. It’s the perfect solution for extra fruit, and I promise—once you try it, you’ll be hooked, too.
Why You’ll Love This Raspberry Jam
This raspberry jam is one of those magical recipes that’s both beginner-friendly and totally impressive. Here’s why it deserves a spot in your recipe collection:
-
No pectin needed – Just natural ingredients and a little bit of lemon juice to help it set.
-
Ready in under 30 minutes – From fruit to jar in practically no time.
-
Customizable – You can make it smooth or keep the seeds, adjust the sugar, and even freeze it for later.
-
So versatile – Spread it, stir it, swirl it—it works in endless ways.
So, let’s get into it. You’ll only need four basic ingredients, and chances are, you already have them in your kitchen!
Ingredients You’ll Need
-
4 cups fresh or frozen raspberries – Fresh is great, but frozen works just as well if berries aren’t in season.
-
1 ½ cups granulated sugar – Adjust based on the sweetness of your berries.
-
1 tablespoon lemon juice – This adds a bit of brightness and helps with the setting.
-
1 teaspoon lemon zest (optional) – Adds a little zing and enhances the flavor.
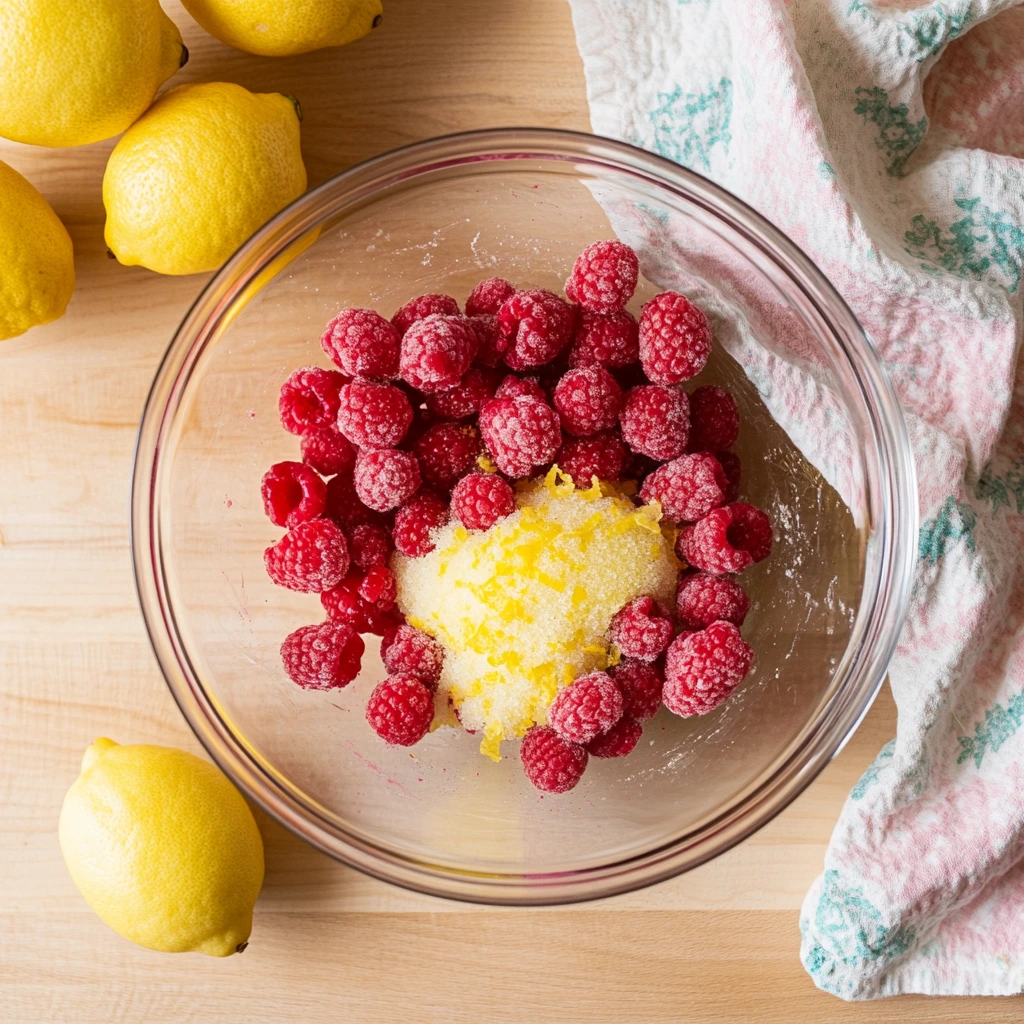
STEP 1: Combine the Ingredients
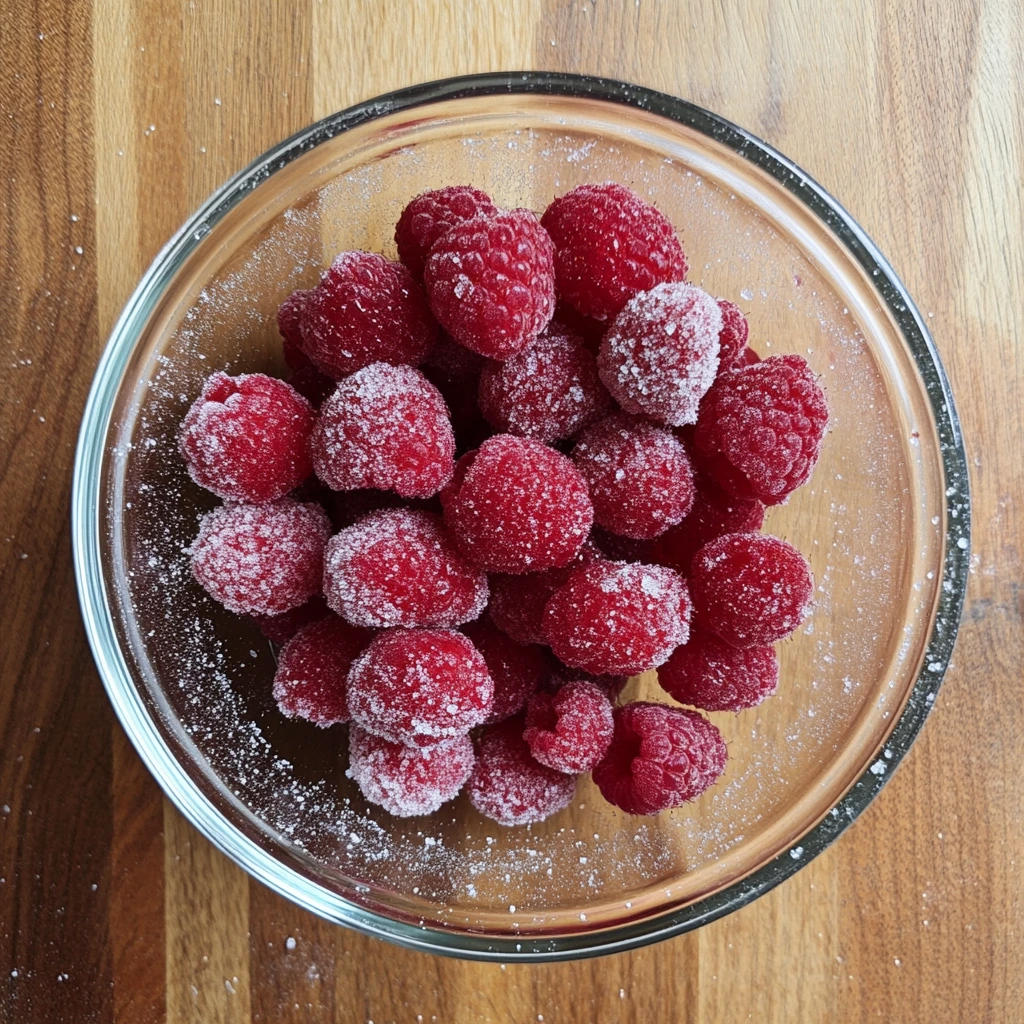
Start by grabbing a large saucepan and adding in your raspberries, sugar, lemon juice, and that optional lemon zest if you’re using it. Give everything a good stir to coat the berries with sugar. Let this mixture sit for about 5 minutes—this short rest allows the sugar to start dissolving, and it helps draw out the juices from the berries. You’ll notice it starts to look glossy and syrupy, which is exactly what we want.
If you’re using frozen raspberries, there’s no need to thaw them first. Just toss them straight into the pot and proceed as usual. The heat will take care of the rest.
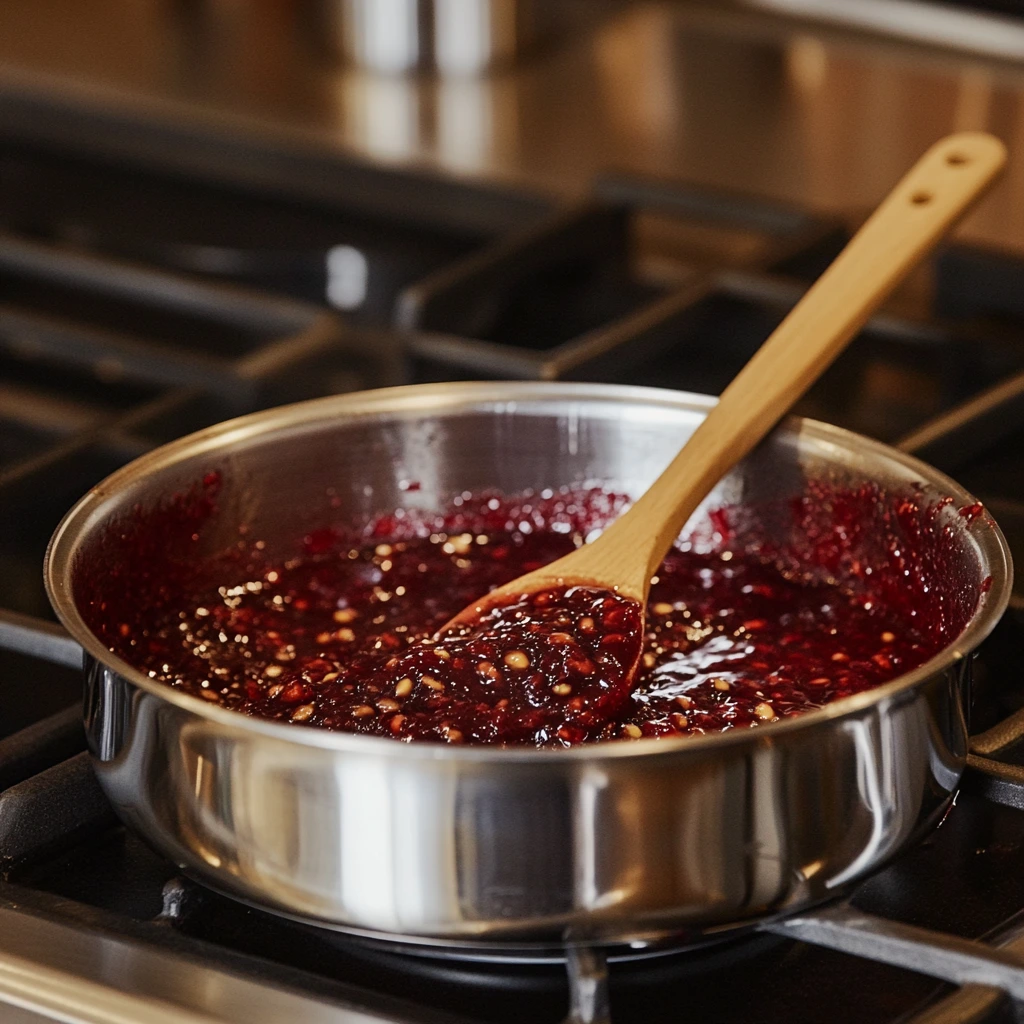
STEP 2: Bring to a Boil
Next, place your saucepan over medium heat. Stir frequently as the mixture begins to heat up and bubble. This is where the magic happens. You’ll start to smell that rich, fruity raspberry scent as the berries break down and combine with the sugar.
Once the mixture comes to a steady boil, keep it going for about 15–20 minutes. Stir often during this time to prevent sticking or burning, and gently mash some of the raspberries with the back of your spoon as they soften. This helps give the jam that classic thick, spoonable texture.
STEP 3: Check for Doneness
Here’s an old-school trick I swear by: To test if your jam is ready, place a small spoonful on a chilled plate (you can pop one in the freezer before you start cooking). Let the jam sit on the plate for about a minute, then run your finger or a spoon through it. If the surface wrinkles a bit, like soft jelly, it’s good to go! If it’s still runny, keep simmering for another few minutes and test again.
This natural method works well without needing store-bought pectin—and once you try it, you’ll see how simple it is to get that perfect set.
How to Finish and Store Homemade Raspberry Jam (Plus Helpful Tips!)
So now that your raspberry jam is bubbling away and thickening beautifully, it’s time to wrap things up and get it ready for the fridge—or your next breakfast! In this part, we’ll finish the cooking process, go over how to store it properly, and I’ll share some of my best tips and tweaks to make the recipe your own. Whether you’re planning to enjoy it right away or want to make a batch for later, this part has you covered.
Making jam at home used to feel intimidating to me—mostly because of all the talk around water baths and canning equipment. But I promise, this recipe keeps things super simple. If you’ve got clean jars and a little counter space, you’re good to go. And the best part? This jam keeps really well in the fridge or freezer, so you don’t need to stress about shelf-stable storage unless you want to.
Let’s dive into the final steps.
STEP 4: Cool and Jar the Jam
Once your jam passes the wrinkle test on the chilled plate, remove the pan from the heat. Let it sit for about 5 minutes to cool slightly. During this time, any foam that rose to the top while cooking will start to settle. You can skim off the foam with a spoon if you’d like a clearer finish, but it’s totally optional and doesn’t affect the flavor.
Carefully ladle the warm jam into clean glass jars. If you’re using this jam for immediate use or short-term storage, just make sure the jars are freshly washed and dry. A wide-mouth funnel makes this step easier and less messy, but you can absolutely pour carefully straight from the pot too.
Leave a bit of space at the top of each jar—around 1/4 inch is perfect—to allow for expansion if you’re planning to freeze some.
STEP 5: Let It Cool and Seal
After filling, let the jars cool at room temperature (with the lids loosely set on top) before sealing them completely. Once the jam is fully cooled, you can screw on the lids tightly. If you’re not processing them in a water bath, store the jam in the refrigerator. It’ll keep for up to 3 weeks this way.
Want to make your jam last longer? Here’s a quick note on water bath canning: Just boil the sealed jars in a large pot of water for about 10 minutes, then let them cool undisturbed. This will help create a vacuum seal and extend the shelf life significantly. Totally optional, but a nice step if you’re planning to gift or store jam for months.
STEP 6: Freeze It for Later
One of my favorite things about this jam is how well it freezes. If you’re making a big batch, just pop a few jars or containers into the freezer for later use. Make sure to leave that headspace at the top so they don’t crack from expansion.
I like to use freezer-safe plastic containers or glass jars labeled “freezer-safe” just to be extra cautious. When you’re ready to enjoy it, let the jam thaw overnight in the fridge. It’ll be just as good as the day you made it.
Helpful Tips and Variations
Now that you know the basics, here are a few extra tips and ideas to help you make this recipe your own:
-
Strain for a smoother jam – Not a fan of seeds? No problem. After cooking, you can press the hot mixture through a fine mesh sieve before jarring. It takes a bit more effort but results in a silky, seed-free jam.
-
Add herbs for a twist – A sprig of thyme or a bit of chopped mint added during cooking can create an interesting flavor profile. Just remember to remove any herbs before jarring.
-
Try other berries – This same recipe works beautifully with blackberries or a mix of raspberries and strawberries.
-
Adjust the sweetness – If your raspberries are very ripe and sweet, you might want to use slightly less sugar. On the other hand, tart berries may benefit from a little extra.
-
Use it in baking – Beyond toast, try swirling a spoonful into cheesecake batter, sandwiching it between cake layers, or even drizzling it over vanilla ice cream.
Raspberry Jam FAQ + Final Thoughts on This Easy Homemade Favorite
By now, you’re just a few jars away from having the sweetest little stash of homemade raspberry jam—perfect for breakfasts, gifts, or sneaking spoonfuls straight from the jar (no judgment here). But before we wrap up, I wanted to answer a few of the most common questions people ask when it comes to making jam at home. If you’ve ever wondered about substitutions, storage, or texture, this section is for you.
Frequently Asked Questions About Homemade Raspberry Jam
1. Can I use frozen raspberries instead of fresh ones?
Yes! This recipe works beautifully with either fresh or frozen raspberries. No need to thaw them beforehand—just add them directly to the pot and cook as directed.
2. What if I want a seedless jam?
You can strain the jam after cooking using a fine mesh sieve to remove the seeds. It takes a few extra minutes, but the result is a smoother, more refined texture.
3. How do I know when the jam is done cooking?
Use the chilled plate test. Place a small spoonful of hot jam on a cold plate, wait a minute, then push it with your finger. If it wrinkles, the jam is ready. If not, cook a few minutes longer and test again.
4. How long will this raspberry jam last?
In the refrigerator, it will last about 3 weeks. If you process the jars in a water bath, the sealed jam can last up to a year in a cool, dark place. It also freezes well for up to 6 months.
5. Do I need to use lemon juice?
Yes, the lemon juice isn’t just for flavor—it helps the jam set naturally and also balances the sweetness. It’s a key ingredient, especially since there’s no added pectin in this recipe.
6. Can I reduce the amount of sugar?
You can, but keep in mind that sugar helps with both preservation and the jam’s consistency. If you’re using particularly sweet berries, feel free to reduce the sugar slightly—but don’t go too low, or the jam might not set properly.
7. Can I double this recipe?
You can, but I recommend making it in smaller batches for the best consistency and even cooking. Large quantities of jam take longer to reduce and can be harder to monitor without overcooking.
Final Thoughts: Sweet, Simple, and Oh-So Satisfying
There’s something incredibly satisfying about pulling a jar of homemade raspberry jam from the fridge. It’s a simple luxury, made with love—and just a handful of ingredients. Whether you’re using it on warm toast, as a filling for cakes, or swirled into yogurt, this jam brings a pop of summer brightness to just about anything.
Personally, I love making a few small batches throughout the berry season, using whatever raspberries I can find—sometimes fresh from the market, other times from a bag in the freezer. It’s an easy way to feel a little fancy, even on a busy weekday morning.
If you try this recipe, I’d love to hear how it turns out for you! Did you keep the seeds or strain them out? Add any fun flavors? Drop a comment and let me know—and don’t forget to share your favorite ways to enjoy this sweet, ruby-red spread.
PrintHomemade Raspberry Jam
Doritos Walking Tacos are a fun, mess-free way to enjoy all the flavors of a loaded taco in a portable snack bag. Crunchy chips, savory seasoned meat, fresh toppings, and creamy sauces come together in a deliciously satisfying bite—perfect for parties, picnics, or weeknight dinners.
- Author: Mark's Recipe
Ingredients
1 pound ground beef or ground turkey
1 packet taco seasoning
⅔ cup water
6 individual bags of Doritos (nacho cheese or your preferred flavor)
1 cup shredded cheddar cheese
1 cup shredded lettuce
½ cup diced tomatoes
¼ cup sliced jalapeños (optional)
¼ cup sour cream
¼ cup salsa or taco sauce
Instructions
In a skillet over medium heat, cook the ground meat until browned, breaking it up as it cooks. Drain excess fat if necessary.
Add taco seasoning and water to the skillet, stirring to combine. Simmer for 4–5 minutes until thickened, then remove from heat.
Gently crush the Doritos bags to break the chips into bite-sized pieces, then carefully open each bag across the top.
Spoon a portion of the taco meat directly into each bag over the chips.
Top with cheese, lettuce, tomatoes, jalapeños, sour cream, and salsa—or any of your favorite taco toppings.
Serve with a fork and enjoy straight from the bag.
Notes
Customize with toppings like guacamole, olives, hot sauce, or onions. You can prep the taco meat ahead of time and keep it warm in a slow cooker. For a vegetarian option, swap the meat for black beans or seasoned lentils. Great for game nights, family dinners, or outdoor events.


")
