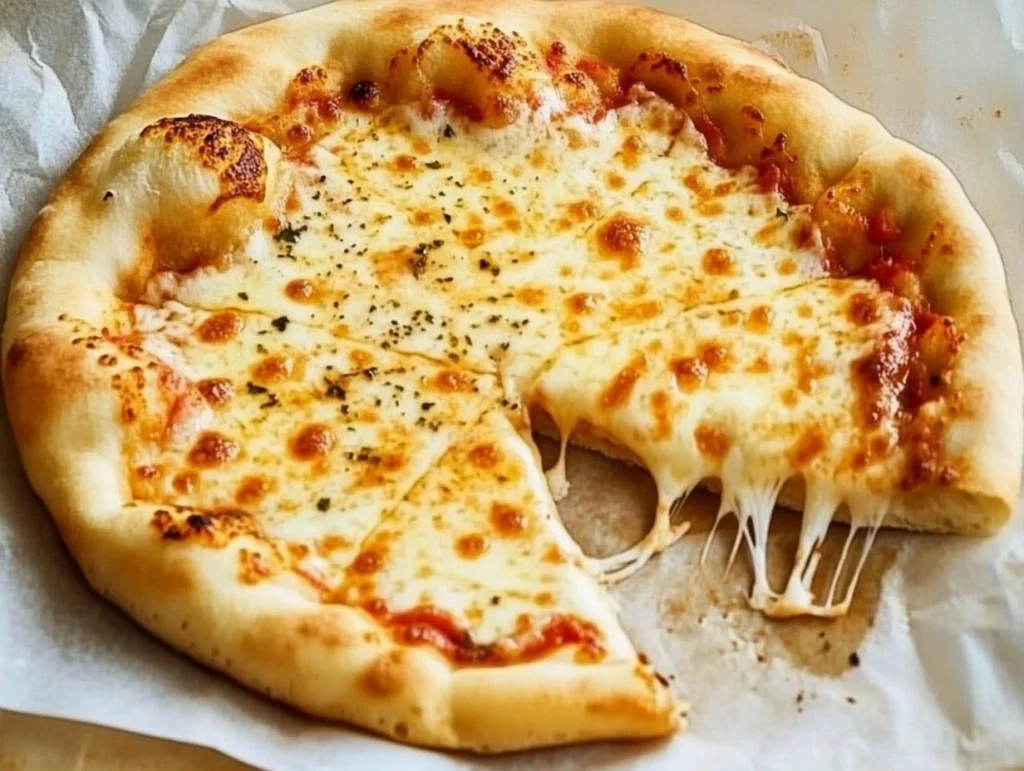
There’s something pretty magical about making pizza dough from scratch. The smell of yeast working its magic, the satisfaction of kneading your own dough, and the joy of pulling a golden, bubbling pizza from the oven—it’s one of those simple pleasures that never gets old.
I started making this pizza dough at home a few years ago when takeout pizza just wasn’t cutting it anymore (and let’s be honest, the delivery fees weren’t helping either). What surprised me most was how easy and foolproof it was to make a truly great dough with just a handful of pantry staples. Now, it’s a regular go-to for busy weeknights and Friday night pizza parties alike.
What I love most about this recipe is how versatile it is. Whether you’re baking in a standard oven, using a pizza stone, or even tossing it on the grill, this dough holds up beautifully. It’s chewy in the center, perfectly crisp around the edges, and has just the right amount of flavor to complement any topping combination you dream up.
So if you’ve been intimidated by the idea of making pizza dough from scratch, this is the recipe to try. It’s straightforward, forgiving, and yields consistent, delicious results every time. Let’s dive in.
Ingredients You’ll Need (Makes 2 medium pizzas)
-
3 ½ cups (440g) all-purpose flour (or bread flour for extra chew)
-
1 ½ tsp instant yeast
-
1 ½ tsp salt
-
1 ½ tbsp sugar or honey
-
1 ¼ cups (300ml) warm water (~110°F / 43°C)
-
2 tbsp olive oil
You probably already have everything you need right in your pantry. I’ve made this dough with both sugar and honey, and either one works great—it just depends on your taste. Bread flour will give you a slightly chewier crust, which I personally love, but all-purpose flour turns out an equally tasty result.
Step 1: Mix the Dough
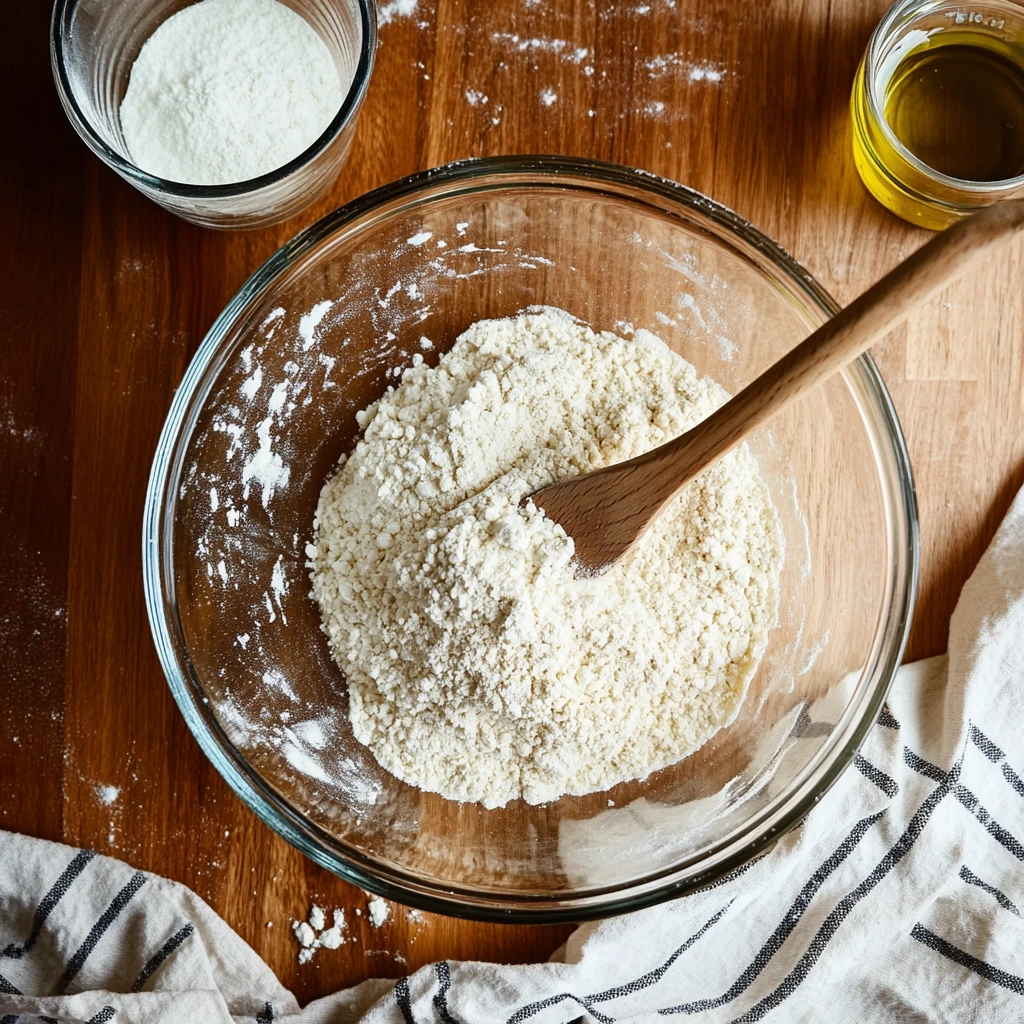
In a large mixing bowl, whisk together the flour, instant yeast, salt, and sugar. It’s important to mix the dry ingredients well first to evenly distribute the yeast and salt. Then, pour in the warm water and olive oil. Using a wooden spoon or sturdy spatula, stir everything together until a rough, sticky dough starts to come together. Don’t worry about it being perfectly smooth at this point—it’ll come together during the kneading stage.
Step 2: Knead Until Smooth
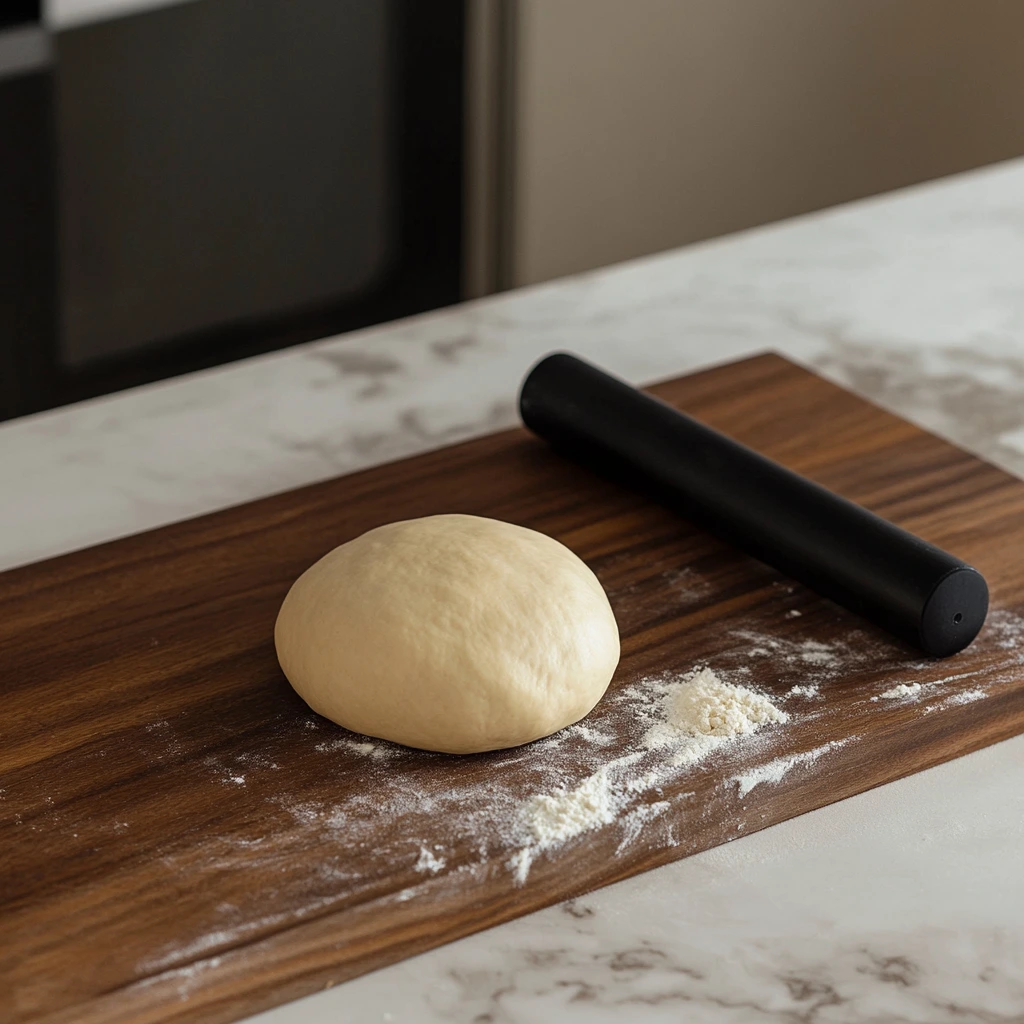
Now it’s time to bring that dough to life. Transfer the dough to a lightly floured surface and knead it by hand for about 5 to 7 minutes. If you’re using a stand mixer with a dough hook, it’ll only take about 3 to 4 minutes. Either way, you’re aiming for a smooth, elastic dough that bounces back when you press it.
One tip I swear by is the “windowpane test.” Just pinch off a small piece of dough and gently stretch it—if it forms a thin, translucent sheet without tearing, the gluten is well-developed and you’re good to go. If it tears easily, knead it a bit more and try again.
Step 3: First Rise
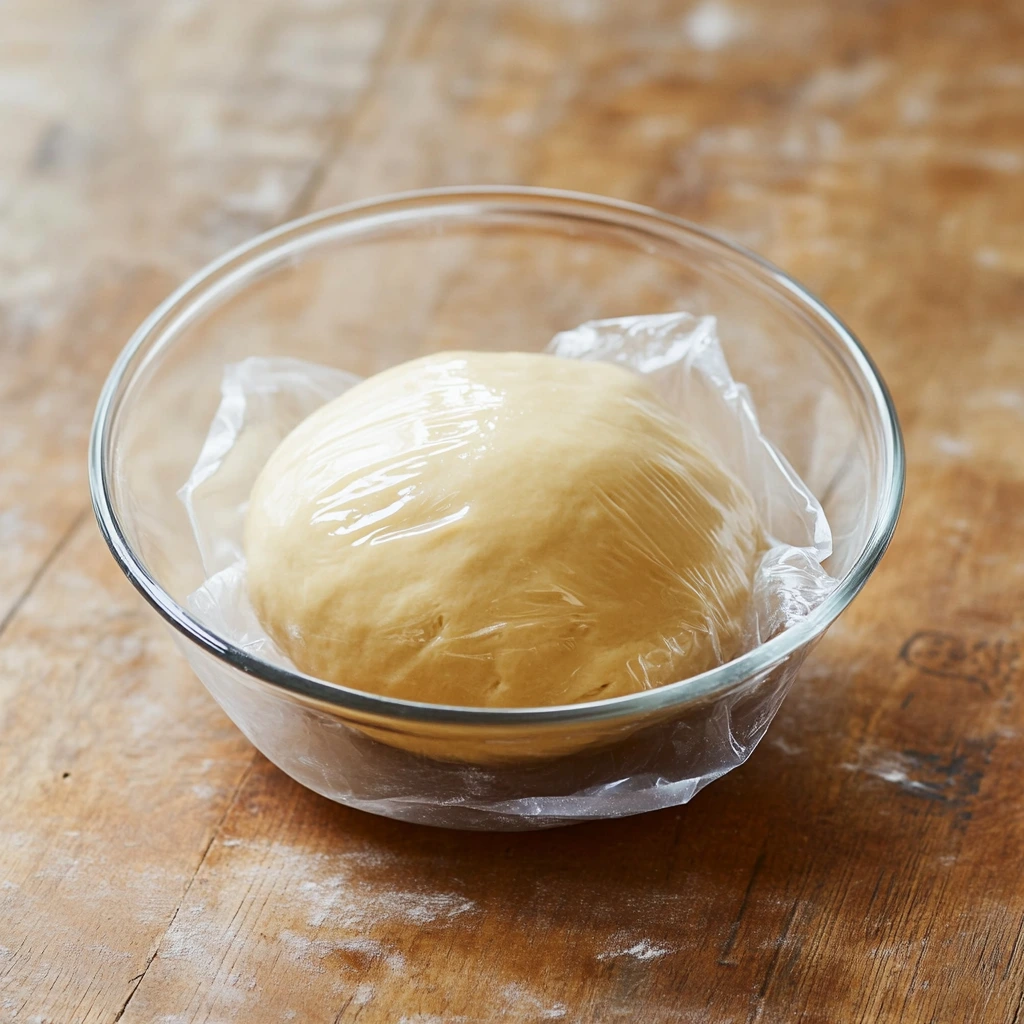
Once your dough is smooth and elastic, place it in a lightly oiled bowl and turn it once to coat all sides with oil. This helps prevent it from drying out as it rises. Cover the bowl with plastic wrap or a damp kitchen towel and set it somewhere warm and draft-free—like inside your oven with just the light on, or on top of the fridge.
Let the dough rise for about 1 hour, or until it’s doubled in size. This step is where the yeast works its magic, creating that light, airy structure you want in a good pizza crust.
Shaping, Baking, and Pro Tips
Now that your dough has risen and is soft, airy, and ready to go, it’s time to move on to the fun part—shaping and baking your pizzas. This is where your kitchen starts to smell incredible, and you get to be as creative (or classic) as you want with toppings.
I always recommend setting aside a little time to really enjoy this part of the process. Turn on some music, dust the counter with flour, and let yourself get a little messy. It’s part of the experience! Whether you like your pizza thin and crispy or thick and chewy, this dough handles beautifully and can be customized to your preference.
Let’s pick up right where we left off.
Step 4: Shape and Second Rise (Optional)
Once the dough has doubled in size, punch it down gently to release some of the built-up air. Then divide it into two equal portions if you’re making medium pizzas. Each ball should be about enough to cover a 12-inch round.
Now, cover the dough balls with a clean towel or lightly greased plastic wrap and let them rest for about 30 minutes. This step is technically optional, but I highly recommend it—especially if you want to avoid the dough snapping back when you stretch it. This short rest period relaxes the gluten, making the dough easier to work with and shape.
After resting, lightly flour your work surface and begin shaping your pizza. You can stretch it out by hand (which gives a more rustic look and texture) or use a rolling pin for a thinner, more even crust. I usually go for something in between—stretch the edges gently with your hands, then use the rolling pin to even things out.
Step 5: Bake Your Pizza
Before you shape your dough, make sure your oven is fully preheated. You’ll want it blazing hot—475°F (245°C) is ideal. If you’re using a pizza stone (which I totally recommend if you have one), place it in the oven while it preheats and let it heat for at least 30 minutes. If you don’t have a stone, an inverted baking sheet works really well too.
Once your dough is shaped, transfer it to a piece of parchment paper. Add your sauce, cheese, and toppings—don’t overload it, especially if you’re after a crisp crust. Then carefully slide the parchment paper onto your preheated stone or baking sheet.
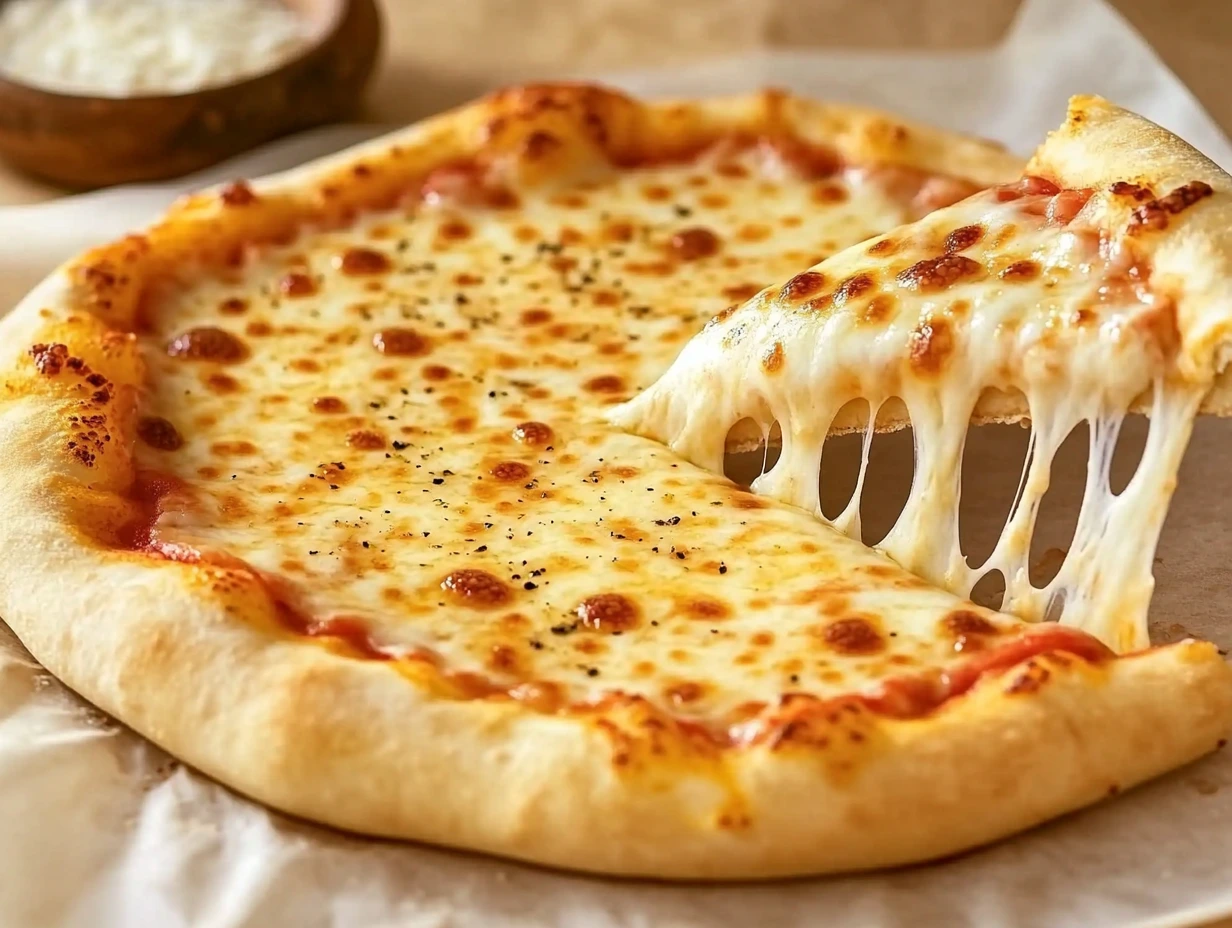
Bake for 10–15 minutes, depending on your oven and how thick your crust is. The pizza is done when the crust is golden brown, the cheese is bubbling and slightly browned, and the bottom of the crust feels crisp when you lift it with a spatula.
Pro tip: If you want an extra-crispy crust, you can broil the pizza for the last 1–2 minutes of baking—but keep a close eye on it to avoid burning.
Helpful Tips for Pizza Dough Success
Over the years, I’ve picked up a few tricks that make all the difference when working with homemade pizza dough:
-
Let It Rest Overnight: If you have the time, refrigerate the dough after the first rise. Letting it sit overnight helps develop a deeper, more complex flavor. Just bring it to room temperature before shaping.
-
Don’t Skip the Preheat: A hot oven is crucial. Give your pizza stone or baking sheet plenty of time to heat up—this helps you get that pizzeria-style crust at home.
-
Use Bread Flour for Extra Chew: All-purpose flour works beautifully, but if you love a chewy, stretchy crust, swap it for bread flour. It has more protein, which develops more gluten during kneading.
-
Freeze Extras for Later: This recipe makes enough dough for two pizzas, but if you only need one, freeze the second portion. Just wrap it tightly in plastic and place it in a freezer bag. It’ll keep for up to 3 months. Thaw overnight in the fridge, then bring it to room temperature before using.
-
Dust with Cornmeal or Semolina: For a more authentic pizzeria feel and added crunch, dust your pizza peel or parchment with a bit of cornmeal or semolina before transferring the dough to the oven.
FAQ & Final Thoughts
If you’ve made it this far, you’re already well on your way to mastering homemade pizza dough. It’s such a game-changer for pizza night—not just because it tastes better than anything store-bought, but because you get full control over flavor, texture, and size. And let’s not forget the satisfaction of saying, “Yep, I made that from scratch.”
Before we wrap things up, I wanted to go over a few common questions that tend to pop up when people make pizza dough at home for the first (or fifth!) time. These FAQs should help you troubleshoot and customize your dough exactly how you like it.
Frequently Asked Questions
1. Can I use active dry yeast instead of instant yeast?
Yes, you can substitute active dry yeast if that’s what you have on hand. Just make sure to proof it first by dissolving it in the warm water with the sugar or honey and letting it sit for 5–10 minutes until bubbly before adding it to the flour mixture.
2. Why is my dough too sticky to handle?
If your dough feels overly sticky, try adding a tablespoon of flour at a time while kneading until it’s easier to work with. Be careful not to add too much though—pizza dough should be slightly tacky, not dry.
3. How can I tell if I’ve kneaded the dough enough?
The best way is the “windowpane test.” Take a small piece of dough and stretch it gently—if it forms a thin, almost see-through layer without tearing, your dough is ready. If it rips, knead for another minute or two and test again.
4. What’s the best way to store leftover dough?
Wrap any unused dough tightly in plastic wrap and store it in an airtight container in the fridge for up to 3 days. For longer storage, freeze it in individual portions for up to 3 months. Thaw in the fridge overnight and bring to room temperature before using.
5. Can I make this dough gluten-free?
This specific recipe relies on gluten for its texture, so swapping in a gluten-free flour 1:1 won’t give you the same results. However, there are great gluten-free pizza dough recipes out there that are specially formulated—look for one that uses a mix of gluten-free flours and binders like xanthan gum.
6. Why is my crust not crisp enough?
There are a few possible reasons. First, make sure your oven is hot enough and your baking surface is preheated. Using a pizza stone or an inverted baking sheet helps a lot. Also, avoid using too many wet toppings, which can prevent the crust from crisping properly.
7. How do I get that puffy edge like at a pizzeria?
Don’t roll the dough all the way to the edge—leave a small border and stretch gently with your hands instead of flattening with a rolling pin. That helps trap air in the edge, which gives it that beautiful puff during baking.
Final Thoughts
There’s just something special about turning simple ingredients—flour, water, yeast, oil—into something so delicious and satisfying. This homemade pizza dough has become a staple in our house not just because it’s easy and reliable, but because it brings everyone together. Whether it’s topping night with the kids, a date-night dinner, or a lazy Sunday lunch, pizza just has a way of making everything feel a little more fun.
If you try this dough, I’d love to hear how it turned out for you! Did you go classic with mozzarella and pepperoni? Or maybe something more adventurous, like caramelized onions and goat cheese? Share your favorite combos in the comments or let me know if you have any questions I didn’t cover.
Once you’ve mastered this base recipe, the possibilities really are endless. And trust me—once you taste that golden, crisp-yet-chewy homemade crust, you’ll never want to go back to store-bought again.
PrintHomemade Pizza Dough Recipe

This homemade pizza dough is soft, chewy, and perfectly crisp on the edges—a versatile base that’s easy to work with and delivers great results whether you’re baking in a home oven or firing up a pizza stone. Made with simple pantry staples, this dough can be prepared ahead for weeknight dinners or weekend pizza nights.
- Author: Mark's Recipe
Ingredients
3 ½ cups (440g) all-purpose flour (or bread flour for extra chew)
1 ½ tsp instant yeast
1 ½ tsp salt
1 ½ tbsp sugar or honey
1 ¼ cups (300ml) warm water (~110°F / 43°C)
2 tbsp olive oil
Instructions
Step 1: Mix the Dough
In a large mixing bowl, whisk together the flour, instant yeast, salt, and sugar. Add the warm water and olive oil, stirring with a wooden spoon or spatula until a rough, shaggy dough forms.
Step 2: Knead Until Smooth
Transfer the dough to a lightly floured surface and knead by hand for 5–7 minutes (or 3–4 minutes in a stand mixer with a dough hook) until the dough becomes smooth and elastic. Test the gluten development by performing the “windowpane test”—stretch a small piece of dough; it should become thin and translucent without tearing.
Step 3: First Rise
Place the kneaded dough in a lightly oiled bowl, turning it once to coat. Cover the bowl with plastic wrap or a damp towel and let it rise in a warm, draft-free spot for about 1 hour or until doubled in size.
Step 4: Shape and Second Rise (Optional)
Punch down the dough and divide it into two equal balls. Cover and let them rest for 30 minutes to relax the gluten, making the dough easier to stretch and shape.
Step 5: Bake Your Pizza
Preheat your oven to 475°F (245°C) with a pizza stone or an inverted baking sheet inside for at least 30 minutes. Stretch or roll the dough to your desired thickness and shape. Add your favorite toppings and transfer to the hot stone or sheet. Bake for 10–15 minutes or until the crust is golden and crisp.
Notes
For best results, let the dough rest in the refrigerator overnight to develop more flavor. Bring to room temperature before shaping. You can freeze unused dough portions—wrap tightly and store for up to 3 months. Thaw in the fridge overnight before using.


")
