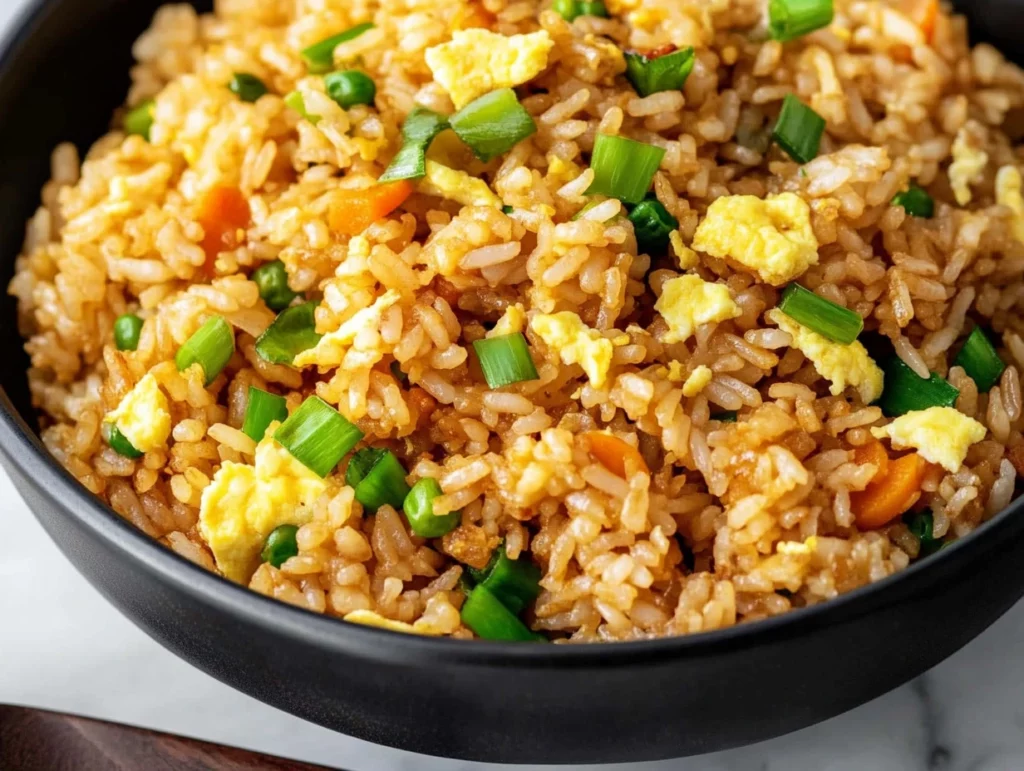
There’s just something about the smell of sizzling butter, soy sauce, and garlic that instantly makes me think of hibachi nights. You know, the ones where you’re sitting around a hot grill, watching the chef flip shrimp into his hat, crack jokes, and set onion volcanoes on fire? It’s dinner and a show. But when I’m craving that buttery, garlicky fried rice without the whole teppanyaki experience, I make this Hibachi Fried Rice right in my own kitchen — and let me tell you, it seriously delivers.
This recipe is one of those dependable favorites in our house. Whether I’m serving it as a side with grilled chicken or steak, or turning it into a full meal by tossing in leftover protein, it always hits the spot. And the best part? It uses simple pantry staples and takes just about 25 minutes start to finish. So you can get that bold, restaurant-quality flavor without the takeout bill.
Now, let’s get into the step-by-step so you can make this at home tonight — no hibachi grill required!
![]()
Ingredients You’ll Need:
-
2 cups cooked and cooled long-grain white rice (preferably day-old)
-
2 tablespoons unsalted butter
-
1 tablespoon neutral oil (canola or vegetable)
-
2 large eggs, lightly beaten
-
¼ cup diced yellow onion
-
¼ cup frozen peas and carrots mix, thawed
-
2 garlic cloves, minced
-
3 tablespoons soy sauce
-
1 teaspoon sesame oil
-
2 green onions, thinly sliced
-
Salt and freshly ground black pepper, to taste
STEP 1: Start with the Right Rice
If there’s one trick to great fried rice, it’s using cold, cooked rice. Fresh rice tends to be too soft and sticky, which can make your fried rice mushy. I like to cook mine the day before, spread it out on a sheet pan, and pop it in the fridge uncovered overnight. The rice dries out just enough to get that perfect, chewy, lightly crispy texture when it hits the hot skillet.
If you forgot to prep rice ahead of time (been there), a quick fix is to spread freshly cooked rice on a sheet tray and put it in the freezer for about 20–30 minutes. It’s not exactly the same, but it’ll work in a pinch.
STEP 2: Scramble the Eggs First
Heat a large skillet or wok over medium-high heat and add 1 tablespoon of butter along with the oil. Once it’s melted and shimmering, pour in the lightly beaten eggs. Scramble them gently, just until they’re set. Don’t overcook them — you want soft, fluffy curds that will mix beautifully into the rice later.
Once the eggs are cooked, transfer them to a small bowl and set them aside. You’ll be adding them back in toward the end so they stay tender and flavorful.
STEP 3: Sauté the Vegetables
In the same pan (no need to wipe it out), melt the remaining tablespoon of butter. Add the diced onion, thawed peas and carrots, and minced garlic. Cook this mixture for about 2 to 3 minutes, stirring often, until the onion is soft and translucent and the garlic is fragrant. This step builds a rich base of flavor that’ll coat every bite of rice later on.
The butter here is key — it gives the dish that signature hibachi flavor that you just can’t get with oil alone.
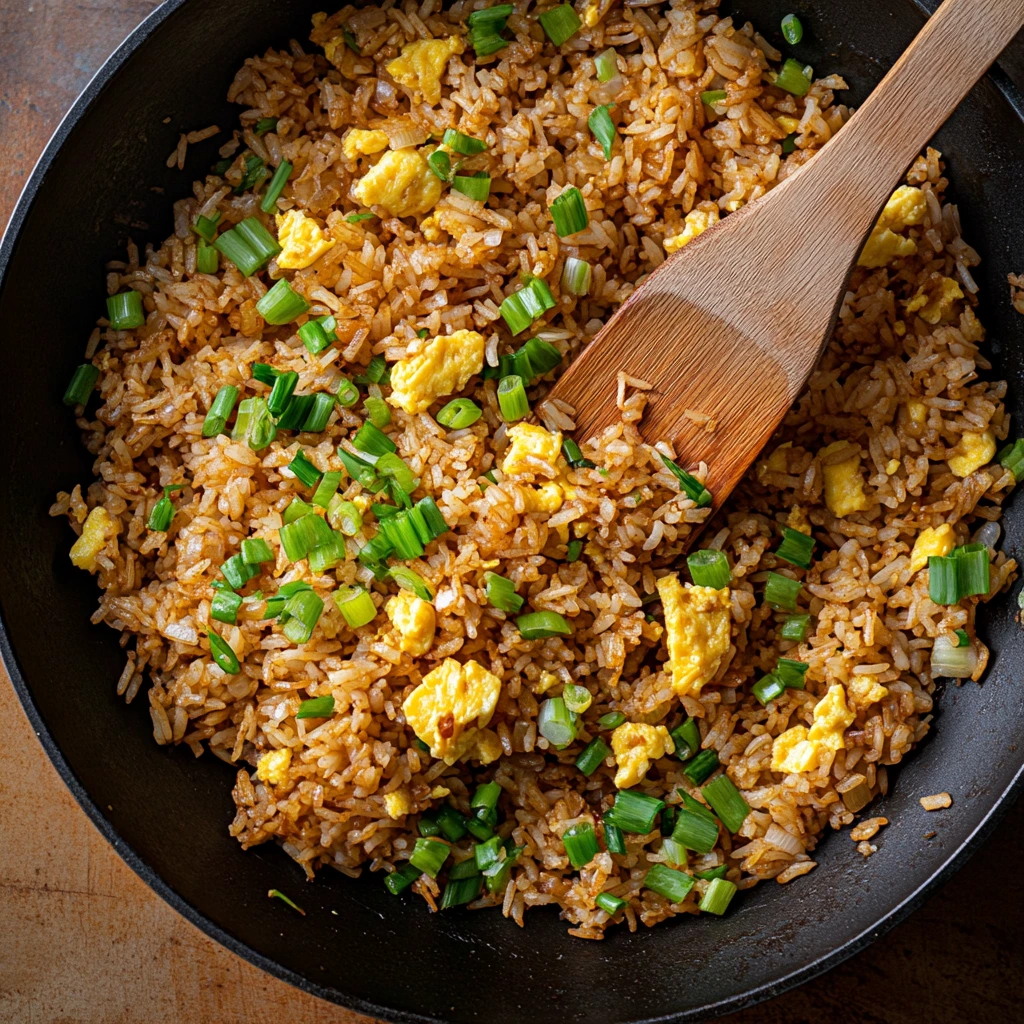
STEP 4: Add and Fry the Rice
Now turn up the heat to high. This is where the magic happens. Add the cold rice to the skillet, breaking up any clumps with your spatula as you go. Stir continuously so every grain gets coated in that buttery veggie mixture. Let the rice fry for about 3 minutes, tossing occasionally, until it starts to get a little golden and crispy in spots.
That slight crispiness is what separates good fried rice from great fried rice — don’t skip this part!
Bring It All Together: Sauce, Flavor, and Final Touches
Alright, now that you’ve got your rice sizzling and the veggies are doing their thing, it’s time to take this Hibachi Fried Rice to the next level. This part is where all the deep, savory flavor really comes together — and it’s simpler than you might think. With a few basic sauces and just a couple more minutes, you’re going to have that signature hibachi-style rice that’s buttery, garlicky, and totally irresistible.
STEP 5: Add the Sauces and Seasonings
Once your rice has started to crisp and everything is well combined, it’s time to drizzle in the soy sauce and sesame oil. These two ingredients do the heavy lifting in the flavor department, so don’t skip or skimp on them. Pour the 3 tablespoons of soy sauce evenly over the rice, followed by 1 teaspoon of sesame oil. Stir constantly while adding to ensure that every grain gets coated.
You’ll notice right away how the rice starts to take on that deep golden-brown hue and the aroma intensifies — that’s exactly what you want. If you’re someone who enjoys a slightly smoky flavor, you can let the rice sit undisturbed in the pan for an extra 30 seconds before stirring again. This gives it a lightly toasted edge that’s seriously addictive.
Now go ahead and taste a bite — this is your chance to adjust the seasoning. Add a pinch of salt and freshly ground black pepper if needed. Just be careful not to go overboard since the soy sauce already brings in a good amount of saltiness.
STEP 6: Add Back the Eggs
Remember those fluffy scrambled eggs we set aside earlier? Time to bring them back into the party. Gently fold the eggs into the rice mixture, breaking them up slightly so they’re evenly distributed. You don’t want to stir too aggressively here — the goal is to keep some of those soft curds intact so you get that nice bite of egg in every scoop.
This step only takes a minute, but it’s what transforms your fried rice from a good side dish to a fully satisfying meal. Eggs add richness and a boost of protein, making the whole thing feel more balanced.
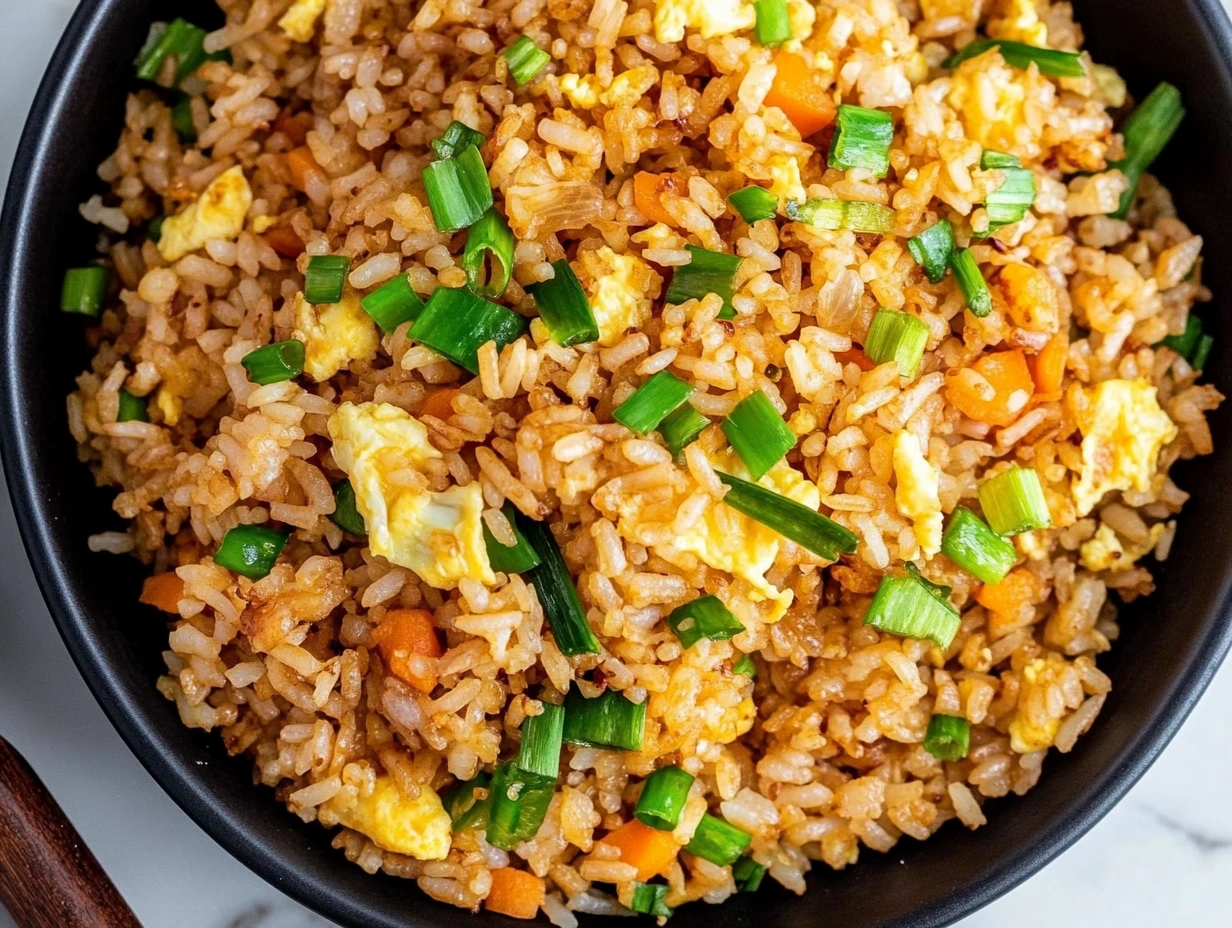
STEP 7: Finish with Green Onions
Right before you take the skillet off the heat, toss in the thinly sliced green onions. They add a pop of color and a little bite of freshness that balances out all the richness from the butter and soy sauce. I usually use about 2 green onions here, but if you’re a big fan of that sharp, herby flavor, feel free to add a little extra.
Once everything is mixed together, go ahead and turn off the heat — your hibachi fried rice is done!
Tips for the Best Hibachi Fried Rice Every Time
You know how some dishes seem simple but just taste better at a restaurant? This recipe cracks the code. With just a couple of tips, you can get that same flavor at home every time.
1. Use Day-Old Rice
This is the single most important thing you can do. Fresh rice is too moist and sticky. Day-old rice has dried out just enough to fry up nicely without turning mushy. If you don’t have leftover rice, you can make a batch and chill it in the fridge (uncovered) for a few hours to mimic that day-old texture.
2. Don’t Skimp on Butter
That signature buttery taste you get at Japanese steakhouses? It comes from real butter — not just oil. Using unsalted butter allows you to control the saltiness while still giving your fried rice that unmistakable hibachi richness.
3. High Heat = Better Texture
When it comes to fried rice, high heat is your best friend. It gives the rice that slightly crispy, toasted edge and prevents everything from steaming. Just make sure to stir often so nothing burns.
4. Customize with Leftovers
This is where things get fun. Once you master the base recipe, you can toss in diced chicken, steak, shrimp, or tofu to make it a full meal. You can also experiment with different vegetables — bell peppers, mushrooms, and even chopped zucchini work great here.
5. Want That Extra Restaurant Touch?
A dash of hibachi steak sauce or a sprinkle of garlic salt at the very end gives it that “just like the restaurant” finish. It’s optional, but definitely worth trying.
Hibachi Fried Rice FAQ: Your Questions Answered
If you’re new to making fried rice at home — or even if you’ve made it before but want to level up your results — you’re not alone. I get a lot of questions every time I share this recipe with friends or post it on social. So I’ve rounded up the most common ones to help you get perfect results every single time.
FAQ
1. What’s the best type of rice to use for hibachi fried rice?
Long-grain white rice is the top choice — think jasmine or even plain white rice. The grains stay separate when cooked, which is key for that signature fried rice texture. Short-grain or sticky rice tends to clump too much.
2. Why does the rice need to be cold or day-old?
Freshly cooked rice has too much moisture and is more likely to get mushy when fried. Cold, day-old rice is drier and firmer, which helps it crisp up in the pan and absorb the sauces better.
3. Can I use brown rice or cauliflower rice instead?
Absolutely! Brown rice works well and gives a slightly nuttier flavor. Cauliflower rice is a great low-carb alternative, but it does cook faster and has a softer texture — so adjust the cook time and don’t overdo the sauces.
4. How do I store and reheat leftovers?
Store any leftovers in an airtight container in the fridge for up to 3 days. To reheat, add a splash of oil to a hot skillet and stir-fry the rice again until heated through. This brings back some of the original texture and flavor better than using the microwave.
5. What proteins can I add to make it a full meal?
Grilled chicken, shrimp, steak, or even tofu all work beautifully. Just make sure they’re cooked ahead of time and add them in during the final step with the eggs. You can also toss in chopped ham or even bacon for a smoky twist.
6. Can I make this recipe gluten-free?
Yes! Just swap the regular soy sauce for tamari or a gluten-free soy sauce alternative. All the other ingredients should be naturally gluten-free, but always check labels to be sure.
7. What’s the difference between hibachi fried rice and Chinese fried rice?
Great question! Hibachi-style fried rice is typically cooked with butter and has a slightly richer flavor, while Chinese fried rice often uses oil and sometimes includes different seasonings like oyster sauce or hoisin. Both are delicious, just a bit different in style.
Final Thoughts: Try It Tonight and Make It Your Own
There’s something so satisfying about mastering a takeout classic at home — especially one as flavorful and versatile as this Hibachi Fried Rice. With just a few everyday ingredients and about 25 minutes, you can recreate that buttery, savory goodness you love from Japanese steakhouses without ever leaving your kitchen.
What I love most about this recipe is how flexible it is. Got leftover grilled chicken? Toss it in. Prefer extra garlic or no peas? Totally fine. It’s one of those recipes that’s easy to make your own, and even easier to enjoy again and again.
PrintHibachi Fried Rice

A classic hibachi-style fried rice that’s buttery, savory, and studded with tender vegetables and fluffy scrambled eggs. Perfect as a side or a satisfying main, it captures the restaurant feel right at home with simple ingredients and quick technique.
- Author: Mark's Recipe
Ingredients
2 cups cooked and cooled long-grain white rice
2 tablespoons unsalted butter
1 tablespoon neutral oil (canola or vegetable)
2 large eggs, lightly beaten
¼ cup diced yellow onion
¼ cup frozen peas and carrots mix, thawed
2 garlic cloves, minced
3 tablespoons soy sauce
1 teaspoon sesame oil
2 green onions, thinly sliced
salt and freshly ground black pepper to taste
Instructions
Melt one tablespoon of the butter and the oil in a large skillet or wok over medium-high heat. Pour in the eggs and gently scramble until just set. Transfer the eggs to a bowl and set aside.
Add the remaining tablespoon of butter to the pan. Stir in the diced onion, peas and carrots, and garlic. Sauté for two to three minutes until the vegetables are tender and the garlic is fragrant.
Increase the heat to high and add the rice, breaking up any clumps with your spatula. Toss continuously so the grains get coated with butter and begin to fry evenly, about three minutes.
Drizzle the soy sauce and sesame oil over the rice, stirring constantly to distribute the sauce. Return the scrambled eggs to the pan and fold gently into the rice. Season with salt and pepper, then stir in the sliced green onions just before removing from heat.
Notes
For extra authentic flavor, substitute half of the soy sauce with tamari and finish with a dash of hibachi-style steak sauce or a sprinkle of garlic salt. Cook the rice a day ahead and refrigerate uncovered so it dries out slightly—this gives the best fried-rice texture. Leftovers reheat well in a hot skillet with a splash of oil.
")
