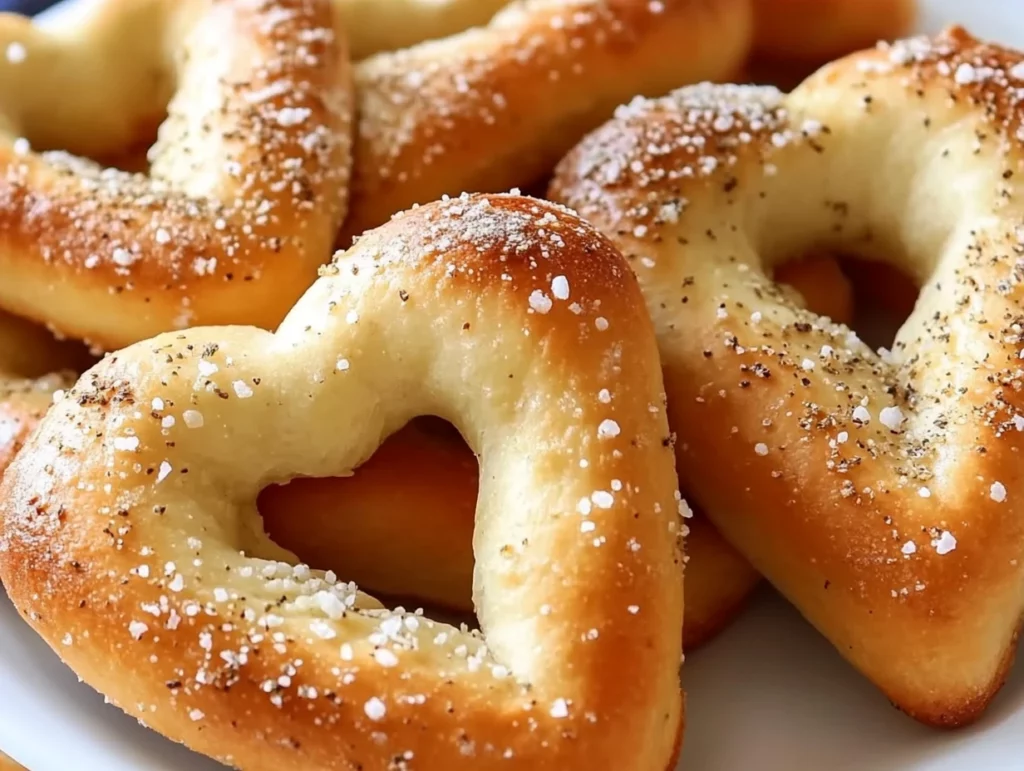
There’s just something extra special about homemade food, especially when it’s shaped like a heart. These Heart-Shaped Breadsticks are a sweet and savory way to show someone you care — without spending hours in the kitchen. Whether you’re planning a romantic dinner or putting together a fun Valentine’s Day spread for the kids, these buttery, garlicky breadsticks are bound to win hearts (pun intended!).
Let’s be real — not everyone has time to whip up bread dough from scratch in the middle of a busy week. That’s why I love using refrigerated pizza or breadstick dough for this recipe. It keeps things simple without sacrificing flavor or that homemade feel. I’ve made these for date nights at home, girls’ movie nights, and even as part of a fun Valentine’s lunch for my kids. They’re always a hit, and they come together in less than 30 minutes from start to finish!
You can keep them classic with just butter, garlic, and herbs — or go all out with melty mozzarella and a side of warm marinara. They’re totally customizable, which makes them even more fun. Plus, who can resist a heart-shaped snack?
Alright, let’s get into the kitchen and start shaping some love.
Ingredients You’ll Need:
-
1 package refrigerated pizza dough or breadstick dough
-
2 tablespoons butter, melted
-
¼ teaspoon garlic powder
-
¼ teaspoon dried Italian seasoning
-
¼ cup grated Parmesan cheese (optional)
Optional Add-Ins & Dips:
-
½ teaspoon crushed red pepper flakes
-
Melted mozzarella or provolone cheese
-
Warm marinara or garlic butter for dipping
Step-by-Step Instructions
Step 1: Preheat & Prepare the Dough
First things first — get your oven preheated to 375°F (190°C) so it’s ready to go. Then grab a baking sheet and either line it with parchment paper or lightly grease it to prevent sticking.
Next, unroll your pizza dough on a clean surface. Cut it into strips that are about ½ inch wide and 12 inches long. These will become the base for your heart shapes.
Step 2: Shape the Breadsticks into Hearts
Now for the fun part! Take each dough strip and bring the two ends toward each other, curving them into the shape of a heart. Pinch the ends together at the bottom point to seal the shape. It doesn’t have to be perfect — part of the charm is that each one is a little unique.
Carefully place each shaped dough heart onto your prepared baking sheet. Make sure they’re spaced out enough that they don’t stick together as they bake. The dough may try to stretch or shift a little, so just gently adjust the shape if needed once they’re on the sheet.

Step 3: Brush with Buttery Garlic Seasoning
In a small bowl, stir together your melted butter, garlic powder, and Italian seasoning. Use a pastry brush to coat each heart-shaped dough piece generously with the butter mixture.
If you’re feeling extra fancy (and who isn’t on Valentine’s Day?), sprinkle grated Parmesan cheese over the tops of the hearts. It adds a deliciously cheesy crust and a bit of golden color once baked.
Finishing Touches: Bake, Serve, and Customize Your Heart-Shaped Breadsticks
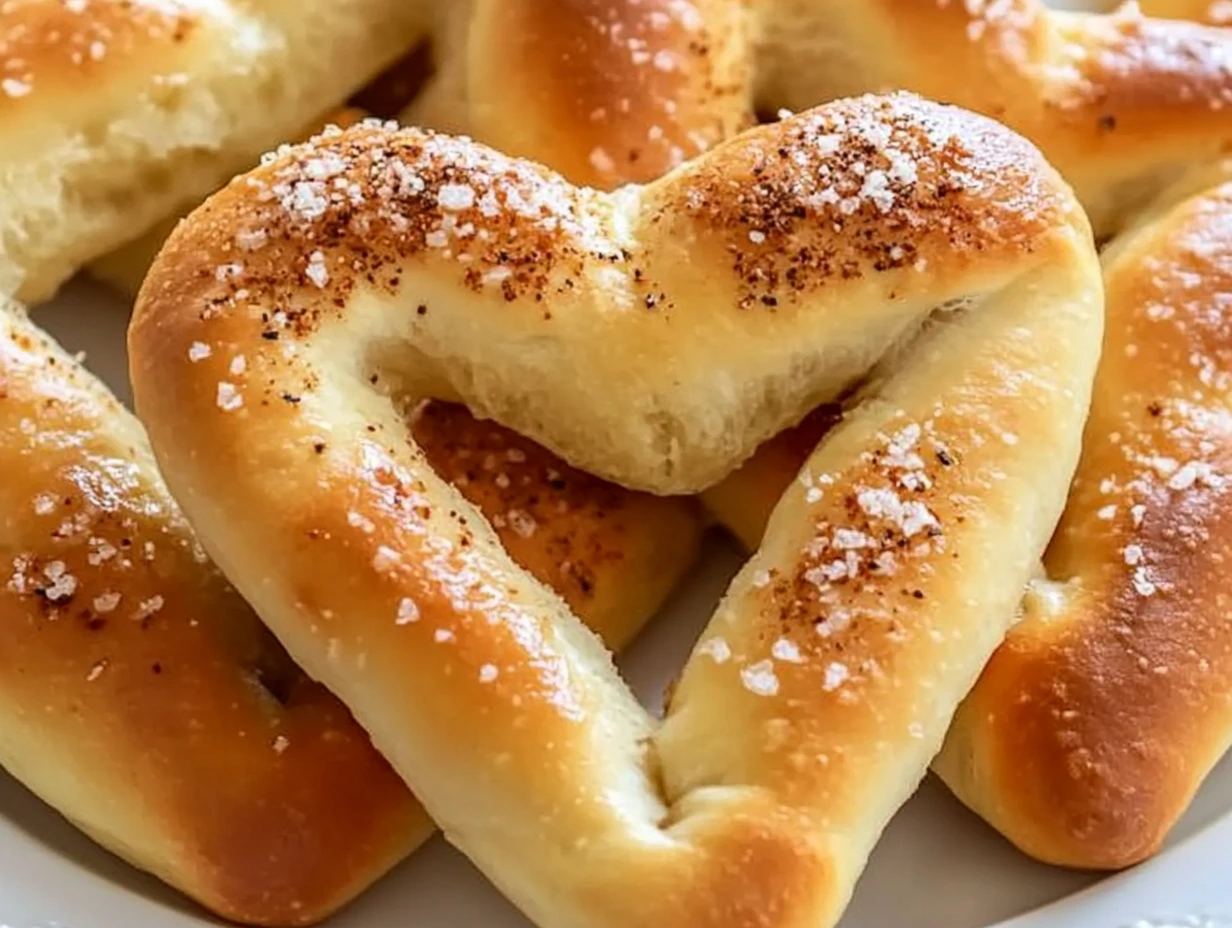
So now that we’ve shaped our dough into sweet little hearts and brushed them with that buttery, garlicky goodness, it’s time to finish these beauties off in the oven. This is where they puff up, turn golden brown, and fill your kitchen with that irresistible warm bread aroma. There’s truly nothing better.
And while they’re baking? That’s your window to pull together some dipping sauces, prep the rest of your meal, or sneak a little sample of that melted butter mixture (I won’t judge). These heart-shaped breadsticks are not only adorable — they’re the perfect blank canvas for your favorite flavors, too.
Whether you’re planning a romantic meal or just want to make your family smile at dinner, these breadsticks bring the perfect touch of fun to the table. Let’s finish them up!
Step-by-Step Instructions (Continued)
Step 4: Bake to Golden Perfection
With your oven already preheated to 375°F (190°C), go ahead and slide the baking sheet onto the center rack. Bake for 12–15 minutes, or until the hearts are a nice golden brown and slightly puffed.
Keep a close eye around the 12-minute mark — you’re looking for that light golden color on top, and a firm, but still soft texture when gently pressed. If you added Parmesan cheese, it should be slightly crisp and toasty.
Once they’re done, remove the tray from the oven and let them sit for a couple of minutes to cool slightly before serving. This helps the butter and cheese settle a bit, and makes them easier to pick up and dip without falling apart.
Tasty Tips & Fun Twists
You know we love a good base recipe, but the real fun comes in the ways you can mix it up. Here are a few of my favorite ways to customize these heart-shaped breadsticks:
-
Add Some Heat: If you’re cooking for someone who loves a little kick, sprinkle crushed red pepper flakes into the butter mixture before brushing it on. It’s a small change that adds just the right amount of spice.
-
Make Them Extra Cheesy: Before baking, lay down a little shredded mozzarella or provolone over the heart shapes — or drizzle it on halfway through baking so it melts beautifully on top. These are especially good with a side of marinara for dipping.
-
Dipping Sauces to Try: A warm marinara sauce is always a classic, but garlic butter is also a winner here. Want something a little different? Try ranch, pesto, or even a spicy tomato jam for a fun twist.
-
Pair Them Up: These breadsticks are super versatile. I’ve served them alongside spaghetti, lasagna, even a big antipasto salad — and they always disappear first. They’re also a hit on appetizer trays at Valentine’s parties or brunch spreads.
-
Make-Ahead Tip: You can shape the dough hearts and refrigerate them (covered) for a few hours before baking. Just bring them to room temp and give them a quick butter-brush right before they go into the oven.
Frequently Asked Questions About Heart-Shaped Breadsticks
I know that by now you’re probably craving a warm batch of these heart-shaped breadsticks, but before you dive into your own kitchen, I wanted to take a moment to address a few common questions. Whether you’re new to making breadsticks or just want to troubleshoot a bit, these tips will help make sure your breadsticks turn out perfectly every time.
1. Can I use homemade pizza dough instead of refrigerated dough?
Absolutely! If you prefer making dough from scratch, go ahead and use your favorite pizza or breadstick dough recipe. Just be sure to roll it out to the same thickness and cut it into strips that are about ½ inch wide and 12 inches long. Homemade dough will give the breadsticks a little extra texture and flavor, but the refrigerated version is super convenient for a quicker meal.
2. How can I make these breadsticks crispy instead of soft?
If you’re more of a crispy breadstick fan, there are a couple of things you can do. First, bake the breadsticks a bit longer than the suggested time, but keep a close eye on them so they don’t burn. You could also brush the dough with a little extra melted butter or olive oil before baking for a crispier finish. Another trick is to bake them at a slightly higher temperature (around 400°F) for a shorter period — this will give them a nice crunch without overbaking the inside.
3. Can I freeze these breadsticks for later?
Yes! If you want to prep these ahead of time, you can freeze the shaped breadsticks before baking. Just lay them on a baking sheet in a single layer and freeze until solid, then transfer them to a freezer bag or airtight container. When you’re ready to bake, no need to thaw them — just pop them directly into a preheated oven and bake as directed. You may need to add an extra minute or two of baking time.
4. What if I don’t have any garlic powder or Italian seasoning?
If you’re missing either garlic powder or Italian seasoning, you can easily make a substitution. For garlic powder, you could use fresh minced garlic (about one clove per tablespoon of melted butter), or try garlic salt if you have it on hand (just reduce the amount of added salt). For Italian seasoning, a pinch of dried oregano, basil, and thyme will work as a quick replacement. These swaps still give the breadsticks a delicious flavor!
5. How do I keep the breadsticks warm if I’m serving them later?
If you’re serving these heart-shaped breadsticks as part of a larger meal, keep them warm by covering them loosely with foil once they’re out of the oven. Alternatively, you can place them in a low-temperature oven (around 200°F) for up to 30 minutes before serving to keep them nice and toasty. Just be sure to monitor them to prevent overbaking.
6. Can I add more toppings, like herbs or cheese?
Definitely! Feel free to get creative with your breadsticks. After brushing on the butter, you can sprinkle extra herbs, like rosemary or thyme, for more flavor. Adding cheese, like mozzarella, provolone, or even a bit of Parmesan, is also a great way to make them extra indulgent. Just remember that cheese can melt and potentially make the breadsticks a little sticky, so use a light hand with it if you’re stacking them on a plate.
Conclusion: The Perfect Valentine’s Day Snack
And there you have it! These Heart-Shaped Breadsticks are the ideal Valentine’s Day treat — easy to make, full of flavor, and just the right amount of fun. Whether you’re serving them for a romantic dinner, as an appetizer at a party, or just as a little surprise for your family, they’re sure to steal the show.
The best part? You can completely personalize them based on your taste. Add some cheese, spice them up with red pepper flakes, or dip them in a savory sauce — it’s all about what you love. Plus, since they come together in less than 30 minutes, they’re perfect for a last-minute treat or a cozy night in.
So what are you waiting for? Get into the kitchen, make some heart-shaped breadsticks, and enjoy a little extra love this Valentine’s Day! If you try any fun variations or have any tips of your own, I’d love to hear all about them in the comments below. Happy baking!
PrintHeart-Shaped Breadsticks for Valentine’s Day

These Heart-Shaped Breadsticks are the perfect Valentine’s Day treat! Soft, buttery, and with just the right amount of garlic and Italian seasoning, they make a charming and delicious addition to your celebrations. Serve them with a warm marinara sauce or garlic butter for dipping, and you’ll have an irresistible snack that’s both adorable and tasty.
- Author: Mark's Recipe
Ingredients
- 1 package refrigerated pizza dough or breadstick dough (for easy preparation)
- 2 tablespoons butter, melted (adds rich flavor)
- ¼ teaspoon garlic powder (for a mild garlic kick)
- ¼ teaspoon dried Italian seasoning (brings in classic flavors)
- ¼ cup grated Parmesan cheese (optional, but adds a cheesy twist)
Optional Add-Ins & Dips:
- ½ teaspoon crushed red pepper flakes (for a spicy kick)
- Melted mozzarella or provolone (for extra cheesiness)
- Warm marinara or garlic butter for dipping
Instructions
Preheat & Prepare the Dough: Preheat your oven to 375°F (190°C). Line a baking sheet with parchment paper or lightly grease it. Unroll the pizza dough and cut it into strips about ½ inch wide and 12 inches long.
Shape the Breadsticks into Hearts: Take each strip of dough and form it into a heart shape. To do this, fold the two ends of the strip towards each other and pinch the bottom together to seal the shape. Place each heart on the prepared baking sheet, making sure they hold their shape.
Brush with Buttery Garlic Seasoning: In a small bowl, combine the melted butter, garlic powder, and Italian seasoning. Use a brush to evenly coat each heart-shaped breadstick with the butter mixture. If desired, sprinkle grated Parmesan cheese on top for an extra layer of savory flavor.
Bake to Golden Perfection: Place the breadsticks in the preheated oven and bake for 12–15 minutes, or until they are golden brown and fluffy.
Notes
-
For extra cheesiness, you can melt mozzarella or provolone cheese and drizzle it over the breadsticks before baking.
-
These breadsticks can be spiced up with a dash of crushed red pepper flakes if you enjoy a little heat.
-
If you’re making these for a special dinner, they pair wonderfully with Italian dishes like pasta, pizza, or a fresh salad.
-
Leftover breadsticks can be stored in an airtight container for up to 2 days. Reheat them in the oven for a few minutes to regain their crispiness.


")
