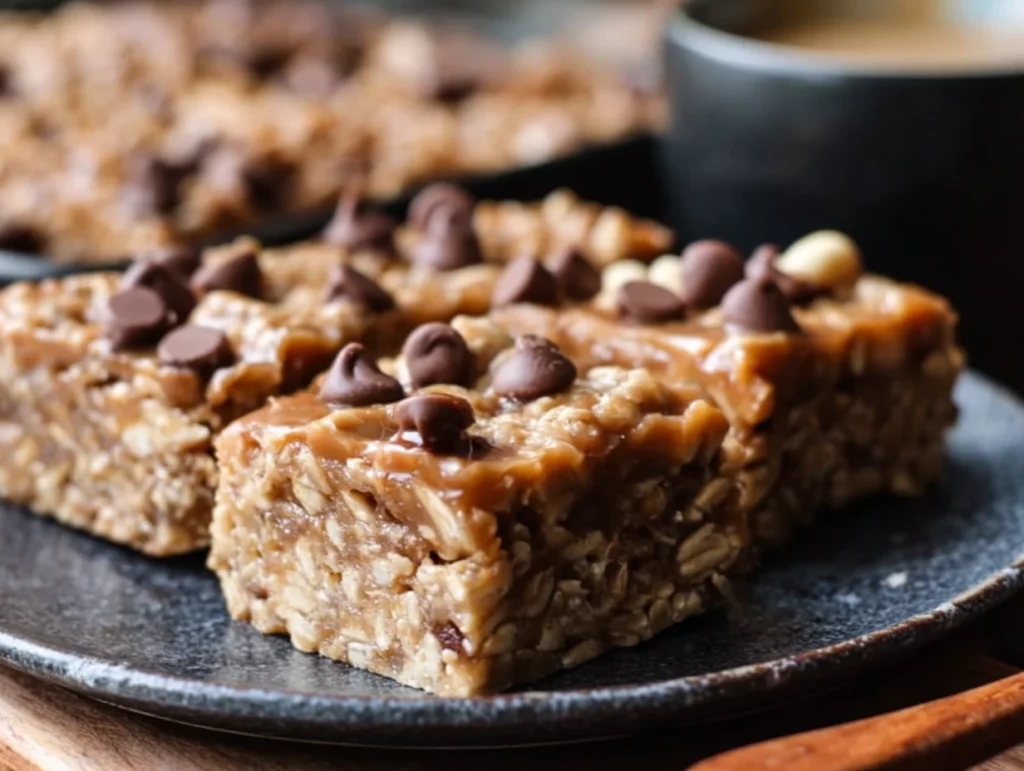
There’s something truly magical about finding a snack that checks all the boxes—easy to make, full of good-for-you ingredients, kid-approved, and ridiculously delicious. These Healthy No-Bake Oatmeal Bars are exactly that kind of recipe. Whether you’re trying to prep breakfast for a busy week or just need a quick and nutritious pick-me-up in the afternoon, these bars are a game changer.
I first made these bars when I was looking for a way to use up some pantry staples—oats, peanut butter, and honey. What came out of that kitchen experiment has since become a weekly staple in our house. They take barely 10 minutes to throw together, and after a quick chill in the fridge, you’ve got a satisfying snack that feels indulgent but is packed with wholesome goodness.
With a chewy texture, subtle sweetness, and the crunch of nuts or dried fruit, these bars hit that perfect middle ground between a treat and a health food. And the best part? You can totally make them your own. Use almond butter, toss in some chia seeds, swap chocolate chips for raisins—it’s one of those recipes that’s endlessly customizable.
Let’s get into it!
Why You’ll Love These No-Bake Oatmeal Bars
-
No oven needed – no-bake means no fuss, no overheating the kitchen, and minimal cleanup.
-
Naturally sweetened – using honey or maple syrup for that touch of sweetness without refined sugar.
-
Customizable – switch up the nut butter, mix-ins, or sweetener to suit your taste.
-
Wholesome and energizing – made with fiber-rich oats, healthy fats, and simple ingredients you can feel good about.
Ingredients You’ll Need
Here’s everything you’ll need to get started:
-
2 cups old-fashioned rolled oats
-
1 cup natural peanut butter or almond butter
-
½ cup honey or pure maple syrup
-
½ tsp vanilla extract
-
¼ tsp salt
-
½ cup chopped nuts (almonds or walnuts work great)
-
¼ cup mini chocolate chips, raisins, or dried cranberries
You can also add in a tablespoon of chia seeds or flaxseed for an extra nutritional boost.
STEP 1: PREP YOUR PAN
Line an 8×8-inch baking dish with parchment paper. I like to leave a bit of overhang on the sides—it makes lifting the bars out of the pan so much easier later on. Set it aside while you work on the oat mixture.
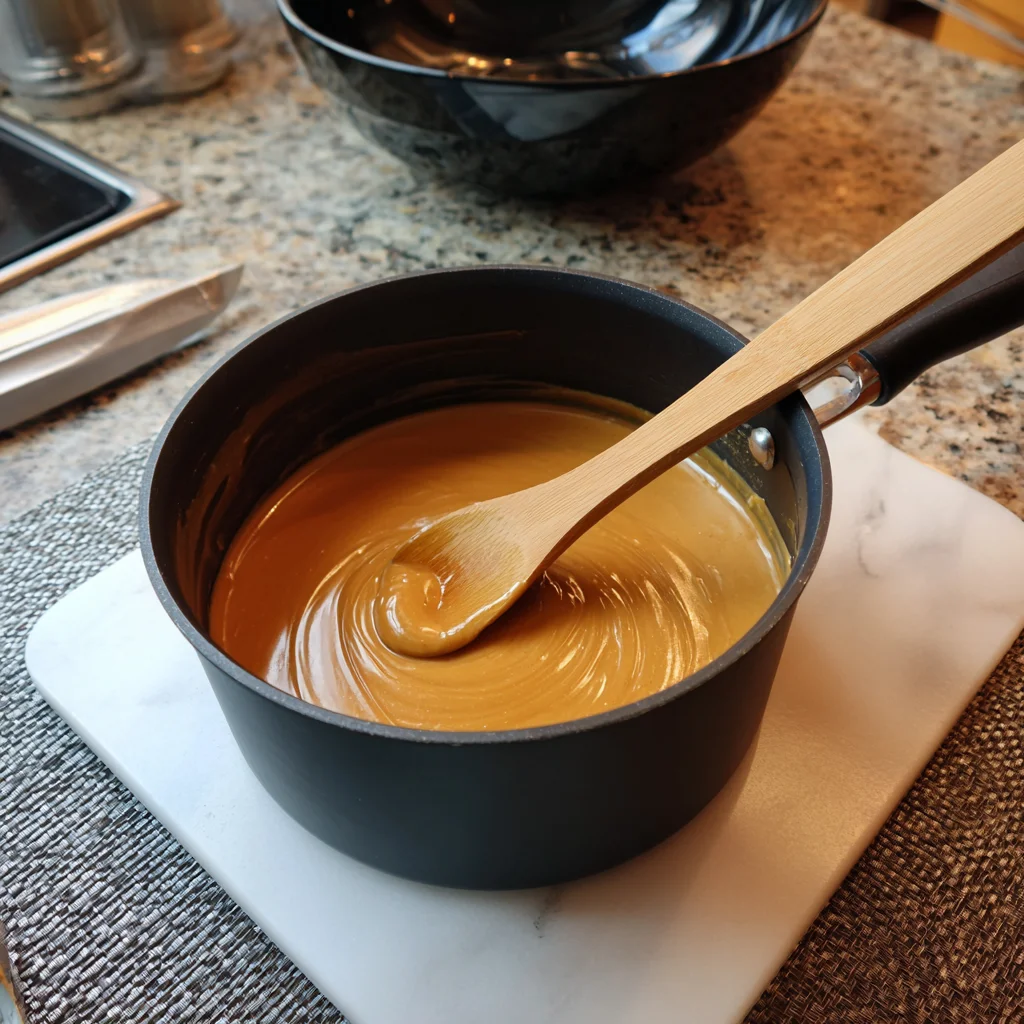
STEP 2: MELT THE WET INGREDIENTS
In a medium saucepan over low heat, combine your nut butter and honey (or maple syrup). Stir constantly until everything is melted together and smooth. This only takes a couple of minutes—don’t walk away, as nut butters can burn quickly if left unattended.
Once melted, remove the pan from heat and stir in the vanilla extract and salt. This gives the mixture a bit of balance and depth of flavor.
STEP 3: MIX IN THE DRY INGREDIENTS
Now it’s time to add in the rolled oats and chopped nuts. Stir until everything is evenly coated and the oats have absorbed the peanut butter mixture.
Let the mixture cool slightly for a few minutes—this step is important if you’re planning to add chocolate chips. You want the mixture to be cool enough that the chips won’t melt completely when folded in. If you’re using dried fruit or raisins, this step is a little more forgiving, but cooling helps the bars firm up better in the fridge.
STEP 4: FOLD IN THE MIX-INS
Once cooled a bit, gently stir in your mix-ins—this could be mini chocolate chips, dried cranberries, or even a combination of the two. Feel free to get creative here; this is where you can put your personal twist on the bars.
STEP 5: PRESS INTO PAN AND CHILL
Transfer the oat mixture into your prepared baking dish. Use a spoon or your hands to press it down firmly into an even layer. Really pack it in—this helps the bars hold together when you cut them later.
Place the dish in the refrigerator and chill for at least 1 to 2 hours, or until firm.
Finishing Touches: Cutting, Storing, and Customizing Your No-Bake Oatmeal Bars
Welcome back! By now, your Healthy No-Bake Oatmeal Bars should be chilling in the fridge, getting nice and firm. While they set, let’s talk about what to do next—and how to make these bars work perfectly for you and your lifestyle.
One of the best things about this recipe is how forgiving it is. Whether you’re adjusting the sweetness, sneaking in some extra nutrients, or trying to make them school-lunch friendly, there’s so much room to customize without sacrificing that delicious chewy texture and flavor. Let’s dive back into the final steps and then go over some of the best variations and storage tips.
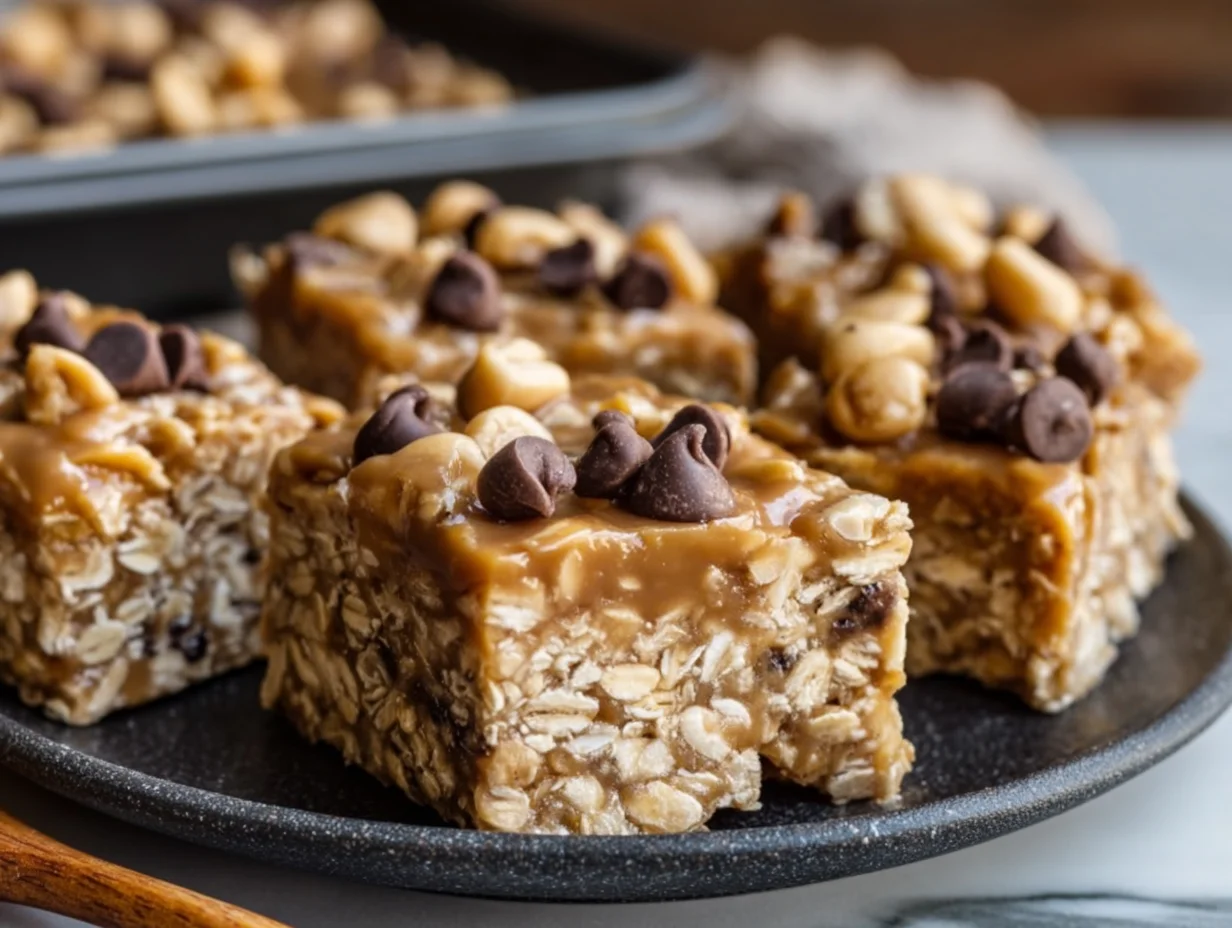
STEP 6: CUT AND SERVE
Once the bars are firm and set (this usually takes about 1–2 hours in the fridge), it’s time to cut them into portions. Lift the mixture out of the pan using the parchment paper overhang and place it on a cutting board.
Use a sharp knife to cut the bars into even rectangles or squares. You should get around 10 bars, but feel free to cut them smaller for bite-sized snacks or larger for meal-prep breakfasts.
STEP 7: STORAGE TIPS
These bars are meant to be enjoyed throughout the week, so proper storage is key to keeping them fresh and chewy.
-
Refrigerator: Store in an airtight container in the fridge for up to one week. You can layer the bars with a piece of parchment between them to prevent sticking.
-
Freezer: For longer storage, these bars freeze beautifully. Just place them in a freezer-safe container or bag and freeze for up to 3 months. Let them thaw at room temperature for a few minutes before eating, or pop them into a lunchbox and they’ll be ready to eat by snack time.
Tips for Success
1. Use Natural Nut Butter
Stick with natural peanut butter or almond butter—the kind that has only nuts and maybe salt in the ingredients. The consistency is smoother and works better for binding everything together.
2. Press Firmly
Don’t skip pressing the mixture down really firmly in the pan. This helps everything stick together once chilled. You can even use the bottom of a measuring cup to pack it in evenly.
3. Let It Chill Completely
It might be tempting to cut into these early, but they really do need that full hour (or two) in the fridge. Otherwise, the bars may crumble when sliced.
Easy Variations to Try
This base recipe is just the beginning. Here are some of my favorite ways to switch things up:
-
Nut-Free Version: Replace peanut or almond butter with sunflower seed butter for a school-safe, allergy-friendly treat.
-
Lower Sugar Option: Use a little less honey or maple syrup and slightly increase the nut butter to keep the mixture moist and sticky.
-
Protein Boost: Stir in a tablespoon of your favorite protein powder, or add a handful of hemp seeds or chia seeds for an extra nutritional bump.
-
Chocolate Lovers’ Version: Use mini dark chocolate chips, drizzle melted chocolate on top before chilling, or even add a touch of cocoa powder to the oat mixture.
-
Fruity Twist: Replace chocolate chips with dried blueberries, cherries, or chopped apricots for a sweet, chewy fruit bar.
-
Spiced-Up Bars: A pinch of cinnamon or nutmeg can add a cozy fall-inspired flavor.
Why These Bars Work
When it comes to no-bake recipes, balance is key. These bars have the perfect ratio of dry (oats, nuts) to wet (nut butter, honey) ingredients. That’s what helps them hold their shape without baking.
The honey or maple syrup acts as both a sweetener and a binder. The nut butter provides healthy fats and a creamy texture. And the oats? They’re the heart of the recipe—chewy, satisfying, and packed with fiber to help keep you full.
FAQs About Healthy No-Bake Oatmeal Bars
These Healthy No-Bake Oatmeal Bars are about as simple as it gets, but questions still come up—especially if you’re making them for the first time or looking to tweak the recipe. Below are some of the most common questions readers ask, along with helpful answers to make sure your bars turn out perfectly every time.
Can I make these bars vegan?
Yes! Just swap out the honey for pure maple syrup or agave nectar. Make sure your chocolate chips are dairy-free, and you’re all set.
Why are my bars falling apart?
This usually happens if the ratio of wet to dry ingredients is off. Make sure you’re using natural nut butter (with a runnier consistency) and that you’re packing the mixture firmly into the pan. Also, chilling for at least an hour is key.
Can I use quick oats instead of rolled oats?
You can, but the texture will be softer and a little less chewy. Rolled oats are best for giving the bars structure and that satisfying bite, but quick oats will still work in a pinch.
How can I make these bars nut-free?
Use sunflower seed butter or soy nut butter in place of peanut or almond butter. Be sure to also swap the chopped nuts for seeds like pumpkin seeds or sunflower seeds if needed.
Are these bars good for kids’ lunches?
Absolutely. These bars are a great school snack or lunchbox treat—just make sure to use a nut-free option if your school has allergy restrictions. You can also cut them into smaller squares for easier portioning.
Can I double the recipe?
Yes, you can double everything and press the mixture into a 9×13-inch pan instead of an 8×8. Just make sure it’s packed in tightly and chilled thoroughly.
Do I have to keep them in the fridge?
They’re best stored in the refrigerator to help them hold their shape. If you’re packing them for a lunch or trip, they’ll be fine at room temp for a few hours, but they’ll soften a bit.
Final Thoughts: A Go-To Snack You’ll Keep Coming Back To
Whether you’re meal prepping for the week, feeding hungry kids after school, or just need a nutritious snack to get you through the day, these Healthy No-Bake Oatmeal Bars truly do it all. They’re quick, satisfying, and packed with real ingredients—no oven, no complicated steps, and no regrets.
Once you’ve tried them once, you’ll probably find yourself making them on repeat. I know I do! And don’t be afraid to play around with flavors and add-ins until you find your perfect version. That’s the beauty of a recipe like this—it fits into your life, not the other way around.
If you give these bars a try, I’d love to hear how they turned out. Drop a comment below, share your favorite variations, or tag your creations on social media. Happy snacking!
PrintHealthy No-Bake Oatmeal Bars
Healthy No-Bake Oatmeal Bars are a simple and satisfying snack packed with wholesome ingredients. Naturally sweetened and full of fiber, healthy fats, and energy-boosting carbs, these bars are perfect for breakfast on-the-go, a midday snack, or a healthy treat. With a chewy texture and customizable flavor, they’re as convenient as they are delicious.
- Author: Mark's Recipe
Ingredients
2 cups old-fashioned rolled oats
1 cup natural peanut butter or almond butter
½ cup honey or pure maple syrup
½ tsp vanilla extract
¼ tsp salt
½ cup chopped nuts such as almonds or walnuts
¼ cup mini chocolate chips, raisins, or dried cranberries
Instructions
1 Line an 8×8 inch square baking dish with parchment paper. In a medium saucepan over low heat, warm the peanut butter and honey until melted and smooth, stirring constantly.
2 Remove from heat and stir in vanilla extract and salt. Add the rolled oats and chopped nuts, mixing until fully coated. Let the mixture cool slightly before folding in chocolate chips or dried fruit.
3 Transfer the mixture into the prepared baking dish. Press it down firmly into an even layer using the back of a spoon or your hands.
4 Refrigerate for at least 1 to 2 hours, or until firm. Once set, lift the mixture from the pan and cut into bars or squares.
Notes
For extra texture and nutrition, stir in a tablespoon of chia seeds or ground flaxseed. These bars can be made nut-free by using sunflower seed butter. Store in an airtight container in the refrigerator for up to one week or freeze for longer storage. To reduce sweetness, cut the honey or maple syrup slightly and increase the nut butter.


")
