If there’s one dessert that feels like a beach vacation in every bite, it’s this Hawaiian Poke Cake. I’m telling you, the combination of fluffy yellow cake, juicy pineapple, creamy coconut pudding, and a cloud of whipped topping is pure sunshine on a plate. Whether you’re planning a summer potluck or just dreaming of a tropical getaway, this poke cake is the perfect treat to whip up. And trust me—it’s as easy as it is irresistible.
I actually made this for a backyard BBQ last weekend, and let’s just say… it disappeared before the burgers were even done grilling. My family loves anything pineapple, but adding the creamy coconut twist takes this dessert to the next level. It’s sweet, refreshing, and perfect for feeding a crowd. Plus, you can make it ahead of time, which means less fuss when you’re entertaining.
Let’s dive right in and start making this tropical treat!
HOW TO MAKE HAWAIIAN POKE CAKE
Ingredients You’ll Need:
-
1 box yellow cake mix (plus the ingredients listed on the box—usually eggs, oil, and water)
-
1 can (20 ounces) crushed pineapple with juice
-
1 package (3.4 ounces) instant coconut pudding mix
-
1 cup cold milk
-
1 container (8 ounces) whipped topping (like Cool Whip), thawed
-
1 cup sweetened shredded coconut, toasted
If you’re a fan of semi-homemade desserts (guilty!), you’re going to love how simple this is. The boxed cake mix is a huge time-saver, and the rest comes together in just a few easy steps.
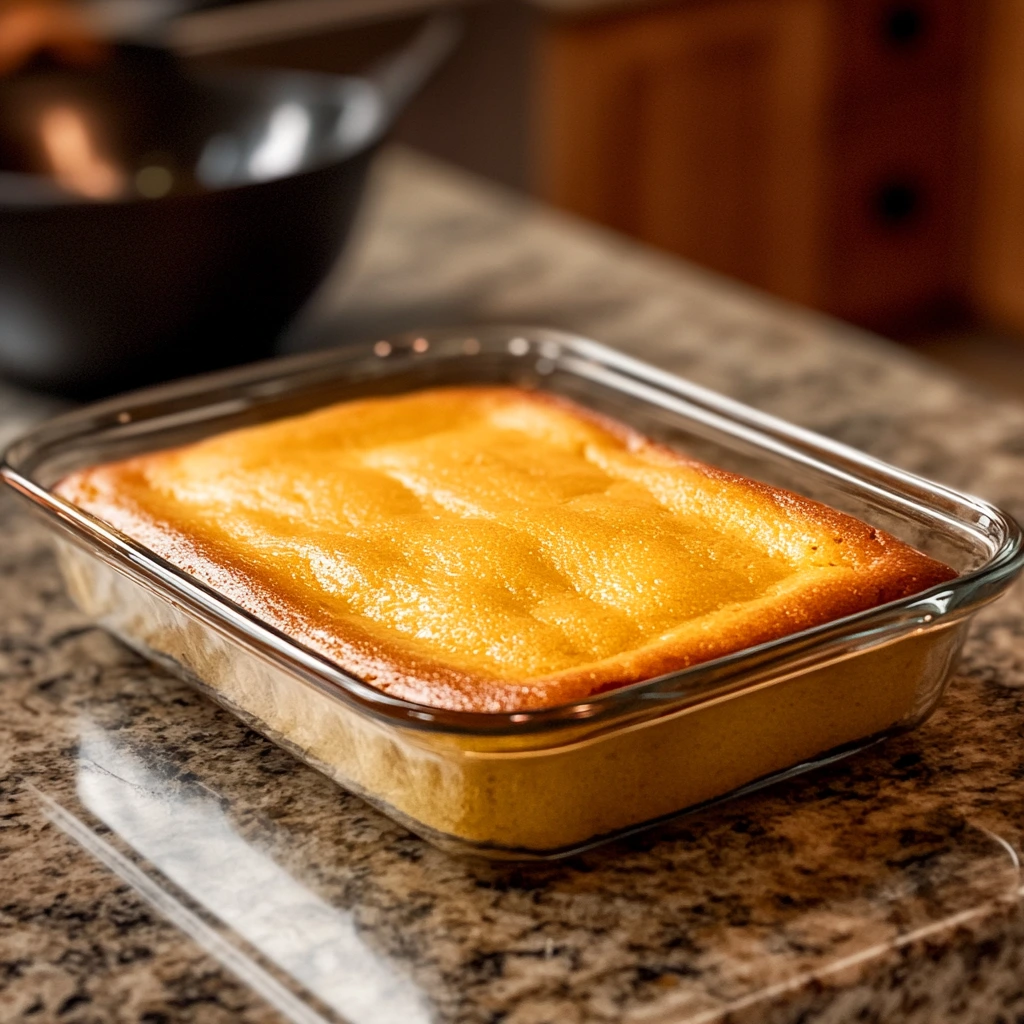
STEP 1: Bake the Cake
Start by preparing the yellow cake mix according to the directions on the box. You’ll typically mix it with eggs, oil, and water. Pour the batter into a 9×13-inch baking dish and bake it just as instructed. Once baked, let the cake cool for about 10 minutes—just long enough that it’s warm but not piping hot
Tip: If you want extra flavor, you can add a splash of vanilla or a bit of coconut extract to the batter before baking.
STEP 2: Poke the Cake
While the cake is still warm, grab the handle of a wooden spoon (or anything similar in size) and poke holes all over the surface. Don’t be shy here—the more holes, the more flavorful your cake will be once the toppings soak in.
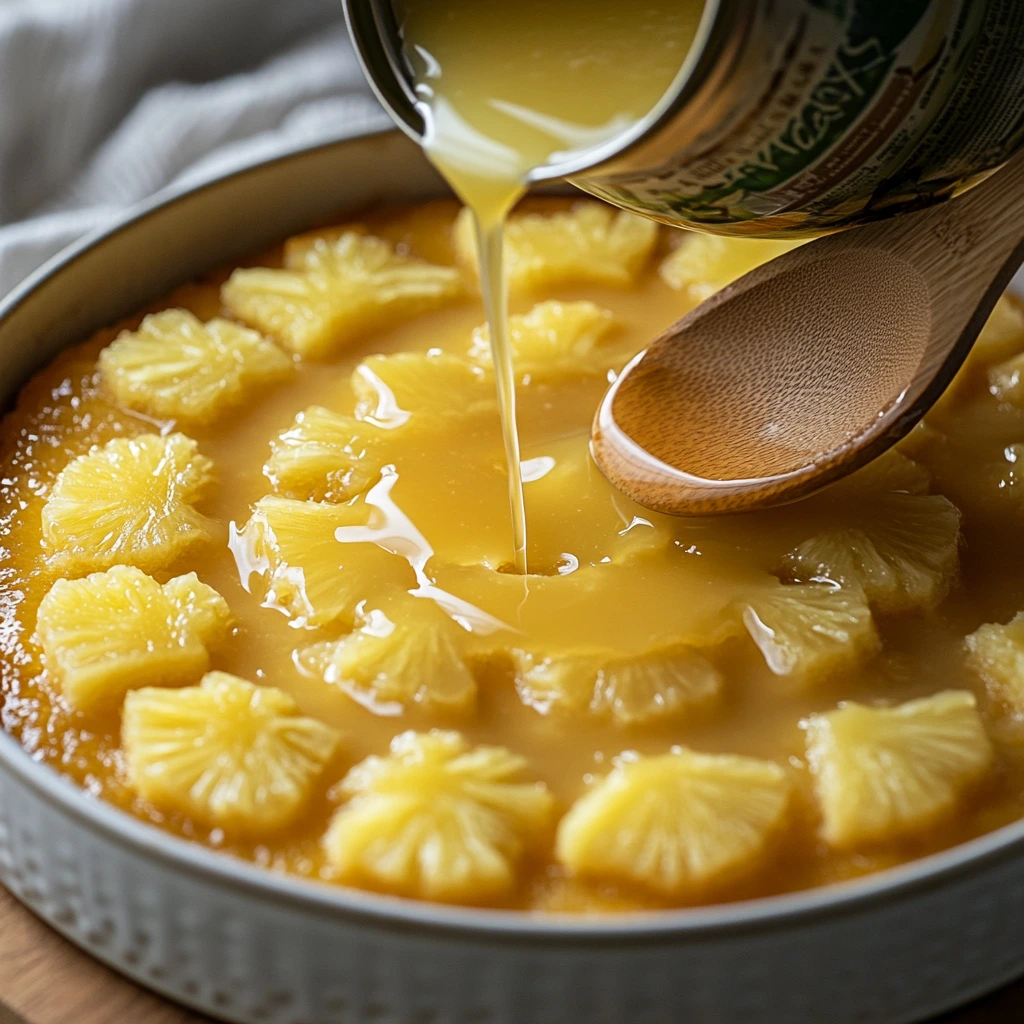
STEP 3: Add the Pineapple
Now, pour the entire can of crushed pineapple—including all that sweet, tangy juice—right over the cake. Spread it around with a spoon so it gets into all those little holes you just made. This is what gives the cake that super moist, tropical burst of flavor in every bite.
Bonus Tip: If you’re short on time, you can do this part and then stick the cake in the fridge for a bit while you prep the next layer.
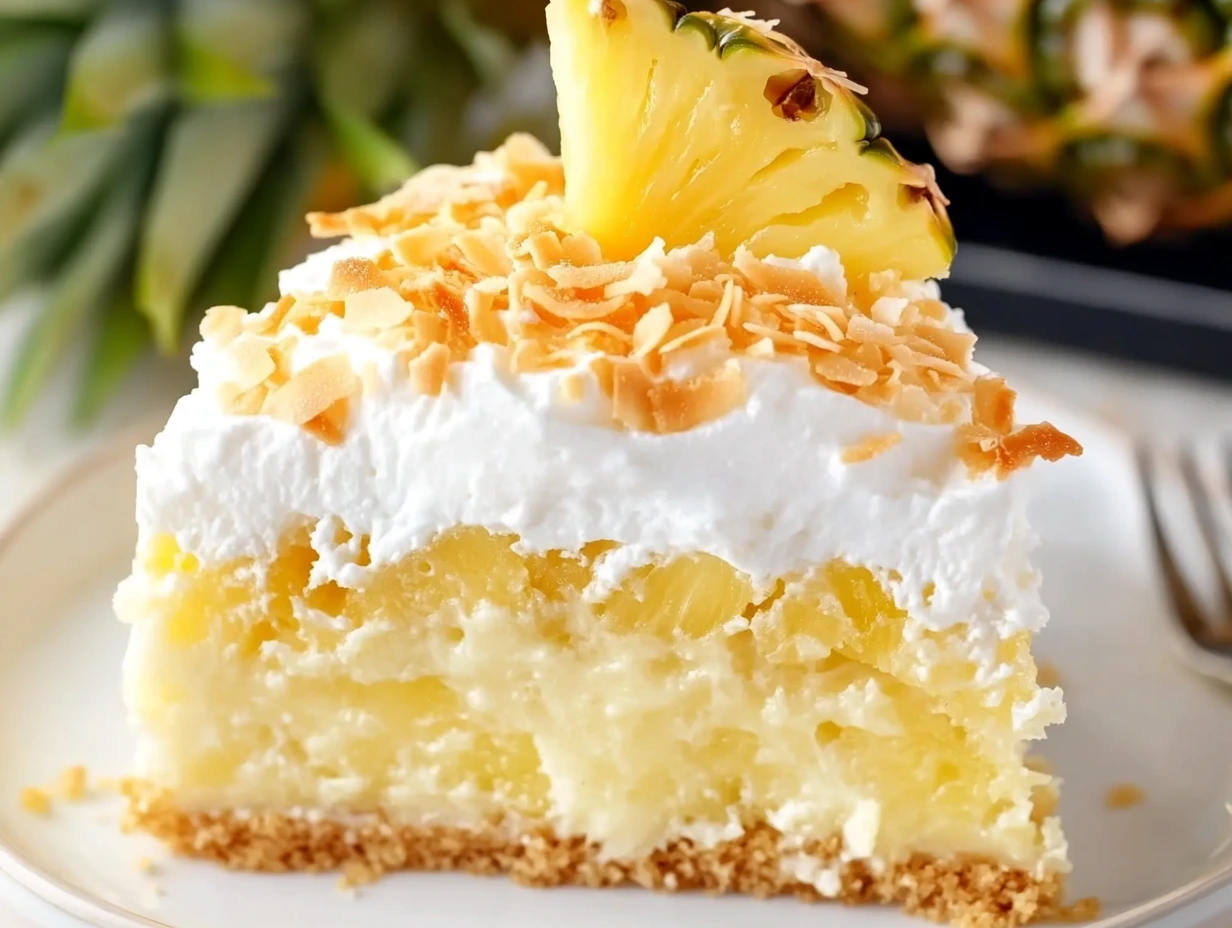
Building the Dreamy Layers of Hawaiian Poke Cake
Alright, so we’ve got our moist yellow cake infused with pineapple juice and crushed pineapple—that tropical base is already tasting like a Hawaiian vacation. But now comes the best part: creamy coconut pudding, fluffy whipped topping, and toasted coconut. This is where all those luscious layers come together to turn a simple sheet cake into something magical.
One of the reasons I love this recipe so much is that every layer adds a new texture and flavor. The pudding adds richness, the whipped topping keeps it light, and the toasted coconut gives just the right crunch. It’s a perfect balance—sweet, refreshing, and totally satisfying.
Let’s get right back into it!
STEP 4: Mix and Add the Coconut Pudding
In a medium-sized mixing bowl, whisk together the instant coconut pudding mix and 1 cup of cold milk. Stir vigorously for about 2 minutes until it thickens. The mixture should be smooth and creamy—no lumps here!
Once the pudding is ready, use a spatula to spread it evenly over the top of your pineapple-soaked cake. This creamy layer will sit beautifully on top and fill in all those little nooks and crannies. Plus, it gives every bite that creamy coconut flavor that just screams “tropical dessert.”
Pro Tip: Make sure your cake has had a few minutes to soak up the pineapple before adding the pudding. That way the layers won’t mix too much, and each one stands out.
STEP 5: Chill the Cake
Once your pudding layer is in place, pop the cake in the fridge for at least 1 hour. This chill time is important—it allows the pudding to fully set and gives the flavors time to meld together. Honestly, I sometimes make this a full day ahead because the flavors get even better overnight.
Shortcut Alert: If you’re in a rush, an hour in the fridge will still do the trick, but longer is always better with poke cakes.
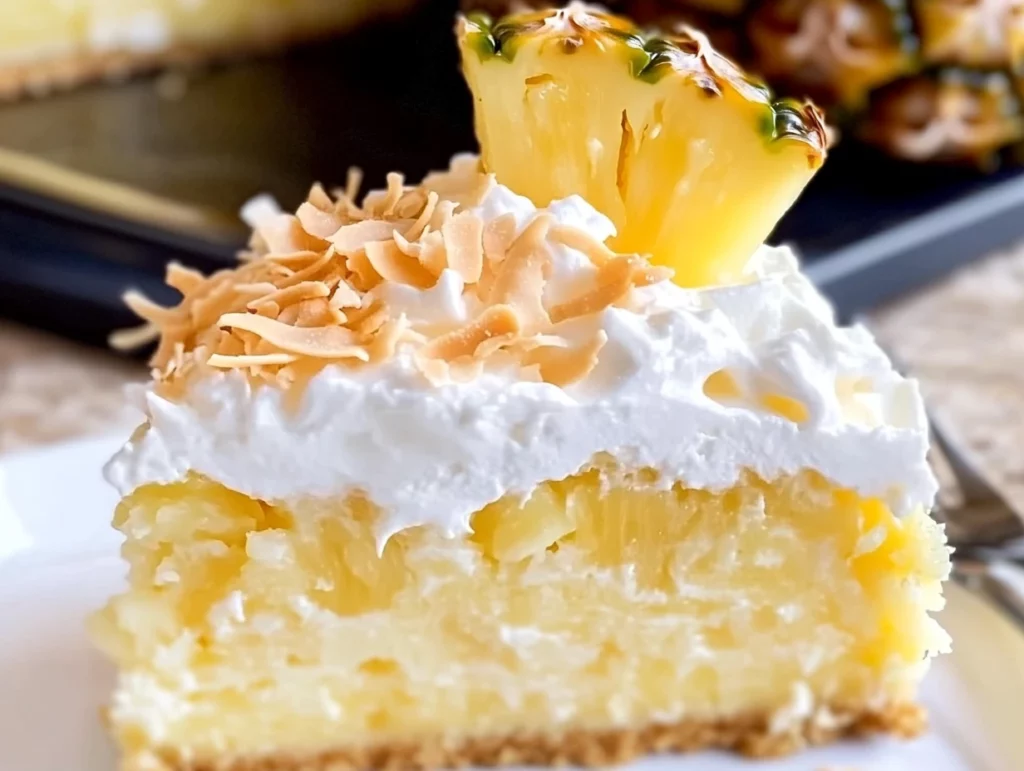
STEP 6: Add Whipped Topping and Toasted Coconut
When your cake is nice and chilled, it’s time for the finishing touches.
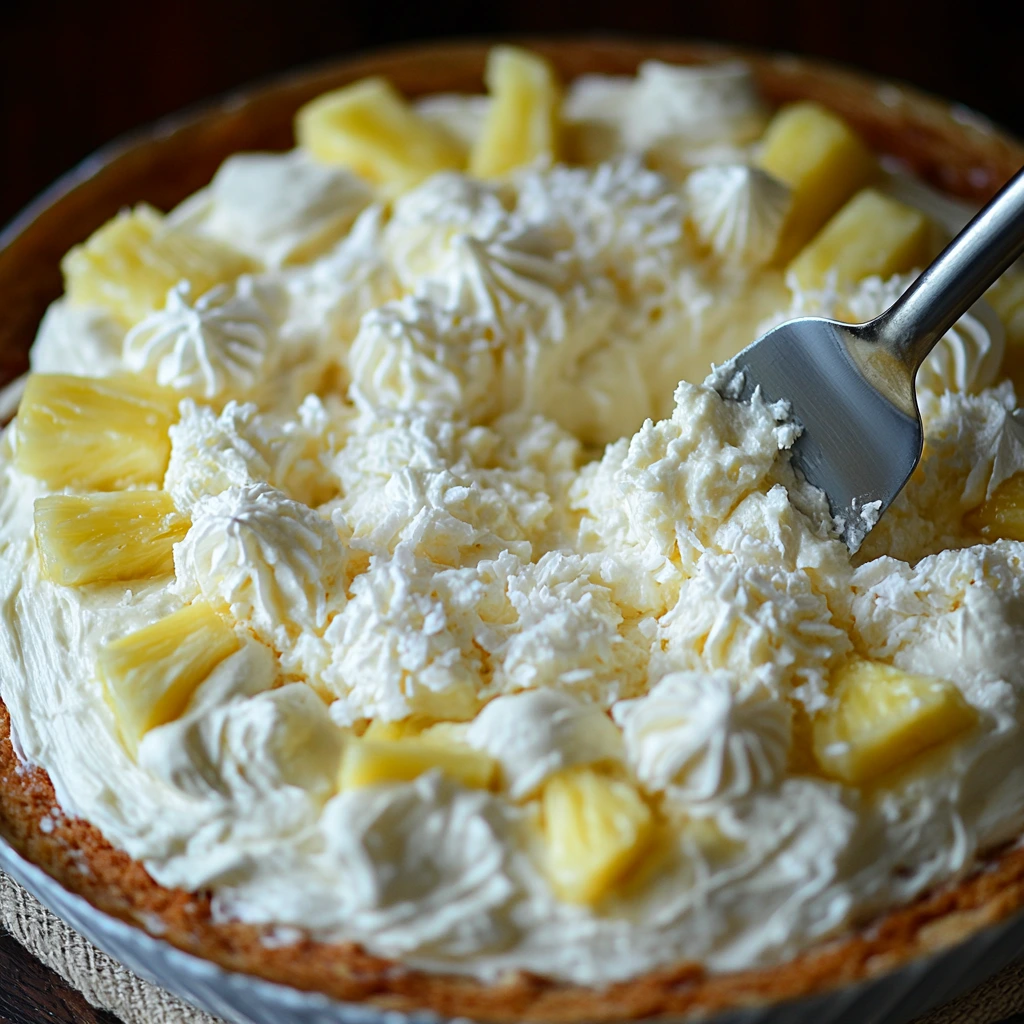
First, spread the thawed whipped topping (like Cool Whip) over the entire surface of the cake. Use a spatula to smooth it out into a light, fluffy layer. This topping adds a cool, creamy finish that complements the richness of the pudding underneath.
Then, sprinkle toasted shredded coconut generously across the top. That hint of crunch and nutty toasted flavor is everything. It adds a little texture and makes the cake look as good as it tastes.
How to Toast Coconut (Quick and Easy)
If you’ve never toasted coconut before, don’t worry—it’s super simple:
-
Preheat your oven to 350°F.
-
Spread the sweetened shredded coconut in an even layer on a baking sheet.
-
Bake for 5 to 10 minutes, stirring every couple of minutes.
-
Watch it closely—it can go from golden brown to burnt fast!
Once your coconut is beautifully golden, let it cool before sprinkling it over your cake.
Tip: You can toast extra coconut and keep it in an airtight container for future desserts or to top oatmeal, yogurt, or even ice cream.
Optional Variations to Try
This Hawaiian Poke Cake is amazing just the way it is, but if you’re feeling adventurous, here are a few fun tweaks:
-
Try banana or vanilla pudding instead of coconut if you want a different flavor profile.
-
Add a layer of sliced bananas or strawberries between the pudding and whipped topping for a fruity twist.
-
Drizzle a little caramel or white chocolate sauce on top for an extra indulgent finish.
This cake is super forgiving and totally customizable, which makes it great for experimenting. Once you get the hang of it, you can mix things up to suit any occasion or craving.
FAQs and Final Tips for the Best Hawaiian Poke Cake
Now that we’ve walked through each delicious step of making this tropical Hawaiian Poke Cake, let’s take a quick pause to go over some common questions that might pop up along the way. Whether it’s your first time making a poke cake or you’re just wondering about storing leftovers, I’ve got you covered.
Frequently Asked Questions
Can I make this cake ahead of time?
Absolutely! This cake actually tastes even better when made in advance. You can make it a full day ahead and store it in the refrigerator. The extra time allows all the flavors to meld beautifully.
Can I use fresh pineapple instead of canned?
Fresh pineapple is delicious, but for this recipe, I recommend sticking with canned crushed pineapple that includes the juice. The juice is essential for soaking into the cake and giving it that signature moist texture.
What can I use instead of coconut pudding?
If coconut isn’t your thing or you can’t find the pudding mix, vanilla or banana instant pudding are great substitutes. They pair wonderfully with the pineapple and still give that tropical vibe.
Do I have to toast the coconut?
You don’t have to, but I highly recommend it. Toasting brings out a rich, nutty flavor and adds a bit of texture that really elevates the cake. It only takes a few minutes and makes a big difference.
Can I freeze Hawaiian Poke Cake?
Freezing isn’t ideal for this particular cake. The texture of the pudding and whipped topping can change once thawed. It’s best enjoyed fresh and stored in the fridge for up to 3-4 days.
Is this recipe good for large gatherings?
Yes! This is one of my go-to desserts for potlucks, BBQs, and holiday parties. It serves 12-15 easily, and you can even double the recipe if you’re feeding a crowd. Just use two 9×13-inch pans and you’re set.
Can I make this gluten-free?
Definitely. Just use a gluten-free yellow cake mix and double-check that your pudding mix and whipped topping are certified gluten-free. The rest of the ingredients are naturally gluten-free.
Final Thoughts and Serving Suggestions
There’s something so comforting and festive about this Hawaiian Poke Cake. It’s light yet indulgent, simple to make but totally crowd-pleasing. The layers of pineapple-soaked cake, coconut pudding, and whipped topping just scream summer, and that golden toasted coconut? It’s the cherry on top—well, figuratively.
I love serving this cake chilled, especially on warm days. If you’re feeling fancy, garnish each slice with a maraschino cherry or a wedge of fresh pineapple. And don’t forget to stash a piece for yourself before setting it out—because once people get a taste, it disappears fast.
This is the kind of recipe you’ll find yourself coming back to over and over. It’s easy, reliable, and always gets rave reviews. So go ahead—gather your ingredients, whip it up, and let me know how it turns out!
Have your own twist on this cake? Maybe a fun variation you’ve tried? Drop it in the comments—I’d love to hear all about it.
PrintHawaiian Poke Cake

This tropical twist on a classic dessert brings a burst of fruity flavor with every bite. Hawaiian Poke Cake features moist yellow cake soaked with sweet pineapple juice and creamy coconut pudding, then topped with whipped topping and toasted coconut for an irresistible treat that’s both refreshing and indulgent.
- Author: Mark's Recipe
Ingredients
1 box yellow cake mix (plus ingredients listed on the box such as eggs, oil, and water)
1 can (20 ounces) crushed pineapple with juice
1 package (3.4 ounces) instant coconut pudding mix
1 cup cold milk
1 container (8 ounces) whipped topping (like Cool Whip), thawed
1 cup sweetened shredded coconut, toasted
Instructions
Prepare the yellow cake mix according to the instructions on the box. Bake in a 9×13-inch baking dish and allow it to cool for about 10 minutes.
While the cake is still warm, use the handle of a wooden spoon to poke holes all over the surface of the cake.
Pour the crushed pineapple with its juice evenly over the cake, allowing the juice to soak in.
In a medium bowl, whisk together the coconut pudding mix and cold milk until thickened, about 2 minutes. Spread the pudding evenly over the top of the cake.
Refrigerate the cake for at least 1 hour to allow it to set and chill completely.
Once chilled, spread the whipped topping evenly over the pudding layer.
Sprinkle the toasted shredded coconut over the whipped topping before serving.
Notes
To toast the coconut, spread it on a baking sheet and bake at 350°F for 5-10 minutes, stirring occasionally until golden brown. You can substitute vanilla or banana pudding if you prefer a different flavor. This cake is best served chilled and can be made a day in advance for convenience. Perfect for summer gatherings or whenever you’re craving a taste of the tropics.


")
