If there’s one combo that never goes out of style, it’s peanut butter and bananas. It’s nostalgic, satisfying, and seriously comforting. But if you’ve only ever had it slapped between two slices of bread, cold and straight from the pantry—friend, you’re missing out. Let me introduce you to the grilled peanut butter banana sandwich. Imagine golden, buttery bread crisped to perfection, with warm, melty peanut butter oozing around naturally sweet banana slices. It’s the grown-up version of a childhood favorite… and honestly, it’s everything.
This sandwich is one of those go-to recipes that I keep in my back pocket. Whether I need a quick breakfast, an easy afternoon snack for the kids, or a no-fuss dessert after dinner, it always hits the spot. And the best part? You probably have everything you need sitting in your kitchen right now.
I first made this on a lazy Sunday when I didn’t feel like baking but craved something cozy and indulgent. My son had asked for a banana and peanut butter toast, and somehow, the skillet was already hot from breakfast. That was the lightbulb moment—why not grill it? The result was so good that it quickly became a regular on our menu.
Let’s dive into how to make this warm, melty dream come true.
Ingredients You’ll Need:
-
4 slices of bread (white, whole wheat, or sourdough—whatever you love!)
-
4 tablespoons creamy peanut butter
-
1 ripe banana, sliced into rounds
-
2 tablespoons unsalted butter, softened
-
1 teaspoon honey (optional)
-
A pinch of ground cinnamon (optional)
Tip: Ripe but firm bananas work best. If they’re too soft, they’ll get mushy when heated.
STEP 1: Spread the Peanut Butter
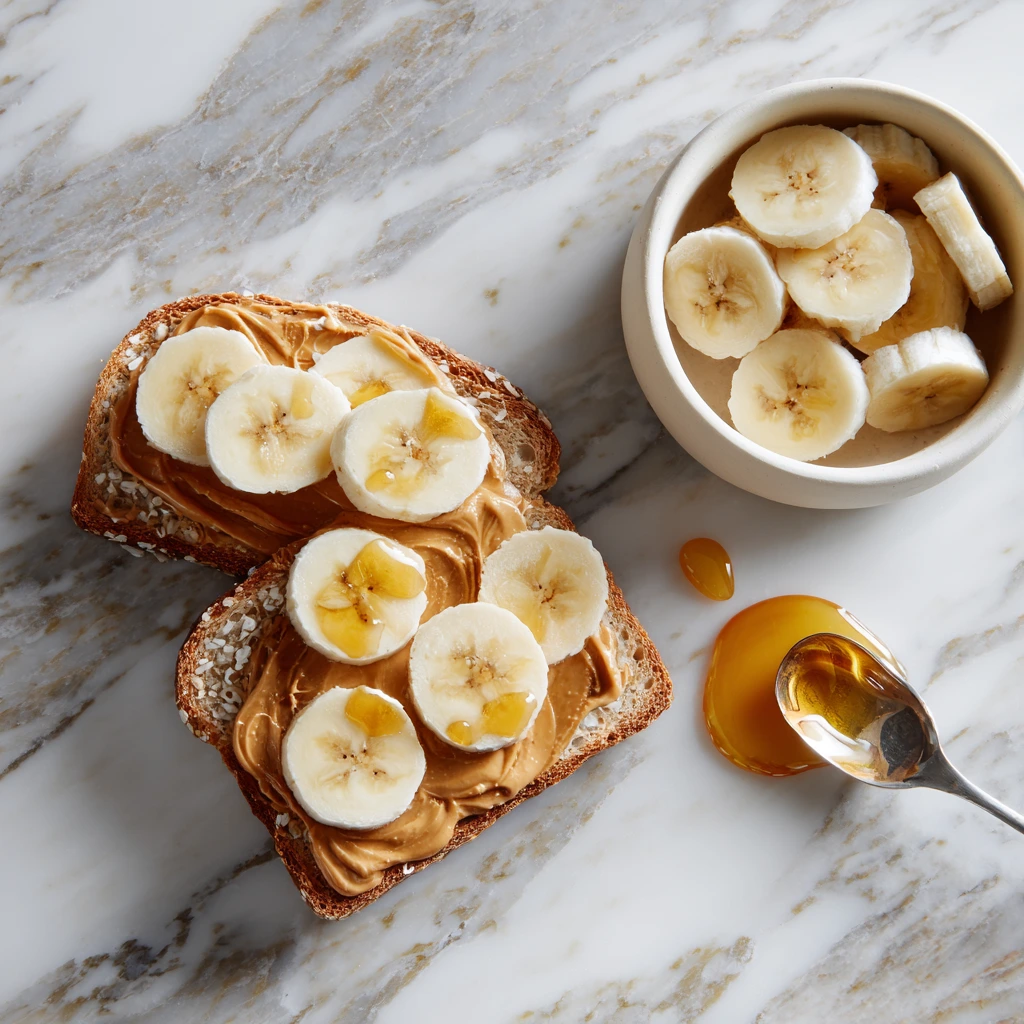
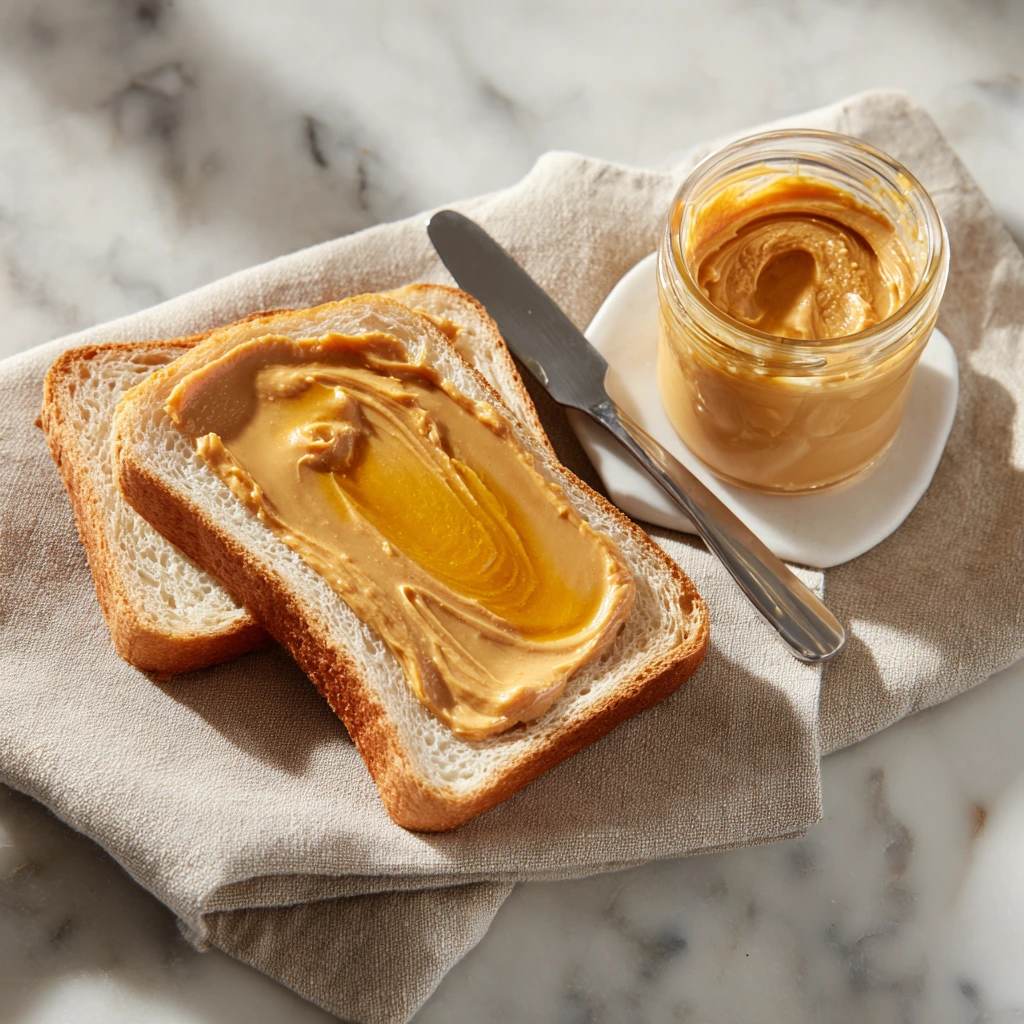
Start by laying out two slices of your favorite bread. Spread about 2 tablespoons of peanut butter on each slice. Try to get it all the way to the edges—every bite should be loaded with flavor.
This is where you can get creative. If you’re feeling fancy, drizzle a little honey over the peanut butter for added sweetness or sprinkle a pinch of ground cinnamon for a warm, spiced touch. These little extras really elevate the sandwich and give it that something special.
STEP 2: Add the Banana Slices
Take your ripe banana and slice it into thin rounds—about ¼ inch thick is perfect. Arrange the slices in a single layer over the peanut butter. You want full coverage here so that every bite has that creamy banana goodness.
Once you’ve got your banana layer set, place the second slice of bread on top to complete the sandwich.
STEP 3: Butter the Bread
This step is key to getting that golden, crispy exterior. Take your softened butter and spread it over the outside of one of the sandwich slices. You’ll only butter one side for now—the one that’s going into the skillet first.
If your butter isn’t soft enough to spread, just pop it in the microwave for a few seconds. You don’t want melted butter—just soft and spreadable.
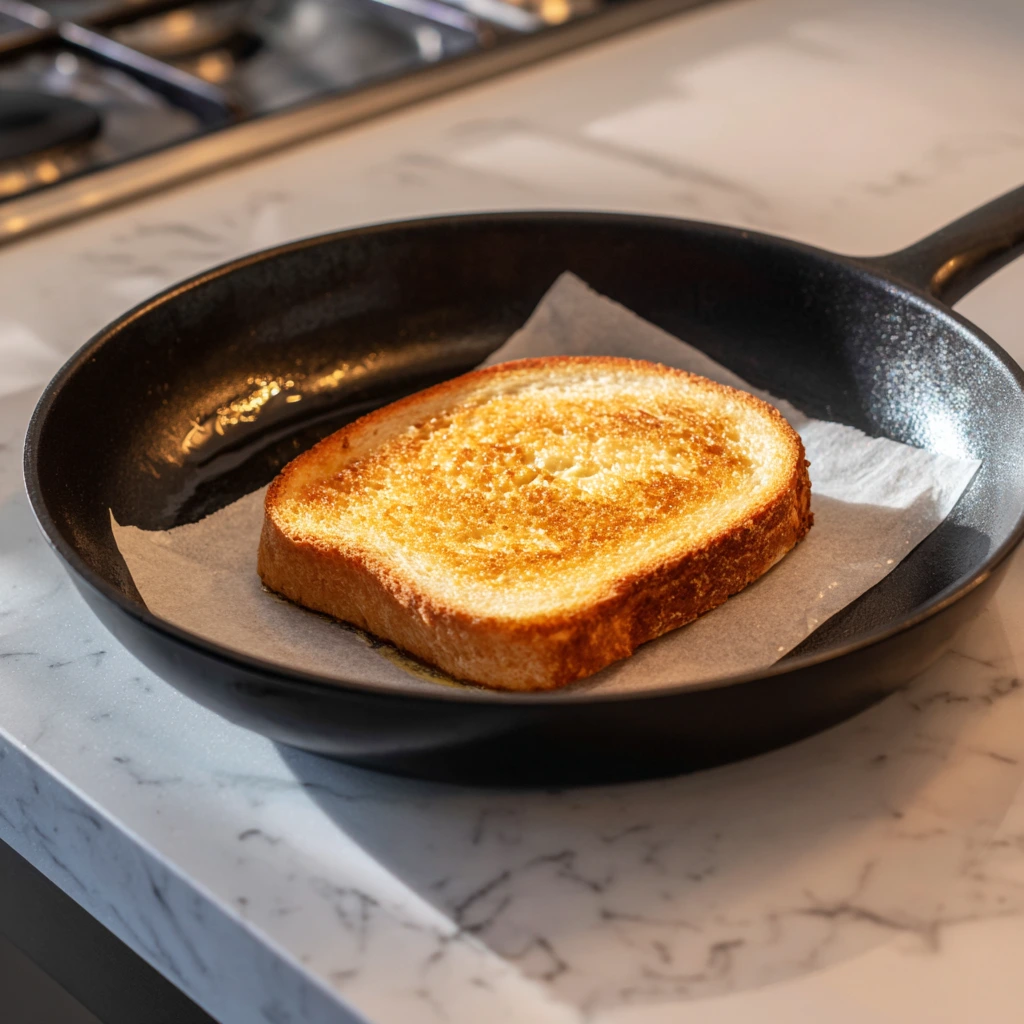
STEP 4: Time to Grill
Heat a skillet or griddle over medium heat. Once it’s hot, gently place your sandwich butter-side down onto the skillet. While it starts sizzling, butter the top slice of bread.
Let it cook for about 2–3 minutes, or until the underside is beautifully golden brown. Then, using a spatula, carefully flip the sandwich over and cook the other side for another 2–3 minutes.
What you’re looking for is even browning on both sides and a nice, warm center where the peanut butter is starting to melt and the bananas soften just slightly.
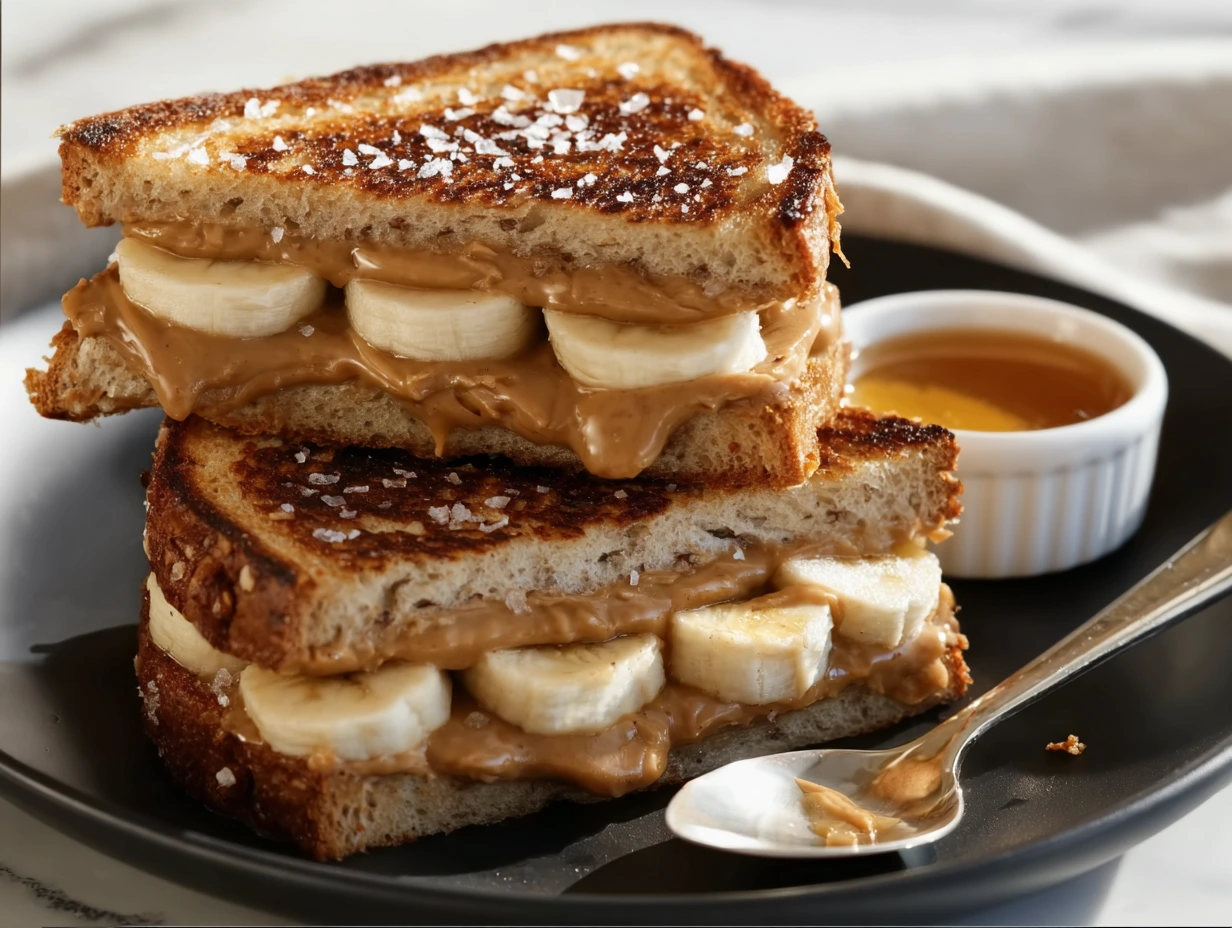
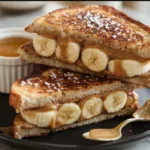
Grilled Peanut Butter Banana Sandwich: Crispy, Gooey Comfort Food
We’ve already built the base of our warm, melty masterpiece—but now comes the best part: finishing it up and digging in. If you’ve ever had a grilled cheese sandwich with that perfect, buttery crust and oozy filling, then you’ll understand the magic that happens here too. But this time, it’s a sweet, nutty, and fruity combo that’s pure bliss.
What I love about this sandwich is that it’s endlessly flexible. You can keep it simple with just the basics or switch things up depending on your cravings (or whatever’s left in your pantry). In this next part, we’ll walk through the final cooking steps, share a few pro tips, and talk about some delicious ways to change things up.
STEP 5: Flip and Finish
After cooking the first side to a beautiful golden brown (about 2–3 minutes), it’s time to flip the sandwich. Use a spatula to carefully turn it over—don’t rush it, especially if the bread is delicate. The peanut butter will be starting to melt, and the banana slices will soften just enough to become extra gooey and flavorful.
Now, let the second side cook for another 2–3 minutes. You’re looking for a golden, crispy exterior and a slightly soft middle. By this point, the peanut butter should be warm and melty, binding the banana slices together like the world’s coziest filling.
If the bread starts browning too quickly, turn the heat down a bit. Every stove is different, and you want a slow, even toast—not burnt edges with a cold center.
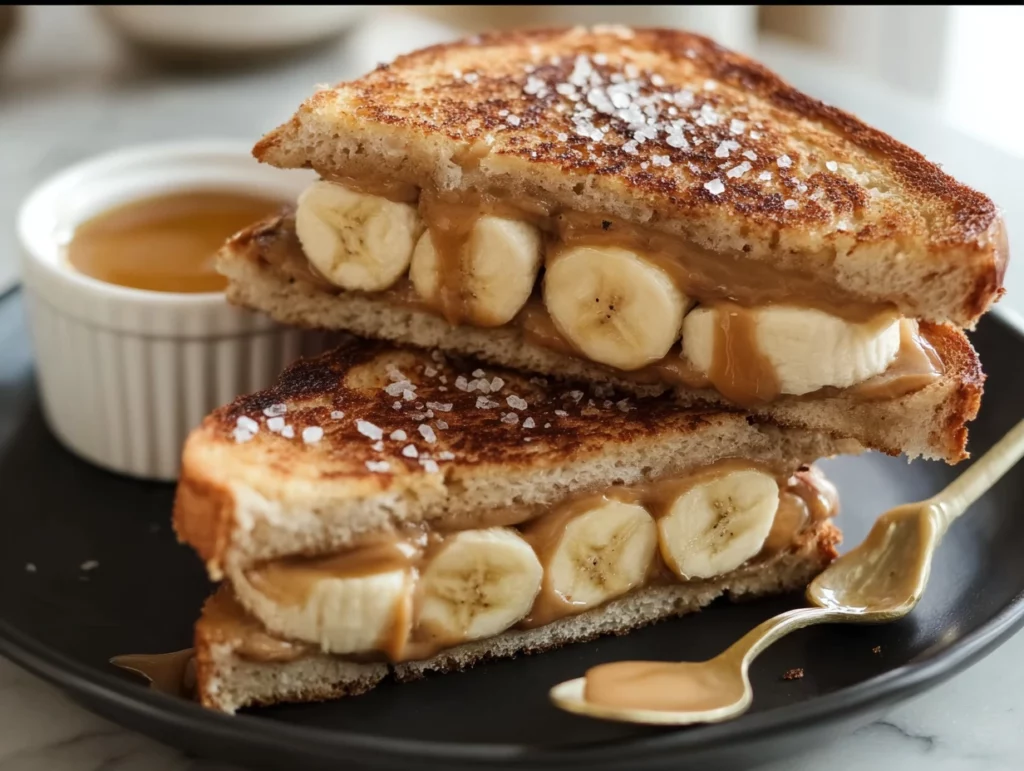
STEP 6: Let It Rest (Just for a Minute!)
Once your sandwich is evenly grilled on both sides, remove it from the skillet and transfer it to a plate. Now, here’s the hard part: let it sit for a minute or so before slicing. I know, I know—it smells amazing, and you’ll want to dive right in. But giving it just a minute helps the filling settle so you don’t end up with peanut butter spilling out everywhere when you cut it.
After that quick rest, slice your sandwich in half (diagonally, if you want the classic café look), and it’s ready to serve.
Tips for the Perfect Grilled Peanut Butter Banana Sandwich
-
Use Day-Old Bread for Best Texture
Slightly stale bread holds up better to the heat and butter without going soggy. It crisps beautifully while keeping the inside soft and warm. -
Don’t Overfill the Sandwich
It’s tempting to load up on banana and peanut butter, but too much can make flipping difficult or cause everything to ooze out. Keep it balanced—enough filling for flavor but not so much that it overwhelms. -
Try a Nut Butter Swap
Not a peanut butter fan? Use almond butter or cashew butter for a different flavor. Just make sure it’s the creamy kind so it spreads and melts easily. -
Add Crunch
For a bit of texture, sprinkle in some chopped nuts (like walnuts or pecans) along with the banana slices. They’ll soften slightly from the heat but still add a nice bite. -
Sweeten It Up Naturally
If you’ve got a real sweet tooth, add a drizzle of honey or a thin layer of jam (like strawberry or raspberry) inside the sandwich. Just a little bit goes a long way, and it pairs beautifully with the bananas.
Serving Ideas
-
Breakfast Upgrade
Pair the sandwich with a cup of coffee or a smoothie for a quick morning meal that keeps you full and satisfied. -
Afternoon Pick-Me-Up
Cut the sandwich into quarters and serve with a glass of milk for a nostalgic, after-school snack kind of feel. -
Dessert Twist
Add a scoop of vanilla ice cream on the side and turn it into an indulgent dessert. It’s like banana bread meets warm pie meets heaven.
Make-Ahead and Storage Notes
While this sandwich is definitely best fresh and hot off the skillet, you can prep parts of it ahead of time. Pre-slice the bananas and refrigerate them with a little lemon juice to prevent browning, or even assemble the sandwich (without grilling) and store it in the fridge for a few hours until you’re ready to cook.
Reheating isn’t ideal, but if you have leftovers, you can warm the sandwich in a toaster oven or skillet on low heat—just avoid the microwave, which will make the bread soggy.
Grilled Peanut Butter Banana Sandwich: All Your Questions Answered
Now that we’ve walked through all the steps and shared some tips for making the ultimate grilled peanut butter banana sandwich, let’s tackle a few common questions that tend to pop up. Whether you’re wondering about ingredient swaps or how to make it ahead, I’ve got you covered. After all, the best recipes are the ones that fit seamlessly into your life—and taste amazing while they do.
Frequently Asked Questions
1. Can I use crunchy peanut butter instead of creamy?
Absolutely! If you like a bit of extra texture, crunchy peanut butter works great in this sandwich. Just be aware that it won’t melt quite as smoothly, but the flavor and bite are fantastic.
2. What’s the best type of bread to use?
Honestly, it comes down to personal preference. White bread gives you that classic, diner-style feel, while whole wheat adds a little nuttiness and extra fiber. Sourdough is sturdier and offers a nice tang that balances the sweetness of the banana and peanut butter. Just make sure your bread isn’t too soft, or it might tear when flipping.
3. How can I make this sandwich vegan?
Super easy! Just swap the butter for a plant-based version (like vegan margarine or coconut oil) and double-check that your bread doesn’t contain milk or eggs. Most peanut butters are already vegan, so no changes needed there.
4. Can I add chocolate?
Yes, and you definitely should if you’re in the mood for a dessert-style sandwich. A few mini chocolate chips or a light spread of Nutella can take this to a whole new level. Just don’t overload it or the filling might get messy when it melts.
5. How do I prevent the bread from getting soggy?
A few things help here: use firm, slightly stale bread; don’t overload the filling; and make sure your skillet is preheated so the bread crisps up quickly. You can also lightly toast the inside of the bread before assembling if you want extra insurance.
6. Can I make this in a panini press or sandwich maker?
Definitely! A panini press works beautifully for this sandwich. It applies even pressure and heat, giving you a consistent golden crust and a gooey inside. Just make sure not to overfill so it doesn’t ooze out the sides.
7. Is this freezer-friendly?
This sandwich is best fresh, but if you’re really set on freezing it, you can try assembling the sandwich (ungrilled), then wrapping it tightly and freezing. When ready to eat, grill straight from frozen on low heat until warmed through. Just note that the texture of the banana may change slightly.
Final Thoughts: Why You’ll Keep Coming Back to This Sandwich
There’s something incredibly satisfying about turning a few simple ingredients into something that feels like a treat. This grilled peanut butter banana sandwich is more than just a snack—it’s cozy, comforting, and endlessly customizable. It’s the kind of food you make when you want something fast and familiar, but also a little indulgent.
Whether you’re making it for breakfast, as a surprise after-school snack, or a lazy weekend dessert, this sandwich never fails to deliver. I’ve made it with almond butter, added thin apple slices for crunch, even snuck in a few chocolate chips when no one was looking—and every version has been a hit.
PrintGrilled Peanut Butter Banana Sandwich
A warm, gooey twist on the classic peanut butter and banana combo, this sandwich is crisp on the outside and melty on the inside. Golden-browned bread gives way to creamy peanut butter and sweet banana slices, with an optional hint of honey or cinnamon for extra depth. Perfect for breakfast, an afternoon snack, or a simple dessert.
- Author: Mark's Recipe
Ingredients
4 slices of bread (white, whole wheat, or sourdough)
4 tablespoons creamy peanut butter
1 ripe banana, peeled and sliced into rounds
2 tablespoons unsalted butter, softened
1 teaspoon honey (optional)
A pinch of ground cinnamon (optional)
Instructions
Begin by spreading two tablespoons of peanut butter evenly over one side of two bread slices. If using honey or cinnamon, drizzle honey over the peanut butter and sprinkle the cinnamon now. Arrange the banana slices in a single layer atop the peanut butter on each slice. Top with the remaining bread slices to form two sandwiches.
Heat a skillet or griddle over medium heat and spread half of the softened butter on the outer face of one sandwich, then place it butter-side down in the pan. Spread the remaining butter on the top face of that sandwich.
Cook until the bottom slice of bread turns golden brown and crisp, about two to three minutes. Carefully flip the sandwich and cook the other side until it matches in color and the filling is warmed through, another two to three minutes.
Remove the sandwich from the skillet and let it rest for a minute before slicing in half. Serve immediately to enjoy the contrast of crisp bread and molten peanut butter and banana.
Notes
Using day-old bread helps achieve a sturdier, crunchier exterior without becoming soggy.
Ripe but firm bananas work best to prevent the filling from becoming too soft or runny.
For a nuttier flavor, swap creamy peanut butter for almond or cashew butter.
To make it vegan, use dairy-free butter and check that your bread contains no milk ingredients.


")
