
If you’re anything like me, you’re always on the hunt for that go-to dinner recipe that checks all the boxes — easy, quick, flavorful, and just a little bit fancy. Well, this Garlic Parmesan Chicken is exactly that. It’s the kind of dish that makes you feel like you’ve pulled off something special in the kitchen without spending hours over the stove. Juicy, golden chicken with a buttery garlic base and a cheesy, crisp topping? Count me in.
This recipe is one of those “impress without stress” meals. It’s simple enough to make on a Tuesday night, but it’s elegant enough to serve when you’ve got friends or family coming over. I actually first made this on a whim when we had company and I hadn’t planned anything fancy. It ended up being the star of the night — and now it’s on permanent rotation in our dinner schedule.
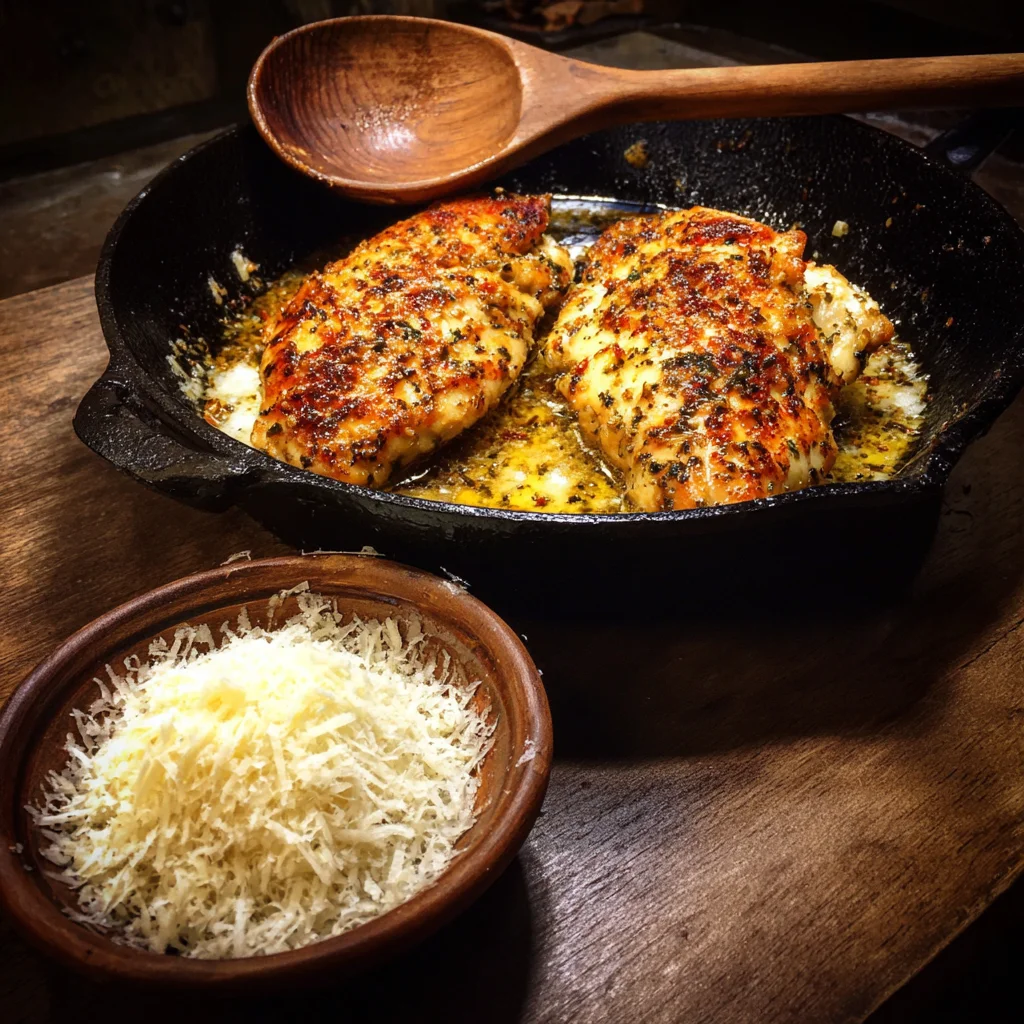
Let’s talk about what makes it shine: we’re taking boneless, skinless chicken breasts and seasoning them up with just the right amount of spice and garlic. A quick pan sear gets them beautifully golden before we layer on the good stuff — melted butter, garlic, and a generous blanket of grated Parmesan cheese. The whole thing finishes off in the oven so the crust can turn perfectly crisp while the inside stays juicy and tender. And honestly, the leftovers? They’re just as good (if not better) the next day.
Ready to get started? Let’s break it down step-by-step.
Ingredients You’ll Need
-
2 boneless, skinless chicken breasts
-
½ teaspoon salt
-
½ teaspoon black pepper
-
1 teaspoon garlic powder
-
½ teaspoon paprika
-
1 tablespoon olive oil
-
2 tablespoons butter
-
3 garlic cloves, minced
-
½ cup grated Parmesan cheese
-
2 tablespoons chopped fresh parsley (optional)
STEP 1: Preheat and Season
Start by preheating your oven to 375°F. It’s always best to give your oven time to come to temperature while you prep everything else.
Then, grab your chicken breasts and pat them dry with paper towels — this helps them sear better and get that golden crust we all love. Season both sides with salt, black pepper, garlic powder, and paprika. This simple blend gives the chicken a well-rounded flavor without overpowering the Parmesan.

STEP 2: Sear the Chicken
Heat a large oven-safe skillet over medium heat and add the olive oil. Once it’s hot (you can test it by flicking a drop of water in to see if it sizzles), add your seasoned chicken breasts.
Let them sear undisturbed for about 3 to 4 minutes on each side. You’re looking for that deep golden color on both sides — it not only adds flavor, but also locks in those juices.
Once both sides are seared, remove the chicken from the skillet and set it aside on a plate. Don’t worry — it’s not cooked through yet. We’ll finish it off in the oven.

STEP 3: Make the Garlic Butter Base
Lower the heat to low and add your butter to the same skillet. As it melts, scrape up any brown bits left from the chicken — they’re packed with flavor. Add your minced garlic and stir it around for about 1 to 2 minutes, just until it’s fragrant.
Be careful here — garlic burns quickly, so keep an eye on it and make sure it stays a light golden color. This garlic butter becomes the rich, flavorful base for the chicken, and trust me, it makes a big difference.
Baking, Topping & Serving Tips
Now that we’ve seared our chicken and created that fragrant garlic butter base, it’s time to bring everything together — and this is where the real magic happens. In this second part of the recipe, we’ll finish assembling the dish, bake it until crispy and golden, and talk about some of my favorite ways to serve and customize it.
Honestly, once you get to this step, your kitchen is going to smell amazing. That mix of garlic, butter, and golden Parmesan cheese is enough to make everyone come running to the table. So let’s not keep them waiting too long.

STEP 4: Add Chicken Back & Top with Parmesan
Go ahead and return the seared chicken breasts to your skillet — nestle them right into that buttery garlic mixture you just made. You’ll want to spoon some of that garlicky goodness right over the tops of the chicken. Don’t be shy — this is where the flavor really starts to soak in.
Now, grab your grated Parmesan cheese and sprinkle it generously over the top of each piece. I like using freshly grated Parmesan because it melts better and gives a crispier finish, but pre-grated works in a pinch too. Just make sure it’s a dry grated cheese (not the pre-shredded bagged kind meant for pizza), or it won’t crisp up properly.
STEP 5: Bake to Finish
With everything in place, transfer your skillet to the preheated 375°F oven. Let the chicken bake for 15 to 18 minutes, or until the internal temperature hits 165°F in the thickest part.
You’ll notice the Parmesan starts to melt, then turn golden and a little crispy on top — that’s exactly what you want. If you’re after an extra crispy top layer (and who isn’t?), you can switch on the broiler for the last 2 to 3 minutes of baking. Just keep a close eye on it — Parmesan can go from golden to burnt fast under the broiler.
STEP 6: Rest and Garnish
Once the chicken is done, remove the skillet from the oven and let everything rest for a few minutes. This gives the juices inside the chicken time to redistribute so your meat stays tender and juicy when you cut into it.
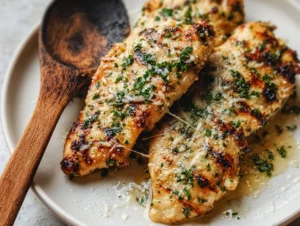
Right before serving, sprinkle a little chopped fresh parsley over the top if you have it. It adds a pop of color and a fresh, herby finish that pairs beautifully with the richness of the dish.
Tips for the Best Garlic Parmesan Chicken
I’ve made this recipe a lot over the years, and here are a few little tweaks and tips that can make a big difference:
-
Use an oven-safe skillet: Cast iron is perfect for this recipe because it retains heat well and gives you a great sear. Just make sure whatever skillet you use can safely go from stovetop to oven.
-
Choose the right Parmesan: As mentioned earlier, freshly grated Parmesan is best. It melts better, crisps up more evenly, and has a deeper flavor. Avoid anything too soft or moist, or you’ll lose that crusty finish.
-
Don’t skip the sear: Searing the chicken before baking is key for flavor and texture. It helps lock in moisture and adds that beautiful golden crust underneath the cheese.
-
Broil for a crunchy finish: A couple of minutes under the broiler at the end gives the Parmesan that irresistible golden crispiness. Just watch it closely.
Serving Suggestions
This Garlic Parmesan Chicken is super versatile and pairs well with all sorts of sides. Here are a few of my go-to combinations:
-
With veggies: Serve it alongside roasted broccoli, asparagus, or Brussels sprouts for a well-rounded meal.
-
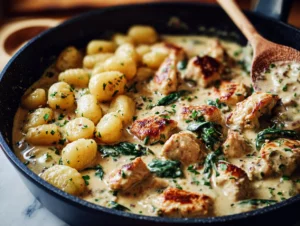
Over pasta: Toss your favorite pasta in a light cream or garlic butter sauce and top it with sliced chicken for a satisfying comfort dinner.
-
On salad: Thinly slice any leftovers and toss them over a Caesar or spinach salad for a quick and flavorful lunch the next day.
-
With mashed potatoes: Garlic mashed potatoes are a natural match and soak up all that buttery sauce from the skillet beautifully.
FAQ & Final Thoughts
We’ve gone through all the steps — from seasoning and searing to that golden oven finish — and by now, your Garlic Parmesan Chicken should be looking (and smelling) irresistible. Whether you’re planning to serve it with pasta, veggies, or just enjoy it on its own, this is the kind of recipe that delivers every single time.
Before we wrap things up, let’s take a moment to go through some frequently asked questions. These are the little details that can make all the difference when you’re cooking this for the first time — or the tenth.

Frequently Asked Questions
1. Can I use chicken thighs instead of chicken breasts?
Absolutely. Boneless, skinless chicken thighs will work just fine. They’re often juicier and more forgiving if you overcook them slightly. Just keep in mind the cooking time may need to be adjusted depending on thickness — check for an internal temperature of 165°F.
2. What’s the best Parmesan to use for this recipe?
Freshly grated Parmesan from a block will give you the best flavor and texture. Pre-grated can work in a pinch, but avoid bagged shredded Parmesan — it often contains anti-caking agents that prevent proper melting and crisping.
3. How do I store and reheat leftovers?
Store leftovers in an airtight container in the fridge for up to 3 days. Reheat in a 350°F oven for about 10 minutes to maintain that crispy topping. Microwaving works too, but you’ll lose some of the texture.
4. Can I make this recipe ahead of time?
You can prep the chicken by seasoning and searing it ahead of time, then refrigerate until ready to bake. When you’re ready to serve, just top with garlic butter and Parmesan, and finish it in the oven as directed.
5. Is it possible to make this dish gluten-free?
Yes! This recipe doesn’t contain flour or breadcrumbs, so it’s naturally gluten-free. Just double-check that your Parmesan and any sides you serve with it are also gluten-free.
6. Can I add breadcrumbs for extra crunch?
You can! Mix a couple tablespoons of seasoned or panko breadcrumbs with the Parmesan before sprinkling it on top of the chicken. It’ll give a slightly thicker crust with extra crunch.
7. What can I use instead of fresh parsley?
If you don’t have fresh parsley, you can skip it or use a sprinkle of dried parsley or even basil for a touch of color and flavor.
Final Thoughts: Your New Weeknight Favorite
Garlic Parmesan Chicken is one of those recipes that feels like comfort food, but with a little extra polish. It’s quick enough for busy weeknights, yet fancy enough for dinner guests. And it’s hard not to love a dish that’s full of garlic, butter, and melty cheese — especially when it comes together in just about 35 minutes from start to finish.
I love how versatile this recipe is. It works with just about any side dish, it’s easy to customize with ingredients you already have on hand, and it even makes amazing leftovers. Honestly, once you make it the first time, I wouldn’t be surprised if it becomes a regular in your rotation.
PrintGarlic Parmesan Chicken

Garlic Parmesan Chicken is a savory, crispy, and incredibly flavorful dish that’s easy enough for a weeknight dinner but satisfying enough to serve guests. Juicy chicken breasts are coated in a garlic and Parmesan cheese crust, pan-seared until golden, then finished in the oven for a crispy, cheesy finish. The result is a juicy, tender interior with a golden, flavorful crust that pairs well with vegetables, pasta, or salad.
- Author: Mark's Recipe
Ingredients
2 boneless, skinless chicken breasts
½ teaspoon salt
½ teaspoon black pepper
1 teaspoon garlic powder
½ teaspoon paprika
1 tablespoon olive oil
2 tablespoons butter
3 garlic cloves, minced
½ cup grated Parmesan cheese
2 tablespoons chopped fresh parsley (optional)
Instructions
1️⃣ Preheat the oven to 375°F. Pat the chicken breasts dry and season both sides with salt, pepper, garlic powder, and paprika.
2️⃣ In a large oven-safe skillet, heat olive oil over medium heat. Add the chicken and sear for 3 to 4 minutes on each side until golden brown. Remove chicken and set aside.
3️⃣ In the same skillet, reduce the heat to low and add the butter. Once melted, stir in the minced garlic and cook for 1 to 2 minutes until fragrant but not browned.
4️⃣ Return the chicken to the skillet and spoon some of the garlic butter over each piece. Sprinkle Parmesan cheese generously over the tops of the chicken breasts.
5️⃣ Transfer the skillet to the oven and bake for 15 to 18 minutes, or until the internal temperature reaches 165°F and the Parmesan is melted and golden.
6️⃣ Remove from the oven and let rest for a few minutes. Garnish with fresh parsley if desired and serve warm.
Notes
For extra crispiness, use freshly grated Parmesan and broil for the last 2 to 3 minutes of baking. This recipe can easily be doubled for more servings. Serve with roasted vegetables, garlic mashed potatoes, or over pasta with a light cream sauce. Leftovers make a great addition to sandwiches or salads the next day.
")
