There’s something about a chili cheese dog that just hits the spot. Maybe it’s the nostalgic feel of summers at the ballpark or the gooey, cheesy, savory bite that satisfies on every level. Now, imagine taking that classic American favorite and turning it into a bubbly, family-style casserole that’s perfect for game day, potlucks, or an easy weeknight dinner. That’s exactly what this Fully Loaded Classic Chili Cheese Dog Casserole delivers—comfort food at its finest with a playful twist.
This dish takes everything you love about chili cheese dogs—juicy hot dogs, beefy chili, melty cheese—and bakes it all under a golden biscuit topping. It’s hearty, it’s crowd-pleasing, and most importantly, it’s super simple to put together. I’ve made this for football Sundays, family dinners, and even late-night cravings when we wanted something indulgent and easy. Every single time, it disappears fast. Even the picky eaters in my house go back for seconds!
Whether you’re hosting friends or feeding a hungry crew, this chili cheese dog casserole is one of those dishes that looks impressive but doesn’t require a lot of fuss. You probably have most of the ingredients on hand, and you can totally customize it with toppings to suit your crowd. Let’s dive into how to make this satisfying meal from scratch.
![]()
INGREDIENTS YOU’LL NEED
For the chili layer:
-
1 lb ground beef
-
1 small onion, diced
-
1 garlic clove, minced
-
1 (15 oz) can tomato sauce
-
1 tbsp tomato paste
-
1 tbsp chili powder
-
1 tsp cumin
-
Salt and pepper to taste
For the casserole:
-
6–8 hot dogs, halved lengthwise
-
1½ cups shredded cheddar cheese
-
1 can refrigerated biscuit dough (8 biscuits) or 1 tube crescent roll dough
Optional toppings:
-
Chopped onions
-
Sliced jalapeños
-
Chopped pickles
-
Mustard or ketchup drizzle
STEP 1: PREHEAT & PREPARE YOUR BAKING DISH
Start by preheating your oven to 375°F (190°C). You’ll want to grease a 9×13-inch baking dish with a bit of butter or nonstick spray—this helps keep all those cheesy, chili layers from sticking and makes cleanup easier later.
STEP 2: COOK THE CHILI LAYER
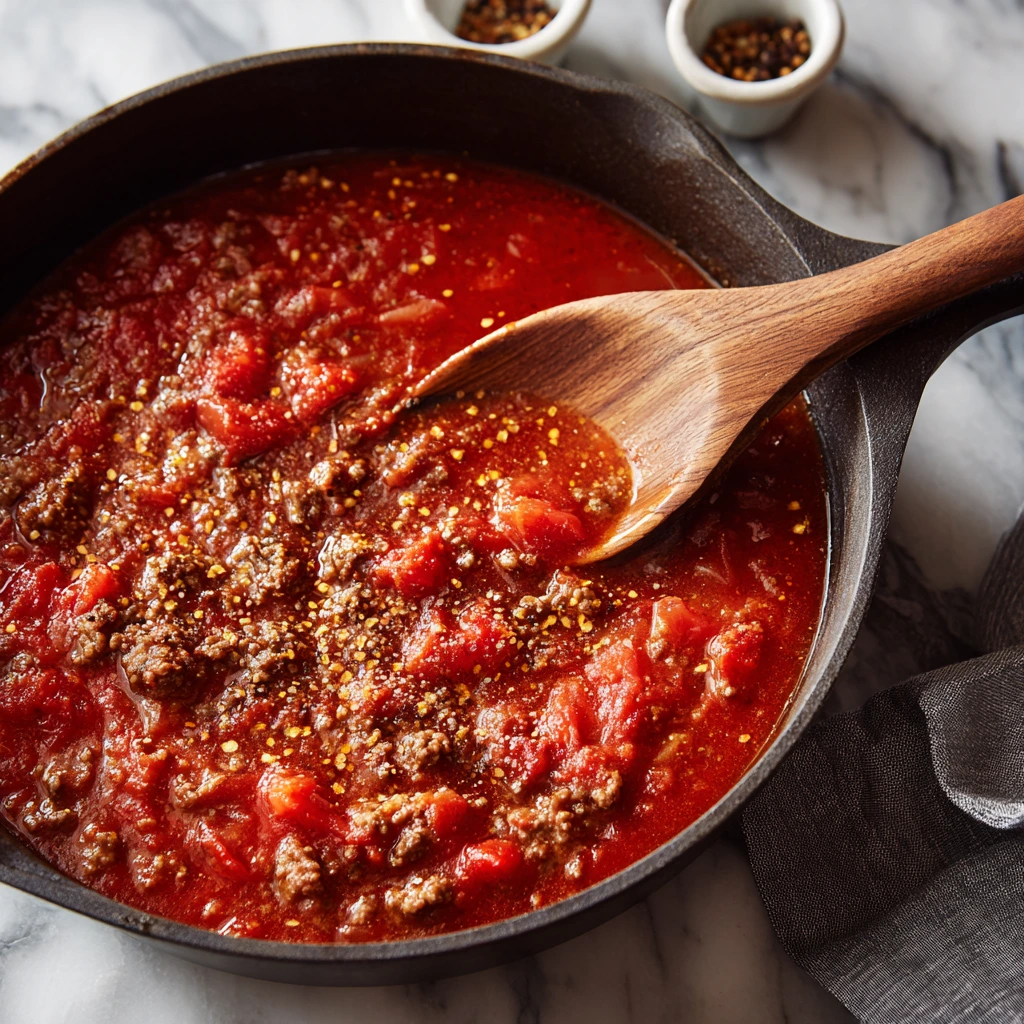
In a large skillet, cook the ground beef and diced onion over medium heat until the meat is browned and the onions are soft. I like to break up the beef with a wooden spoon as it cooks so you get a nice, even texture throughout. Once browned, drain off any excess grease to keep the chili from getting too oily.
Next, stir in the minced garlic, tomato sauce, tomato paste, chili powder, cumin, salt, and pepper. Let it all simmer together for about 10–15 minutes. You’re aiming for a thick, flavorful chili base that will hold up well in the casserole. This step really makes a difference in the final flavor, so don’t rush it.
Tip: If you’re in a time crunch, you can absolutely swap in your favorite canned chili (go for the no-bean kind to keep it classic). But honestly, this homemade version is super easy and so worth it.
STEP 3: LAYER THE CHILI AND HOT DOGS
Now it’s time to start building your casserole. Spread half of the chili into the bottom of your prepared baking dish. Then, take your halved hot dogs and arrange them evenly over the chili layer. Depending on your dish size and how many hot dogs you’re using, you might have to do a bit of Tetris-style arranging, but don’t stress—just try to cover most of the surface.
Once your hot dogs are in place, spoon the remaining chili over the top. This creates a delicious, saucy blanket that keeps everything moist and flavorful during baking.
STEP 4: ADD THE CHEESE AND BISCUITS
Sprinkle the shredded cheddar cheese evenly over the top of the chili. You can stick with classic cheddar, or if you want to turn up the heat, mix in some pepper jack. The cheese will melt into the chili, adding that signature gooey layer that makes this dish so craveable.
Now for the topping: Take your biscuit dough (or crescent rolls) and separate each piece. Flatten them slightly with your hands and arrange them on top of the cheese layer, leaving a little space between each one. This gives them room to puff up and get golden during baking without overcrowding.
Note: If you prefer a lighter, flakier topping, crescent rolls are a great swap. Puff pastry works too—just be sure to adjust baking time as needed.
Fully Loaded Classic Chili Cheese Dog Casserole: Bubbly, Cheesy, and Crowd-Approved
Welcome back! By now, your casserole is fully layered and ready to head into the oven. This is where the magic happens—the chili thickens, the cheese bubbles, and the biscuits turn golden brown and flaky. It’s everything you love about a chili cheese dog but baked into one cozy, sliceable dish.
This part of the recipe is super straightforward, but I’ve also included some tips and variations to help you make it your own. Whether you like things spicy, mild, or somewhere in between, this casserole can flex to fit your flavor preferences.
STEP 5: BAKE TO GOLDEN PERFECTION
Place the casserole in your preheated oven (375°F) and bake uncovered for 25–30 minutes, or until the biscuits are a deep golden brown and cooked through.
You might notice the chili bubbling up around the edges—that’s a good sign! It means everything is heating through and melding together. The biscuits on top should puff up nicely and form a golden crust that’s slightly crisp on the outside and tender inside.
Tip: If your biscuits are browning too quickly but still look doughy underneath, you can lightly cover the top with foil during the last 5–10 minutes of baking. That will slow down the browning and let the centers cook fully.
STEP 6: COOL SLIGHTLY AND ADD YOUR FAVORITE TOPPINGS
Once out of the oven, let the casserole rest for about 5 minutes before serving. This gives everything a chance to settle and makes it easier to slice into neat portions.
Now comes the fun part: toppings! You can keep it classic or go all out depending on your crowd. Here are a few of my go-to finishing touches:
-
Chopped raw onions – for that classic hot dog crunch
-
Sliced jalapeños – fresh or pickled, depending on your spice level
-
Chopped dill pickles – surprisingly good and adds a little zing
-
Drizzle of yellow mustard – bold and tangy, it ties everything together
-
Ketchup – if you’re a fan, go for it!
Feel free to set up a toppings bar if you’re serving a group—everyone can customize their slice just the way they like it.
MAKE IT YOUR OWN: VARIATIONS AND TIPS
This casserole is already packed with flavor, but it’s also a great base for getting a little creative. Here are a few simple ideas to mix things up:
Use different cheeses:
A cheddar and pepper jack blend adds a nice kick, or go smoky with gouda or smoked mozzarella.
Swap the biscuits:
If biscuits aren’t your thing, try crescent roll dough or even puff pastry for a lighter, flakier topping. Just keep an eye on bake time—crescent rolls may cook slightly faster.
Add beans (or don’t):
Want to stretch the chili a little further? Add a can of drained kidney or black beans before layering. If you’re a chili dog purist, stick to the no-bean version.
Go veggie:
You can absolutely make this vegetarian! Use plant-based hot dogs and swap in your favorite meatless ground for the chili. Most plant-based grounds cook up just like beef and soak in the chili flavors beautifully.
Make ahead and freeze:
You can assemble the chili and hot dog layers in advance and store them in the fridge for up to 24 hours before baking. Just add the biscuit topping right before it goes in the oven. This casserole also freezes well—bake first, cool completely, then wrap tightly and freeze for up to 2 months. Reheat covered in the oven until warmed through.
![]()
Fully Loaded Classic Chili Cheese Dog Casserole: The Final Slice
So, your casserole’s out of the oven, the biscuits are golden, and the kitchen smells like pure comfort food heaven. Whether you’re serving this up at a game day gathering or enjoying a relaxed weeknight dinner with family, it’s the kind of meal that brings everyone to the table—fast.
Before we wrap things up, let’s go over a few frequently asked questions. I know when I first made this, I had a few “what-ifs” too, so I’ve pulled together answers that should help you tweak the recipe to fit your kitchen, your ingredients, and your style.
FREQUENTLY ASKED QUESTIONS
1. Can I use canned chili instead of making it from scratch?
Absolutely. A 15-ounce can of no-bean chili works perfectly if you’re short on time. Just layer it in place of the homemade chili and continue with the rest of the steps.
2. What’s the best kind of hot dog to use?
Any standard beef or all-beef hot dog works great. I usually go for the classic-style dogs you’d use on the grill, but you can use turkey, veggie, or even spicy sausages if you want to change things up.
3. My biscuits aren’t baking through—what am I doing wrong?
This is a common issue if the chili is too hot or the biscuits are too thick. Try flattening the biscuit dough more before baking and leave space between each one. If the tops brown too fast, cover the casserole loosely with foil for the last 10 minutes.
4. Can I make this ahead of time?
Yes! Assemble everything except the biscuit topping and refrigerate for up to 24 hours. Add the biscuits right before baking. You can also fully bake it, cool, and freeze for up to 2 months.
5. What can I serve with this casserole?
It’s a complete meal on its own, but if you want sides, keep it simple. A crisp green salad or some roasted veggies go well. Or serve with a side of coleslaw or chips for a more classic chili dog vibe.
6. How do I store leftovers?
Cover tightly and store in the fridge for up to 3 days. Reheat in the oven at 350°F until hot, or microwave individual slices if you’re in a hurry.
7. Can I make it spicy?
Definitely. Add diced jalapeños to the chili, mix in a bit of hot sauce, or use a spicy cheese like pepper jack. You can also top the casserole with fresh or pickled jalapeños after baking for an extra kick.
WRAPPING IT UP: WHY THIS CASSEROLE JUST WORKS
There’s something undeniably satisfying about turning a fast-food favorite into a baked, shareable meal that still delivers all the bold flavors you crave. This Fully Loaded Classic Chili Cheese Dog Casserole is simple enough to throw together on a weeknight but tasty enough to impress at a weekend hangout. It’s hearty, cheesy, customizable, and—most importantly—it brings people together.
Whether you top yours with pickles and mustard like a classic hot dog stand or keep it mellow and cheesy for the kids, this dish is endlessly flexible. The chili layer packs serious flavor, the hot dogs add that signature bite, and the biscuit topping ties it all together with a golden finish.
PrintFully Loaded Classic Chili Cheese Dog Casserole
This Fully Loaded Classic Chili Cheese Dog Casserole brings the ballpark favorite into a hearty, family-style bake. Juicy hot dogs are layered with rich beef chili, melty cheese, and a golden biscuit topping—turning a nostalgic snack into a satisfying dinner. Add your favorite toppings for a crowd-pleasing dish that’s perfect for game day or casual gatherings.
- Author: Mark's Recipe
Ingredients
For the chili layer:
1 lb ground beef
1 small onion, diced
1 garlic clove, minced
1 (15 oz) can tomato sauce
1 tbsp tomato paste
1 tbsp chili powder
1 tsp cumin
Salt and pepper to taste
For the casserole:
6–8 hot dogs, halved lengthwise
1½ cups shredded cheddar cheese
1 can refrigerated biscuit dough (8 biscuits) or 1 tube crescent roll dough
Optional toppings:
Chopped onions
Sliced jalapeños
Chopped pickles
Mustard or ketchup drizzle
Instructions
Preheat oven to 375°F (190°C). Grease a 9×13-inch baking dish.
In a skillet over medium heat, cook ground beef with diced onion until browned. Drain excess fat, then stir in garlic, tomato sauce, tomato paste, chili powder, cumin, salt, and pepper. Simmer for 10-15 minutes until thickened.
Spread half of the chili in the bottom of the baking dish. Arrange halved hot dogs evenly over the chili.
Top with the remaining chili, then sprinkle shredded cheese over the entire surface.
Separate the biscuit dough and flatten each slightly. Arrange on top of the cheese, leaving a bit of space between each to allow for expansion during baking.
Bake uncovered for 25-30 minutes or until the biscuits are golden brown and cooked through.
Let rest for 5 minutes before serving. Garnish with your choice of toppings like onions, jalapeños, or a drizzle of mustard.
Notes
For a shortcut, use canned chili with no beans in place of homemade. You can substitute puff pastry or crescent rolls for biscuits depending on your texture preference. Customize the cheese with a blend of cheddar and pepper jack for extra flavor.
")
