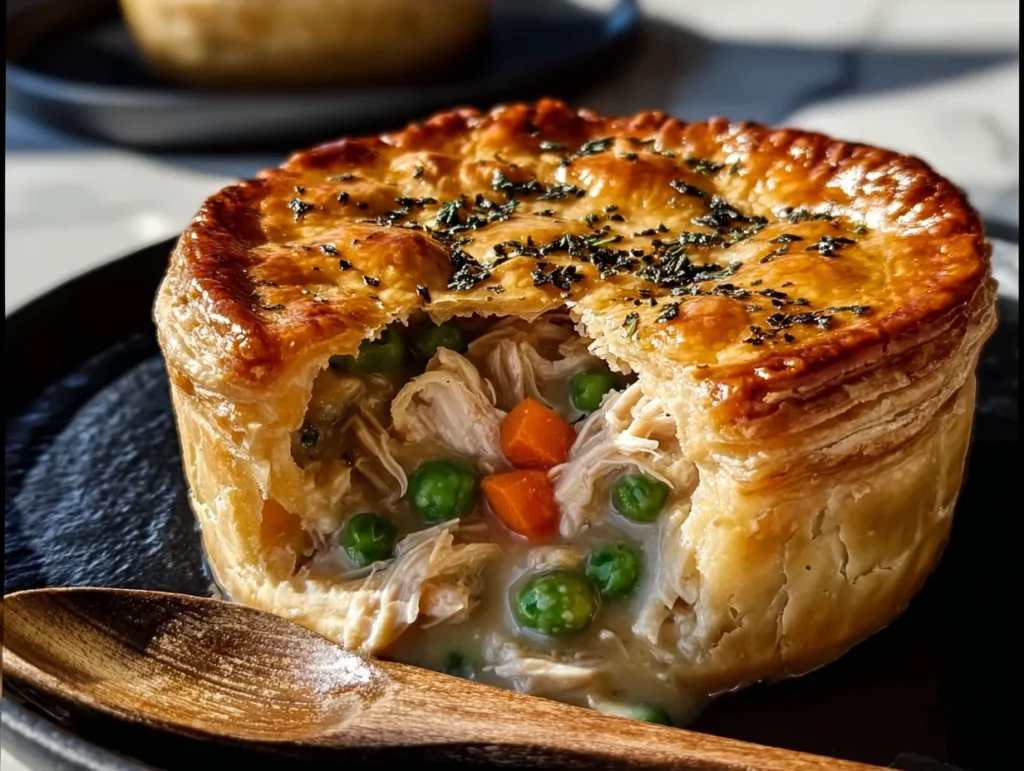
There’s just something about individual-sized comfort food that makes any meal feel extra special—and these Easy Mini Chicken Pot Pies are no exception. Whether you’re wrangling a busy weeknight dinner or prepping make-ahead lunches for the week, these savory little pies bring all the creamy goodness of a classic chicken pot pie into a perfectly portable, handheld version.
Now, I’ll be honest: I’ve always had a soft spot for chicken pot pie. Growing up, it was one of those dishes that signaled comfort, warmth, and a whole lot of love in one bite. But as much as I adored the flavors, making a full pot pie from scratch on a hectic Tuesday? Not always practical.
That’s why I absolutely love this mini version. It uses store-bought biscuit dough for a quick and easy crust and a simple homemade filling that simmers up in just minutes. The result? A golden-brown, buttery crust filled with creamy chicken, veggies, and herbs—all baked into a muffin tin for the easiest serving ever.
You can prep them in just 15 minutes, bake them for another 20, and have dinner on the table in barely half an hour. Let’s jump right in and get these mini miracles in the oven.
Ingredients You’ll Need:
-
1 can (10 oz) refrigerated biscuit dough
-
1 cup cooked chicken, shredded
-
1 cup frozen mixed vegetables, thawed
-
¼ cup onion, finely diced
-
1 clove garlic, minced
-
2 tablespoons unsalted butter
-
2 tablespoons all-purpose flour
-
1 cup milk
-
½ teaspoon dried thyme
-
Salt and freshly ground black pepper to taste
-
1 egg, beaten (for egg wash)
STEP-BY-STEP INSTRUCTIONS
Step 1: Preheat and Prep Your Muffin Tin
Start by preheating your oven to 400°F (204°C). Grease six wells of a standard muffin tin with butter or non-stick spray. This helps the biscuit crust get crispy around the edges and ensures the pot pies release easily once baked.
Step 2: Sauté the Aromatics
Melt 2 tablespoons of butter in a small saucepan over medium heat. Add in the diced onion and minced garlic and sauté until the onion turns translucent and your kitchen starts to smell amazing—usually about 2-3 minutes. This step lays down the savory foundation for the whole filling.
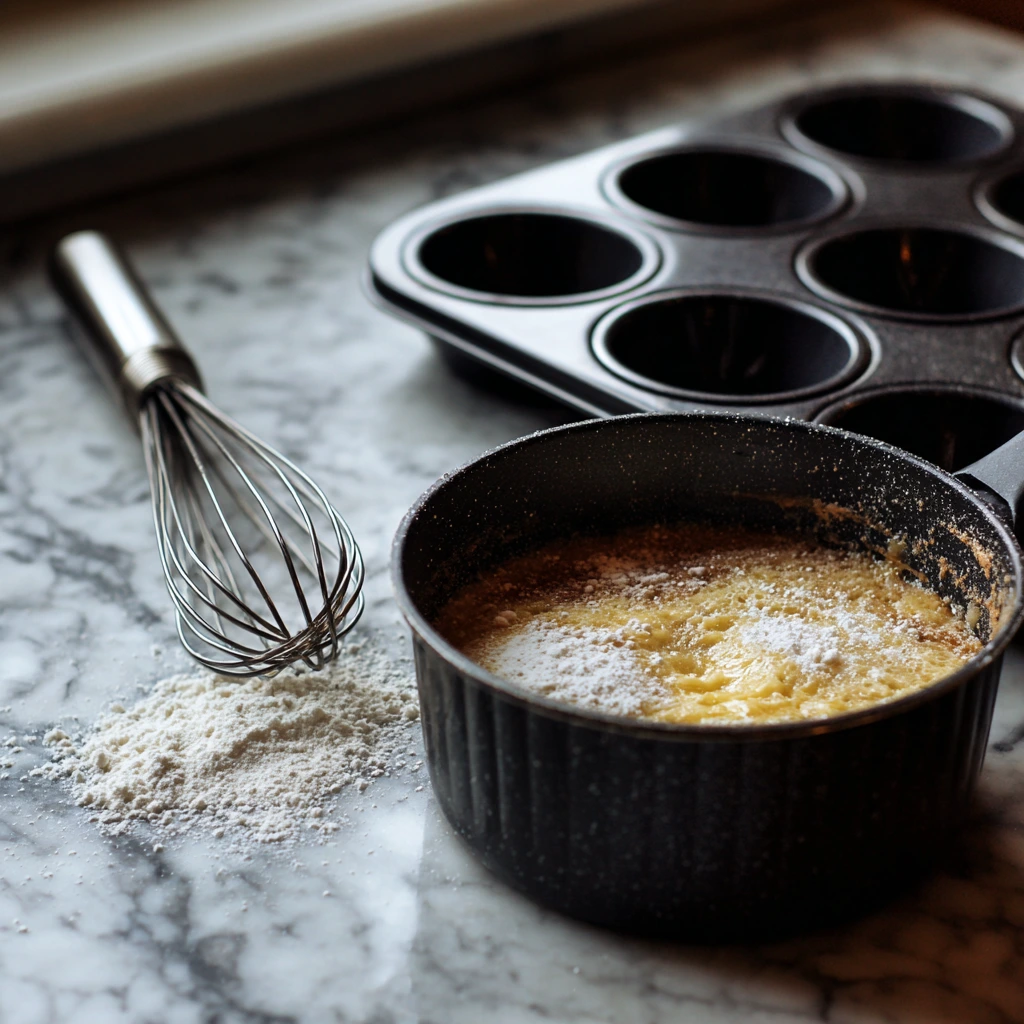
Step 3: Build the Sauce
Next, stir in 2 tablespoons of all-purpose flour and cook for about one minute. This creates a quick roux and helps thicken the filling later. Slowly whisk in the 1 cup of milk, stirring constantly to avoid lumps. Let the mixture come to a gentle simmer until it begins to thicken slightly.
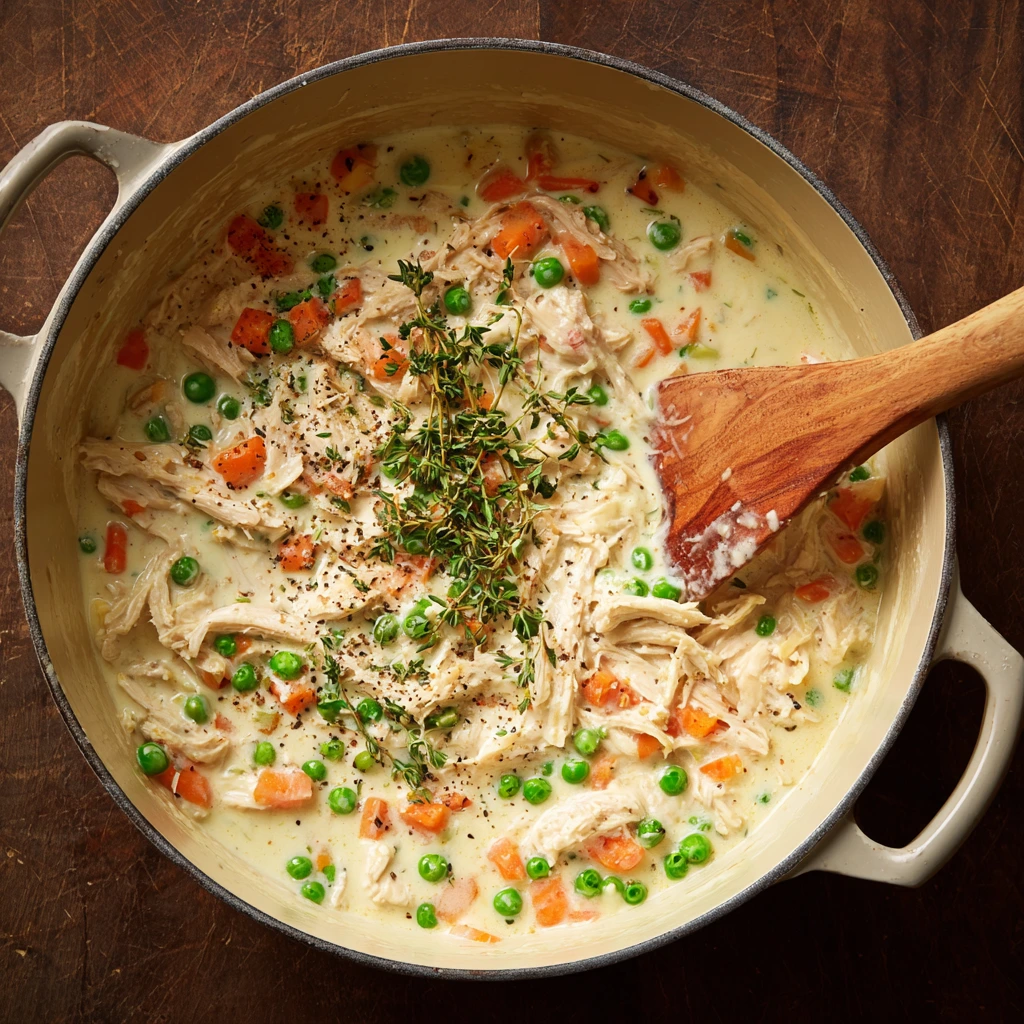
Step 4: Add the Filling Ingredients
Now it’s time for the stars of the show—shredded chicken, thawed mixed vegetables, and ½ teaspoon dried thyme. Toss them into the sauce and give it all a good stir. Season to taste with salt and freshly ground black pepper, then remove the pan from heat once everything is heated through and well coated in that luscious, creamy sauce.
If you’re feeling indulgent, this is the perfect moment to stir in a couple of tablespoons of cream cheese for an extra-rich texture (totally optional, but highly recommended if you’re in a cozy mood!).
Step 5: Form the Biscuit Crusts
Open your can of biscuit dough and separate it into six individual pieces. Using your hands or the bottom of a glass, press each piece of dough into the bottom and up the sides of your greased muffin wells. Don’t worry if they don’t look perfect—once baked, they’ll puff up and hug the filling beautifully.
How to Finish and Bake Mini Chicken Pot Pies to Golden Perfection
Now that we’ve prepped our creamy chicken filling and lined the muffin tin with biscuit dough, it’s time for the best part—putting everything together and baking up these golden, flaky little pies. This next part is quick and easy, and it’s where the magic really starts to happen. If your kitchen isn’t already smelling amazing, it definitely will once these hit the oven.
What I love most about this recipe (aside from the fact that it tastes like comfort in a cup) is how it turns simple ingredients into something that looks and tastes like you spent way more time in the kitchen than you actually did. Whether you’re serving these for a casual family dinner or tucking a few away for weekday lunches, they’re guaranteed to hit the spot.
Let’s finish what we started!
Step 6: Fill the Biscuit Shells
Now that your muffin tin is lined with biscuit dough, it’s time to spoon in that warm, savory chicken filling. Divide the mixture evenly between the six biscuit crusts. You’ll want to fill each one generously, but leave just a bit of space at the top so the filling doesn’t bubble over during baking.
TIP: If you find that you have a little extra filling, it’s delicious spooned over leftover biscuits or even stirred into pasta or rice for a quick meal.
Step 7: Seal the Tops with Biscuit Dough
Take the remaining biscuit dough pieces and flatten them slightly so they’ll fit over the tops of the filled pies. Gently press each one down over the filling, tucking the edges in to seal the top crust to the bottom crust. It doesn’t have to be perfect—just press enough that the filling is contained and the tops stay put as they bake.
If you want a more rustic, open-faced look, you can also leave the tops off entirely and bake them like little tarts. But personally, I love the full crust-on-top experience—it’s classic and gives that satisfying, golden finish.
Step 8: Brush with Egg Wash
Using a pastry brush (or the back of a spoon if you’re in a pinch), lightly brush the tops of each mini pie with beaten egg. This step gives your pot pies that beautiful, glossy golden finish. If you skip it, they’ll still bake up just fine—but trust me, the egg wash really makes them look bakery-worthy.
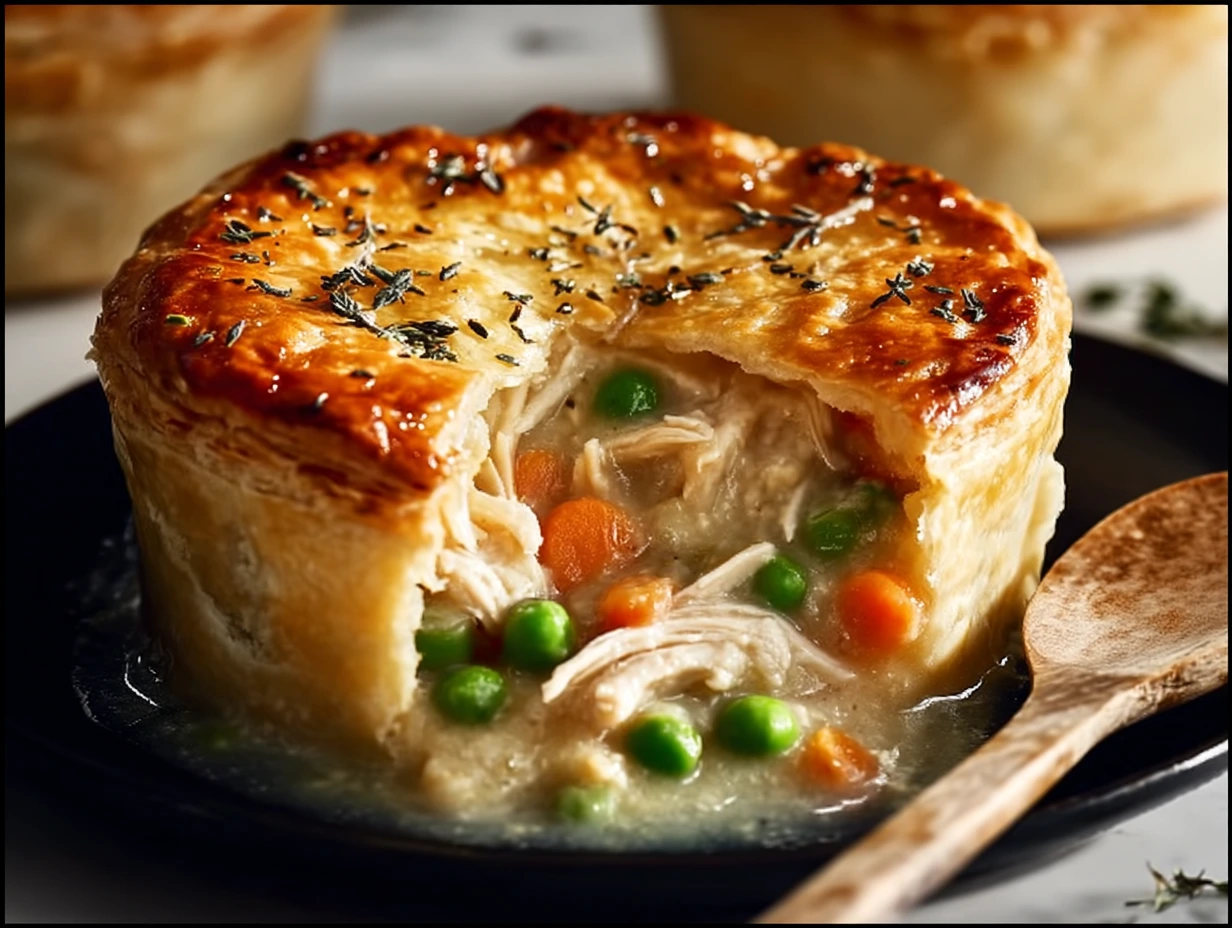
Step 9: Bake Until Golden Brown and Bubbly
Pop the muffin tin into your preheated 400°F oven and bake for 18 to 20 minutes. You’re looking for biscuit tops that are a deep golden brown and a bit of bubbling action around the edges. That’s how you know everything inside is perfectly cooked and ready to devour.
Step 10: Cool and Remove
Once they’re out of the oven, let the mini pot pies cool in the muffin tin for about 5 minutes. This makes them much easier to remove without falling apart. Use a butter knife to gently loosen the edges, then lift them out carefully.
They’re ready to serve—and let me tell you, biting into that warm, flaky crust and creamy filling is one of life’s little joys.
Helpful Tips and Easy Variations
These mini chicken pot pies are fantastic just as they are, but here are a few ideas to mix things up:
-
Swap the protein: Use leftover turkey, rotisserie chicken, or even cooked ground beef.
-
Add cheese: A sprinkle of shredded cheddar or mozzarella on top of the filling before sealing with the crust adds extra richness.
-
Upgrade the crust: If you’re craving a flakier, more traditional pot pie crust, swap out the biscuit dough for pre-made pie dough. Cut into circles slightly larger than the muffin wells for easy shaping.
-
Make it vegetarian: Skip the chicken and double the veggies, or use canned white beans for a meat-free option.
-
Prep ahead: These can be assembled and stored in the fridge (covered) up to 24 hours before baking. Great for busy weeknights or make-ahead lunches!
One of my favorite ways to serve these is alongside a simple salad for a light, comforting meal. But they also make great after-school snacks or game-day bites—just the right size to grab and go.
Mini Chicken Pot Pies FAQ + Final Thoughts
So, you’ve baked up a batch of these cozy, golden-brown mini chicken pot pies—your kitchen smells amazing, your muffin tin is working overtime, and now you’re wondering: how do I store these? Can I freeze them? What about substitutions? You’re not alone! Below, I’ve rounded up the most common questions I’ve heard about this recipe to help you get the most out of each and every little pie.
FREQUENTLY ASKED QUESTIONS
1. Can I use rotisserie chicken for this recipe?
Absolutely! Rotisserie chicken is a time-saving favorite for this recipe. Just shred about one cup’s worth (roughly one chicken breast) and you’re good to go. The seasoning from the rotisserie adds an extra layer of flavor that works really well here.
2. Can I freeze these mini pot pies?
Yes! These freeze beautifully. Once baked and cooled completely, wrap each mini pie in foil or plastic wrap and store them in a freezer-safe bag or container. When you’re ready to eat, reheat in a 350°F oven for 15–20 minutes or until heated through.
3. What’s the best way to reheat leftovers?
To keep the crust crispy, reheat leftovers in the oven at 350°F for 10 minutes. You can also microwave them for about 1 minute, but the crust will be softer. If you’re all about that golden crunch, the oven is the way to go.
4. Can I make these ahead of time?
Yes, and that’s part of what makes them so handy! You can fully assemble the pot pies (right up to the egg wash step), cover the muffin tin with foil or plastic wrap, and refrigerate for up to 24 hours. Just brush with egg wash right before baking.
5. What other veggies can I use besides frozen mixed vegetables?
Feel free to get creative with whatever you have on hand. Chopped broccoli, mushrooms, diced bell peppers, peas, corn, or even spinach all work great. Just make sure any fresh vegetables are lightly sautéed or steamed before adding to the filling so they cook through properly.
6. Can I use puff pastry or pie dough instead of biscuit dough?
Definitely! Puff pastry makes for an extra flaky, buttery crust, and pie dough gives you that classic pot pie texture. Just be sure to cut the dough large enough to fit and fully line each muffin well—and adjust baking time as needed to make sure the crust is golden and cooked through.
7. How long do leftovers keep in the fridge?
Stored in an airtight container, these mini pot pies will stay fresh in the fridge for up to 3 days. They’re just as delicious reheated and make for the perfect grab-and-go lunch or quick dinner.
Final Thoughts: A Weeknight Win You’ll Make Again and Again
I have to say, these Easy Mini Chicken Pot Pies are one of those recipes that check all the right boxes: fast, comforting, kid-friendly, and versatile. Whether you’re using up leftover chicken, cleaning out your veggie drawer, or just craving something cozy without the hassle of a full pot pie, this recipe is here for you.
What I really love is how adaptable it is. Once you get the hang of the basic method, you can switch up the filling, try different crust options, and even make mini dessert pies using this same technique (but that’s a story for another day!).
PrintEasy Mini Chicken Pot Pies

These individual pot pies feature a creamy chicken and vegetable filling encased in tender biscuit crusts. They bake up quickly, making them perfect for a comforting weeknight dinner or a grab-and-go lunch. Each mini pie delivers all the warmth and flavor of a classic chicken pot pie in a perfectly portable package.
- Author: Mark's Recipe
Ingredients
1 can (10 oz) refrigerated biscuit dough
1 cup cooked chicken, shredded
1 cup frozen mixed vegetables, thawed
¼ cup onion, finely diced
1 clove garlic, minced
2 tablespoons unsalted butter
2 tablespoons all-purpose flour
1 cup milk
½ teaspoon dried thyme
salt and freshly ground black pepper to taste
1 egg, beaten (for egg wash)
Instructions
Preheat the oven to 400°F and grease six wells of a standard muffin tin.
Melt the butter in a small saucepan over medium heat. Add the onion and garlic and cook until the onion is translucent and fragrant.
Stir in the flour and cook for one minute to eliminate the raw taste. Gradually whisk in the milk until the mixture is smooth.
Bring the sauce to a gentle simmer, then stir in the shredded chicken, thawed vegetables, dried thyme, salt, and pepper. Remove from heat once the filling is thick and well combined.
Separate the biscuit dough into six pieces. Press each piece into the bottom and up the sides of a muffin well, forming a small crust shell.
Divide the chicken filling evenly among the crusts. Top each with the remaining biscuit dough pieces, pressing the edges together to seal. Brush the tops with beaten egg.
Bake until the crusts are golden brown and the filling is bubbling, about eighteen to twenty minutes. Let the mini pies cool in the tin for five minutes before removing.
Notes
For a flakier crust, substitute refrigerated pie dough cut into circles slightly larger than the muffin wells.
If you prefer a richer filling, stir in two tablespoons of cream cheese with the chicken and vegetables.
These mini pies can be assembled ahead of time, covered, and refrigerated for up to 24 hours before baking.
Leftovers keep well in the refrigerator for three days and reheat in a 350°F oven for ten minutes to maintain crispness.


")
