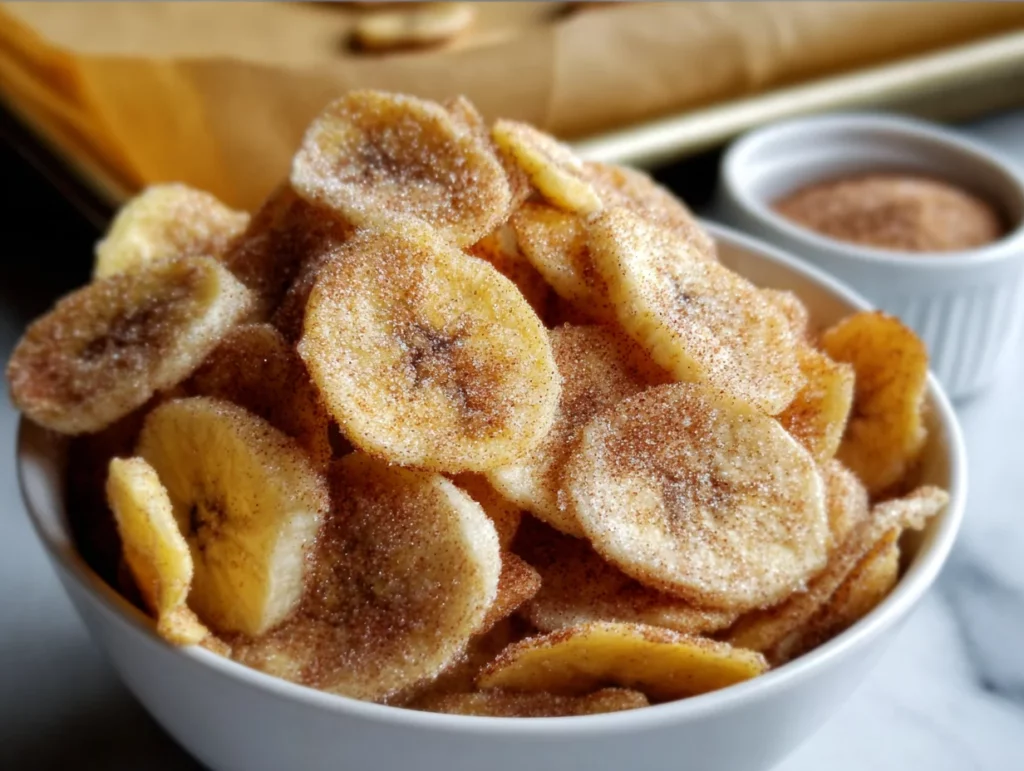
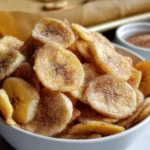
If you’ve ever found yourself aimlessly digging through the pantry, looking for something crunchy, sweet, and just a bit better-for-you than a bag of cookies or chips… let me introduce you to your new favorite snack: Crispy Cinnamon Sugar Banana Chips.
These homemade banana chips are everything I love in a snack—easy to make, naturally sweet, and satisfyingly crunchy. They remind me a little of the dried banana chips my grandma used to buy from the bulk bins at the grocery store, except these are fresher, lighter, and made with ingredients I already have at home. Plus, they don’t have any of the added oils or preservatives you find in store-bought versions.
What makes this recipe a winner is the perfect balance of warm cinnamon and just a touch of sugar over perfectly crisped banana slices. They’re baked low and slow (trust the process—it’s worth it!) and make the ideal topping for yogurt bowls, oatmeal, or just plain snacking straight from the jar. And if you’ve got kiddos at home? These are lunchbox gold.
Before we jump into the recipe, just a quick note: this is one of those treats where patience pays off. The slow bake ensures they dry out evenly and become delightfully crisp. No chewy centers here!
Let’s get to it.
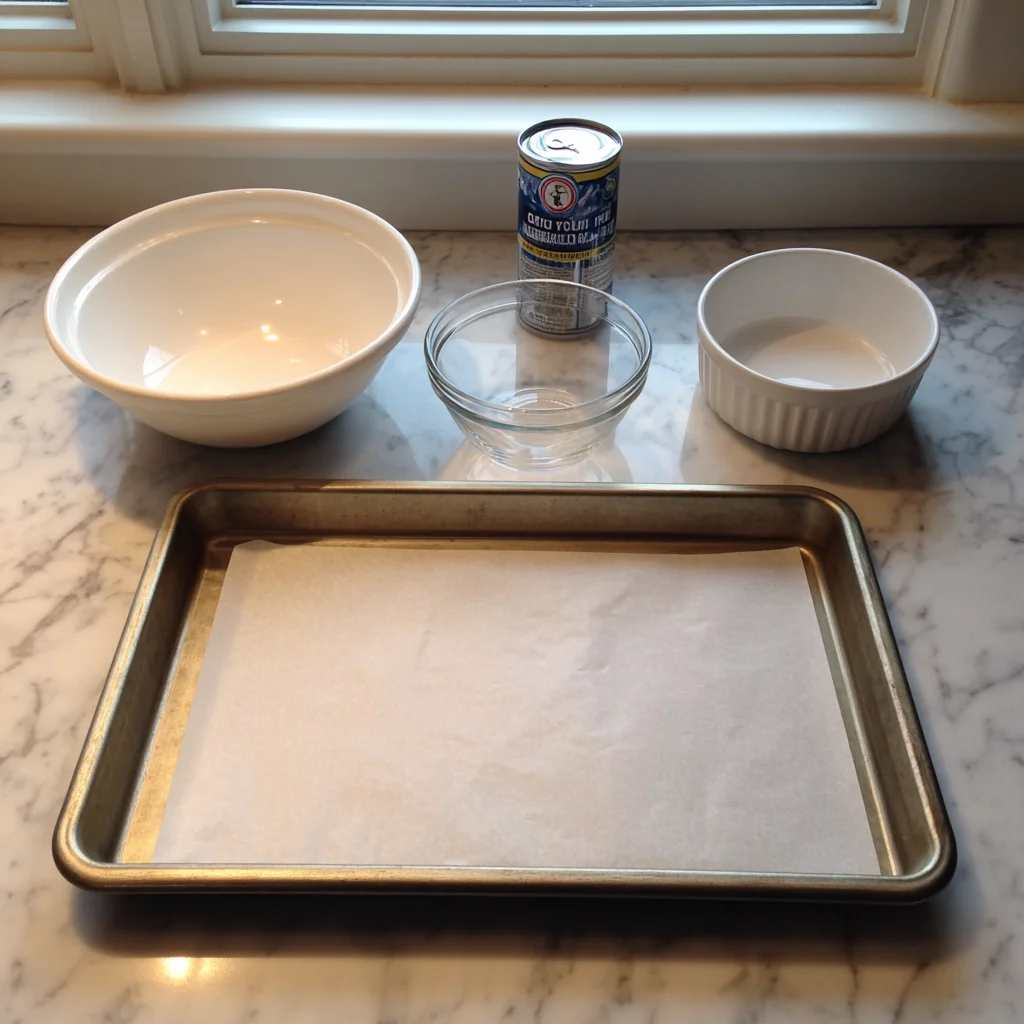
Ingredients You’ll Need:
-
3 ripe but firm bananas
-
1 tablespoon lemon juice
-
1 tablespoon granulated sugar
-
1/2 teaspoon ground cinnamon
-
Non-stick cooking spray or parchment paper
That’s it! Nothing fancy, and you probably already have most of it in your kitchen right now.
STEP 1: Prep Your Bananas
Start by preheating your oven to 225°F (107°C). Low and slow is key here—you’re not baking as much as you’re gently drying the banana slices into crispy little chips.
Line a baking sheet with parchment paper or give it a light spray with non-stick cooking spray. This will keep the bananas from sticking and make clean-up super easy later on.
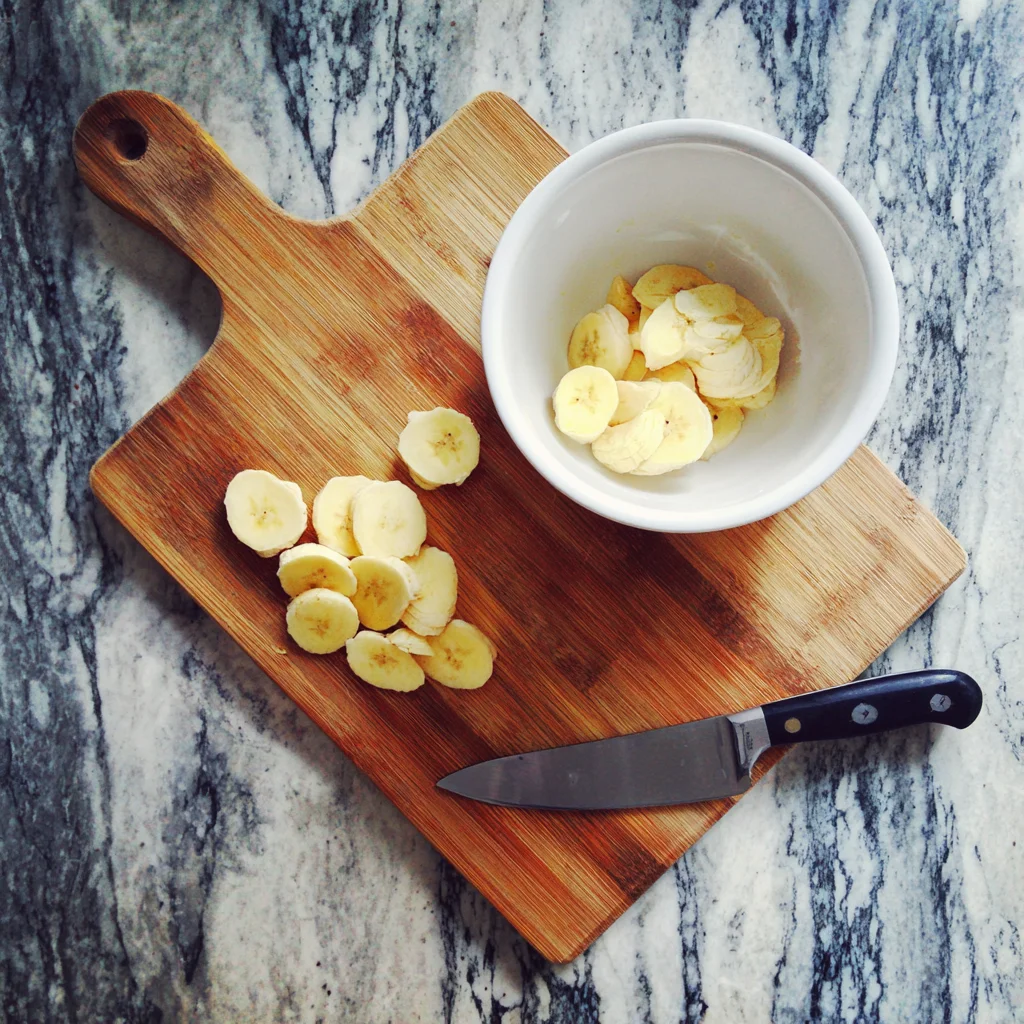
Now, grab your bananas. You want them to be ripe but still firm. If they’re too soft or spotty, they’ll be a nightmare to slice and may never crisp up. Peel them and slice them as thinly and evenly as possible—I aim for about 1/8-inch thick. Uniform thickness is what gives you even baking and that lovely crunch.
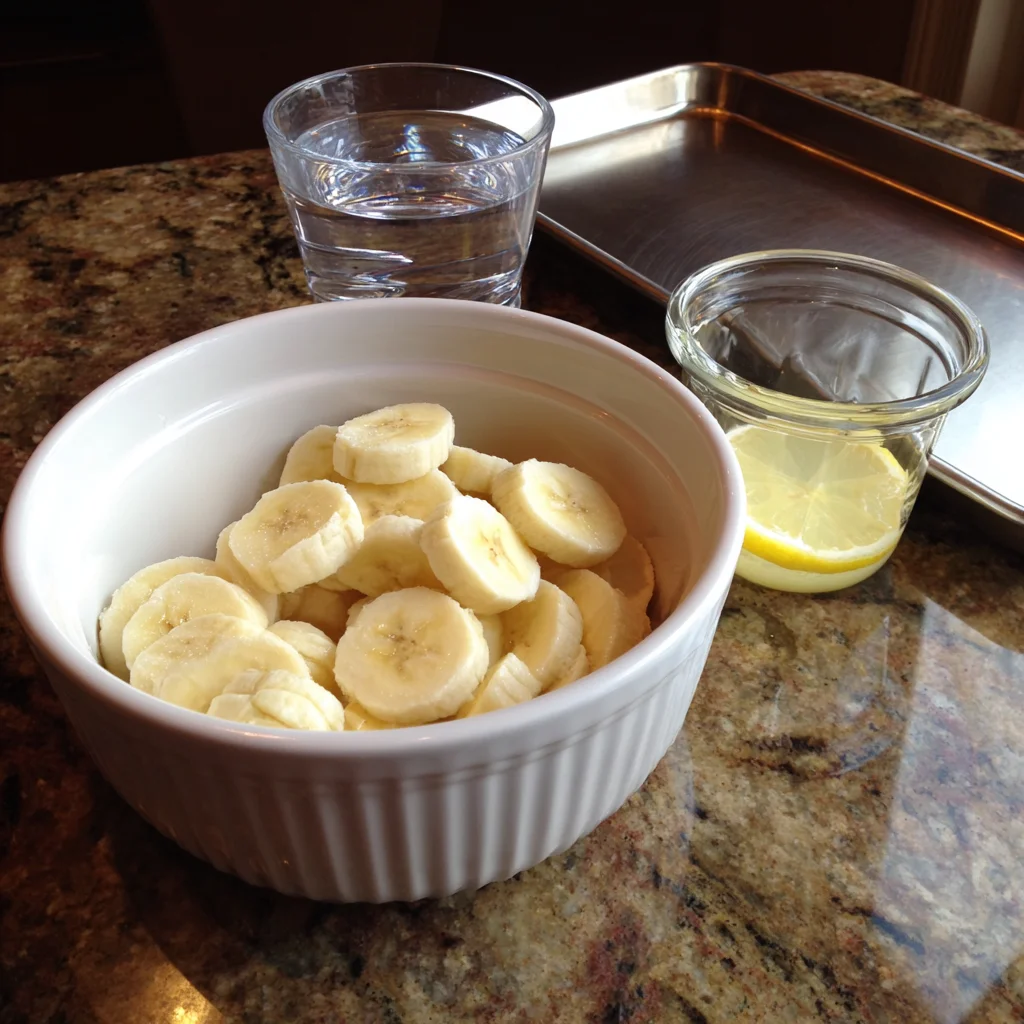
STEP 2: Add a Little Lemon
Place the banana slices in a mixing bowl and gently toss them with lemon juice. This step isn’t just for flavor—the lemon helps prevent browning and keeps your chips looking golden and fresh after baking.
It’s a small detail, but it really makes a difference in the final look (and who doesn’t love a beautiful snack?).
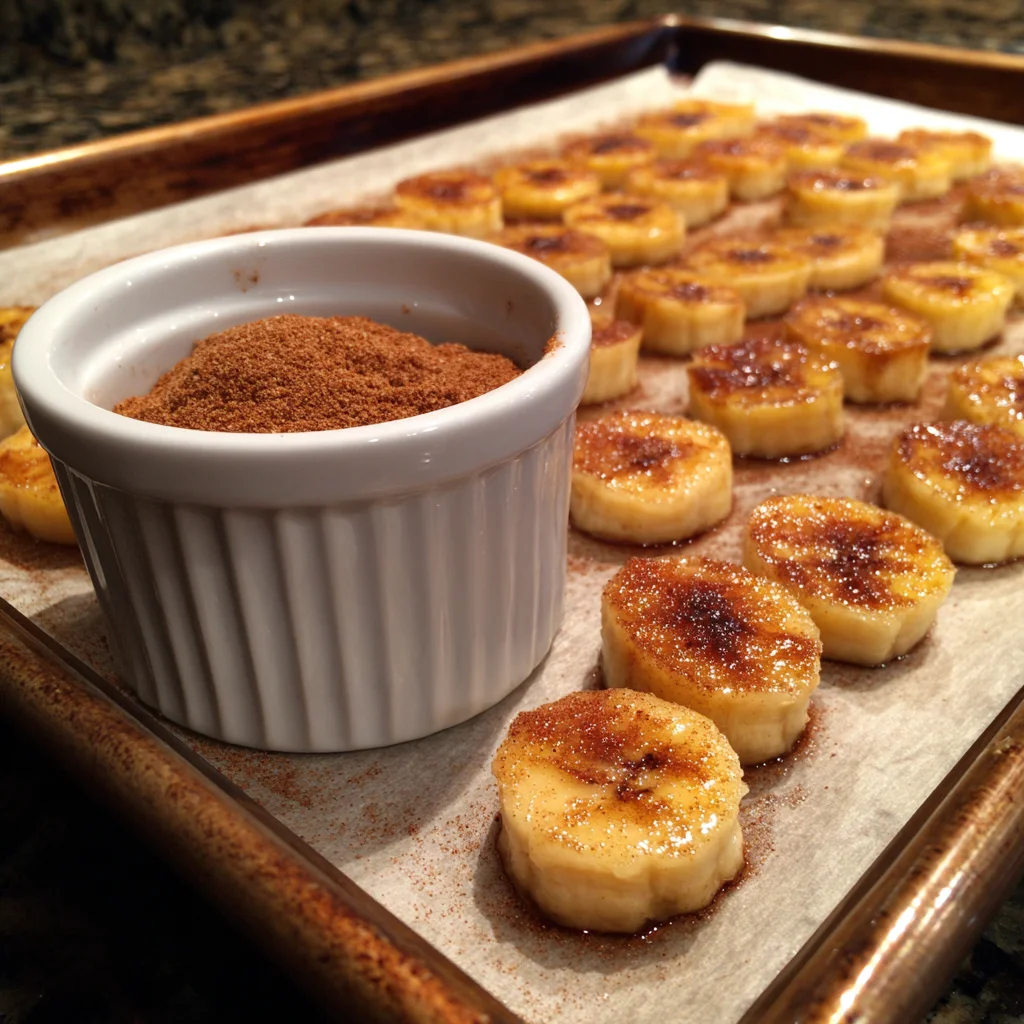
STEP 3: Line Them Up and Sprinkle the Magic
Now, arrange the banana slices in a single layer on your prepared baking sheet. Be sure they’re not overlapping—overlapping slices tend to stay soft and won’t crisp properly.
In a small bowl, mix your sugar and cinnamon together. It’s such a simple combo, but it gives the chips that cozy, spiced flavor that makes them feel extra special. Lightly sprinkle the cinnamon sugar mixture over the banana slices. You don’t need much—just enough to give each chip a little kiss of sweetness and spice.
At this point, your kitchen will already smell amazing. But just wait until they start baking!
How to Bake the Perfect Crispy Banana Chips (Plus Tips & Variations)
Alright, now that we’ve prepped our bananas, tossed them in lemon juice, and sprinkled them with that delicious cinnamon-sugar blend, it’s time to get to the good part: baking. This is where the magic really happens. Banana chips may seem simple, but they do require a little technique (and patience!) to get that satisfying crunch just right.
So if you’ve ever tried making banana chips before and ended up with chewy or unevenly baked slices—don’t worry. I’ve got you covered with step-by-step guidance and a few helpful tricks to make sure your chips turn out crisp, golden, and completely addictive.
Let’s finish what we started.
STEP 4: Bake Low and Slow
Once your banana slices are arranged in a single layer and lightly dusted with cinnamon sugar, place the baking sheet in the preheated oven (225°F). Set a timer for 2 hours, but don’t walk away completely—this is a slow bake, and while it doesn’t need constant attention, it does benefit from a little mid-way check-in.
Halfway through baking (around the 1-hour mark), flip the banana slices over. This helps them dry out evenly on both sides. A thin spatula or even your fingers will work here, just be gentle—remember, they’re still soft at this point.
Bake for another 1 to 1.5 hours, keeping a close eye on them during the last 30 minutes. Every oven is a little different, and the chips can go from “almost there” to “burnt” fairly quickly once they’ve dried out.
You’ll know they’re ready when they feel dry to the touch, slightly golden, and firm. Don’t worry if they’re not completely crisp while hot—they’ll continue to harden as they cool.
STEP 5: Let Them Cool Completely
This step is easy to overlook, but it’s super important. Once your banana chips come out of the oven, let them cool completely on the baking sheet. This is when they really crisp up.
If you try to move or store them too soon, you might trap residual steam and lose that crunch you just spent hours working toward. Give them at least 15-20 minutes to cool completely, and you’ll be rewarded with a crispy, snappy texture that’s seriously satisfying.
Tips for Banana Chip Success
After making these countless times, here are a few extra tips I’ve picked up that make all the difference:
-
Use firm bananas. They slice better, hold their shape, and bake more evenly. Overripe bananas tend to get mushy and won’t crisp up properly.
-
Slice thin and even. Aim for about 1/8 inch thick, and try to keep every slice uniform. A mandoline slicer works beautifully for this if you have one.
-
Don’t crowd the pan. Give each slice its space. Overlapping will lead to uneven baking and soggy chips.
-
Check your oven temperature. An oven thermometer can help ensure your oven is really at 225°F. Too hot, and the chips will burn before they dry; too cool, and they’ll stay soft.
Fun Variations to Try
Once you’ve nailed the classic cinnamon sugar version, it’s fun to get creative. Here are a few simple variations you might love:
-
Plain Banana Chips: Skip the cinnamon sugar entirely and just bake them with lemon juice. They’re naturally sweet on their own and perfect for healthier snacking.
-
Savory Banana Chips: For something totally different, try sprinkling the banana slices with a tiny pinch of sea salt before baking. It brings out a whole new flavor profile that pairs great with hummus or guac.
-
Coconut Sugar + Nutmeg: Swap the granulated sugar for coconut sugar and add a pinch of nutmeg along with the cinnamon. It gives the chips a deeper, caramel-like flavor that’s absolutely delicious.
-
Spicy-Sweet Chips: Add a tiny dash of cayenne pepper to your cinnamon sugar mixture for a sweet and spicy twist.
Feel free to play around and make them your own. These chips are a great base for flavor experimentation, and once you get the hang of the baking process, the possibilities are endless.
Crispy Banana Chip FAQs + Final Thoughts
Now that you’ve got the full recipe and all my best tips for getting those banana chips perfectly crisp, let’s go over a few common questions. Whether you’re a first-time banana chip baker or you’ve tried before and want better results, these FAQs should help clear up any confusion and set you up for snack-time success.

FAQ: Your Banana Chip Questions Answered
1. Why are my banana chips chewy instead of crispy?
This usually happens if the banana slices were too thick, the oven temperature was too high or low, or they weren’t baked long enough. Make sure you’re slicing them about 1/8-inch thick and baking low and slow—around 225°F—for 2 to 3 hours. Also, don’t forget to let them cool completely after baking, which helps them crisp up even more.
2. Can I use overripe bananas for this recipe?
It’s best to use bananas that are ripe but still firm. Overripe bananas tend to be too soft, which makes them harder to slice thinly and more likely to stay soggy or fall apart during baking.
3. How should I store homemade banana chips?
Let them cool completely, then store in an airtight container at room temperature. A glass jar or resealable bag works great. They’ll stay crisp for up to a week—though they rarely last that long in our house.
4. Can I make these in an air fryer instead of the oven?
Yes, you can! Just keep in mind that air fryers work faster, so you’ll want to check on the chips every few minutes. Set the air fryer to about 200°F and cook in batches to avoid overcrowding. Start with 1 hour, flipping halfway through, and adjust time as needed.
5. Can I use a dehydrator instead of baking them?
Absolutely. A dehydrator is actually perfect for banana chips and often results in a more consistent crunch. Follow your dehydrator’s instructions for banana slices, usually around 8–12 hours at 135°F.
6. Can I freeze banana chips for later?
Freezing isn’t ideal for maintaining that crisp texture. While you can freeze them, they tend to soften when thawed. For best results, stick to storing them at room temperature in an airtight container.
7. How can I make these chips less sweet?
You can simply skip the sugar and cinnamon step if you prefer a more natural, unsweetened version. The bananas have enough natural sugars to be tasty all on their own, especially once concentrated through slow baking.
Final Thoughts: A Simple Snack Worth Making Again and Again
These Crispy Cinnamon Sugar Banana Chips are one of those recipes that quickly become part of your regular snack rotation. They’re simple, healthy-ish, and satisfy that need for a little crunch without diving into a bag of store-bought junk food.
What I love most about these chips—aside from how easy they are to make—is how versatile they can be. One batch might go into lunchboxes, the next into a jar on the counter for grab-and-go snacking, and another batch might end up topping a bowl of yogurt or even tossed into trail mix. Once you get comfortable with the base recipe, you’ll find yourself reaching for this again and again with little tweaks to keep it interesting.
If you do try this recipe, I’d love to hear how it turned out for you! Did you stick with the classic cinnamon sugar, or try one of the variations? Let me know what worked, what you loved, and what you’d try next time. And if you have your own flavor twist or baking tip, drop it in the comments—we’re all here to learn from each other.
PrintCrispy Cinnamon Sugar Banana Chips
Crispy Cinnamon Sugar Banana Chips are a naturally sweet and crunchy snack that offers a healthier alternative to traditional chips and sweets. Thinly sliced bananas are baked low and slow until crisp, then dusted with a simple cinnamon sugar mixture for a warm, spiced finish. They’re perfect for snacking, topping yogurt or oatmeal, or packing into lunchboxes.
- Author: Mark's Recipe
Ingredients
3 ripe but firm bananas
1 tablespoon lemon juice
1 tablespoon granulated sugar
1/2 teaspoon ground cinnamon
Non-stick cooking spray or parchment paper
Instructions
Preheat the oven to 225°F and line a baking sheet with parchment paper or lightly spray with non-stick spray. Peel the bananas and slice them as thinly and evenly as possible, about 1/8-inch thick, for uniform crispness.
Place the banana slices in a bowl and gently toss with lemon juice to prevent browning. Arrange the slices in a single layer on the prepared baking sheet, making sure they don’t overlap.
In a small bowl, mix together the sugar and cinnamon. Lightly sprinkle the cinnamon sugar over the banana slices.
Bake the chips for 2 to 3 hours, flipping halfway through, until they are dry and crispy. Keep a close eye on them during the final 30 minutes to avoid burning.
Remove from the oven and let them cool completely. They will continue to crisp up as they cool.
Notes
The key to crispy chips is slicing the bananas thinly and baking at a low temperature for a long time. Use firm bananas to make slicing easier and to prevent sogginess. Store the chips in an airtight container at room temperature to maintain their crunch. You can adjust the cinnamon sugar ratio to your taste or leave them plain for a less sweet version.


")
