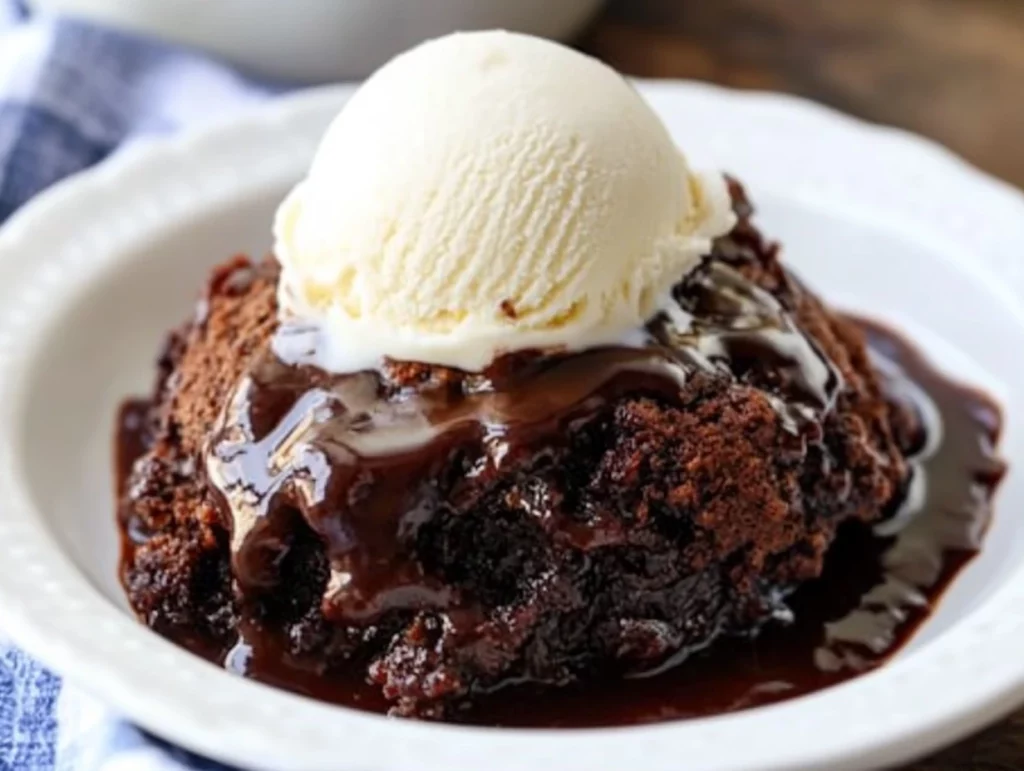
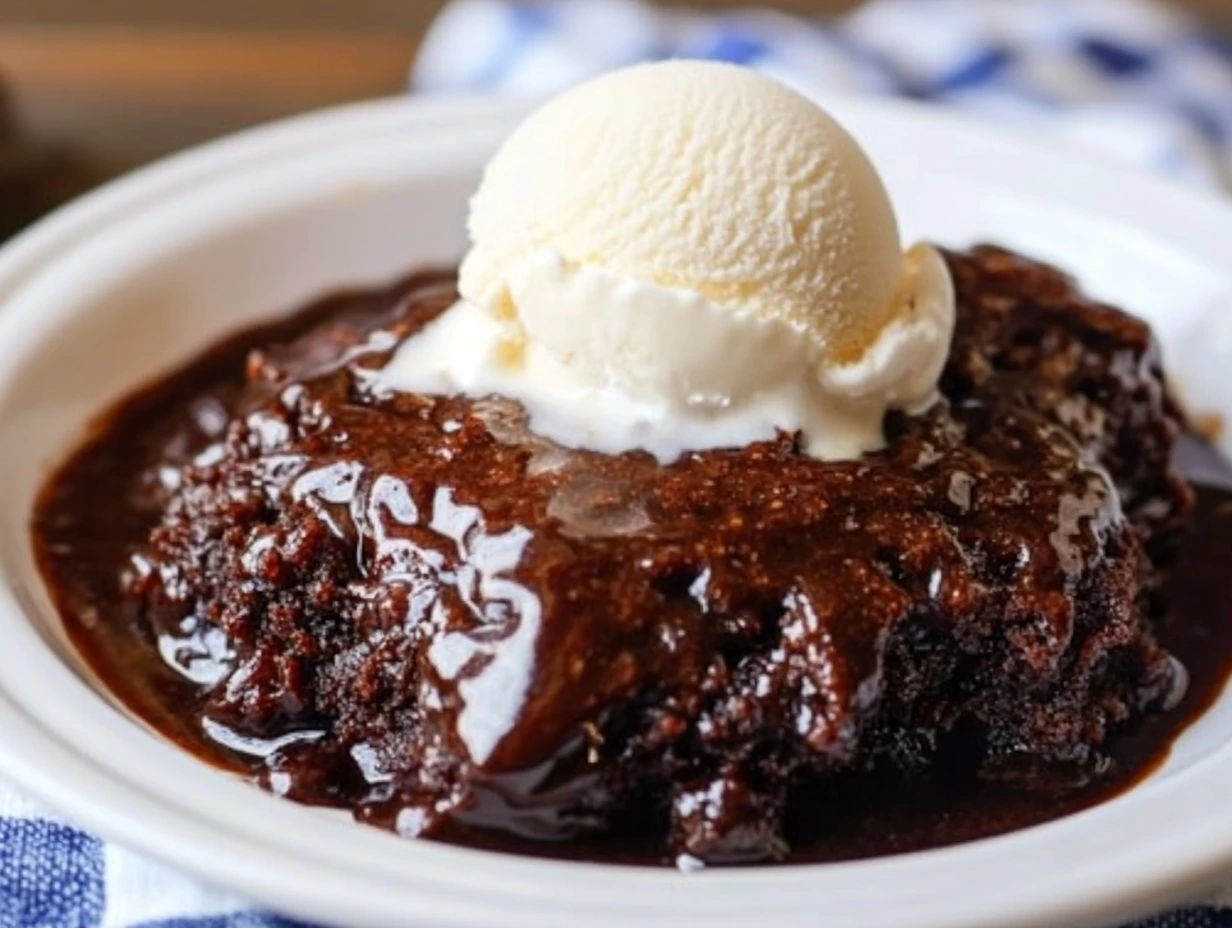
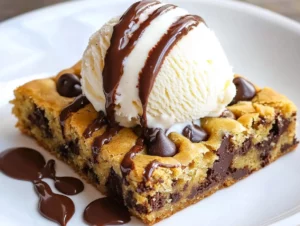
There’s something magical about a dessert that makes its own sauce as it bakes, don’t you think? That’s exactly what you get with this Chocolate Cobbler — a rich, fudgy masterpiece that practically begs to be served warm with a scoop of creamy vanilla ice cream.
I first discovered chocolate cobbler during a family potluck years ago. One bite of that warm, gooey chocolate under a perfectly cakey top and I was hooked. Since then, it’s become a go-to recipe in my home for everything from cozy weeknight treats to special occasions. The best part? It’s deceptively simple to make. Even if you’re not an experienced baker, this recipe is practically foolproof.
Today, I’m walking you through how to make this irresistible dessert, step-by-step. Trust me, once you make it, it’s going to earn a permanent spot in your recipe box.
WHY YOU’LL LOVE THIS CHOCOLATE COBBLER
-
Self-saucing magic: The batter rises to the top while a luscious chocolate sauce forms underneath as it bakes.
-
Simple ingredients: No fancy equipment or rare ingredients required.
-
Perfectly indulgent: Warm, gooey, and absolutely loaded with chocolate flavor.
-
Great for gatherings: Serves 9, making it perfect for family dinners or potlucks.
INGREDIENTS YOU’LL NEED
Before we dive into the steps, let’s take a look at what you’ll need to gather:
For the cobbler batter:
-
½ cup unsalted butter, melted
-
1 ⅓ cups all-purpose flour
-
½ cup packed light brown sugar
-
2 ½ teaspoons baking powder
-
½ teaspoon salt
-
½ cup granulated sugar
-
¼ cup cocoa powder
-
1 cup milk
-
1 teaspoon vanilla extract
-
1 cup semi-sweet chocolate chips
For the topping:
-
2 cups granulated sugar
-
½ cup cocoa powder
-
1 ½ cups hot water
LET’S GET STARTED
Alright, grab your mixing bowls and let’s begin creating this heavenly dessert.
STEP 1: PREHEAT AND PREP YOUR BAKING DISH
Start by preheating your oven to 350°F (175°C). This gives your oven plenty of time to come up to temperature while you prepare the batter.
Next, pour ½ cup of melted unsalted butter into a 9×9-inch baking dish. Gently tilt the dish to evenly coat the bottom with butter. Set it aside for now. This butter layer is going to create the perfect foundation for your cobbler.
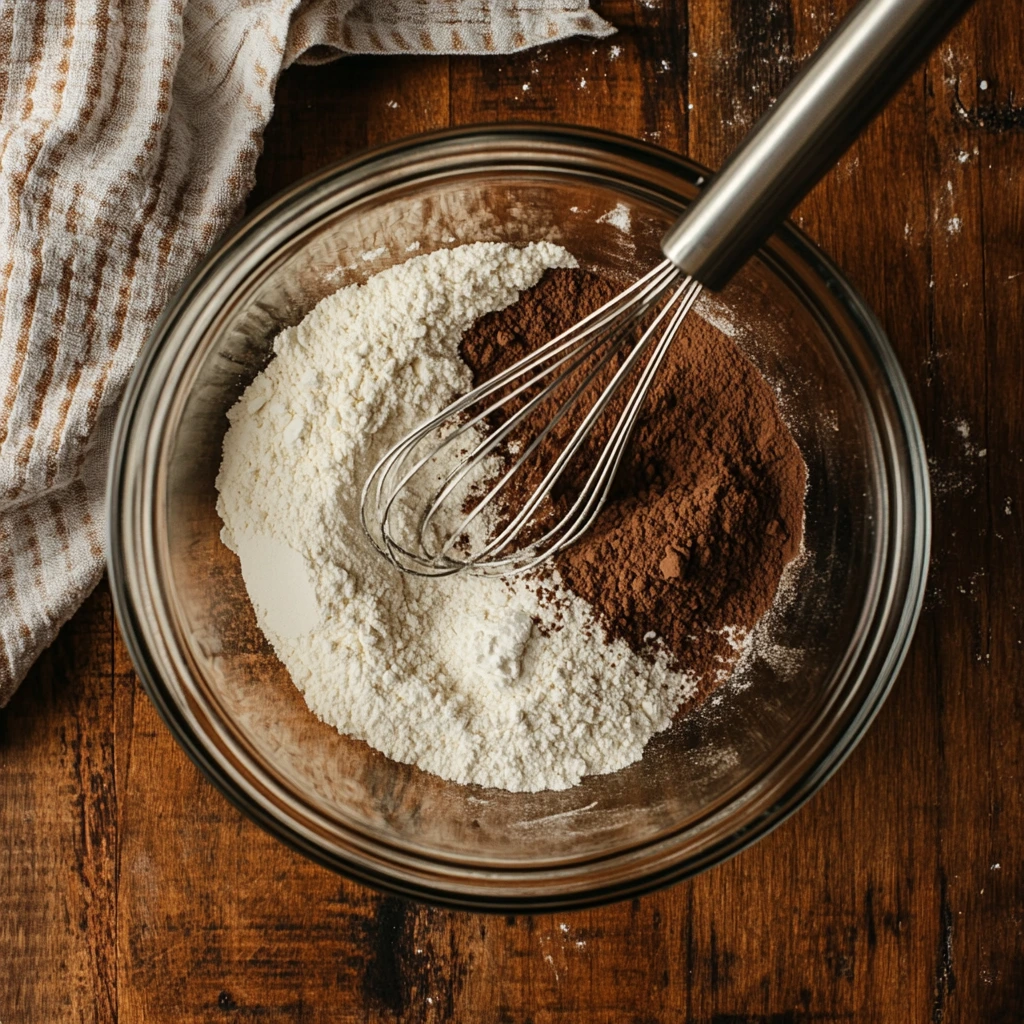
STEP 2: MIX THE DRY INGREDIENTS
In a large mixing bowl, whisk together:
-
1 ⅓ cups all-purpose flour
-
½ cup packed light brown sugar
-
2 ½ teaspoons baking powder
-
½ teaspoon salt
-
½ cup granulated sugar
-
¼ cup cocoa powder
Make sure everything is well combined, with no lumps of cocoa or brown sugar remaining. This dry mix is the heart of your cobbler batter, and getting it evenly mixed will ensure a consistent texture.
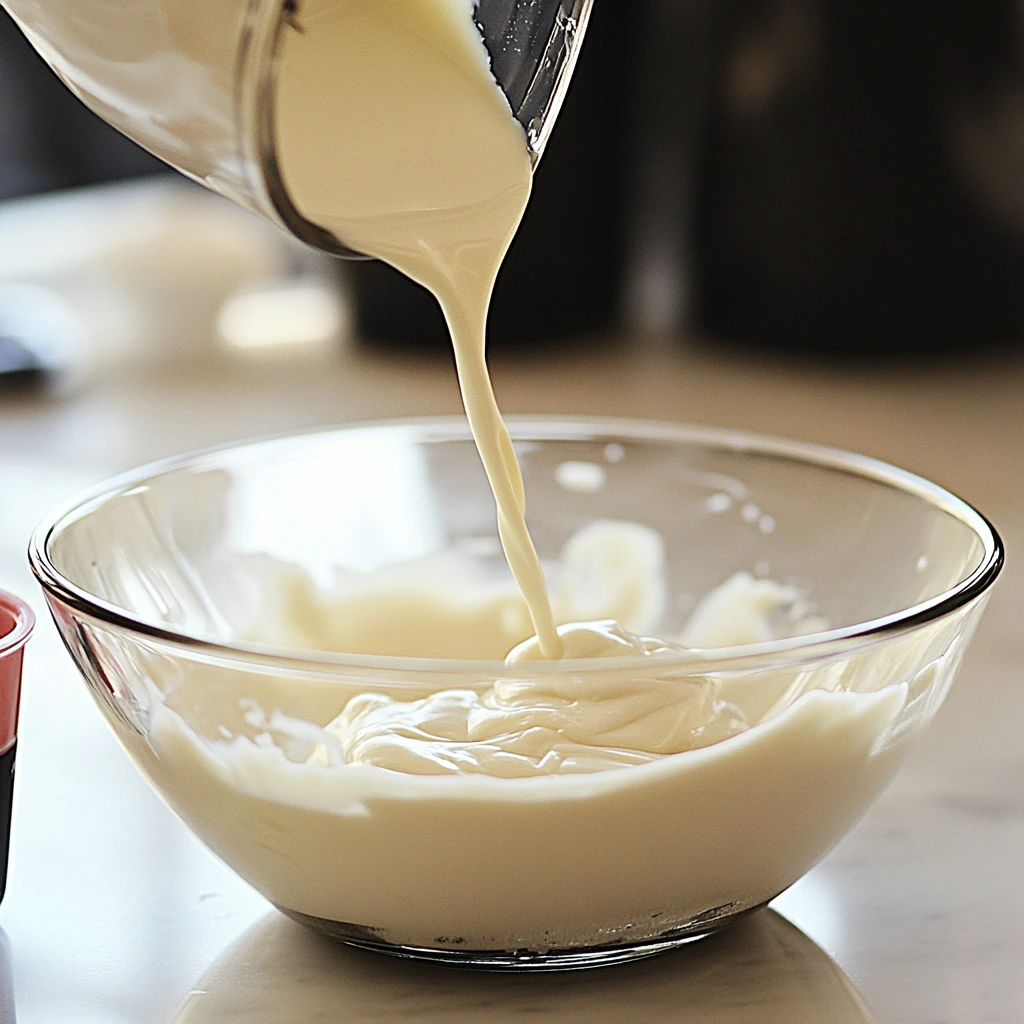
STEP 3: ADD THE WET INGREDIENTS
Now it’s time to turn your dry mix into a smooth batter. Pour in:
-
1 cup milk
-
1 teaspoon vanilla extract
Stir everything together until you have a smooth, lump-free batter. Once that’s done, fold in 1 cup of semi-sweet chocolate chips. These little pockets of melted chocolate will take your cobbler to the next level of decadence.
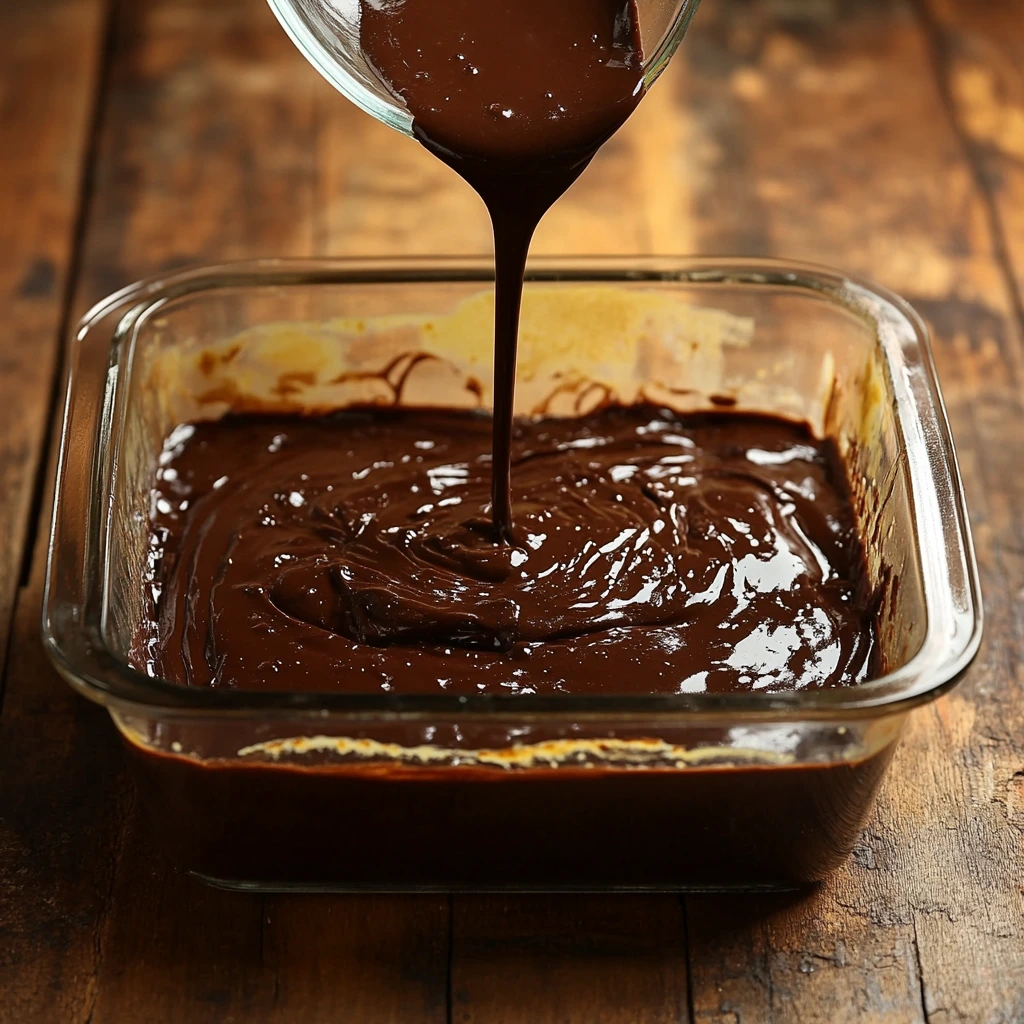
STEP 4: POUR BATTER INTO THE DISH
Carefully pour your batter over the melted butter in the baking dish. Do not stir — just gently spread the batter out to the edges so it covers the butter layer evenly. This separation is crucial for creating the self-saucing effect while it bakes.
FINISHING YOUR CHOCOLATE COBBLER: THE MAGIC SAUCE AND BAKING TIPS
Now that you’ve got your batter perfectly spread over that buttery base, it’s time for the real magic—the self-saucing layer that makes this cobbler so special. This part might feel a little unusual if you’ve never made a self-saucing dessert before, but trust the process. You’re just a few simple steps away from warm, chocolatey perfection.
THE SECRET TO THE SAUCE: SUGAR, COCOA, AND HOT WATER
One of the coolest things about this recipe is how the sauce forms beneath the cake as it bakes. This happens because of the unique layering and the hot water that activates the process. Let’s break it down.
STEP 5: PREPARE THE TOPPING MIXTURE
In a separate mixing bowl, whisk together:
-
2 cups granulated sugar
-
½ cup cocoa powder
Make sure the cocoa and sugar are thoroughly combined. This topping will sit right on top of your batter and slowly melt down during baking, creating that thick, rich chocolate sauce underneath.
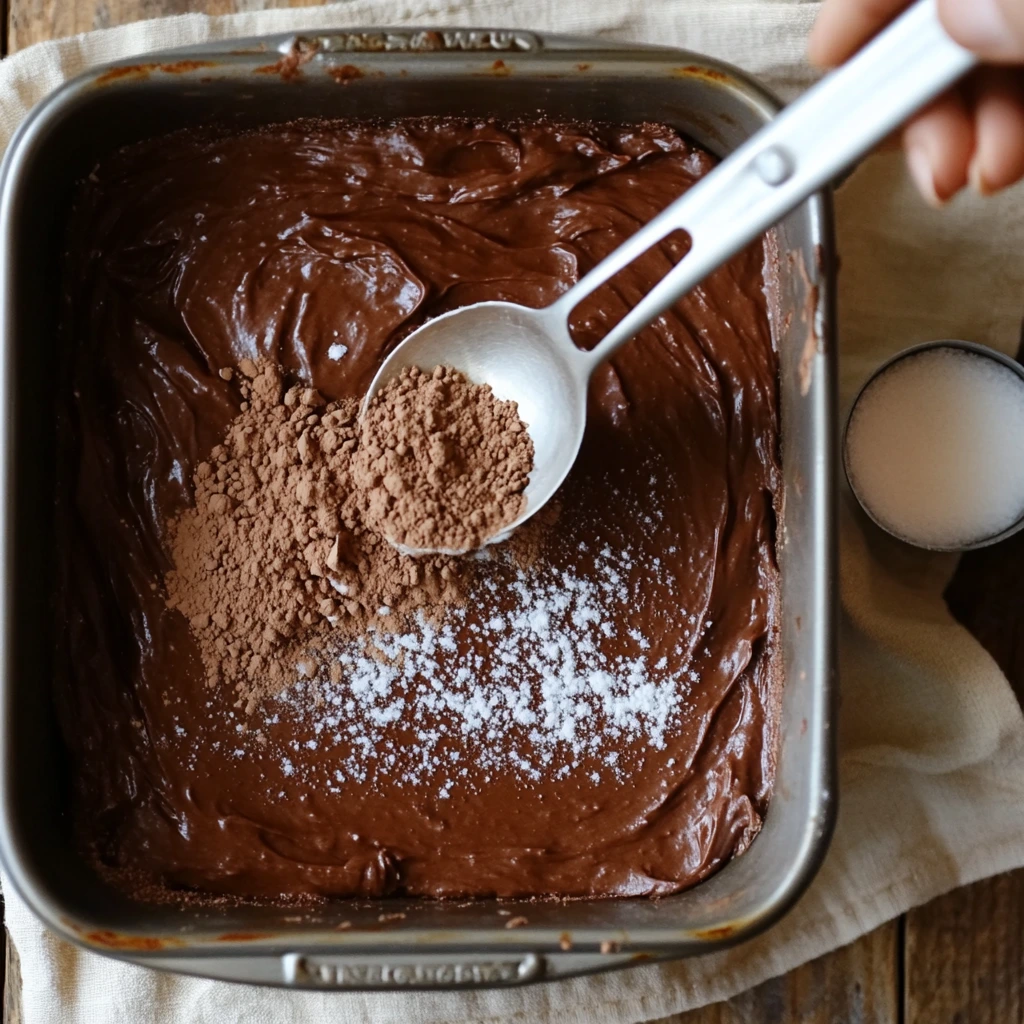
STEP 6: SPRINKLE THE TOPPING
Evenly sprinkle the sugar and cocoa mixture over the entire surface of your batter. Try to distribute it as evenly as possible so every bite of the cobbler has that luscious, gooey sauce underneath the cakey top.
STEP 7: POUR THE HOT WATER
This step feels a little strange, but it’s what makes this dessert truly magical. Slowly and carefully pour 1 ½ cups of hot water over the entire surface of the cobbler. Do not stir.
The hot water will look like it’s just sitting on top, but as it bakes, the batter will rise and the sauce will form underneath. This creates that perfect balance between a moist, fudge-like bottom and a fluffy, slightly crisp top.
STEP 8: PREPARE FOR BAKING
Because the cobbler can bubble up a bit during baking, I highly recommend placing your baking dish on a larger sheet pan before putting it in the oven. This will catch any possible drips and save you from having to clean up a sticky oven mess later.
STEP 9: BAKE TO PERFECTION
Place your cobbler in the preheated oven and bake uncovered for 40 to 50 minutes. You’ll know it’s done when the top has formed a firm crust that looks dry and set. The inside will still be wonderfully gooey and rich.
STEP 10: COOL SLIGHTLY BEFORE SERVING
Once it’s out of the oven, let the cobbler cool for about 10 minutes. This brief resting time allows the sauce to thicken slightly while still staying perfectly warm and gooey.
TIPS FOR THE BEST CHOCOLATE COBBLER EVER
-
Don’t stir after adding the hot water: This is absolutely crucial. Stirring would prevent the sauce from forming correctly.
-
Serve warm: While you can store leftovers, nothing beats chocolate cobbler fresh from the oven.
-
Experiment with cocoa: For a deeper chocolate flavor, try substituting dark cocoa powder for regular cocoa.
-
Ice cream is your best friend: A scoop of vanilla ice cream takes this dessert from delicious to downright heavenly.
A LITTLE EXTRA MAGIC: WHY THIS RECIPE WORKS
What makes this chocolate cobbler so special is the unique chemistry happening in the oven. As the cobbler bakes, the leavening agents in the batter push it upward while the sugar and cocoa mixture combine with the hot water, sinking to the bottom and thickening into a rich sauce. The end result? A two-textured dessert with a light, fluffy cake layer on top and a silky chocolate sauce underneath.
I’ve made this countless times for family gatherings, and it’s always the first dessert to disappear. Even people who claim they “aren’t big chocolate fans” (I know, I don’t get it either) end up going back for seconds. It’s that good.
CHOCOLATE COBBLER FAQ: YOUR QUESTIONS ANSWERED
Whenever I share this recipe, I get a lot of great questions from readers who want to make sure their cobbler turns out perfectly. Here are some of the most common ones, along with my best tips and advice.
CAN I USE DARK COCOA POWDER INSTEAD OF REGULAR COCOA POWDER?
Absolutely! In fact, I often use dark cocoa powder when I want a richer, more intense chocolate flavor. Just substitute it 1:1 for the regular cocoa powder in both the batter and the topping.
CAN I MAKE THIS AHEAD OF TIME?
Chocolate cobbler is best served warm, right after baking, because that’s when the sauce is the gooiest. However, you can make the batter and topping ahead of time, cover them separately, and store in the fridge. When you’re ready to bake, assemble the layers, add the hot water, and bake as directed.
WHAT’S THE BEST WAY TO STORE LEFTOVERS?
If you happen to have leftovers, store them covered in the refrigerator for up to 3 days. You can reheat portions in the microwave for 20-30 seconds to bring back some of that gooey texture, but keep in mind it won’t be quite as saucy as when freshly baked.
CAN I DOUBLE THE RECIPE FOR A CROWD?
Yes! You can easily double the recipe and bake it in a 9×13-inch dish. Keep an eye on the baking time—it might take a little longer, so start checking around the 50-minute mark.
WHAT IF I DON’T HAVE SEMI-SWEET CHOCOLATE CHIPS?
You can substitute milk chocolate chips, dark chocolate chunks, or even chopped chocolate bars. Each variation brings a slightly different flavor, but they all work wonderfully.
WHY SHOULDN’T I STIR AFTER ADDING THE HOT WATER?
Stirring would mix the layers together, preventing the self-saucing effect. The hot water needs to sit on top so it can gradually sink through the sugar and cocoa, creating the sauce layer underneath while the batter rises to form the cake on top.
CAN I ADD NUTS OR OTHER MIX-INS?
Definitely! Chopped pecans or walnuts can add a nice crunch. Just fold them into the batter along with the chocolate chips before pouring into the baking dish.
FINAL THOUGHTS: GIVE THIS CHOCOLATE COBBLER A TRY
There’s a reason this Chocolate Cobbler has become one of my all-time favorite desserts. It’s simple to make, uses everyday ingredients, and delivers that perfect combination of warm, gooey, and rich chocolate goodness that’s hard to resist.
Whether you’re making it for a cozy night in, a family gathering, or just because you’re craving something indulgent, this dessert never disappoints. The self-saucing magic always amazes my guests, and the leftovers (if there are any) never last long.
If you give this recipe a try, I’d love to hear how it turns out for you! Feel free to leave a comment, share your own variations, or let me know what you served it with. And trust me — once you’ve made it, you’ll find yourself coming back to this recipe again and again.
Happy baking!
PrintChocolate Cobbler
Chocolate Cobbler is a rich, self-saucing dessert that delivers layers of warm, gooey chocolate beneath a crisp, cakey top. As it bakes, the batter rises to the surface while a decadent fudge sauce forms underneath. Serve warm with a scoop of vanilla ice cream for the ultimate indulgence.
- Author: Mark's Recipe
Ingredients
½ cup unsalted butter, melted
1 ⅓ cups all-purpose flour
½ cup packed light brown sugar
2 ½ teaspoons baking powder
½ teaspoon salt
½ cup granulated sugar
¼ cup cocoa powder
1 cup milk
1 teaspoon vanilla extract
1 cup semi-sweet chocolate chips
For the topping
2 cups granulated sugar
½ cup cocoa powder
1 ½ cups hot water
Instructions
Preheat the oven to 350°F. Pour the melted butter into a 9×9-inch baking dish, tilting to coat the bottom evenly. Set aside.
In a large mixing bowl, whisk together the flour, brown sugar, baking powder, salt, granulated sugar, and cocoa powder until well combined.
Pour in the milk and vanilla extract, stirring until smooth. Add the chocolate chips and stir again to combine.
Pour the batter gently over the melted butter in the baking dish, spreading it out evenly to the edges without mixing it into the butter.
In a separate bowl, combine the remaining granulated sugar and cocoa powder for the topping. Whisk together and sprinkle the entire mixture evenly over the batter.
Slowly pour the hot water evenly over the entire surface of the cobbler without stirring. The water will sit on top but will create the sauce as it bakes.
Place the baking dish on a larger sheet pan to catch any possible overflow. Bake uncovered for 40 to 50 minutes, or until the top has formed a firm crust and looks dry.
Allow the cobbler to cool for about 10 minutes before serving. Best served warm with vanilla ice cream or your favorite topping.
Notes
The cobbler will continue to thicken slightly as it cools, but it’s best enjoyed warm for maximum gooeyness. Be careful not to stir after adding the hot water, as this step is key to forming the self-saucing layer. For a deeper chocolate flavor, you can substitute dark cocoa powder in place of regular cocoa.

")
