
Let me just start by saying: if you’re anything like me, mornings can get a little hectic. Whether it’s getting the kids ready for school, squeezing in a few sips of lukewarm coffee, or just trying to get out the door in one piece, breakfast can easily become an afterthought. That’s exactly why I’m so excited to share these Cheddar Turkey Bacon Egg Biscuit Bombs with you—they’re warm, cheesy, hearty, and super easy to make ahead.
These little breakfast bombs are the perfect solution to busy mornings or weekend brunches. They’ve got everything you love in a good breakfast—eggs, cheese, bacon (we’re using turkey bacon here!), all wrapped up in a soft, flaky biscuit. And the best part? They’re handheld. No fork, knife, or even plate needed. Just grab and go.
I made these for my family last weekend and let me tell you, there were zero leftovers. Even my pickiest eater came back asking for seconds. They’re warm and comforting right out of the oven but still delicious reheated throughout the week. Whether you’re meal-prepping or feeding a crowd, these biscuit bombs will absolutely save the day.
Alright, let’s jump right in and get started on the first steps!
Ingredients You’ll Need
Here’s a quick look at what goes into these biscuit bombs. Nothing fancy—just simple ingredients that pack a whole lot of flavor.
-
1 can refrigerated biscuit dough
-
6 large eggs
-
1/4 cup milk
-
1 cup shredded cheddar cheese
-
6 slices cooked turkey bacon, chopped
-
Salt and pepper to taste
-
1 tablespoon butter
-
Optional: melted butter for brushing and extra cheese for topping
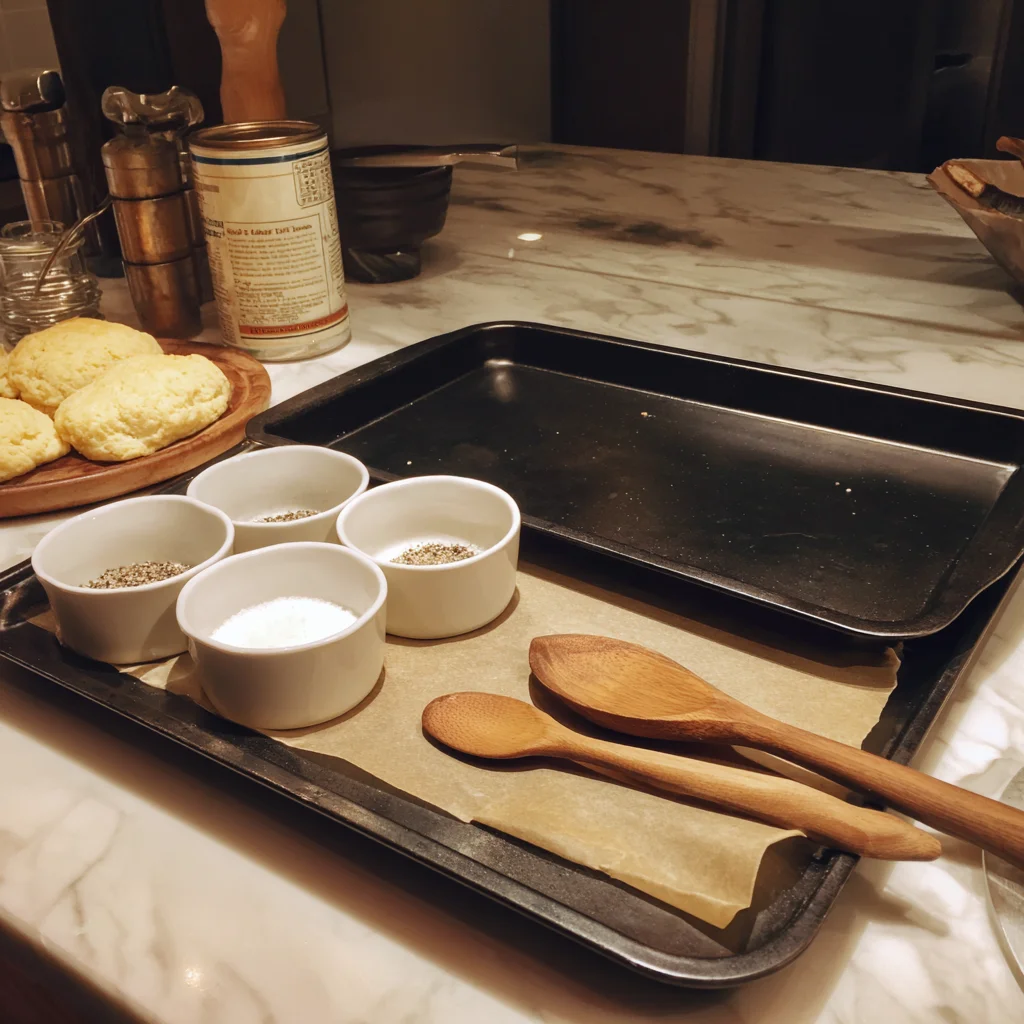
STEP 1: PREP YOUR OVEN AND BAKING SHEET
Start by preheating your oven to 375°F. You’ll want to either lightly grease a baking sheet or line it with parchment paper for easy cleanup. Trust me, you’ll be glad you did once the cheese starts bubbling.
STEP 2: SCRAMBLE THE EGGS
In a medium bowl, whisk together your eggs, milk, salt, and pepper until everything’s well combined. Heat a skillet over medium heat and melt the tablespoon of butter.
Once the butter’s melted, pour in your egg mixture and scramble gently. The key here is to cook the eggs until they’re just set—you want them soft and fluffy, not dry. This makes a big difference once they’re baked inside the biscuit dough. Once done, take the pan off the heat and let the eggs cool slightly.

STEP 3: FLATTEN THE BISCUIT DOUGH
Now grab your can of biscuit dough and separate each piece. Using your fingers or a rolling pin, flatten each biscuit into a round that’s about 4 inches wide. This gives you plenty of room to add the filling without making it too tricky to seal.
STEP 4: FILL THEM UP
Spoon a generous portion of scrambled eggs into the center of each biscuit. Then top with a sprinkle of chopped turkey bacon and shredded cheddar cheese. Try not to overfill—you’ll want to be able to close the dough around the filling without any leaks.

STEP 5: SEAL AND SHAPE
Carefully fold the edges of each biscuit up and over the filling. Pinch the seams together and roll it slightly in your hands to form a sealed ball. This is where the “bomb” part comes in—they should look like little round pillows of breakfast goodness.
Place each one seam-side down on your prepared baking sheet. If you want an extra golden top (who doesn’t?), brush them lightly with melted butter and sprinkle on a bit more cheese.
Cheddar Turkey Bacon Egg Biscuit Bombs: Easy, Cheesy, and Perfectly Portable
Alright, now that we’ve got those biscuit bombs prepped and ready to go, it’s time to finish things off with a good bake and a few insider tips to make sure they turn out perfect every time. This part is where the magic happens—because nothing beats that moment when you pull a tray of golden, cheesy breakfast bombs out of the oven.
These are one of those recipes you’ll find yourself making on repeat, not only because they’re delicious, but because they’re so versatile. Whether you’re whipping up a batch for Sunday brunch or meal prepping for the week ahead, they reheat beautifully and taste just as good the next day (or two).
Let’s get right back into the recipe and walk through those final steps.

STEP 6: BAKE UNTIL GOLDEN AND BUBBLY
Now that your biscuit bombs are assembled and sitting seam-side down on your baking sheet, pop them into your preheated 375°F oven.
Bake for 15 to 18 minutes, or until the tops are a beautiful golden brown and the dough is fully cooked through. Keep an eye on them during the last few minutes—every oven is a little different, and you don’t want the bottoms to over-bake.
If you brushed the tops with melted butter and added a sprinkle of cheese, you’ll get that gorgeous golden finish with crispy edges that’s seriously hard to resist.
STEP 7: COOL AND SERVE
Once they’re out of the oven, let them cool for about 5 minutes before serving. I know it’s tempting to bite into one right away, but the filling will be piping hot.
That little bit of cooling time also helps everything settle so your first bite includes all those delicious layers—fluffy eggs, melted cheddar, and crispy turkey bacon wrapped in that warm, flaky biscuit.
TIPS FOR MAKING THE BEST BISCUIT BOMBS
I’ve made these more times than I can count, and over time I’ve picked up a few tricks to make sure they turn out great every single time:
-
Don’t overfill. It’s tempting to pile in the filling, but too much will make them hard to seal and prone to leaking during baking.
-
Use cold dough. If the biscuit dough gets too warm, it becomes sticky and harder to work with. If needed, pop it back in the fridge for a few minutes before shaping.
-
Seal tightly. Pinch the dough firmly around the filling to make sure everything stays inside. You want to avoid any cheese sneaking out onto the baking sheet.
-
Mix up the cheese. Sharp cheddar is amazing here, but Monterey Jack, pepper jack, or even mozzarella can add different flavors if you want to switch things up.
-
Prep ahead. You can assemble the biscuit bombs the night before, cover them tightly, and bake them fresh in the morning. They’re also great for freezing (more on that in Part 3).
VARIATIONS TO TRY
One of the reasons I keep coming back to this recipe is because it’s so easy to customize. Here are a few ideas if you want to make them your own:
-
Spicy Kick: Add chopped jalapeños to the eggs or a few dashes of hot sauce to the mixture before scrambling.
-
Meat Swap: Not a fan of turkey bacon? Use regular bacon, sausage crumbles, or even diced ham instead.
-
Veggie Boost: Add some sautéed spinach, bell peppers, or mushrooms to the eggs for an extra punch of flavor and color.
-
Mini Version: Use smaller biscuits or cut larger ones in half to make bite-sized versions—perfect for brunch parties or kids’ breakfasts.
Cheddar Turkey Bacon Egg Biscuit Bombs: Everything You Need to Know
So now you’ve seen just how easy it is to whip up a batch of these buttery, cheesy, protein-packed breakfast bombs. They’re warm, satisfying, and just the right balance of flaky biscuit and savory filling. But before you head off to preheat your oven, let’s answer a few questions you might have.
Whether you’re wondering about storing them, freezing them, or customizing them for picky eaters, I’ve got you covered. This section is all about helping you get the most out of this recipe.

FREQUENTLY ASKED QUESTIONS
1. Can I make these biscuit bombs ahead of time?
Absolutely! You can assemble them the night before, cover them tightly with plastic wrap, and store them in the fridge. In the morning, just bake as directed. They also reheat beautifully, so they’re perfect for meal prep.
2. Can I freeze biscuit bombs?
Yes! Let them cool completely after baking, then wrap each one individually in plastic wrap or foil. Store in a freezer-safe container or zip-top bag for up to 2 months. To reheat, pop them in a 350°F oven or toaster oven until warmed through.
3. What’s the best way to reheat them?
If you’ve refrigerated them, reheat in the oven or air fryer at 350°F for about 8–10 minutes. This helps maintain a crispy outside. Microwaving is quicker (30–45 seconds), but you may lose a little of that nice texture.
4. Can I use homemade biscuit dough instead of canned?
Definitely! If you’ve got a favorite homemade biscuit recipe, go for it. Just make sure the dough is rollable and seals well around the filling. The baking time might vary slightly, so keep an eye on them.
5. What kind of cheese works best?
Sharp cheddar is a classic for flavor and meltiness, but you can easily swap it out for Monterey Jack, pepper jack, mozzarella, or a mix. Just be sure it’s a good melting cheese.
6. What if I don’t eat meat?
No problem. You can make these vegetarian by leaving out the turkey bacon or replacing it with a plant-based alternative. A sautéed veggie mix (like spinach, onions, and peppers) is a great filling on its own, too.
7. How do I keep the biscuit bombs from opening during baking?
Make sure the edges are firmly pinched and sealed. It helps to slightly stretch the dough around the filling before sealing. Placing the sealed side down on the baking sheet also helps them hold their shape.
A FEW FINAL THOUGHTS
If you’re looking for a no-fuss breakfast that delivers on both taste and convenience, these Cheddar Turkey Bacon Egg Biscuit Bombs are a must-try. They’re warm and filling, customizable, and make mornings so much easier—especially when you’ve got a busy schedule and no time to cook from scratch every day.
I love keeping a batch in the fridge or freezer for those grab-and-go mornings, and they’re always a hit at brunch get-togethers. There’s something about biting into that flaky biscuit shell and hitting that gooey, cheesy center that just feels like comfort food done right.
Give them a try, and don’t be afraid to make them your own! Add some spice, swap the meat, change up the cheese—whatever fits your family’s taste. And if you do try them, I’d love to hear how they turned out. Share your thoughts, your twists, or even photos in the comments.
PrintCheddar Turkey Bacon Egg Biscuit Bombs

Cheddar Turkey Bacon Egg Biscuit Bombs are a satisfying, all-in-one breakfast treat. Flaky biscuit dough is stuffed with fluffy scrambled eggs, crispy turkey bacon, and melty cheddar cheese, then baked until golden brown. These handheld breakfast bombs are great for busy mornings, meal prepping, or serving at brunch gatherings.
- Author: Mark's Recipe
Ingredients
1 can refrigerated biscuit dough
6 large eggs
1/4 cup milk
1 cup shredded cheddar cheese
6 slices cooked turkey bacon, chopped
Salt and pepper to taste
1 tablespoon butter
Optional: melted butter for brushing and extra cheese for topping
Instructions
Preheat the oven to 375°F and lightly grease a baking sheet or line it with parchment paper. In a bowl, whisk together the eggs, milk, salt, and pepper. Melt the butter in a skillet over medium heat, then pour in the egg mixture. Scramble the eggs gently until just set but still soft. Remove from heat and let cool slightly.
Flatten each biscuit round into a circle about 4 inches wide. Spoon a portion of scrambled eggs into the center of each, followed by a sprinkle of turkey bacon and shredded cheddar cheese. Fold the edges of the dough up and over the filling, pinching to seal and form a ball.
Place each biscuit seam-side down on the prepared baking sheet. Brush the tops with melted butter if desired and sprinkle with a little extra cheese for a golden crust.
Bake for 15 to 18 minutes or until the biscuit dough is fully cooked and golden brown. Let cool slightly before serving.
Notes
These biscuit bombs can be made ahead and stored in the fridge for up to three days or frozen for longer storage. Reheat in the oven or air fryer to maintain a crispy exterior. You can substitute regular bacon or breakfast sausage and use any cheese you prefer. For a spicier version, add chopped jalapeños or a dash of hot sauce to the eggs.


")
