
Is there anything more comforting than the smell of rich, chocolatey brownies baking in the oven? I’m not sure there is. Brownies have this magical way of taking you back—whether it’s to childhood afternoons spent licking the spoon or late-night cravings that only a square (or two) of gooey chocolate can satisfy.
And the best part? Brownies are a blank canvas. They’re perfect on their own, but they also play so nicely with just about anything—ice cream, whipped cream, berries, caramel, even a generous swirl of peanut butter. That’s why this recipe is one I keep coming back to again and again. It’s my go-to base brownie: fudgy, chewy, and with that gorgeous crackly top that always gets oohs and ahhs.
So whether you’re planning a cozy night in or hosting friends for dessert, this is the brownie recipe that’ll win everyone over. Let’s get into it.
Why These Brownies Are So Special
You know those brownies that are somehow both dense and soft, with that perfect balance between sweetness and rich chocolate flavor? That’s what we’re going for here. This recipe uses simple pantry staples—nothing fancy—but delivers a next-level dessert that feels bakery-worthy.
What makes them stand out?
-
Butter and sugar base that gives the brownies a shiny top and chewy texture.
-
A full cup of cocoa powder for deep, chocolatey richness.
-
Chocolate chips or chunks folded in at the end for those melty bites that make every square irresistible.
-
Super versatile – enjoy them as-is, or use them in parfaits, trifles, or sundaes.
And let’s be honest, there’s something really satisfying about cutting into a tray of cooled brownies and seeing that perfectly baked, slightly gooey center.
Ingredients You’ll Need
Let’s start with what you’ll need. Chances are, you’ve got most of these in your kitchen already:
-
1 cup unsalted butter
-
2¼ cups granulated sugar
-
4 large eggs
-
1 tablespoon vanilla extract
-
1 cup unsweetened cocoa powder
-
1 teaspoon salt
-
1 teaspoon baking powder
-
1½ cups all-purpose flour
-
1 cup chocolate chips or chunks
STEP-BY-STEP INSTRUCTIONS
Let’s break down the first part of this recipe. It’s all about building that rich, chocolatey base.
Step 1: Preheat and Prep
Preheat your oven to 350°F. Grease a 9×13-inch baking pan or line it with parchment paper if you want super easy cleanup (and neatly cut squares).
Step 2: Melt the Butter
In a large saucepan, melt the butter over low heat. Keep an eye on it—no browning or bubbling, just a slow melt. Once it’s completely melted, remove it from the heat.
Step 3: Stir in the Sugar
Add your sugar directly into the melted butter and stir until the mixture is glossy and smooth. This step helps create that signature crackly top you see on bakery-style brownies.
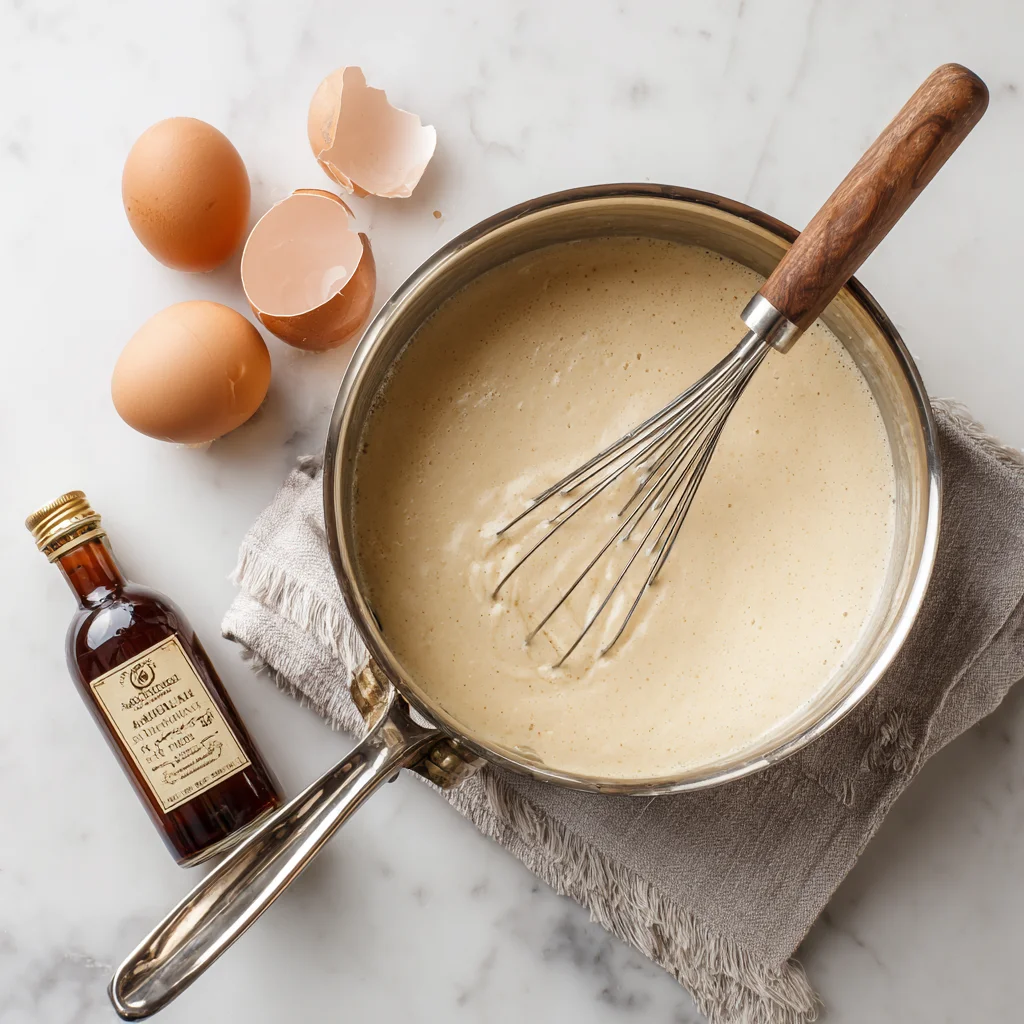
Step 4: Whisk in the Eggs and Vanilla
Whisk in your eggs one at a time, mixing well after each addition. Then stir in the vanilla. The batter will start to thicken and become silky—this is exactly what you want.
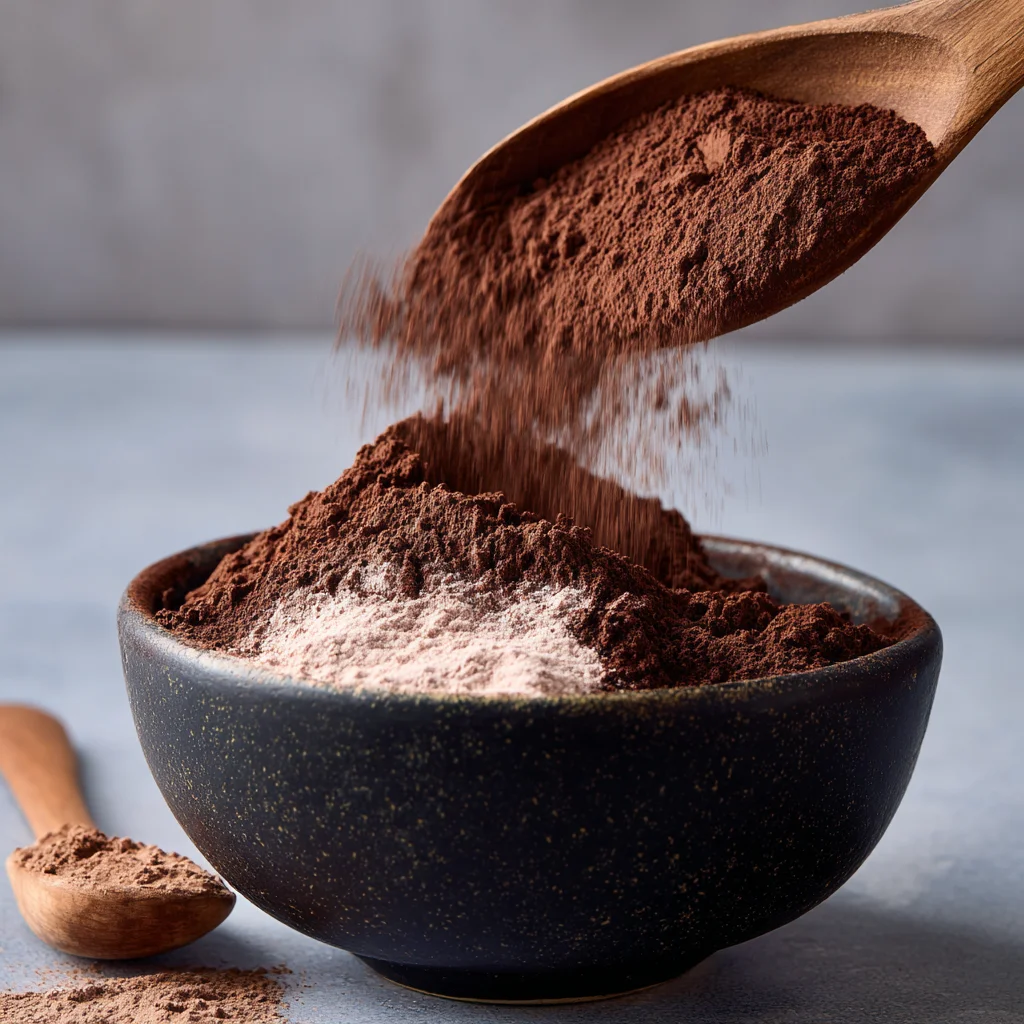
Step 5: Add Dry Ingredients
Stir in the cocoa powder, salt, and baking powder until fully incorporated. No dry spots allowed! Take your time and mix well to keep the texture smooth and consistent.
How to Bake the Perfect Brownies Every Time (Plus Tasty Variations to Try)
Welcome back! Now that we’ve built our rich, velvety brownie batter base, it’s time to bring it all together, bake it off, and (if you’re like me) try very hard not to sneak a taste before it cools. In this second half of the recipe, we’re finishing the batter, popping it into the oven, and exploring some of the fun ways you can customize your brownies to suit any occasion—or craving.
Whether you like your brownies with a fudgy center, stuffed with extras, or as part of a decadent sundae, this recipe is the perfect place to start.
Finishing the Batter and Baking to Perfection
This is where the magic really starts to happen. Once your wet and dry ingredients are mixed, it’s time for the final additions and baking.
Step 6: Fold in the Flour
Gently fold in the 1½ cups of all-purpose flour, mixing just until no white streaks remain. You want to avoid over-mixing here—that’s the key to keeping your brownies tender and chewy rather than dense and dry.
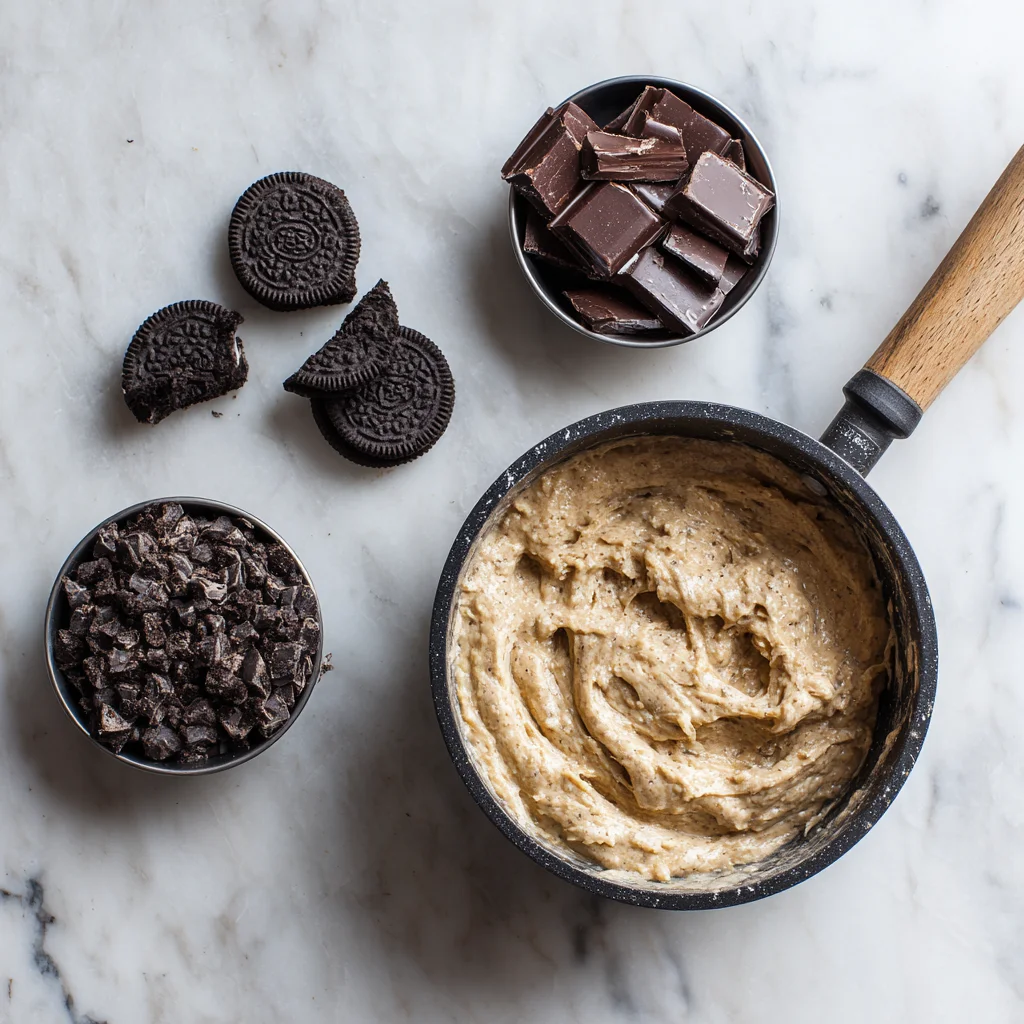
Step 7: Add the Chocolate Chips
Next, stir in 1 cup of chocolate chips or chunks. I love using semi-sweet chips for that classic chocolate taste, but you can totally switch it up with dark, milk, or even white chocolate. Want a little texture? Throw in a handful of chopped walnuts or pecans here too.
Step 8: Pour and Spread the Batter
Pour the thick, glossy batter into your prepared pan. Use a spatula to spread it evenly to the edges. The batter should be thick but spreadable—don’t worry if it takes a minute to smooth out.
Step 9: Bake
Bake at 350°F for 28 to 32 minutes, depending on your oven. You’ll know they’re done when a toothpick inserted near the center comes out with a few moist crumbs (not totally clean—you don’t want to overbake).
Step 10: Cool Completely
This step is hard, I know. But resist the urge to slice in too early. Let the brownies cool completely in the pan—this helps them set up and gives you those beautiful, clean edges when you cut them.
Tips for Brownie Success
You don’t have to be a professional baker to make show-stopping brownies. Here are a few helpful tips I’ve picked up over time:
-
Use real butter. It’s tempting to swap in margarine or oil, but butter is what gives brownies their rich flavor and perfect texture.
-
Don’t overmix. Once the flour goes in, mix just until combined. Overworking the batter can make your brownies tough.
-
Let them cool. Cutting brownies too soon can make them fall apart or appear underbaked. Letting them cool gives them time to set and develop the ideal chewy texture.
-
Customize the mix-ins. Think of this recipe as your brownie base. From here, you can go classic or get creative.
Fun Variations You’ll Want to Try
One of the reasons I love this recipe so much is how endlessly adaptable it is. Depending on your mood—or what you have in your pantry—there are so many directions you can go:
-
Brownie Sundaes: Warm up a square, top it with a scoop of vanilla ice cream, a drizzle of hot fudge, and a little whipped cream. Add sprinkles or nuts if you’re feeling fancy.
-
Swirled Brownies: Add spoonfuls of peanut butter, Nutella, or caramel to the top of the batter and swirl with a knife before baking.
-
Mocha Brownies: Stir in 1 tablespoon of instant espresso powder with the cocoa for a coffeehouse twist.
-
Holiday Brownies: Mix in crushed candy canes around Christmas, or add pastel-colored candies for Easter.
-
Brownie Parfaits: Crumble the baked brownies and layer with whipped cream, berries, or pudding for an easy no-bake dessert.
Brownie Baking FAQs and Final Thoughts
Now that you’ve got your brownies baked and cooling (and maybe already taste-tested a corner piece—no judgment!), let’s wrap things up with answers to some of the most common brownie questions I get. Whether you’re wondering how to get that perfect fudgy center, how to store leftovers, or how to make this recipe your own, this section will help make sure you get the most out of your brownie experience.

FREQUENTLY ASKED QUESTIONS
1. How do I know when my brownies are done baking?
Look for slightly set edges and a center that’s just firm but still soft. When you insert a toothpick in the center, it should come out with a few moist crumbs—not completely clean. Overbaking can dry them out, so start checking at the 28-minute mark.
2. Can I make these brownies ahead of time?
Absolutely! These brownies actually taste even better the next day once they’ve had time to settle. Just store them in an airtight container at room temperature for up to four days.
3. Can I freeze brownies?
Yes! Once completely cooled, cut them into squares, wrap individually in plastic wrap, and store in a freezer-safe bag or container. They’ll keep well in the freezer for up to 3 months. When ready to enjoy, just thaw at room temperature or warm briefly in the microwave.
4. How can I make my brownies even fudgier?
To get that ultra-fudgy texture, slightly underbake your brownies by 1–2 minutes and let them cool completely in the pan. You can also add an extra egg yolk or reduce the flour slightly (by 2–3 tablespoons) if you want a denser result.
5. What’s the best way to cut brownies cleanly?
Let them cool completely—this is key. Then use a sharp knife and wipe it clean between each cut. For super clean slices, you can chill the brownies in the fridge for about 30 minutes before cutting.
6. Can I use Dutch-processed cocoa powder?
Yes, but it will slightly change the flavor and color. Dutch-processed cocoa is smoother and less acidic than natural cocoa, and may result in a slightly darker, more mellow-tasting brownie.
7. Can I double this recipe?
If you want to feed a crowd, you can double the recipe and bake it in a larger pan (like a 12×18-inch sheet pan). Just watch your baking time—it may need a few extra minutes.
Final Thoughts: Don’t Overthink It—Just Bake
Whether you’re a seasoned home baker or someone who’s just craving something sweet and homemade, this brownie recipe is your new best friend. It’s simple, forgiving, and totally delicious. Even better, it’s a great base for building other desserts—think sundaes, parfaits, trifles, or layered bars. You can dress it up, keep it classic, or make it your own.
Honestly, the hardest part might just be letting them cool before digging in.
If you give this recipe a try, I’d love to hear how it turned out! Did you add caramel swirls? Go full double chocolate? Create a brownie ice cream sandwich? Share your twists in the comments—I’m always looking for more delicious ideas to try!
PrintBrownie Desserts

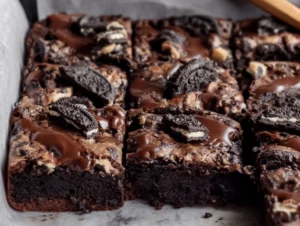
Rich, fudgy, and endlessly versatile, brownie desserts are a timeless treat that can be dressed up or enjoyed as-is. Whether served warm with a scoop of ice cream or layered into parfaits and trifles, brownies are the ultimate chocolate indulgence. This base recipe yields dense, chewy brownies with a glossy top and deep cocoa flavor, perfect for customizing with add-ins like nuts, chocolate chips, or swirls of caramel and peanut butter.
- Author: Mark's Recipe
Ingredients
1 cup unsalted butter
2¼ cups granulated sugar
4 large eggs
1 tablespoon vanilla extract
1 cup unsweetened cocoa powder
1 teaspoon salt
1 teaspoon baking powder
1½ cups all-purpose flour
1 cup chocolate chips or chunks
Instructions
Preheat the oven to 350°F. Grease a 9×13-inch baking pan or line it with parchment paper.
In a large saucepan, melt the butter over low heat. Once melted, remove from heat and stir in the sugar until combined and glossy.
Whisk in the eggs, one at a time, followed by the vanilla extract. Mix until the batter is smooth and slightly thickened.
Add the cocoa powder, salt, and baking powder. Stir until fully incorporated.
Fold in the flour and mix just until no streaks remain. Gently stir in the chocolate chips or chunks.
Spread the batter evenly into the prepared pan. Bake for 28 to 32 minutes, or until a toothpick inserted in the center comes out with moist crumbs.
Cool completely in the pan before cutting into squares or using as a base for other desserts.
Notes
For extra fudgy brownies, slightly underbake them and allow to cool fully before slicing. To turn them into brownie sundaes, warm individual squares and top with ice cream, whipped cream, and chocolate sauce. Brownie parfaits can be made by layering crumbled brownies with whipped cream and berries. These brownies store well in an airtight container for up to four days or can be frozen for longer storage.


")
