There’s something so comforting about the smell of fresh bread baking in the oven, right? But if you’re anything like me, the idea of dragging out a dozen ingredients and babysitting yeast just to get a loaf on the table can be… well, a little much. That’s where this 3-Ingredient Flourless Oatmeal Bread swoops in and saves the day. No flour, no refined sugar, and no complicated steps—just simple, wholesome goodness that comes together in about 30 minutes.
I actually stumbled across this recipe on a busy weekday when I realized I was out of sandwich bread and didn’t want to run to the store. I had a few overripe bananas on the counter, a bag of oats in the pantry, and a wild hope that something magical could happen if I blended them together. Spoiler alert: It totally worked. And now, this recipe is one of my go-to’s for easy breakfasts, snacks, or even a quick lunch base.
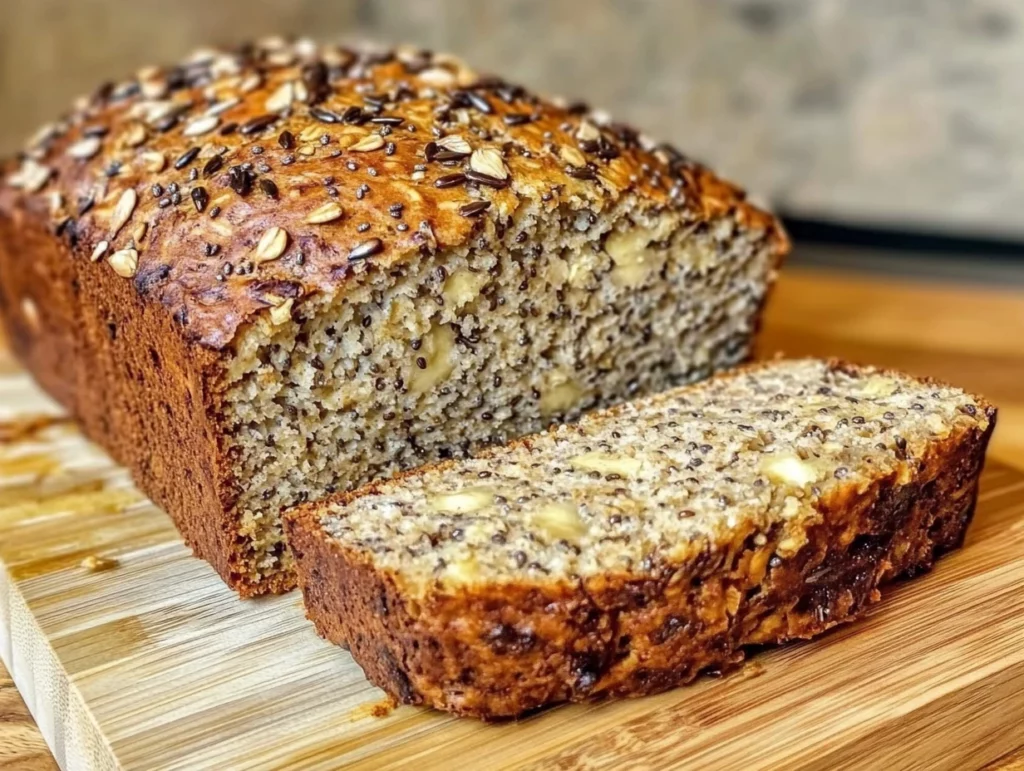
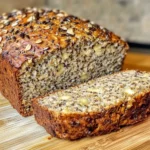
The texture is soft and slightly sweet, with just the right amount of chew. It’s one of those super versatile breads—you can toast it, top it with nut butter or avocado, or even make a quick sandwich out of it. And the best part? You likely already have the ingredients sitting in your kitchen.
So let’s get into it!
Ingredients You’ll Need
Here’s all you need to make this easy flourless bread:
-
2 cups rolled oats (use certified gluten-free oats if needed)
-
1 large ripe banana (or substitute with ½ cup unsweetened applesauce)
-
1 teaspoon baking powder
Optional add-ins:
-
¼ teaspoon salt
-
1 tablespoon honey or maple syrup
-
Chia seeds, chopped nuts, or your favorite extras
STEP 1: PREP YOUR PAN AND OAT FLOUR
Before anything else, go ahead and preheat your oven to 350°F (175°C). Then, line a small loaf pan with parchment paper. This step is important not just for easy cleanup but also for making sure the loaf doesn’t stick to the bottom of the pan.
Now, if you’re starting with rolled oats (like I usually do), toss them into a blender or food processor and pulse until they become a fine flour. This will only take about 30-60 seconds. If you already have oat flour on hand, great—skip the blender and move right on to the mixing step.
STEP 2: MIX TO FORM YOUR DOUGH
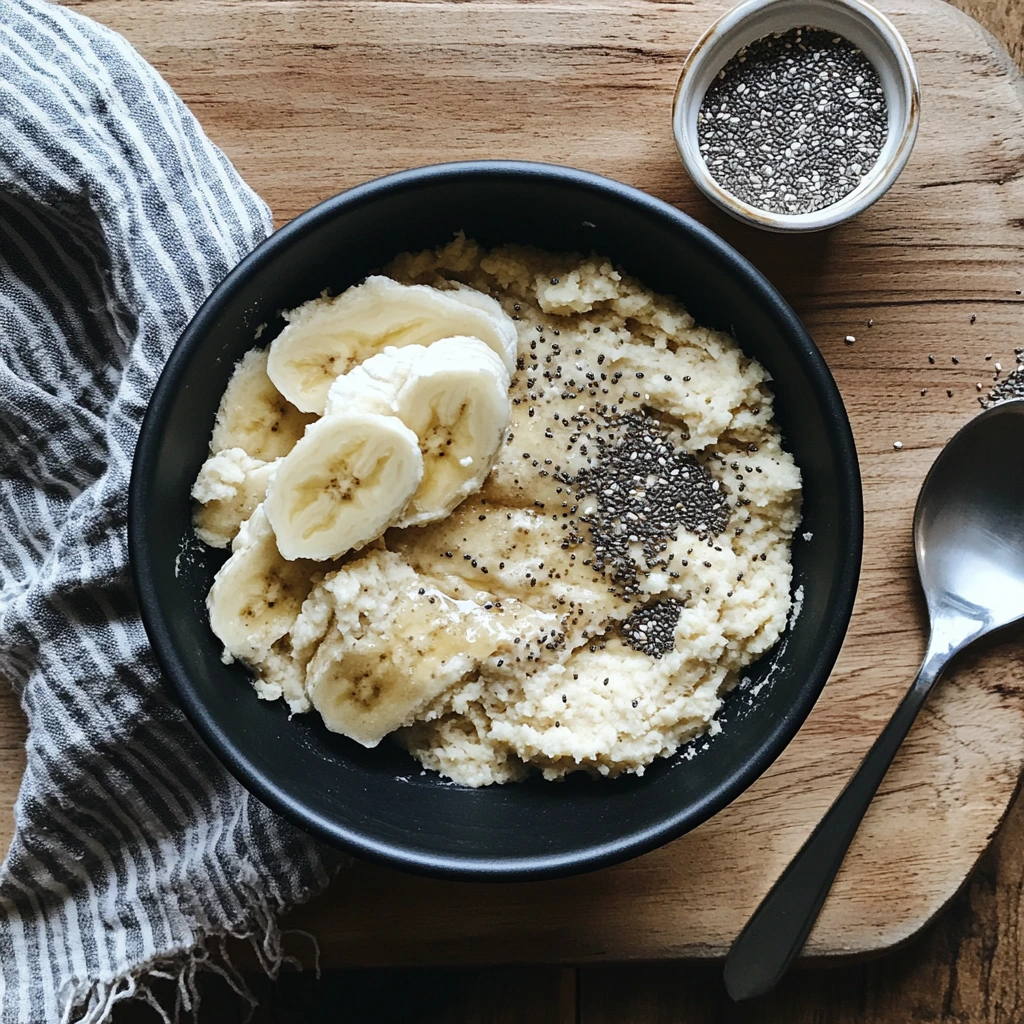
In a medium-sized mixing bowl, mash your banana until it’s super smooth—no big chunks left. This helps the texture stay even once it’s baked. If you’re using applesauce instead, just measure out ½ cup and pour it right in.
Next, stir in your homemade oat flour and the baking powder. The mixture will come together as a thick, dense dough, kind of like a thick banana bread batter. This is also the time to fold in any extras you’re using. A dash of salt adds depth, a spoonful of honey or maple syrup adds a bit more sweetness, and a sprinkle of chia seeds or chopped nuts gives it some texture and crunch.
I usually add a pinch of salt and a handful of walnuts when I’m feeling fancy—but even just the basic three ingredients make a great loaf.
STEP 3: BAKE UNTIL GOLDEN AND FIRM
Scoop the dough into your prepared loaf pan and use a spatula or the back of a spoon to smooth out the top. Don’t worry if it looks a little rustic—that’s part of the charm!
Pop it in the oven and bake for 25 to 30 minutes, or until the top turns golden and the loaf feels set when you gently press it. The baking time may vary slightly depending on the moisture content of your banana or applesauce, so keep an eye on it during the last few minutes.
How to Finish and Customize Your Flourless Oatmeal Bread
Now that your loaf is baking away and filling your kitchen with that cozy, nutty aroma, it’s time to talk about what happens next. Cooling, slicing, storing—plus a few flavor variations you can try once you’ve mastered the base recipe. This bread is not only easy, it’s also super flexible. Whether you like it savory or sweet, there are plenty of ways to make it your own.
One of the things I love most about this 3-ingredient oatmeal bread is how it fits into almost any part of the day. I’ll often toast a slice in the morning and top it with peanut butter and berries, or pair it with a savory spread for lunch. And since it’s naturally gluten-free (as long as you’re using certified GF oats), it’s a great option for sharing with friends or family members who have dietary restrictions.
Let’s wrap up the process and get into some handy tips and flavor twists!
STEP 4: COOL BEFORE SLICING
Once your loaf is golden on top and firm to the touch, take it out of the oven and let it cool in the pan for about 10 minutes. This gives it a chance to set a little more, making it easier to slice cleanly.
After 10 minutes, lift the bread out of the pan using the parchment paper and transfer it to a wire rack (or a cool plate if you don’t have one). Let it cool completely before slicing. I know—it’s tempting to dig in right away—but if you slice it too soon, the bread might be a little too soft and crumbly.
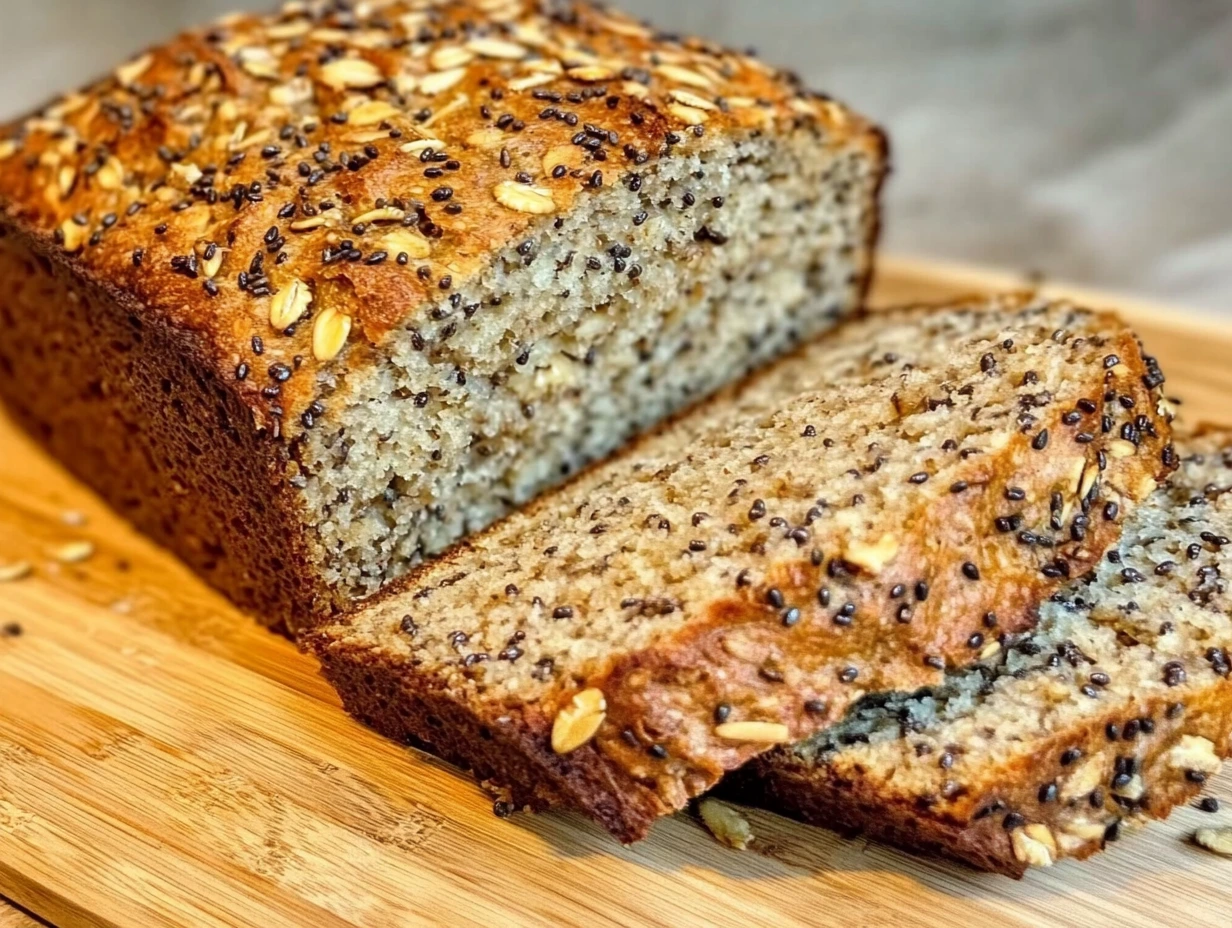
Once it’s cooled, use a sharp bread knife to cut it into slices. You’ll notice that the texture is soft and moist with a nice hearty crumb. It’s kind of like a cross between banana bread and rustic sandwich bread.
HOW TO STORE IT
This bread is best enjoyed the day you make it, especially if you’re eating it fresh without toasting. But don’t worry—leftovers store just fine.
To store:
-
Keep slices in an airtight container at room temperature for up to 2–3 days.
-
For longer storage, wrap individual slices and freeze. You can pop them straight into the toaster from frozen when you’re ready to eat.
Tip: Toasting brings out an extra layer of nuttiness that’s totally delicious. It also helps firm up the texture if the bread gets a little soft after a day or two.
FLAVOR VARIATIONS TO TRY
Once you’ve tried the base recipe, here are a few simple ways to switch things up:
-
Nutty & Sweet: Add 1 tablespoon of maple syrup and a handful of chopped pecans or walnuts.
-
Berry Boost: Fold in ¼ cup of fresh or frozen blueberries (just be careful not to overmix).
-
Chocolate Chip Treat: Stir in a few mini chocolate chips for a dessert-style loaf.
-
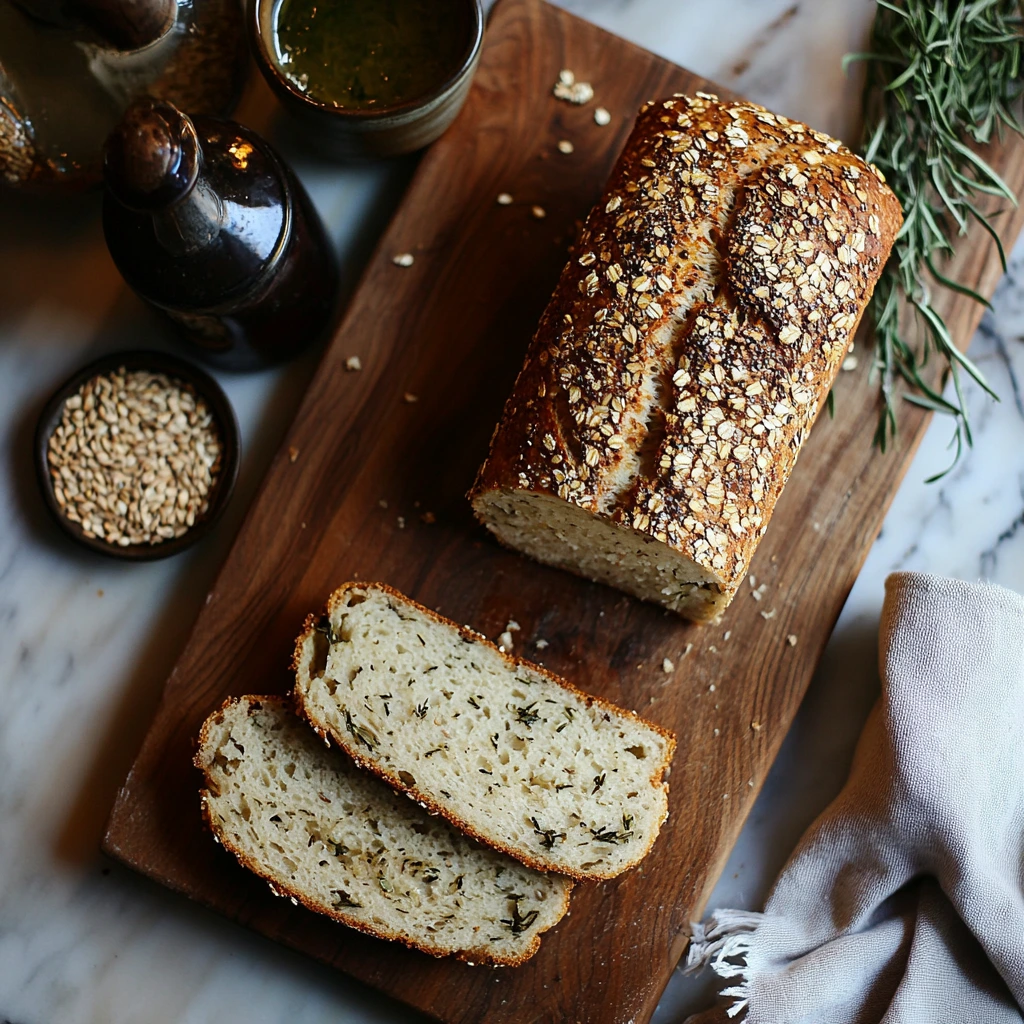
Savory Herb: Swap the banana for applesauce and add ½ teaspoon of dried rosemary or thyme, plus a pinch of sea salt.
-
Cinnamon Spice: Add ½ teaspoon ground cinnamon and a splash of vanilla extract to the batter.
These add-ins give your loaf a little personality while still keeping it wholesome and simple. You don’t need to go overboard—even small tweaks can make each batch feel a little different and special.
SERVING IDEAS
Need a little inspiration for how to enjoy this bread once it’s baked and cooled? Here are some of my favorite ways to serve it:
-
Classic Toast: Toast and top with butter, nut butter, or fruit preserves.
-
Savory Stack: Add sliced avocado, a sprinkle of sea salt, and a drizzle of olive oil.
-
Sweet Snack: Top with banana slices and a light drizzle of honey or maple syrup.
-
Breakfast Sandwich: Add a fried egg, spinach, and a slice of cheese between two toasted slices for a quick and filling morning meal.
It’s truly a blank canvas—ready to take on whatever flavors you’re craving.
FAQs & Final Thoughts on This Easy Oatmeal Bread
We’ve gone over the ingredients, the steps, and even a few fun variations—but before we wrap things up, let’s cover some of the most common questions that come up when making this flourless oatmeal bread. Whether you’re wondering about substitutions, storage, or texture tips, I’ve got you covered.
Frequently Asked Questions
1. Can I use quick oats or steel-cut oats instead of rolled oats?
Quick oats can work in a pinch, but the texture may be a bit softer and less structured. I don’t recommend using steel-cut oats for this recipe—they won’t blend into a fine enough flour and the bread won’t hold together properly.
2. What’s the best substitute for banana if I don’t have one?
Unsweetened applesauce is the perfect swap. Use ½ cup of applesauce in place of one ripe banana. It offers a similar moisture level and mild sweetness, though the flavor will be slightly different (and less banana-forward, obviously!).
3. Is this bread completely gluten-free?
Yes—as long as you’re using certified gluten-free oats. Oats themselves are naturally gluten-free, but they’re often processed in facilities that handle wheat, so cross-contamination can happen unless they’re certified.
4. Can I double the recipe to make a larger loaf?
You can, but be aware that the baking time will increase. I recommend keeping an eye on the center of the loaf and testing it with a toothpick—when it comes out clean or with just a few crumbs, it’s ready. You may need to bake it for 40–45 minutes if doubled.
5. Why did my bread come out gummy or too soft?
This usually happens if the banana was overly ripe (too much moisture) or if the bread wasn’t baked long enough. Letting the loaf cool completely before slicing is also key—it needs time to firm up once out of the oven.
6. Can I make this recipe in a muffin tin?
Yes! You can divide the batter into muffin cups and bake at the same temperature for about 15–20 minutes. They’ll be like soft, wholesome oatmeal muffins—perfect for meal prep or grab-and-go snacks.
7. How can I make this bread sweeter without using refined sugar?
Try adding a tablespoon of honey, maple syrup, or even a few mashed dates to the batter. These natural sweeteners work beautifully without overpowering the clean, earthy flavor of the oats.
Final Thoughts: Simple, Wholesome, and Totally Worth It
This 3-Ingredient Flourless Oatmeal Bread really is one of those recipes that proves just how powerful simple ingredients can be. Whether you’re gluten-free, trying to cut back on processed foods, or just looking for a quick bread that doesn’t require yeast or fancy equipment, this one checks all the boxes.
I love that it’s easy enough to throw together on a busy morning but still feels like a treat when I slice it warm from the oven. It’s also a great canvas for experimenting with different add-ins depending on your mood or what you have on hand.
So if you’ve got oats and a banana hanging around your kitchen, I highly recommend giving this recipe a try. It might just become one of your new staples. And if you do make it, I’d love to hear how it turned out—drop a comment, share your favorite toppings, or let me know how you made it your own!
Print3-Ingredient Flourless Oatmeal Bread
This simple, wholesome bread is perfect for those seeking a quick, flour-free option with minimal ingredients. Naturally gluten-free (if using certified oats) and free from added oils or refined sugar, it’s a soft, lightly sweet loaf that works for breakfast, snacks, or even as a base for toast. With just oats, banana (or applesauce), and baking powder, it’s as easy as it gets—customizable with your favorite add-ins too.
- Author: Mark's Recipe
Ingredients
2 cups rolled oats (certified gluten-free if needed)
1 large ripe banana (or ½ cup unsweetened applesauce)
1 tsp baking powder
Optional
¼ tsp salt
1 tbsp honey or maple syrup
Chia seeds or chopped nuts
Instructions
Step 1: Preheat your oven to 350°F (175°C) and line a small loaf pan with parchment paper to prevent sticking and ensure easy removal. Blend the rolled oats in a blender or food processor until they become a fine flour. If using oat flour, you can skip this step.
Step 2: In a mixing bowl, mash the banana thoroughly until smooth. Stir in the oat flour and baking powder until a thick dough forms. If using, add any optional extras like salt, sweeteners, seeds, or nuts to enhance flavor and texture.
Step 3: Press the dough evenly into the prepared loaf pan. Smooth the surface with a spatula or the back of a spoon for a neat finish. Bake for 25 to 30 minutes, or until the top is golden and the loaf feels firm to the touch.
Step 4: Let the bread cool in the pan for about 10 minutes before slicing. This helps it firm up further and makes slicing easier. Enjoy it as-is for a soft bite or toast slices for a crisp, nutty texture.
Notes
This bread is best the day it’s made, but can be stored in an airtight container for 2 to 3 days. Toasting brings out a delightful nuttiness and firm texture. Try topping with nut butter, fruit spreads, or avocado for a satisfying and healthy bite.


")
